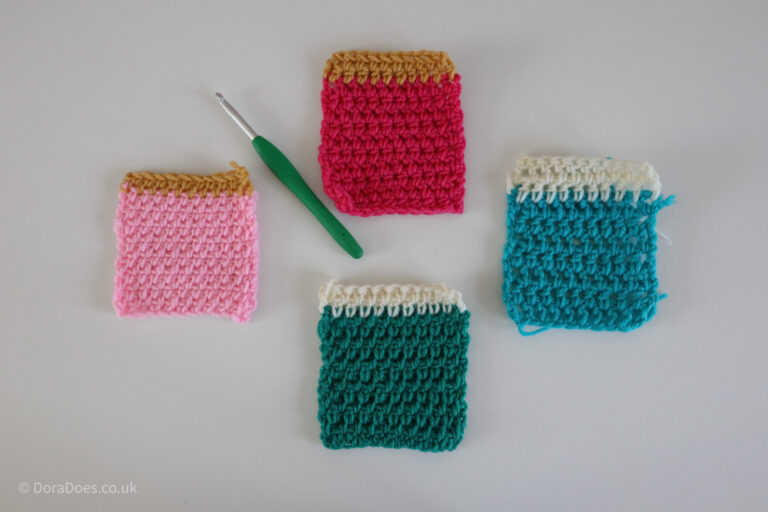
All about crochet hats: How to crochet a beanie + 14 free hat patterns

In this edition of ‘all about crochet…’ you’ll learn all about crochet hats. Whether you’re a beginner crocheter or a budding crochet designer this article is a new go-to crochet hat resource.


If you want to skip the theory and jump right to the pattern round-up, click here
The anatomy of a crochet hat
As always, I like to start with clarifying terms I’ll be using so that we’re all on the same page.
Typically, a crochet hat is made up of three parts; the crown, the body and the brim.
The crown of a crochet hat covers the top of the head and is often where the majority of the shaping, which allows the hat to fit, takes place.
The body of a hat is the part below the crown (if moving from the top down) which covers the sides of the head.
The hat brim forms the base of the hat and may be flush with the body or made at an angle. In some cases, such as a beret, there may be no brim but a headband section, tight enough to ensure the hat stays in place.
Below shows a schematic of the anatomy of three common types of crochet hat pattern; a beanie, a bucket hat and a beret:

You can see that the proportions of the crown, body and brim will change in different styles of hat.
A slouchy beanie hat, or one that is worn rolled up, will have a long body to create extra space whereas a beret will have a short body, but the oversized crown will create the fabric that covers most of the head.
The terms ‘length’ and ‘height’ are used interchangeably to describe the measurement from the base of the brim to the top of the crown.
Different crochet hat styles
There are many different styles of hat that can be made with crochet. The use of these terms varies between different cultures and geographies, so below I outline 8 different kinds of hats you might see crochet patterns for. I also give a brief description of the features of each style.
- Beanie hat – a close fitting brimless hat made of soft fabric which may be worn short and crown slimming or long and slouchy.
- Bucket hat – a relaxed fit, casual summer hat, often made from cotton or canvas. Like an upside-down bucket, it has a flat circular crown, gently sloping sides sides and is finished with a small, downward sloped brim that flares out to provide some shade to the face and neck.
- Fedora – a soft but sturdy hat, often made from felt, with a brim of a few inches which sits at right angles to its tear drop shaped crown and body. The crown typically has a crease down the middle and is ‘pinched-in’ at the front.
- Cloche – a more formal, bell shaped hat (cloche comes from the french word for bell) with a downward sloping brim at the front which may be worn pointing down or turned up and embellished.
- Beret or tam (which is a regional type of beret) – a soft round hat, usually made from woolen or felted fabric, with a flat, oversized crown that’s sharply drawn in to fit around the head with no brim. Beret is french for cap and they have a strong history within the military.
- Deerstalker – a typically tweed panelled cap with ear flaps, traditionally worn for hunting. The brim and flaps over the ears can be folded up and tied together over the crown.
- Trapper hats – are similar to deer stalkers in that they have ear flaps and a brim but are designed for warmth in excessively cold temperatures and were often made fro, the pelts of animals caught by the trappers. They are similar in shape to aviator hats and sometimes the descriptions are used interchangably.
- Newsboy or flat cap – these are differing versions of a similar overall shape. The crown is made from panels and a stiff rounded brim sits at the front. On a flat cap the crown may overlap the brim with the rest of the crown being fairly fitted and lined. Conversely, the crown of a newsboy cap is rounder and more slouchy and looks like a sliced pie from above (usually with a button in the middle).
This article will focus on beanie hat construction given they are the most popular and common crochet hat style. Some of the construction tips and other resources I outline below can be applied to other types of hat, such as berets or bucket hats, but each style of hat will have it’s own idiosyncrasies.
To avoid any misunderstanding, I want to take a few moments to go into a little more detail about what I include in the term crochet beanie hat, because it covers a lot of options.
What is a crochet beanie?
A crochet beanie hat can be defined as a tight fitting brimless hat made from soft crocheted fabric.
Beanies are traditionally tight fitting around the body of the head, made with negative ease so they stretch to stay on your head.
Crochet beanie hats can be slouchy or snug in length, depending on preference and how you like to wear them. If a brim is present, it continues the same shape as the body of the hat, possibly in a different texture or thickness. A brim may also be formed by rolling or turning the bottom of the hat up, fisherman style.
There are endless names people use to describe a hat which I place under the umbrella term of beanie. Some common terms include; knit cap, stocking cap, skull or ski cap, toque / tuque (in Canada). Add a pom pom to the top and the name changes to a bobble hat.
Historically, the term beanie referred to what we currently call a baseball cap. A fitted hat made from panels which joined at the centre of the crown with a button.
In many commercially made beanies (and some handmade) you still see this panelling at the crown. The Fisherman’s winter hat, is such an example. It’s made in one piece but uses shaping and seaming to form the crown (shown below).

Crochet beanie hats may be made from panels or in one piece. In this article we are going to focus on those made in one piece.
How to construct a crochet beanie hat
Like with any crochet project, before starting, it’s important to think about the function you want your item to perform.
In the case of a beanie hat, it’s main purpose is us usually to keep the head, and ears warm, and make you look good whilst you’re at it.
This means that the crown must be large enough to cover the top of the head (in your desired style) and the body should be long enough to cover the ears (I have a problem with hats that don’t keep my ears warm).
If present, the brim on a crochet beanie hat often serves to provide extra security to ensure the hat stays on as well as a little extra warmth if made from a thicker crochet stitch pattern or if designed to be turned up.
Obviously there are many style choices when it comes to beanies so the above serves as a general rule of thumb which can be customised however you prefer.
A common customisation is to make a ‘bun-hat’ where there is a hole in the crown to feed a ponytail or ‘messy bun’ through. As someone with a lot of hair, I get how helpful this can be, though personally I prefer to go for the slouchy beanie which has room under the hood for my hair as well as my head!
If you live in warmer climbs. you may want a shorter beanie which finishes at the top of the ear instead. There are no hard and fast rules.
The important point is to know what you want to achieve in terms of function, fit and length before you start to crochet. Once you have decided on your style, you can set about deciding how you want to construct it.
There are three main approaches to crochet beanie construction; top down, bottom up and side to side. Lets have a look at each of these in some detail.
How to crochet a top-down beanie
Typically a top-down crochet beanie is one that starts at the crown, works down through the hat body to the brim.
I love this construction style because the hat can be worked in one piece and, like many top down construction styles, it’s easy to adjust the circumference and hat height as you crochet. This allows you to achieve a perfect fit without too much drama.
Here’s my quick guide to crocheting a classic top down beanie (with any stitch and suitable size hook);
- Starting with a magic ring or small loop of chains, crochet a flat circle*.
- Continue increasing the size of the circle until its circumference reaches the desired circumference of the finished hat – this forms the crown of the hat. (More about sizing later on)
- Continue crocheting in your stitch pattern without increasing until your hat reaches it’s desired height, allowing for the length of the brim if you’re including one – this forms the body of the hat.
- Crochet the brim or hat band directly onto the body of the hat (learn how here) to finish off your hat.
In it’s simplest form, that really is all there is to it… just insert your choice of yarn and stitch pattern. Of course there are many ways to modify this approach to achieve different shapes and styles, but the basic underlying principle remains the same.
Shaping your crown
In most crochet hats, the shape of the crown dictates the overall look and style of the hat, so it’s important to understand how to achieve your desired shape.
*I use the term flat circle to describe the start of the crown above, but depending on the shape of the crown you want, the circle doesn’t have to be flat. When it comes to crown shaping, it’s essential to understand how to crochet a flat circle, and therefore how to crochet a not flat one.
This simple technique is an incredibly helpful crochet fundamental that’s worth learning about both for making hats and for many other kinds of crochet projects. You can learn all about how to crochet flat circles in this detailed tutorial.
So with the assumption you know about crochet circles, let’s dig into some examples of crown shaping.
If you crochet a totally flat circle, then abruptly stop increasing, you’re going to end up with a hat shape closer to a bucket hat style shown at the top. (This is essentially the same way you crochet a basket, but working the other way up.)
If you crochet an oversized flat circle (i.e. one that’s bigger than your head),then abruptly start decreasing to fit the circumference of your head, you’re going to end up with something that looks more like a beret.
If you want more of a dome shape at the crown, then I recommend adjusting the flat circle method, crocheting fewer increases each round. This will cause the fabric to curve in and is my preferred approach to beanie hat designs.
The cadence with which you space your increases will dictate the shape of the crown. This also depends on the height of the stitch you’re working with. as your stitch height increases, so will the number of increases required.
As a rough guide, the fewer and smaller your increases, the more pointy your hat is going to be.
Lets say you start by making 6 single crochet stitches in your magic circle;
- If you increase by 3 single crochets (sc) every other round, you’re going to get something pretty pointy.
- If you increase by 6sc each round then you’ll end up with a flat(ish) circle.
- If you increase by 4 sc each round, you’ll get something in between and more gently curved.
- If you go the other way and crochet more increases than needed for a flat circle then your fabric is going to ruffle and you’ll end up with something pretty unconventional!
It can take a little trial and error, but playing with different increase rates will help you work out how to get a crown shape that’s right for your desired style of hat.
My article on how to crochet a flat circle goes into a lot more detail on this topic if you want to learn more. It also includes a guide to how many increases to make if you want to keep your circle roughly flat for different basic stitches. (If you’re into the how and why, it goes into the maths behind it too.)

How to crochet a bottom-up beanie
Essentially crocheting a bottom up beanie is the reverse of crocheting a top down one.
You get the advantage of being able to adjust the length of the body as you work, but will need to check the brim / base of the hat is a good fit at the start.
Here’s my overview of how to crochet a beanie bottom-up;
- Crochet the brim of the hat in your chosen style (if present)
- Working the body into the brim, crochet in rows / rounds upwards in your stitch pattern until your body reaches a suitable height (accounting for the brim size).
- Begin to work decreases in order to shape the crown as desired.
- Use the yarn tail to weave into the last round of the crown and seal it closed.
In terms of the crown shaping, you can pretty much just replace increase with decrease in the crown shaping description above.
When decreasing the crown in a bottom up beanie, you can finish with more stitches than you might start with if you’re working top down.
So where you might start a top down beanie with 10 double crochets worked into a magic ring, you could finish a bottom up beanie with say, 20 double crochet and sew in the crown at that stage. You may get some gather here as you’re not completing the sphere, but that might be seen as a feature of the hat.

How to crochet a side-to-side beanie
A side to side beanie is made in a single piece where the number of rows equate to the head circumference and the stitch count (the length of the rows) relates to the height of the hat.
Basic side-to-side crochet beanies can be super simple to crochet for easy beginner crochet projects.
One of the significant benefits of a side to side hat is that it can often create a more stretchy and sometimes elasticated fit. This is because crochet tends to stretch more between rows than along them (i.e. between stitches).
This is also the reason you’ll often find side to side, short row ribbed brims added to crochet hats that are made top-down or bottom-up.
You can crochet a simple beanie from side to side as follows:
- Make a chain as long as you want your hat to be tall
- Crochet into the chain using your stitch pattern and suitable stitch multiple
- Repeat your stitch pattern until your piece reaches the desired circumference of your hat (which should be a couple of inches shorter than the head it’s designed to fit).
- Seam the final row to the foundation row to create a tube of fabric. I like to use the mattress stitch but you could also slip stitch the two sides together.
- Fasten off leaving a long yarn tail.
- Thread the tail onto a yarn needle and weave it in and out of the row ends on the top of the beanie.
- Pull the yarn tight to bring in the top of the hat, like a drawstring bag. Continue to sew in the ends to secure the top of the crown.
- Add a brim to the bottom row-ends if desired.
The down side of side-to-side beanies is that they can be more complex to add crown shaping. They often (but not always) have bunched up fabric gathered at the top which can get unsightly. This is why you often see a bobble or pom pom on the top… they are great at hiding this excess.
There are some styles of side to side beanie which introduce shaping into the rows in order to shape a crown as you work. I’ve given some examples of this in the free crochet hat pattern round up at the end of the post if you want to see examples of how it can be done.

In the round vs flat crochet beanies and seams
Top-down and bottom-up beanies can be crocheted flat and seamed together at the side, but, for the most part, they tend to be crocheted in the round. That includes both continuous rounds /spirals and joined rounds (where you slip stitch to the top of the first stitch to complete each round).
If you are joining at the end of each round you can turn and work the next round in the opposite direction, or you could continue working in the same direction. Note that turning or not turning at the end of a joined round will impact the row gauge, so keep this in mind if adjusting an existing pattern.
Joining rounds usually creates a visible seam on your hat. I find that if you’re turning at the end of each round then this seam stays straight and is quite hard to detect. The key is to make sure you consistently ignore the slip stitch used to join the round as it’s easy to accidentally work into it.
If you don’t turn at the end of each round then you may find that your seam will start to lean or ‘wander.’ This seems to be the biggest complaint I hear about crochet beanie hats. It’s also one of the reasons I like to turn when working in joined rounds.
The amount of ‘lean’ on this seam is partly dependent on the stitch choice. The lean is caused by the natural slant in crochet stitches, so the less slanty your stitch the less lean. Turning means that the lean one way is counteracted by crocheting the other way.
This issue isn’t isolated to hats and there are lots of video tutorials on you tube sharing different ways to avoid this wandering seam phenomena. So if it’s a issue you face then there are a range of techniques to try out there.
If you crochet your beanie in continuous rounds then you won’t have a seam but you will need to find a way to avoid any kind of stagger when you finish the last round. This can be simple with a short stitch like a single crochet (learn how to make an invisible join here), but with taller stitches it will need some more thought.
If you crochet your hat flat and then sew the two sides together then you are still going to get a visible seam. However, depending on your sewing skills and the stitch pattern you use, a sewn seam may be less visible than joining as you crochet.
How to crochet the brim of a hat
No article about crocheting beanies would be complete without a discussion of how to add a brim or hat band to your project.
In my experience the function of the brim on a crochet beanie hat is two fold;
Firstly, I tend to make the brim a little tighter fitting than the body of the hat to help it stay put. As you take your hat off and put it on multiple times, the fabric will stretch, so having a stitch pattern which is elastic (i.e will ping back after stretching) is helpful. This will also depend on the stitch pattern you’re working with for the body of a hat.
Secondly, a crochet brim can add a pleasing visual to a hat. I find that a brim adds a nice defined finish to a beanie and gives it a sense of balance. Especially if you’ve put a pom pom on top.
In terms of crochet beanies, when and how you add the brim will depend on which method of construction you are using.
You will commonly see brims on crochet hats using a crochet rib stitch. You can find a selection of back loop rib stitches which could work well as a hat brim in part 1 of my crochet rib stitch directory. If you prefer to create a brim using post stitches, part 2 of the crochet ribbing directory includes rib patterns made from back and front post stitches.
Of course your brim doesn’t have to be ribbed, you could just work a few rounds of single crochet for example. Just think about how it is going to help with keeping your hat on your head and how it will complement the rest of the hat.
Adding a brim to top down beanies
With top down beanies a brim is added at the end. You can add a few extra rounds to the base of the hat body in your chosen stitch pattern.
If you want to work with a ribbed brim, you can add this using a join as you go (jayg) method, which is my preference. I will switch to working in short rows at right angles to the last round of the hat, slip stitching back into it at the end of every other row.
I have a detailed tutorial demonstrating how to crochet a jayg ribbed brim here. The tutorial uses a single crochet in the back loop only type of rib but you can substitute whatever kind of rib stitch you like.
This same principle works for adding a cuff to a sleeve or a hem.
How to add a brim to a bottom up crochet beanie
With a bottom up beanie, you can start by creating the brim and working the body of the hat into it (as described in the construction section) or you can start with the body and add the brim at the end.
If you’re working into a ribbed brim you will want to crochet into the row ends. A common hat band stitch is half double crochets worked in the back loop only (hdc BLO). When I work into the row ends of this kind of ribbing, I tend to crochet 3 stitches for every two row ends.
This creates a ribbing that pulls in a little compared to the stitches worked into it, but which will stretch to fit. As always, this will depend on your tension and the specific stitches you’re working with, but I have found this a great rile of thumb for hat bands.
If you’re working with a shorter stitch in your rib, say single crochet in the BLO, I would work one stitch for each row end. When this is the case, I tend to work two stitches every two row ends, working the two stitches in the same place, as I find this creates a neater finish.
When working into row ends, I also work into the tightest part so that I am not making existing spaces larger.
Adding brims to a side to side crochet hats
If you have made a side to side beanie using the method described above, you’ll need to add the brim at the end. This can be done a similar way to adding a brim to a top down beanie. You may find it helpful to work a single round of sc, into the row-ends so that you have a nice neat round to work into, but this is not essential.
In some side to side beanie designs, you might find that the brim is worked at the same time as the hat. This works where the brim is worked in rows (such as a hdc BLO) and is done by starting / finishing alternate rows with the brim stitches, working the rest of the rows in the main stitch pattern you’re using for the body. If shaping is being added too, this is done at the opposite row ends to the brim.
What size should you crochet your hat?
Generally speaking the circumference of an adult hat measures around 50cm / 20 inches.
Typically, any size hat measures 5cm / 2 inches smaller than the head it is intended to fit, i.e has 5cm / 2 inches of negative ease.
(You can learn more about ease here.)
The important thing about hats is that they should be made with negative ease so that they stay on. Negative ease is where the item is smaller than than the body part it’s designed for, so that it stretches to fit.
In terms of hat length and fit, this will depend on the size of the head and the style of hat you are looking to make.
I have a separate post which goes into the details of hat sizing (including size charts). It describes the process by which you can crochet a hat for any size head based on your gauge.
A hat is an item which is made to fit a specific size, so making a gauge swatch is important.
- If you’re new to the concept of gauge, this post introduces it.
- If you’ve never made a tension swatch, you can learn how to do so here.
I see a lot of people making gauge swatches inaccurately, so it’s worth understanding the process to improve the chances that your finished hat is actually going to fit!
Remember that hats are pulled on and off and exposed to all kinds of temperatures and weathers, so thinking about stretch and wear is important when thinking about the lifetime and fit of your beanie.
What is the best yarn for a crochet hat?
The great thing about hats is that they can be crocheted with pretty much any fibre and yarn weight, so really there isn’t a single best yarn. It’s more a case of the ‘right yarn’ for what you want to create.
I tend to lean towards using wool or acrylic yarn for a hat that is designed to be worn in cold weather. Cotton and Bamboo work better in summer hats, and can be used to create a fairly stiff fabric which is great if you’re looking for a stiff brim.
In terms of yarn weight, anything goes. Depending on the crochet stitches you’re using, bulky or chunky yarns may have larger holes in, so although the fabric might be quite thick, the ‘ventilation’ caused by said holes may be a bit breezy. Finer yarns lead to more drape and finer holes but thinner fabric.
It really is down to personal preference so you can generally jump in with your own favourite yarns. I usually land somewhere in the middle with a double knit or aran / worsted weight yarn for most of my hats. But I do love the squishyness, density and drape on a hat made in fingering wight yarn.
Stitch pattern will also impact the drape and density of the fabric too so it’s useful to think of how the yarn and chosen stitch work together. The beehive beanie seen below uses a bulky yarn but a stitch pattern which allows the fabric to have a beautiful soft slouch.

You can learn more about what factors to consider when choosing yarn for a project in this post.
How much yarn do you need for a crochet beanie?
The amount of yarn needed for a crochet hat will depend on all the usual factors such as size of the hat, type of crochet stitch and the weight of the yarn.
It’s a fairly safe assumption that you can make an adult sized hat with 100g of most yarns. However, it’s not always the case so make sure you check the pattern requirements or make a swatch to determine how much you’ll need.
For example, my off piste beanie uses the crochet waffle stitch which is a bit of a yarn eater so will use a little more yarn than is typical.
You can learn two techniques for estimating yarn amounts here.
What are the best stitches for crochet hats?
The stitch selection for a hat will depend on the function you have in mind for it.
Because beanie hats are tight fitting you want to choose a stitch pattern which will stretch to fit comfortably around your head without loosing its shape or structure. Hat’s are pulled around all over the place so something fairly robust will serve you well.
For a summer hat you might want to use a lacy open stitch pattern for a lightweight aesthetic hat. For something requiring more structure, you might want to use single crochets or the waistcoat stitch or thermal stitch.
A typical winter crochet beanie you could be crocheted with any one of a range of textured cosy stitches for the tactile squish factor or opaque stitches to keep the wind out.
Generally speaking most crochet stitches can be made to work in a hat.
My Granny dot hat (seen below) uses a combination of granny stripe and puff stitches to create a fun texture, but because it has quite a few holes, I wouldn’t be wearing this on the colder days. It’s one for spring and autumn and mild winter days.

How long does a crochet hat take to make?
The length of time a hat takes to crochet depends entirely on the yarn weight, stitch pattern and complexity of the design as well as your experience level.
You could whip up the off the rails hat, or the waste not want not beanie, which use super chunk yarn, in around an hour. But if you want to make a 4ply / fingering weight version of the fisherman’s winter ribbed beanie then you will need longer.

On average however (and because I don’t want to give you an answer that basically asks how long is a piece of string) I would say about 2-3 hours is fair estimate of how long a typical crochet hat takes to make.
14 Free crochet beanie hat patterns for all skill levels

Below you will find a round-up of 14 free crochet patterns for beanie hats made using the three different construction styles I’ve discussed, as well as some which use an alternative approach.
These patterns include basic beanies for crochet beginners as well as more intricate and involved patterns for adventurous crocheters or those with more experience. My aim is that there is something here for every skill level and taste!
Top down beanie hats
1. Stash-busting moss stitch beanie
The first beanie I’m highlighting is my Scandi stashbuster hat pattern, which is a great project for using up left over yarn. The hat is worked top down using the classic moss stitch, which creates a beautiful vertical stripe effect when crocheted in alternating colours.
I love easy projects that can be made with small amounts of yarn, and hats are perfect for using what you already have, and this is the perfect crochet hat pattern for experimenting with mixing up colours.
The one you see here was made with the small amounts of a fine double knit yarn (closer to sport weight really) I had left over from the Geometric Joy shawl. I really enjoyed working with the limitations of what I had available as it encourages me to be creative and play with different sized stripes.
The free hat pattern is for a standard adult size hat (with the paid pattern including additional sizes) and looks just as good with or without the handmade yarn pom pom on top.

2. Colourful textured crochet hat
The Pair it up hat comes with matching mittens if colour and matching sets are up your street! It plays with a subtle cosy texture and mixing colour blocks with asymmetric stripes.
Because this hat pattern uses a stitch multiple in the pattern, it approaches the increases a little differently, so one for those looking for something other than the flat circle start!

3. Crochet waffle stitch beanie hat
The Off Piste Beanie is a top down crochet hat which uses the cozy waffle stitch to keep your nuggin’ warm whether you’re on or off the piste.
This hat is one for the more intermediate crocheters as it the crown increases require a bit of concentration to ensure you maintain that lovely waffle texture. IT also has an incredible alpaca fur pom pom to add that colour pop too.
The Crochet waffle stitch is a bit of a yarn eater, but it creates a warm, dense fabric perfect for colder weather. If tight weave or opaque crochet stitches are your thing, I share some of my favourites here.

Read the free waffle stitch beanie hat pattern here
The Parky Beanie Hat
‘Parky’ is an easy, lightweight top-down beanie hat that uses simple stitches throughout and a super simple technique to create a lovely cozy texture from a fine yarn.

Read the free parky hat pattern here.
Bottom up crochet hats
4. Bottom Up Houndstooth Beanie
The Houndstooth Hat is a simple bottom up crochet beanie offered in four sizes from toddler to large adult.
This is a fun and fairly straightforward free crochet pattern for a super cozy, two-colour crochet hat. It’s a great opportunity to play with contrasting colours as well as perhaps adding variegated yarn for one of the contrast colours.
The hat is designed using aran weight yarn and a fold up ribbed brim which gives it extra warmth.

5. Honeycomb textured bottom up crochet beanie
I absolutely love the texture of this homeycomb beanie hat from Hooked on patterns.
On first sight I thought it was made using a Tunisian crochet technique, but it uses some fun combinations of basic crochet stitches to create the honeycomb pattern.
This isn’t one for a beginner crocheter, but the pattern comes with a step-by-step instructions and a photo tutorial, so don’t be intimidated if you want to try something different.

6. Cozy double moss stitch beanie
The Eloise crochet hat pattern from A crochet simplicity has a beautiful texture created by the double moss stitch pattern. This is a dense crochet stitch which will create a warm and tactile fabric. Perfect for a winter warmer accessory.
I also love how this design uses raised crochet post stitches on the hat band to great effect and in a way that I’ve not seen before.
I love the effect from the ombre yarn in this example but think this would look awesome in a solid colour or even in a hand dyed yarn too.

7. Bottom up beanie worked flat with crown shaping
The Cosy Bean crochet hat from knotted nest is worked bottom up in one flat piece and seamed at the side and crown to finish. This one starts with the ribbed brim and then works the bean stitch upwards, adding shaping towards the crown. It’s a great example of a simple crochet beanie worked bottom up flat.
This is a relatively easy crochet beanie pattern (certainly easier than it looks!) that will keep you super cosy.

Free side-to-side crochet hat patterns
8. Quick and easy side to side herringbone beanie hat pattern
The back country beanie from through the loop yarn craft is a simple side to side crochet beanie pattern for those looking for a classic look crochet hat.
It’s made using the herringbone double crochet stitch, a favourite of mine because of its lovely drape; perfect for adding a little slouch to your hat.
This pattern uses super bulky yarn with an 8mm crochet hook, making it both chunky and warm. It works up fast so makes for that perfect last minute gift for the winter holiday season.

9. Simple beginner’s bean stitch beanie pattern
The free cosy faux fur pom pom beanie pattern from Daisy cottage designs uses the textured crochet bean stitch to create an easy hat pattern which can be easily adapted to work with any yarn weight and a suitable hook size.
It has no shaping so makes for an easy beginner crochet pattern and is relatively simple to adjust to fit.

10. Ribbed wave pattern crochet hat
I love the joy and fun that emanates from this ‘twist to the classic beanie’ hat pattern from Fosbas Designs.
It manages to combine a lovely ripple like wave pattern with a ribbed effect and can be worn slouchy or with the brim turned up, depending on your preference.
This beanie crocheted from side to side but there is also crown shaping added to the pattern. This gives it a big tick in my book because it reduces that extra bulk at the crown.
On top of that, the free pattern includes step by step instructions, so if you think it looks intimidating or if you’re more of a beginner level crocheter, there are photos to guide you through.

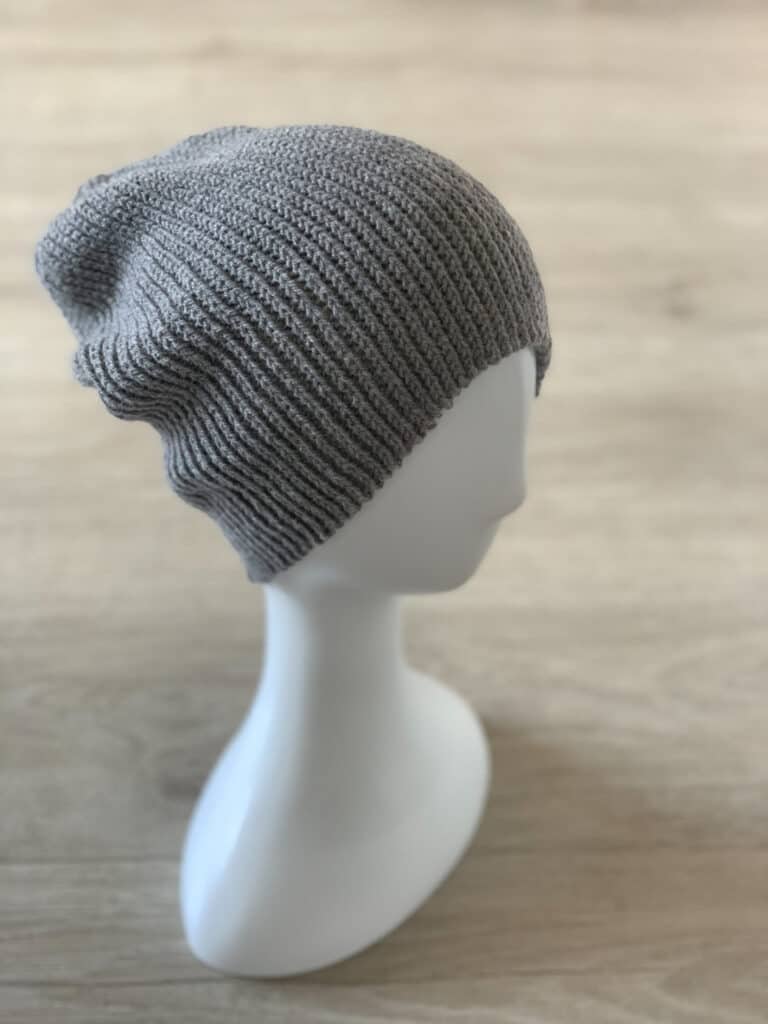
11. Classic Fisherman’s Rib crochet beanie
The Fisherman’s winter crochet ribbed beanie is a traditional slouchy hat which can be worn as such or with the brim rolled up for a more fitted feel.
It also introduces a somewhat different approach to crown shaping in a side to side crochet beanie. Using slip stitches throughout to create a stretchy ribbed crochet fabric, it’s constructed in a crown shape (the royal kind) with the top of the hat being seamed to form the hat crown at the end.
You can find a free 4ply / fingering weight version of the hat pattern (in the adult size) on the dora does blog. This also includes a supporting video tutorial. I know slip stitching isn’t everyone’s favourite and because of its unusual construction I created a video to demonstrate some of the less familiar techniques.
The full PDF pattern is available in 3 different yarn weights for 4 different sizes.
Crochet hat patterns using a different construction
12. Classic ribbed crochet beanie with crown shaping
The My brother’s beanie hat pattern combines a side to side construction with a top down crown.
Designed as a birthday present for my brother (hence the name), this one starts with a magic ring and after a round or so it switches to working side to side rows, with one end of each row being anchored to the ring. The top ends of the rows use shorter stitches to add shaping to the crown.
This has the advantage of reducing that unsightly gather common in so many side to side hat designs, without adding over complex shaping. As you ca see from the top down image below, I think it’s pretty effective (if I say so myself!).

You can read the free pattern here and check out the step by step photo tutorial in this post
13. Crochet pillow hat with twin pom poms
This fun Victoria Kids Pillow hat pattern from Regina P Designs is a quick and easy crochet hat design.
This type of crochet hat uses a super simple and fun construction, made from a rectangle folded in half and seamed at the folded sides (rather than the end like a side to side hat), No need for shaping in this one.
It’s a great project for new crocheters who like this hat style with the cute pom poms placed on each corner.
I’d never heard it called a pillow hat before doing my research for this post but I think it is an apt name! I used a similar construction for my Christmas gift hat using the pretty crochet star stitch.

14. Ear flap beanie hat
Last but not least, I want to share my kidult hat design. It brings the playfulness of kid’s accessories into the adult sphere – why should kids get all the fun stuff?
The construction is similar to the my brothers beanie hat, but I have altered the length of the hat around the back and ears to ensure it covers the back neck and the ears.
I’ve also added those plaited dangly bits (I wish I knew a better name for them!) at the end to give it that folky feel.
This pattern is worked in super bulky yarn so works up pretty fast and is a great last minute make to keep you warm on those cold windy days.

I hope you’ve enjoyed learning how to crochet a hat and found a pattern or two you love, or had your inspiration sparked to make your own design.
If you’ve found this useful, don’t forget to share it with your crochet friends or on social media (every like and share helps me a lot!).
You may also want to check out my other ‘all about crochet…’ articles;
If you’re still looking, you can find more dora does crochet hat patterns here.
Until next time
Happy Hooking
Dx
Copyright Dora Does Limited, Registered in England, Company Number 13992263. This pattern is for personal use only and may not be shared or reproduced in written, photo, video or any other form without prior written consent. All rights reserved. Terms of service.