Crochet Explained: What are stitch multiples?
Recently I wrote a post about how to read a crochet pattern. I want to follow that up by breaking down some of the elements in a little more detail; starting with explaining Stitch Multiples
When reading a crochet pattern you may come across a line that says something like, make a foundation chain of 3+1 stitches or something similar. This is the stitch multiple used in that pattern.
Different patterns will have different numbers depending on how they are made up. For this post, I’ll refer to it as ‘x + y’ So I can talk about it in generic terms.
So let’s take a look at what it all means!
(Note that I am using US terms in this example, you can find basic abbreviations here)
What is a stitch multiple?
A stitch multiple is simple the number of stitches needed to complete your pattern repeat.
So if you are working a pattern where you use the same stitch across each row, e.g. a row of double crochet, then your stitch multiple is 1.
If you’re working a pattern where you use stitch combinations then the number of stitches in that combination is your stitch multiple. So Moss Stitch, for example is ‘chain 1, 1 single crochet’; that’s a stitch multiple of 2.
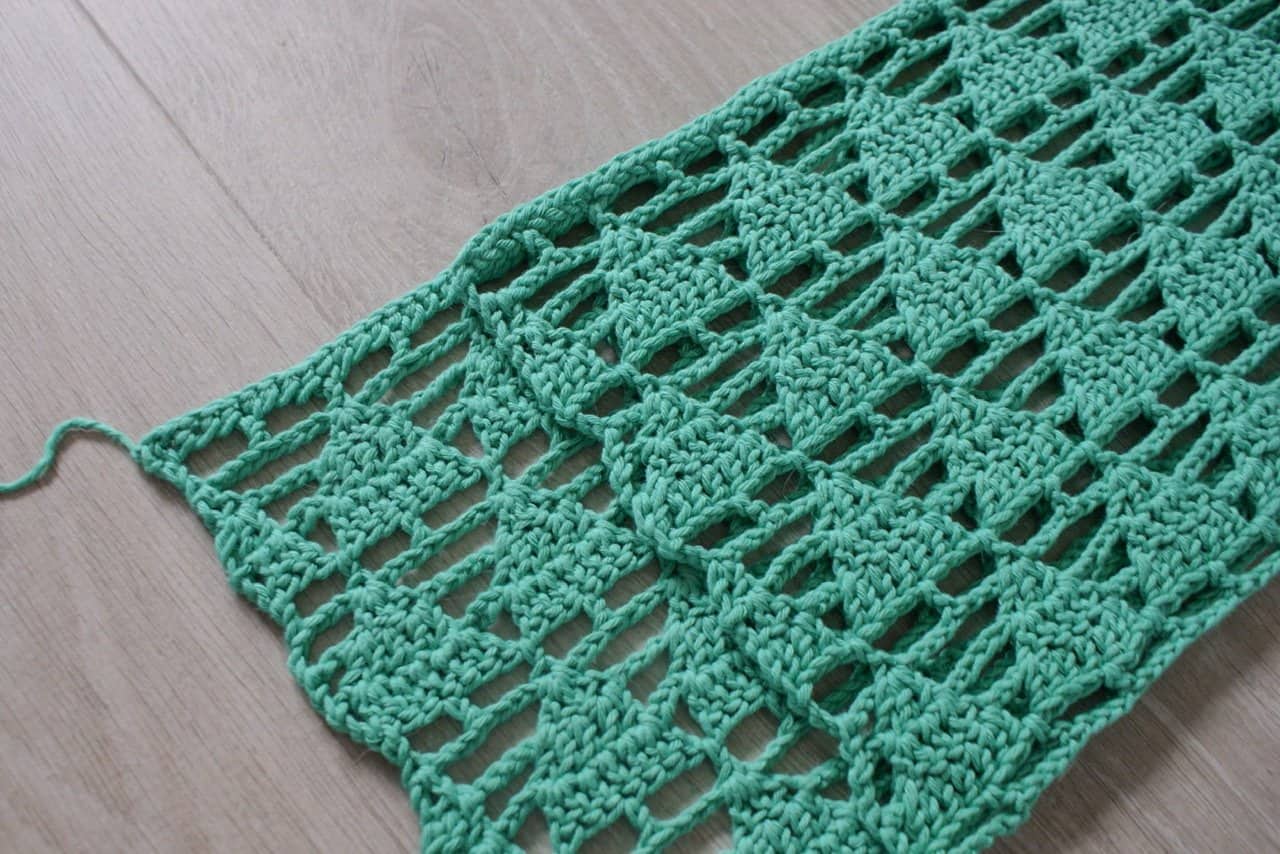
For this post we are going to use the example of a crochet scarf made using a simple ‘V-stitch’.
Working out the multiple
V-stitch is made by working ‘1 double crochet, chain 1, 1 double crochet’ all in the same stitch then skipping 2 stitches and repeating the instructions. On the next row you work (1dc, ch1, 1dc) into the ch1-sp you made in the previous row.
So for each V-stitch you work 3 stitches, giving you a stitch multiple of 3 (if you count the chain 1 as a stitch which I do for this purpose).
We now have our ‘x’ part of that stitch multiple statement mentioned at the start. But that’s not the end of the story. What about the ‘plus y’ part? What’s that all about?
Working out the ‘plus y’ bit – keeping your edges straight!
For our scarf we have a multiple of 3 for the stitch repeat. But, what about those bits at the beginning and end of the row? How do we start and finish the row to make sure the sides of the scarf straight?
This is always the bit that confuses people and is where you need your ‘plus y’.
Let’s say that for our V-stitch scarf, we want a double crochet at the start and end of each row to get nice tidy edges.
The V-stitch pattern might be written out as follows (where instructions in brackets are worked in the same stitch):
*Sk 1 st, (dc, ch1, dc), sk 1 st; rep from * to end
We can see that each repeat required 3 stitches (our stitch multiple). This is great but we want to start and finish the row with a double crochet.
The way I’ve written this pattern means that you just need to add a dc on each end, So our y in the ‘plus y’ is 2.
So our stitch multiple is 3+2 and the pattern instructions would now look like this:
Row 1: Ch2 (does not count as st), 1dc in first st, *sk 1 st, (dc, ch1, dc) in next st, sk 1 st; rep from * to last st, 1dc in last st, turn.
For Row 2 we would do the same working into the chain spaces:
Row 2: Ch2, 1dc in first st, *sk 1 st, (1dc, ch1, 1dc) in ch1-sp, sk 1 st; rep from * to last st, 1dc in last st, turn
Then you would just keep repeating Row 2 for the duration of your scarf.
Hopefully this explains how the stitch multiple is built.
How many chains do I need to start my v-stitch scarf?
So far we know that we have a stitch multiple of 3 and that we have to add 2 stitches on to get straight sides, so our ‘x + y’ stitch multiple would be 3 (the V-st) + 2 (our 2 dc we add on the ends):
To start your v-stitch scarf, you would need a multiple of 3 + 2 stitches
In terms of your starting chain, the exact number of stitches would depend on the type of yarn and hook you were using. But let’s say you wanted 20 V-sts across your scarf.
You would make (20 x 3) + 2 = 62 chains on your foundation row.
What about turning chains?
This multiple does not include turning chains.
The 62 chains in the example is the number of stitches you would need to work into. It would not include the chain 2 or 3 you would need to add to start your row. So when making your starting chain, this is another number you’ll need to add.
In my designs I tend not to count a turning chain as a stitch. For a row which starts with a double crochet I would add 2 chains and start with a dc in the 3rd chain from the hook as the first st of the row.
Note that some designs will include this turning chain in their stitch multiple and some don’t. If you’re altering the pattern, you need to know whether this is included or not.
Why do I need to know my stitch multiple?
Now you understand what this elusive ’x + y stitch multiple’ is, it might help if you know what it’s used for!
Stitch multiples are like the building blocks of crochet patterns. Once you have the block, like Lego, you can build anything!
Most commonly these multiples are useful if you want to adjust a pattern or make something off the cuff.
If you see a stitch pattern that you love but it’s in a huge blanket and you only want to make a scarf, you can use the multiple information to down size the pattern (and vice versa).
If you’re more into designing patterns then knowing the stitch multiple is essential to make sure everything adds up. Especially if you are grading items for different sizes.
How to work out a stitch multiple
The example I gave was fairly straight forward, but if you want to work it out for your own stitch pattern, or one you have seen, there are various ways to do it.
Firstly you work out the multiple of the stitch pattern (the x). This should be as simple as counting the stitches.
Working out the ‘plus y’ part is a bit trickier.
Here are two ways which work for me.
1: Sketch it
If you’re familiar with stitch symbols then draw the pattern out on a piece of paper. If you’re familiar with the pattern (i.e. know how the rows start and finish), then this should be straight forwards. If you’re trying to design something new then this may take a bit more trial and error.
Using squared paper can be really helpful to check the stitches are stacking
Once you have your sketch, you can simply cross through the stitches that are part of the multiple and see how many you have left – that’s your plus y.
This is the method I use as it’s quick and I find it really helpful to visualise how the pattern is going to work up but I appreciate it may not be fore everyone.
If diagrams aren’t your thing then you can write out the pattern stitch by stitch too (as I did with the V-stitch example) which will allow a similar approach.
2: Swatch it
If you have the instructions already, but want to work out the multiple, you can just follow the pattern, working just a few repeats and then count how many stitches you have either side.
If you only know the stitch repeat and now how the rows start and finish, then it’s time to experiment a bit. In this case I would advise sketching first to work this out, then making a swatch to check that it works. Usually you just need to work a few rows to see if your ‘plus y‘ method is on the money.
Swatching is essential if you’re creating stitch patterns. Experiment with various options to work out how to make your edges straight or to achieve the look you’re aiming for. Once you’ve got it you can count out the multiples to work out your x+y.
When I’m coming up with new patterns, this is how I check that my sketching does what I hope it will!!
What about row multiples?
Just like your stitch multiple you can also have row multiples which work in exactly the same way.
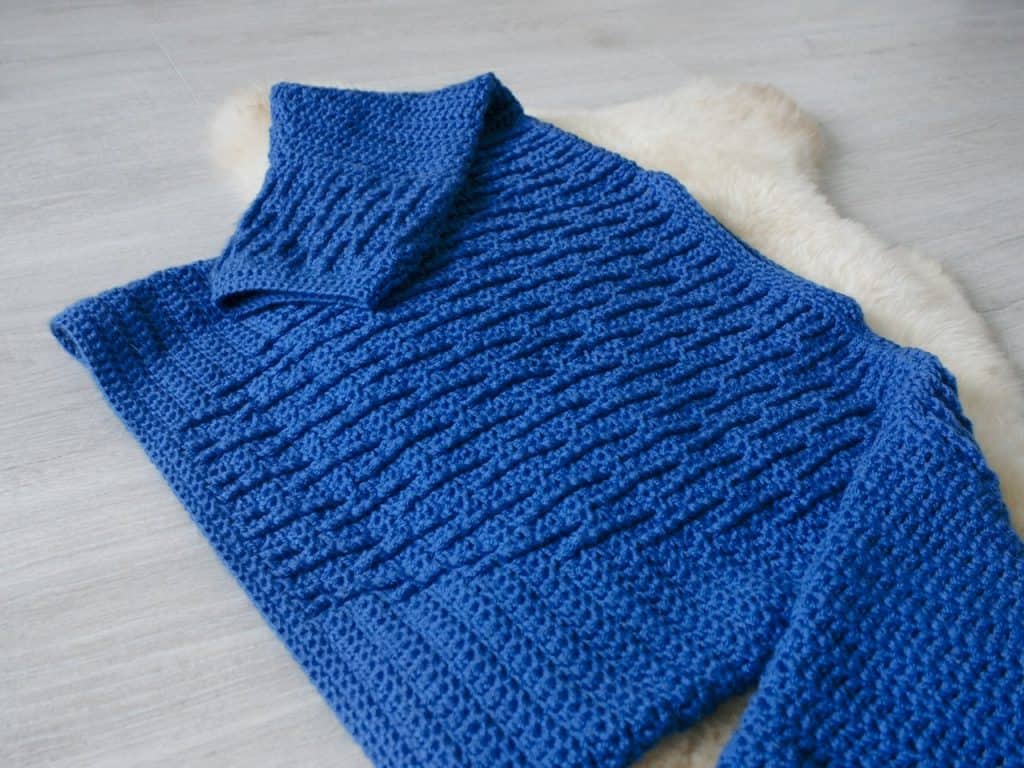
As an example, the So What Sweater pattern uses alternating rows of single crochet and double crochet. So my row multiple is 2.
In some patterns you may also need the ‘plus y’ part for your row repeats.
For example if you start with a simple row of single or double crochet before getting into the row repeat.
This is sometimes called a set-up row.
My Leap Year Infinity Scarf has a two row pattern repeat with a different stitch for the first and last row. So this would have a row multiple of 2 + 2.
It uses a 4 stitch multiple and, interestingly, because it is worked in the round, it has no ‘plus y’ part, so the stitch multiple could be written as 4 + 0!!

As patterns get more complex, the row (and stitch) repeats may get longer, or parts of the pattern may have different sections with different repeats.
When you are working with row repeats, it can be really helpful to make a note of wrong and right sides as a way to keep track of which repeat you’re on. Stitch makers can help too.
For example, you would almost always work a row of bobbles on the wrong side of your work, meaning the next row would be a right side row. (Learn more about why bobbles are worked on the wrong side here!)
The Smell the Roses poncho uses bobbles and different types of row repeats throughout.

As always, I have probably gone into tons more detail than needed to explain what is a relatively simple concept, but if you read my blog posts, you’ll know that I like to dig in! I do hope I haven’t overcomplicated things!
I hope the examples have given you some extra context and that you found this useful, maybe even had an ah-ha! moment or two!
Any questions, just drop a note in the comments!!
Happy hooking
Dx


Desk Mat Rectangular 23” by 36” with J hook, 1st time Multiple of 4+2=94 Note: Starting over made mistake off by 2” (21” by 34) chained 101 stitches this is new for me.
If your size is out, I would recommend you check your gauge against that given in the pattern. You could also change your starting chain by multiples of 4. I hope that helps.
That was so helpful! I never knew what those numbers ever meant and now I do. Thank you so much for this info!🙂
You’re so welcome. Glad I could help you out 🙂
THANK YOU! This is invaluable information for me as I try to branch out into making some variations on patterns as well as some of my own creations. Thank you for taking the time to explain it. I’m sure it will be a blessing to everyone.
You are welcome!! I’m so glad you found it helpful! It’s always good to know I’m on the right track!! 😊
Michelle, Michelle !! – you can’t imagine you happy I was to see your email in my Inbox: I was just about to work out how to send an email to you !
I have finished a crocheted cardi (which is absolutely gi-normous, only the gods know why), and am now needing to put it together. It’s in double crochet, but for cables down the two fronts and around the bottoms of the sleeves.
http://www.lionbrand.com/patterns/crochet-pattern-curvy-girl-cabled-cardigan.html
My problem: what stitch do I use to join the bits ? If I sew it, I’m pulling dcs sideways and leaving big empties. Should I sc it together ?
WWDD ?
What Would Dora Do ???
There are lots of options. If you’re joining down row ends I would sitich together working through the stitches so you don’t get the gaps. Mattress stitch is a great one for sewing pieces together – I’m not great at sewing but if you google it with crochet you will find a tutorial !
I will do as you say, O wise one !