How to make and measure a crochet gauge swatch

In this post, I will walk you through how to crochet a gauge / tension swatch and how to accurately measure it to check your gauge.
I will also explain the other benefits of crocheting a swatch and how the swatching process can improve the overall look of your finished crochet projects.
I’ve talked in a previous post about what gauge is and why it’s important for your crochet projects so if you’re totally new to the concept of gauge in crochet, then start here.
What is a gauge swatch for?
A gauge swatch is a small piece of crochet fabric, normally a minimum of 12.5cm / 5inches square. It is made with the same crochet hook you intend to use in the same yarn and stitch pattern as the crochet project you are preparing to make.
The gauge measurement given in a crochet pattern is what the designer uses to do all the maths which goes into sizing a crochet project.
To make sure that your crochet project ends up the same size as the pattern, you need to check that you are crocheting using the same gauge measurement as the designer (i.e. that you are “meeting gauge”).
To check this, you crochet a test piece, i.e. a crochet swatch, so you can compare and check you can crochet to the correct gauge before you start making.
This post will teach you the most accurate way to make and measure such a swatch, setting you up for success.
If you want to learn more about gauge, check out my new PDF ebook: Everything you ever wanted to know about gauge but were afraid to ask. It covers this topic and more.
What you need to to know to make a gauge swatch
Before you start to make your swatch you need to consider the following:
Hook size – What size hook does the pattern call for. Are you using the same hook size?
Yarn – is the yarn you’re the same as, or a suitable substitute to that suggested in the pattern?
Stitch pattern – what stitch pattern should you be using to make your swatch? Is there a stitch multiple you need to work in your first row? This should be clear from the pattern.
Is the gauge given in the pattern blocked or unblocked? Sometimes this is clearly stated in a pattern, sometimes it isn’t. Making and blocking your swatch will let you know if there is a big difference between unblocked and blocked gauge (which there can be with some fibres and lace patterns), so check to see if it is specified.
If it’s unspecified, I would think about how you’re going to treat your final piece. If you’re going to block it, then your blocked swatch will want to match gauge.
Once you have all this information you are ready to swatch.
Note that in the UK, gauge is referred to as tension. In this post, I use the two terms interchangeably.
How big should my gauge swatch be?
To begin making your swatch, you need to think about how big you’re going to make it.
To give a useful idea of gauge your swatch should be at least 12.5cm / 5in square, bigger if possible.
If you’re working with a chunkier yarn then I would advise going even larger as 12.5cm may be only a few stitches.
Why can’t I just make a 10cm / 4 inch swatch?
A common misconception is that you should make a swatch based on the number of stitches and rows given in the gauge statement and then measure it to see if it’s 10cm.
This will not give you an accurate gauge measure and is not something I recommend.
The first couple of rows and stitches at the edges of your swatch are never going to be reflective of the tension you will achieve when crocheting over a larger area.
Gauge will also change with familiarity with the stitch pattern. I find that when you are working a pattern for the first time, you concentrate hard and, most likely work with a tighter tension (though the reverse can be true too!). Once you’re used to the stitch, you tend to relax into it and you will achieve a more consistent tension.
Because of these factors, making a bigger swatch and checking the gauge at different parts of it will give you a much more accurate measure.
How to crochet your gauge swatch
Some patterns will give you specific gauge instructions, where as other will just state the measurement. There’s a huge amount of variation here.
Assuming there are no specific instructions, crochet your starting chain or foundation row by eyeballing the length so it measures at least 12-15cm.
If you’re working with a stitch pattern rather than a single stitch repeated, make sure you taking note of any stitch multiple (e.g. 4+2) the pattern uses.
Once you have the foundation row complete, work the stitch pattern given in the pattern until you have created a large enough swatch to allow you to take accurate measurements. At least 5 inches square.
If there is no stitch pattern specified in the gauge section of your pattern then I would take a quick look at the pattern to see if there is a majority stitch used. For example, if the whole pattern is worked in double crochet then it’s fairly safe to assume that that is what the gauge refers to.
If it’s not clear then contact the designer.
I confess that in my earlier patterns I was a little vague about what stitch my gauge referred to – it always referred to the stitch pattern I had used in the garment but I could have been more explicit about this! (I’m working back through them to update!!)
Through constructive feedback, designers can improve their patterns and make them easier to read, so I am definitely open to this.
Once you have completed your swatch, you may want to block it – if that is required by the pattern. If you’re blocking it, make sure you take a gage measurement before and after (more on how to measure below).
Should I block my gauge swatch?
The consensus is that you should treat your swatch the same way that you treat your finished item.
If you’re making a sweater from acrylic yarn that you will machine wash then stick your swatch in the washing machine. If it’s a delicate hand wash lace shawl, then hand wash the swatch and pin it out to dry flat on a blocking board.
Theoretically, the gauge should state whether it was taken blocked or unblocked if there is an important difference but this isn’t always the case.
If in doubt, ask the designer for clarification.
You can learn more about blocking here.
Make sure you follow the washing guidelines given on most ball bands. If there is no guidance or you don’t have the yarn label, hand wash and be gentle.
Even if the gauge is given unblocked, washing your swatch will give you an idea of how the finished item will wash (better to wreck a 20 minute to swatch than a whole sweater!), so it’s a very useful exercise..
How to measure your crochet swatch
Once you have your finished, washed, dried and blocked swatch, it’s time to measure it.
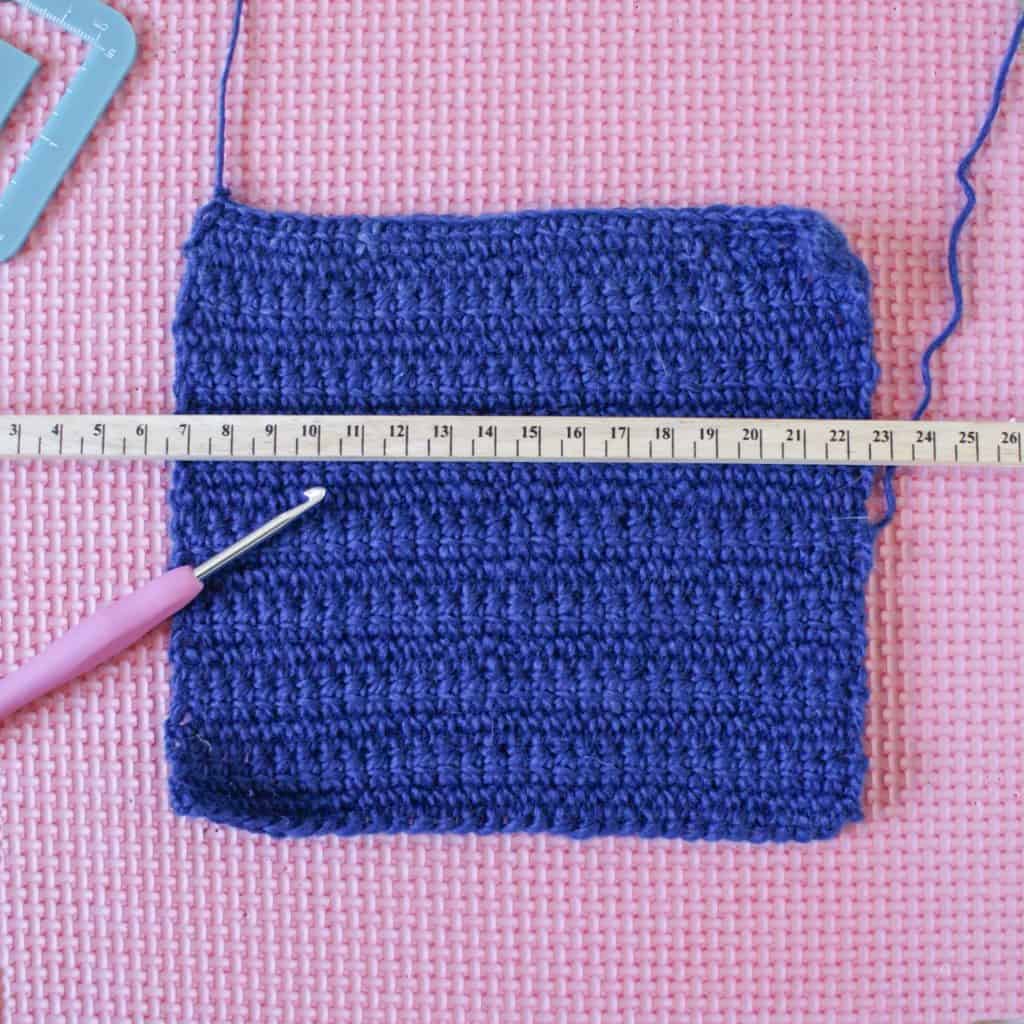
Lay the swatch out on a flat hard surface and take a solid ruler or gauge measure.
You can use tape measures too, but I prefer something solid as measuring tapes can move about quite a lot and they can stretch over time and use.
What you are looking for here is the number of stitches and rows in 10cm / 4 inches, so that you can check to see if your gauge matches that given in the pattern.
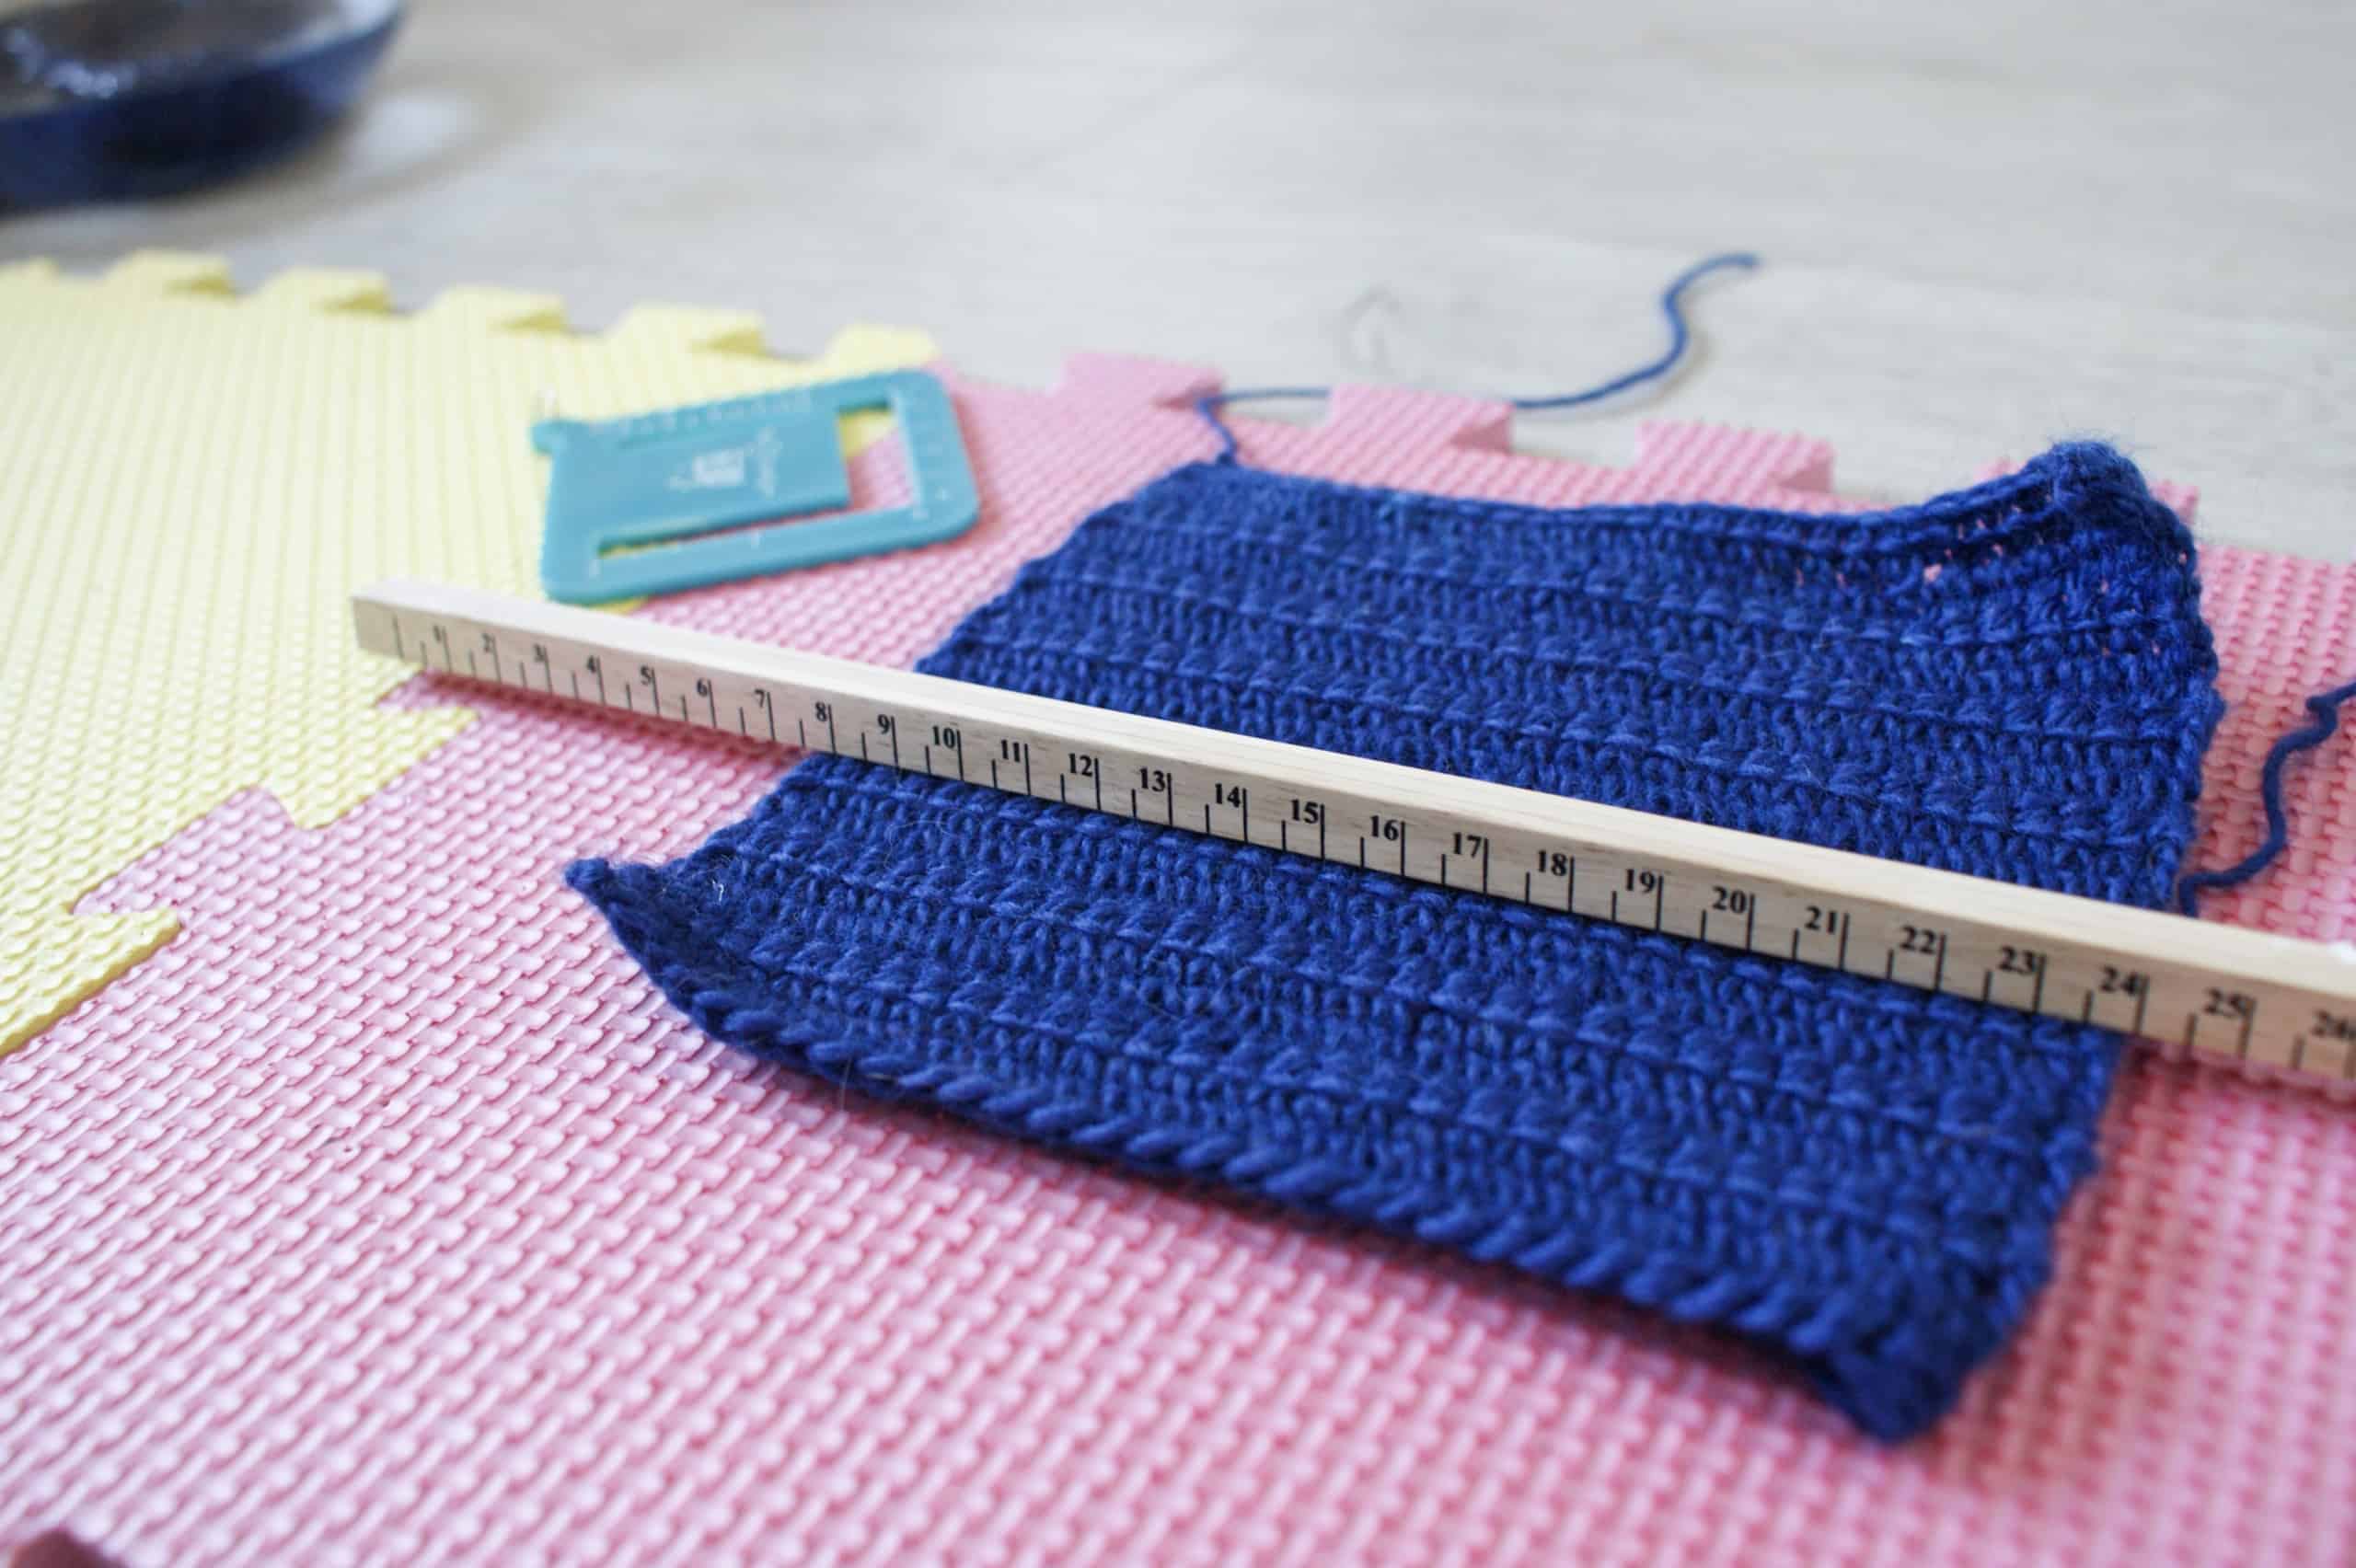
Gauge measures like my super cute one from Yarnistry pictured on the (unblocked) swatch below can be super useful but are not essential.

Note that the pictured gauge measure is only 5cm. Generally you get a more accurate measure of gauge when measuring over larger areas. 10cm / 4 inches is the standard but with finer yarn and smaller stitches 5cm can be okay, especially if you take the measurement over multiple ares.
You can see that this swatch is unblocked as it curls up at the edges. This demonstrates the importance of blocking and also illustrates the point that tension can change throughout your swatch.
Whatever measure you are using, place it flat on your swatch and count the number of stitches worked in 10cm across a row.
I use a the tip of a crochet hook to help me count as I find it helps me ‘see’ the stitches better. You need to make sure you account for the spaces between the stitches whenn counting a complete stitch as well as the yarn.
A common method to stop you loosing count or worrying about shifting the ruler or tape measure by accident is to use pins to mark off the 10cm distance.

In the photo above, I would put 1 pin in at the 10cm mark on the ruler and another at the 20cm mark, This way you can count without worrying about holding the measure still.
Move your ruler to another part of the swatch and re-count.
Do this several times.
Tension can vary within the swatch so it’s good to count in lots of areas to check the count is consistent. Another reason why the swatch needs to be at least 12.5cm, and bigger than you think it needs to be.
If your stitch count changes over different parts of the swatch then you can either take an average or make another swatch if your tension is significantly uneven.
This number gives you your stitch gauge.
Turn your ruler at right angles and, using the same method as the stitches, count how many rows there are in 10cm.

Move the ruler to another part of the swatch and repeat the process.
Now you have the second part of your gauge – your row gauge.
Compare your stitch and row counts to that given in the pattern you’re working from to see if they match.
What if my gauge doesn’t match the pattern?
If your gauge is not the same as the pattern then there are a few things you can do to solve this.
The first and simplest thing to try is changing your hook size.
If you have more stitches and rows, it means you are crocheting tighter than the gauge in the pattern. Try increasing the size of your hook so your stitches are larger.
If you don’t have enough stitches in your swatch then you are crocheting more loosely than the designer. Try working with a smaller hook to make your stitches smaller.
If you find your stitch gauge matches but the height of your stitches (i.e. the row gauge) is off, then you can use the golden loop method to change your row height.
You can read more about what affects gauge and how to change it in this post about the concept of gauge.
What else can you learn from a crochet swatch?
Swatches are vital for checking your gauge but there are other things we can learn from them too.
Making a swatch is a great way to practice the stitch pattern you’re going to use in your project.
As I mentioned in my justification for making larger swatches, when I’m working a new stitch pattern, I pay a lot of attention the first few rows and this makes me crochet more tightly. Once I get into the groove, my stitches relax and I make fewer mistakes.
This is not the same for all crocheters. You may find that you crochet loosely when familiarising yourself with a stitch pattern.
Either way, it follows that, by the time we get to start the project we know what we’re doing and our gauge will be much more consistent and our work neater.
This is one of the most useful ways that swatching can improve the look of your finished work.
Swatching is also a good way to check you’re using a suitable yarn for your project. You may crochet up a swatch and decide that the yarn really doesn’t suit the stitch pattern.
Isn’t it so much better to find that out after a bit of swatching instead of 2 hours into a project?
Finally, your swatch will also give you an idea of how the finished fabric will drape and move.
When you are crocheting, you are creating fabric and different fabrics behave in different ways. Your swatch is so useful for giving you an idea of how the finished work will look and feel. You can learn more about drape in crochet fabric here.
So there we have it.
Now you can make a swatch and measure your gauge from it, as well as learn a lot more about how your project is going to work up.
I hope I’ve convinced you of the value of swatching and I would love to know how you get on with it so please do share your experiences in the comments.
Oh one more tip… If the project you’re swatching for is a garment… coul you use your swatch as a pocket? … because everyone loves a pocket and hates wasting yarn right!!!?
Happy Hooking
Dx
Read more in the Crochet Fundamentals series


One Comment