Crochet Design Basics: How to Design Simple Crochet Clothes in 7 steps
Ever wanted to design your own crochet sweater or dress but don’t have a clue where to start? Well this post is that place!
This guide will give you a simple overview the process I use to design crochet clothes. I’ve focused on crochet garments but if you’re not quite there yet, then you can take the same principles and apply them to any crochet project. So feel free to start with a blanket (with the help of my blanket size guide) or cowl or something you feel comfortable with.
Before I start I want to say that there are very few absolutes in crochet design. My approach has changed a lot since I started publishing patterns 7 years ago.
So if you choose work a different way, that’s totally fine. Take what serves you and leave the rest!
When I started designing, I used to just pick up the hook and see what happened and there is a lot to be said for the creative freedom in doing that.
However, experience (and a LOT of frogging) taught me that if I do as much prep work as I can before I start, it saves me lots of time (and tantrums) and makes the whole thing more fun.
My adult clothing patterns are, at a minimum, graded for 7 sizes from XS – 3X, with the more recent ones being available in 9 sizes from XS-5XL. So when designing, I need to think ahead about how a design is going to work across that range. This idea of keeping the bigger picture in mind is one of the factors which drives the design process I’m going to outline for you today.
Below I will outline the 7 steps to follow and then go into more detail on each. This post is by no means a complete guide to crochet pattern design, but it offers a solid framework to get you started.
There are 100 tangents I could go down on every one of the steps, and where applicable I’ve linked to related articles for additional reading, but I’ve kept it simple here. I encourage you to explore the tangents that engage your own curiosity at every opportunity!

Above I’ve listed the essential steps I go through in my design process. You can actually work steps 1 to 4 in pretty much any order, because they are all interdependent. Whatever garment you choose to make, it’s important that you consider how the stitch, yarn and shapes will all work together.
Let’s go into some more detail with a worked example.
Step 1: Decide what you want to make
What do you want to create? A Sweater? Cardigan? Poncho? Skirt? Dress?
Think about the shape and style, fit and drape of your garment. Will it have cuffs, collars hems? What will the neckline look like?
Sketch it out – it doesn’t matter if you’re not great at drawing, I’m no Monet as you can see…
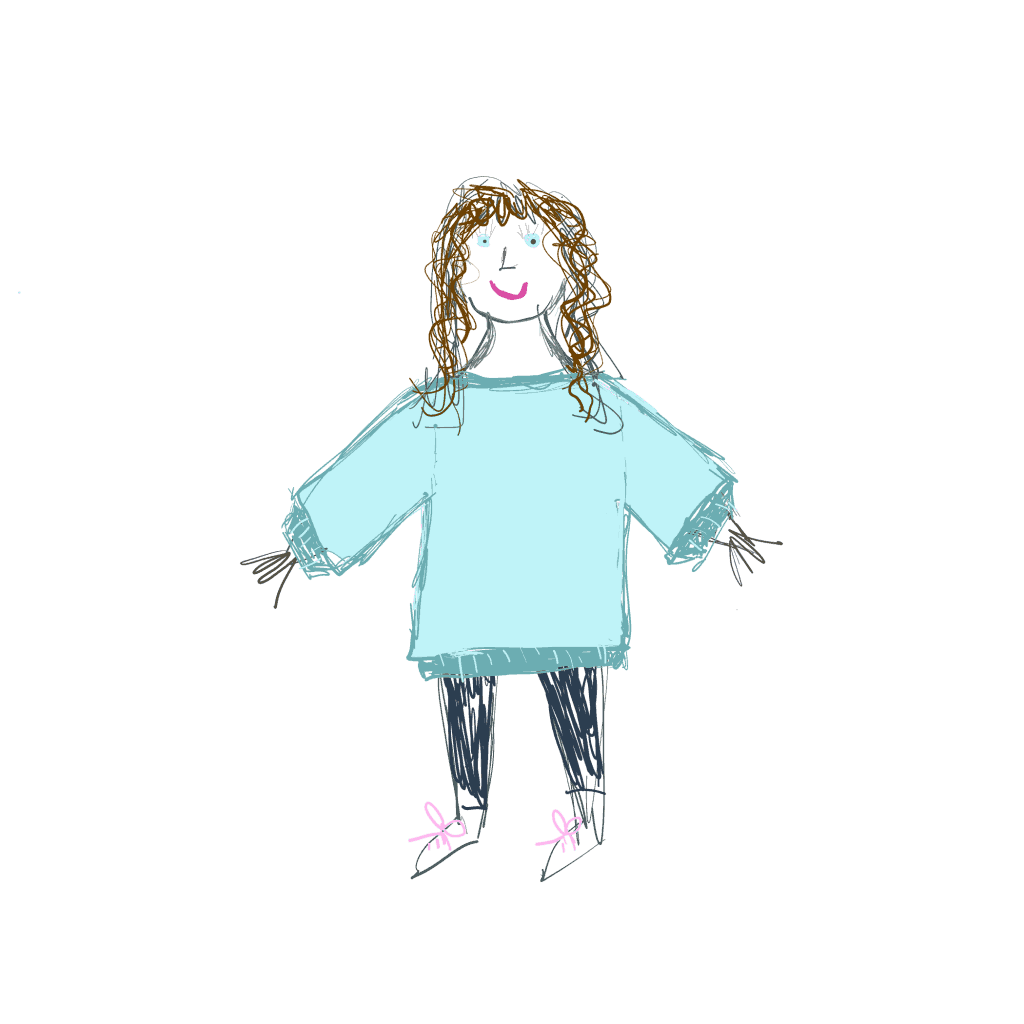
I’m going to use this example of an oversized drop shoulder sweater with no shaping to keep it simple.
Step 2: Figure out the pattern pieces
Before you begin, you need to understand how your garment is constructed.
Think about the shapes needed to make your garment and how they will fit together. Essentially you will just create crochet fabrics in these shapes and then join them all together to make your garment.
If you need a hand getting started with this, I recommend you read my blog giving you 6 types of sweater construction as a starting point. This outlines how to make the most popular types of crochet garment.
If you’re feeling adventurous, you may want to look at top-down garments too. I have a separate tutorial on how I design top down round yoke garments, but you will need to understand all the steps outlined here first.
In this article, I’m only really looking at garments which are worked flat in panels. There are different considerations for shaped garments like hats and socks. The same basics apply but I am not going to address that level of shaping in this post.
When I started designing, I had no idea how clothing was constructed. I experimented a lot, got it wrong a lot, looked at favourite garments in my wardrobe (my favourite tip), read books about construction, talked to designers and generally did lots of research.
I’m still learning and trying new construction methods all the time, so don’t be afraid to experiment whatever your experience level is..
If you sew your own clothes then you will definitely be at an advantage here as it gives you a great understanding of the garment construction process.
Once you have decided on the shapes of your pattern pieces, you need to work out the measurements of each piece, based on your preferred size.
So for my drop shoulder sweater, I need a front and back rectangle, which are the same size and two sleeve rectangles which are the same as each other.
This is what my drop shoulder schematic looks like.
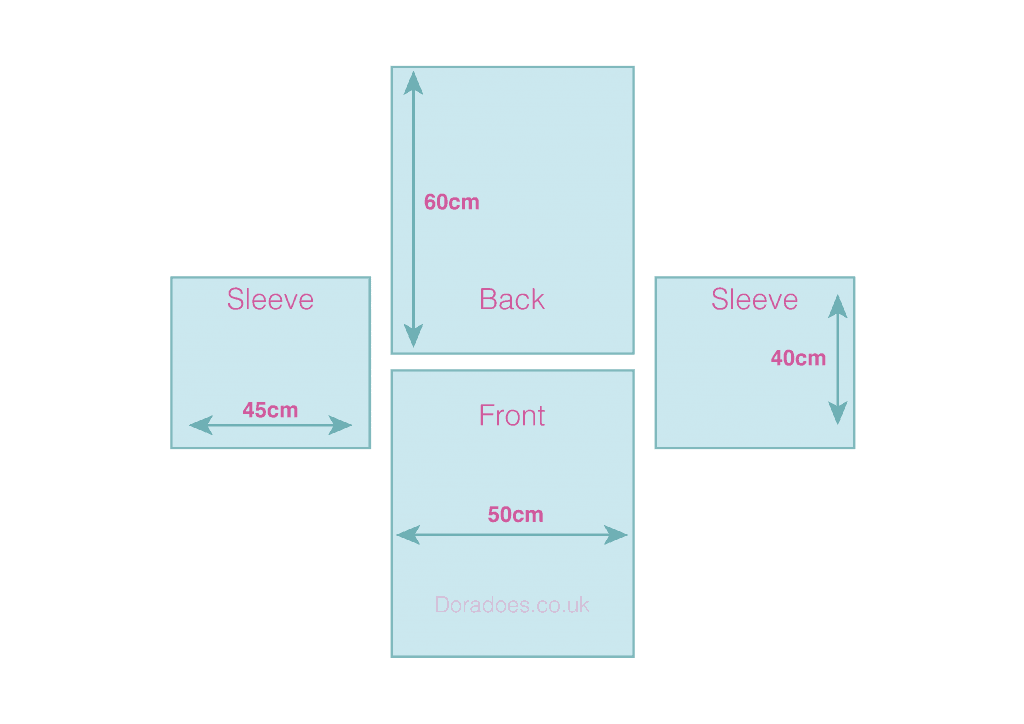
I’m going to crochet the body panels from the bottom up in rows (more about that when I come to stitch pattern). Each panel will measure 60cm long and 50cm wide. For my body measurements, this will create a long and slouchy sweater.
The sleeves will be crocheted from the wrist/cuff to shoulder. in rows. I have allowed 20cm depth for my arm holes. so the total width of the sleeve is 40cm.
If you’re not sure where to start with sizing, have a look at the Craft Yarn Council Standards. Their website is chock full of useful information – get it bookmarked asap!! Ysolda also has an extensive sizing chart which includes measurements not given in the craft yarn council standards. You chan check out this super useful blog here.
And if you’re making for yourself, get your tape measure out and take your own measurements. Or take the measurements of one of your favourite fitting garments as a guide to how much ease (the difference between the size of the garment and the body it’s made to fit) you would like.
Step 3: Choose your stitch pattern
You might have started your design based on a stitch pattern. This is quite often what inspires my design. I see a stitch I like and start to think about what sort of garment it might work well with.
I have an in depth blog post looking at what to consider when choosing stitch patterns for garments which you can read here. I also share my favourites (explaining why I chose them) if you’re looking for a starting point.
But in short, ask yourself ; do you want to create an opaque fabric or one with open work? What about lace work? How much stretch do you want in your fabric? How much texture do you want in the fabric? How do you want it to move and drape?
My advice is to play around a lot here. If you have one, browse a Stitch Directory (check out my fave crochet books here), or have a nose on Pinterest. Try swatching with a few different stitches, hooks and yarn weights. This is one of the really creative and fun parts for me.
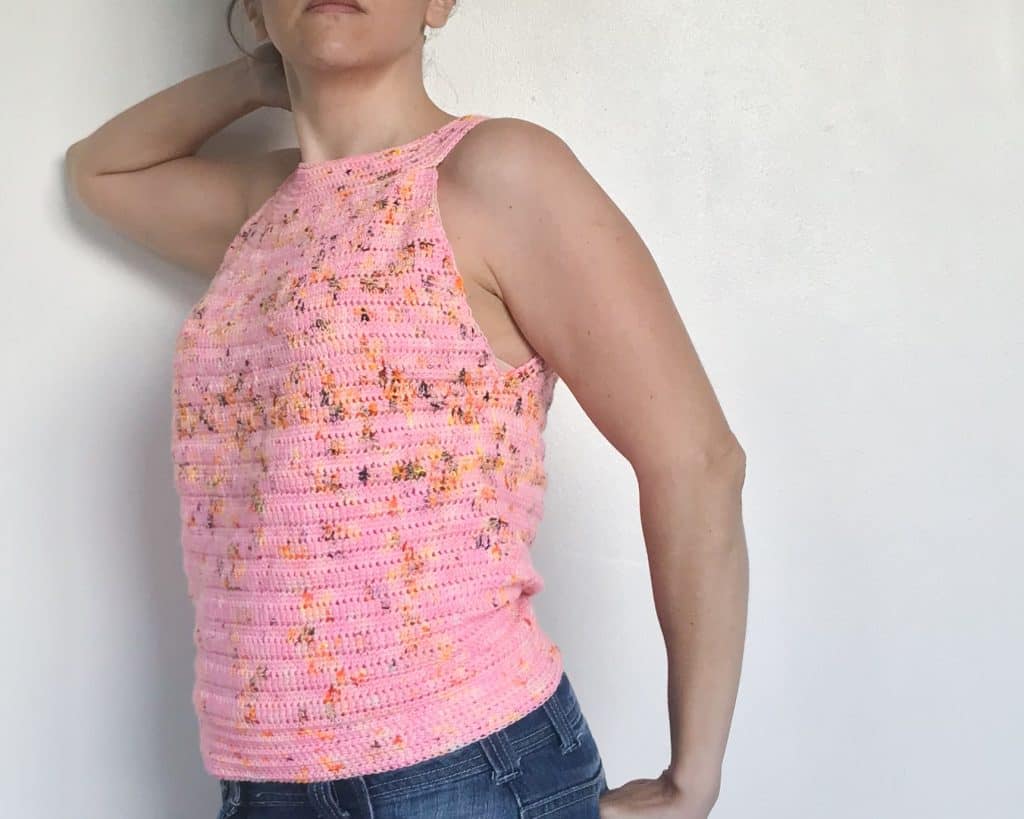
My Corona Summer Top (named in 2019…) was inspired by an addiction to working linked crochet stitches. I went up a hook size or two to get the right drape on the body based on swatching with different hooks.
Once you have your stitch pattern, make a note of any stitch and row repeats that are needed for the pattern repeat. This is really key when it comes to calculating your stitch and row counts. You can learn more about working with stitch multiples here.
You also need to bear in mind whether your stitch pattern has a right and wrong side, and whether it’s worked in rows or rounds (turned, unturned or continuous) as this will impact your row repeats.
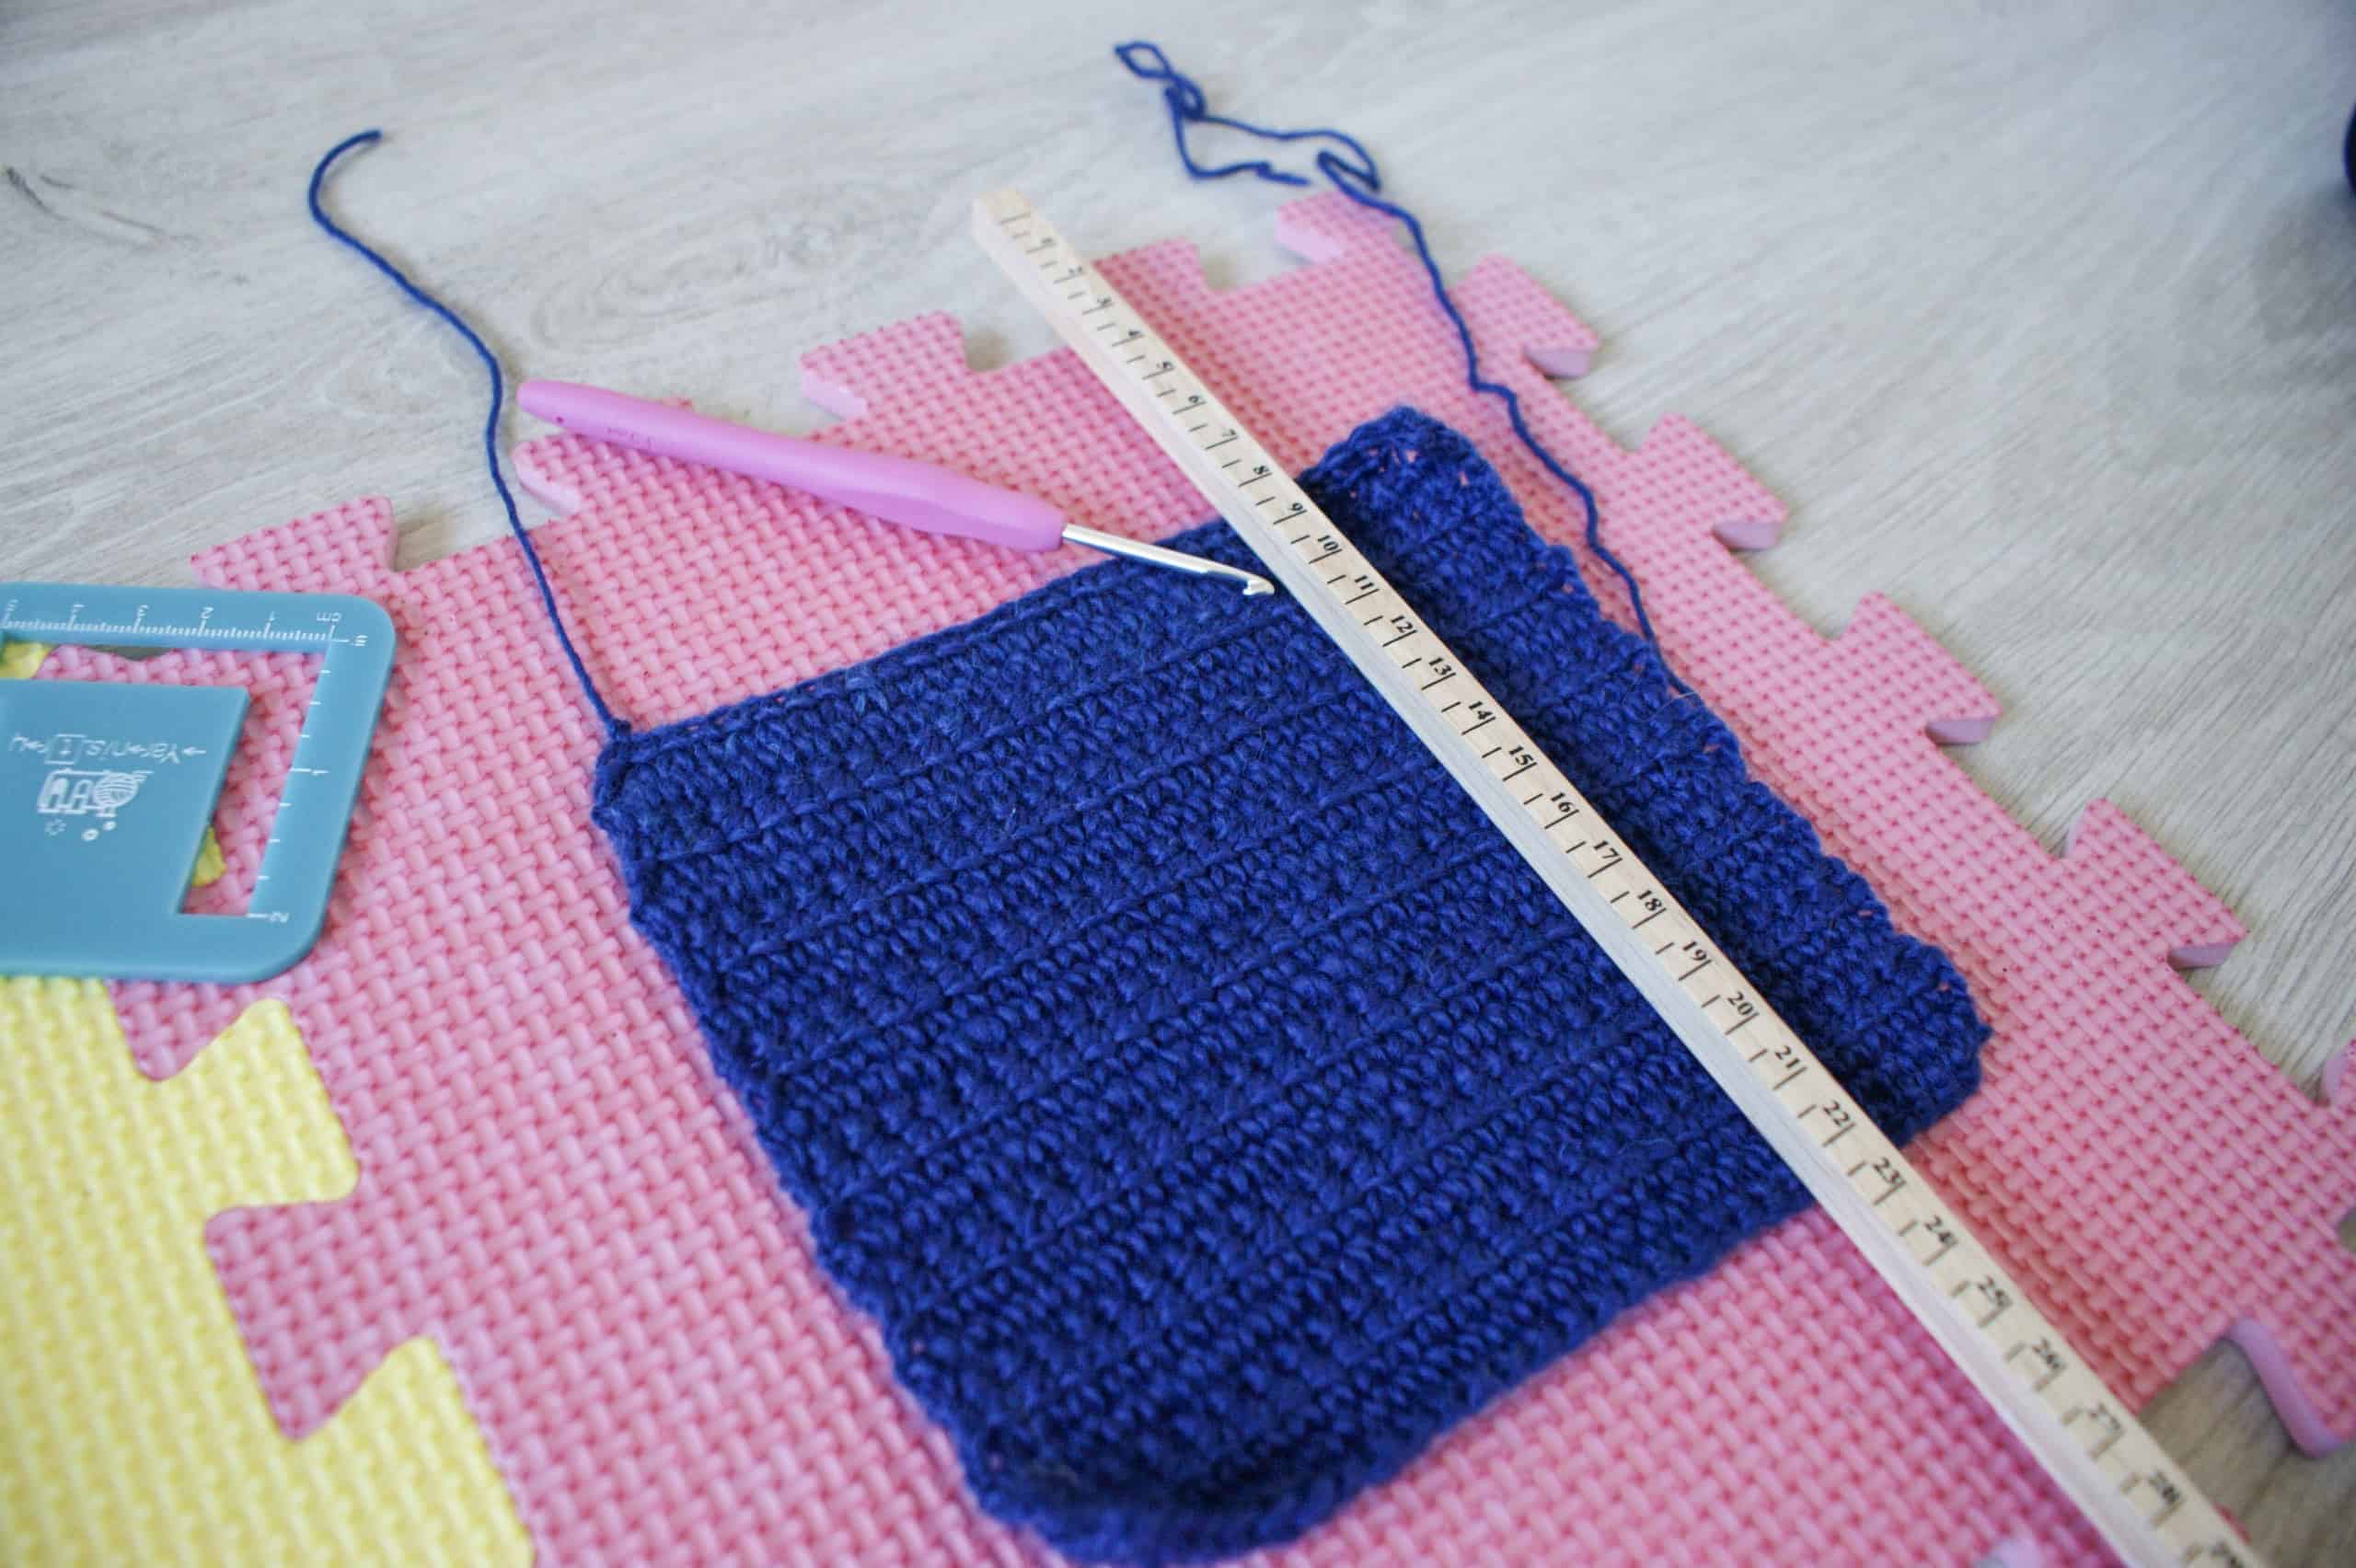
Below is a peek at one of the many swatches I made for the It’s Just Not Cricket sweater. Swatching and frogging and swatching is how I finally got a stitch pattern I was happy with. And of course, once I had the stitch pattern, I then had to start over and make a gauge swatch.

Step 4: Choose your yarn and hook
This is linked closely to your stitch pattern choice.
Think about the properties of your fibre, the yarn weight and how these will work with your chosen stitch pattern.
Is your yarn smooth or does it have a halo? How is the yarn made? Is it plied or roving? Is it likely to felt? Would that be useful?
How will it wash, drape and wear? Will it need blocking? Will it feel nice against the skin? Is it warm or cooling? Are you combining fibres? How will they work together?
What about hook size? Will the recommended hook size for the yarn give your fabric the right drape or do you need to go up a size?
Choosing the right hook is a lot more involved that it might seem. It can take a while to find a hook that works best for your own style of crochet. You can learn some of the secrets of your crochet hooks here.
Crochet stitches are generally (but not always) made in a way which means they tend to be thicker than most knit stitches. Going up a hook size might create a fabric with more movement, which is usually helpful for garments.
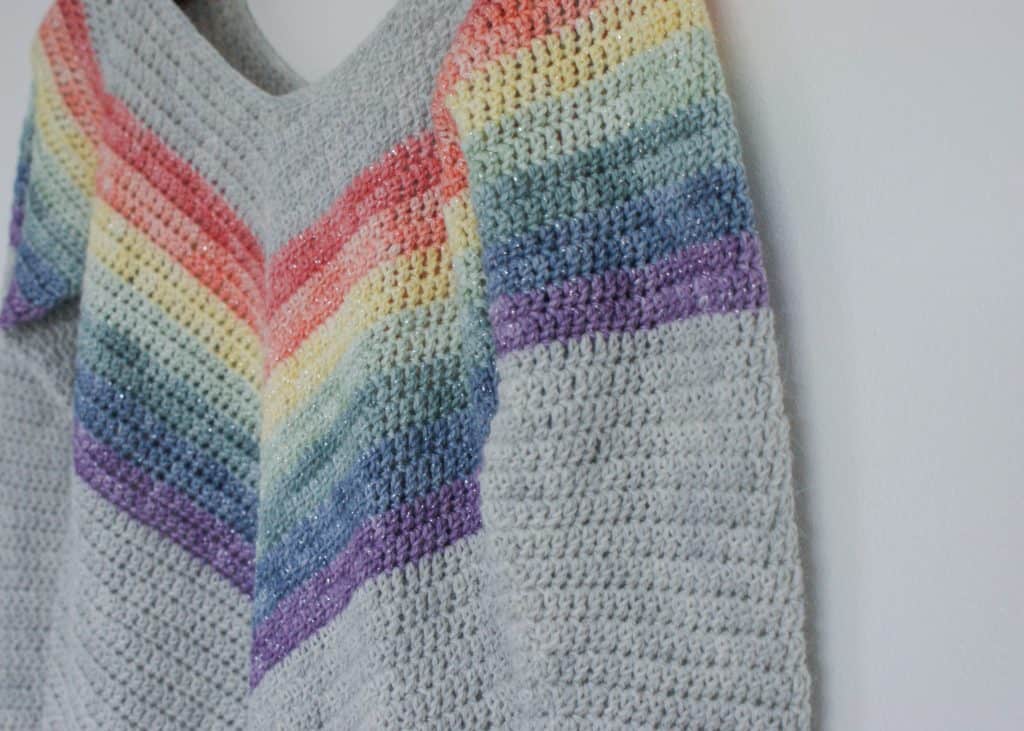
Once again, it may be a yarn which inspires your design. One of my most popular patterns, the Rainbow Smiles Sweater was inspired the beautiful hand dyed rainbow mini-skeins I picked up from Eden Cottage Yarns at Yarndale. It took me a while to work out how to use them in a way to show off the yarn. It was worth the wait!
Once you have your stitch patterns and materials sorted… make a note of it!!
WRITE EVERYTHING DOWN! You think you will remember but you won’t!!
Dora (right before she forgets to write it down!)
Step 5: Make a swatch and measure your gauge
DO NOT MISS THIS STEP! This is where you will learn most about your garment before you even start it.
Make your tension swatch using the the same yarn and hook as you’ll be making the garment with. And make it at least 5 inches square, preferably more.
Measure your gauge both before and after blocking and use the blocked gauge measurement in your maths (Step 6). If you don’t intend blocking your garment then you can use the unblocked gauge, bearing in mid that most crochet garments will stretch with wear (fibre, stitch and construction style dependent).
You can find instructions on how to make and measure your gauge swatch here.

I can’t emphasise how important this is, so I’ll say it again… MEASURE YOUR GAUGE!
Understanding gauge is so important. I know it’s not glamorous, but it is your foundation. I promise it’s not as complicated as people sometimes think. If gauge is a bit of a black hole then you might want to read my post explaining why you need to make a gauge swatch.
Gauge should be written as the number of stitches and rows over a specific measurement. Let’s say that for my example, I’m working my sweater in simple double crochet (UK Treble Crochet) using a 4mm hook.
My gauge statement might read something like this:
“18 stitches and 12 rows over 10cm/4in of blocked double crochet using a 4mm hook.”
Other than the essential gauge measurement, your swatch will also teach you how your fabric will move and stretch. Wash and block it and pull it about a bit (a less technical term for sure) to see how the resulting garment will wear, wash and block.
Your swatch holds a treasure trove of valuable information which shouldn’t be overlooked.
Step 6: Do the Math(s)
For each piece you need to make, you need to calculate the stitch and row counts required.
Please don’t be put off by the Math.
I have written out the the simple formula below, but if you want a more detailed explanation, you can read this post on how to calculate row and stitch counts using gauge.
Note that there are variations on how to make these calculations. This is the way I do it, but so long as you arrive at the correct answer, you can use your own route to get there. I also prefer to work with cm over inches (I find the maths way easier and more precise).
You’ll need to be clear on which way you’re working your garment (top down / bottom up or side to side) so that you know what the stitches and rows represent (width or length).
So for my sweater, the stitch count represents the width of my sweater and the row count is the length. This is the general way most bottom up or top down garments are crocheted. If your garment is constructed side to side then these roles will be reversed.
Using our basic sweater as an example, lets calculate our row and stitch counts for the body panel;
Calculating the stitch and row count for the body panels
The formula below shows how to calculate your stitch and row counts using gauge:
Stitch Count for width: Gauge sts (18 sts) / Gauge measurement (10cm) * Width of fabric (50cm) = 90 stitches
(i.e. 18/10 = 1.8, then 1.8*50=90)
Row count for length: Gauge rows (12 rows) / Gauge measurement (10cm) * Length of panel (60cm) = 72 rows
(i.e. 12/10=1.2, then 1.2*60=72)
So, for each of my body panels, I need to work 90 stitches across and 72 rows from the bottom up to make it the size given in my earlier schematic.
When calculating your stitch and row counts, you’ll need to remember that stitch multiple I mentioned earlier. Here is where you might need to adjust these numbers to fit. For example, If I was working with a stitch multiple of 3+1, I would change my stitch count to 91 (or maybe 88) to make it work.
Calculating the stitch and row count for the sleeves
Now we do the same calculations for the sleeves (using the sleeve measurements from the schematic):
Using our basic sweater as an example, lets calculate our row and stitch counts for the body panel;
The formula below shows how to calculate your stitch and row counts using gauge:
Stitch Count for sleeve width: Gauge sts (18 sts) / Gauge measurement (10cm) * Width of fabric (40cm) = 72 stitches
(i.e. 18/10 = 1.8, then 1.8*40=72)
Row count for sleeve length: Gauge rows (12 rows) / Gauge measurement (10cm) * Length of panel (45cm) = 54 rows
(i.e. 12/10=1.2, then 1.2*45=54)
So, for each of my sleeves, I need to work 72 stitches across and 54 rows from the wrist to the shoulder in order to make it the size given in my schematic.
Wrong sides and right sides
Depending on the shapes of your pattern pieces and your stitch pattern, you’ll need to know whether you’re working bottom up or top down and which is the right and wrong side.
Wrong and right sides are sometimes the same so it’s less important to pay attention to them. It’s something I ignored for a long time (until it caused me issues to be honest!).
If your stitch pattern is different on each side, you’ll want to make sure you know which is the Right Side (sometimes called public side) and which is the Wong Side (sometimes called private side).
This can be really essential for items like cardigans where the fronts should be mirror images of one another, or when you want to adding shaping.
Despite the terms wrong and right, this is really a preference as you, the designer, get to decide what is right and what is wrong. I recently wrote an article which looks at the basic stitches, comparing them worked in the round and in rows, showing the differences in how the stitches look, including the wrong and right sides. You might find this useful when thinking about wrong and right side selection.
Adding shaping
If you’re adding shaping, then you’ll need to think about decreases and increases too (and how much to increase and decrease by).
I won’t go into detail here but essentially, if you know how many stitches you need at one end and how many at the other (for example if you were to work a sleeve which was narrower at the cuff than the shoulder) and you know how many rows you have to increase or decrease your stitch count then you can work out how many stitches you need add or remove on each row.
This post talks more about distributing increases and decreases. It’s not written with relation to garments and focuses more on evenly distributing your increases (when you’re making a flat circle for example), but is a useful fundamental to get your head around.
If you do want to taper your sleeves, this tutorial will teach you more about sleeve styles and shaping.
Step 7: Hook it up (and adjust as needed)
I hope by now you’ll understand what I meant by doing the prep work before you start. I know it probably feels like a lot right now but I promise it’s worth it… Because now you’re ready to make your garment!
You know your stitch and row counts for each piece you need to make, you know what yarn and hook you’re using, your stitch pattern and what direction you’re working (because remember you wrote it all down). Now you can get hooking!
As your garment grows, you might decide you want to tweak here and there along the way. You might want to adjust the length or add some shaping. Go with it (and write it down so you can do the same on the other side).
The prep work is essential, but going off piste because you thought of a better way to do something is also part of the fun and creativity of design.
If I can offer one pice of advice here, it would be not to make any adjustments for the first few rows. If you have made and measured your gauge swatch correctly then trust the numbers!
So many times, I have worked out my stitch count from my gauge, started working then panicked after 3 rows that it’s too big, ripped back and restarted with fewer stitches only to find it’s too small when worked up.
Before you make any judgements, make sure you have worked a good 10-15cm. If your measurements are still off then I would advise looking again, but only then! Remember that your gauge will change with blocking so when making the item, compare it with your unblocked gauge.
Once you have made all your pieces, block them if needed (you’ll have decided this at the swatching stage). I tackle blocking in full in this post, but it is usually an essential part of the process of garment making.

Then I advise you to pin your pieces together and try it on to check you’re happy with the fit and drape. Once you’re satisfied, it’s time to seam them all together, remembering to notice your right and wrong sides. I like to use mattress stitch for my seams.
My post on how to construct a drop shoulder sweater shows how I join the pieces.
Then you can get on to finishing. Add your cuffs, hem and neckline. This tutorial shows how to add ribbed cuffs / hems etc to a garment as a finishing technique. If you’re making a cardigan, I also have a tutorial on adding button bands AND I share my hidden button hole technique in this lesson
You might have changed your mind about the type of cuff / hem / collar you want by this point. It’s fine to react to the design as it grows. You are the designer remember, so you’re in charge!!
Last of all, sew in your ends. I advise not sewing in ends until you’re done. That way if you do need to change something it’s less painful to undo it all. Sometimes that is sadly necessary.
Et Voila, you have a finished sweater!
There is a lot of information to take in here and I hope it has been a help rather than a cause of overwhelm. I certainly don’t want it to put anyone off, so just take it one step at a time and you will get there.
If you have to frog it and start over (and sometimes you will) then at least you will have learned a way not to make a sweater. I could fill a book with ways not to make a sweater, so you won’t be alone.
If you take one message away from this post let it be this:
Have a play, try something new and enjoy yourself!
(But also make the damn gauge swatch!)
Happy Hooking
D x
P.S. Please be sure to let me know how you get on with your design efforts. If you enjoyed this post, you can share it with your friends using the share buttons.
Copyright Dora Does Limited, Registered in England, Company Number 13992263. This pattern is for personal use only and may not be shared or reproduced in written, photo, video or any other form without prior written consent. All rights reserved. Terms of service.


Great article.
I have a question, i cant find an answer to about Swatches, when the designer writes the swatch instructions does this count some of the chains to start or just the ensuing pattern, also is the yarn for the swatch included in the overall yarn amount or do you buy extra for the Swatch please?
Hi there, I’m not quite sure what you mean by counting the chains to start. Hopefully the swatch should include a stitch multiple or tell you how many stitches to start with. Does that answer the question? You can read more about making and measuring swatches here: https://doradoes.co.uk/2019/04/10/how-to-make-and-measure-a-crochet-gauge-swatch/
I usually add around 10-15% to yarn amounts to account for the swatch and variation in style. I think most designers do the same but can only speak for myself.
Thank you for the best article ever!
So glad you found it useful 🙂
This post is crazyyy and soo detailed. I love it. I literally read all the link posts and bookmarked them as well. It’s soo understandable and full of details. It has helped me answer all my questions about making a pattern, gauging etc. I’m following you on all social medias asap. I love youuuu. Thanks
Ahh. Thank you! I’m so glad you found it useful! You’re comment really made me smile!
This post is crazy helpful! Thank you!
You’re welcome! I’m happy you found it helpful 🙂