How to construct a simple drop shoulder crochet sweater

The drop shoulder sweater design is the simplest type of crochet garment construction you are likely to come across in many ways. This post will talk you through how the construction works, regardless of the precise pattern.
Although top-down crochet sweaters are easy to make because you can make them in one piece without seaming, the drop shoulder offers a different sort of flexibility.
What is a drop shoulder sweater?
You can learn more about the different types of sweater construction in this article, but, in short a drop shoulder sweater is made from a front panel, a back panel and an panel for each of the sleeves (which are usually identical).
The instructions are relevant for knitted garments too but the focus here is crochet.
In a basic crochet drop shoulder sweater (such as the So What Sweater), the front and back panels are the same, simple rectangles with no shaping. The sleeves may be also be simple rectangles with no shaping – so they are the same size at the shoulder as at the cuff (though many do have some shaping).
Conversely, drop shoulder sweaters can be much more intricate. You would still have the front and back panels, but there may be shaping around the neck, and the sleeves may decrease in width from the shoulder to the cuff. You can use complex stitch patterns or a single stitch.
There is a lot of scope to our humble drop shoulder sweater construction!

There are many ways to construct the drop shoulder sweater, but I am going to show you the most simple approach, the one I take at least!
Once you get the gist you can modify it to suit your style!
How to make a drop shoulder sweater without a pattern
Because of this modular type of construction, drop shoulder sweaters are simple to make without a pattern. You just work your panels to the desired size in whatever stitch pattern works, join them up and voila, there is your sweater!
You’ll want to make 4 panels; two body panels and two sleeve panels.
You should end up with something like the image below. Note that in this example there is no neck line shaping so its important to leave the neckline a bit wider to make sure it is comfortable!

How to join together a drop shoulder sweater
Check out the video below for the tutorial which uses a simple drop shoulder sweater example. Keep reading for the written / diagrammatic instructions.
Start with the shoulder seams
The rest of your garment will hang from the shoulder seams so this bit is important to get right.
Once you have made and blocked your front and back panels, lay them out wrong side facing with tops aligned.

Securely sew together the shoulder seams across the tops, leaving sufficient space for your head. Make sure you join the same number of stitches across each shoulder so you get an even look.
When it comes to seaming, I prefer to use the mattress stitch as it creates a flat seam. However, you can also use a whip stitch or crochet the panels together.
Join the sleeves
Line up the centre of the shoulder-end of the sleeve with the outside edge of the shoulder seam and pin in place.
Make sure your sleeve reaches the same number of rows down from the top on on the front and back body panels to get an even sleeve. You may wish to add stitch markers to the row ends of the body panels to indicate where the sleeve should reach on each side.
Pin your sleeves to the fronts and backs as illustrated below and stitch in place ensuring your seams lie flat and there is no puckering.
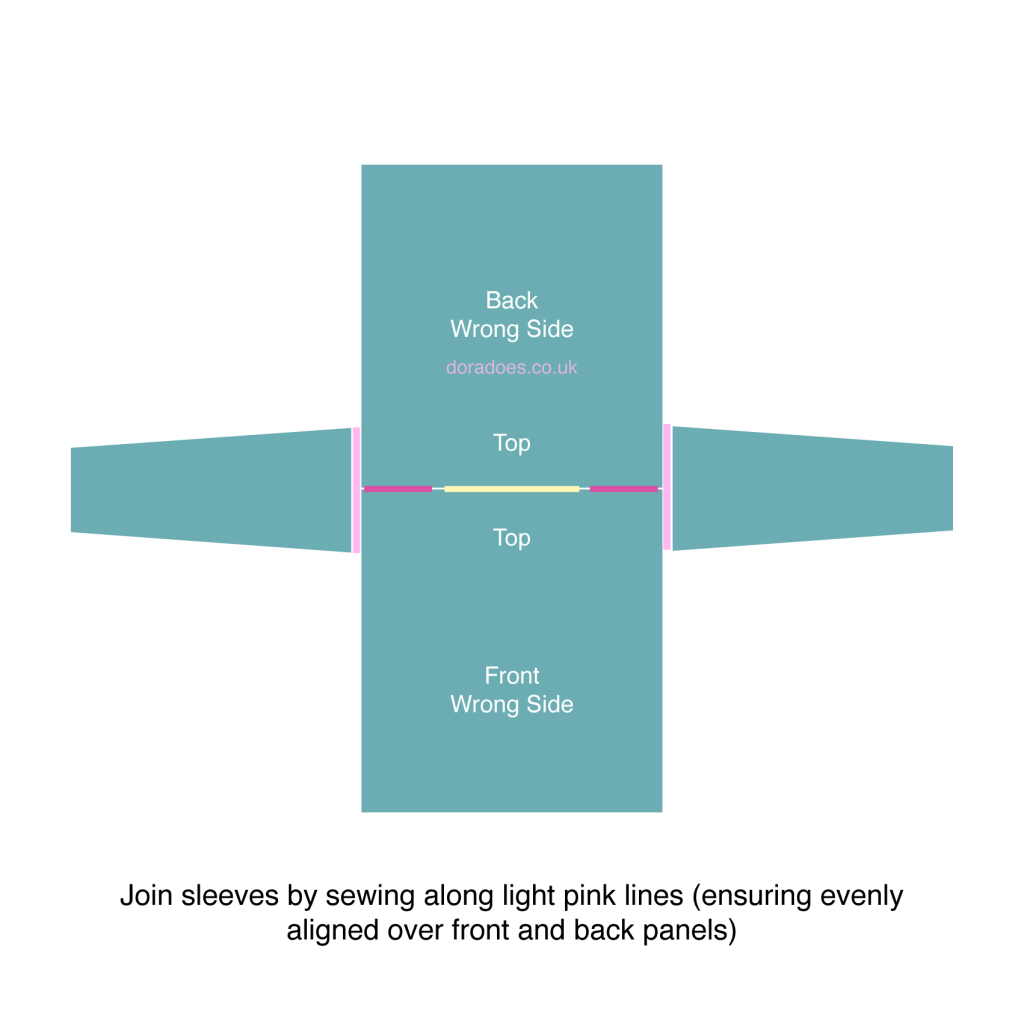
Note that in the schematic, I have used slightly tapered sleeves, but the drop shoulder design works with all kinds of sleeve shapes (so long as the shoulder join is flat). You can learn all about crochet sleeve shaping in this article if you like to freestyle your crochet garments.
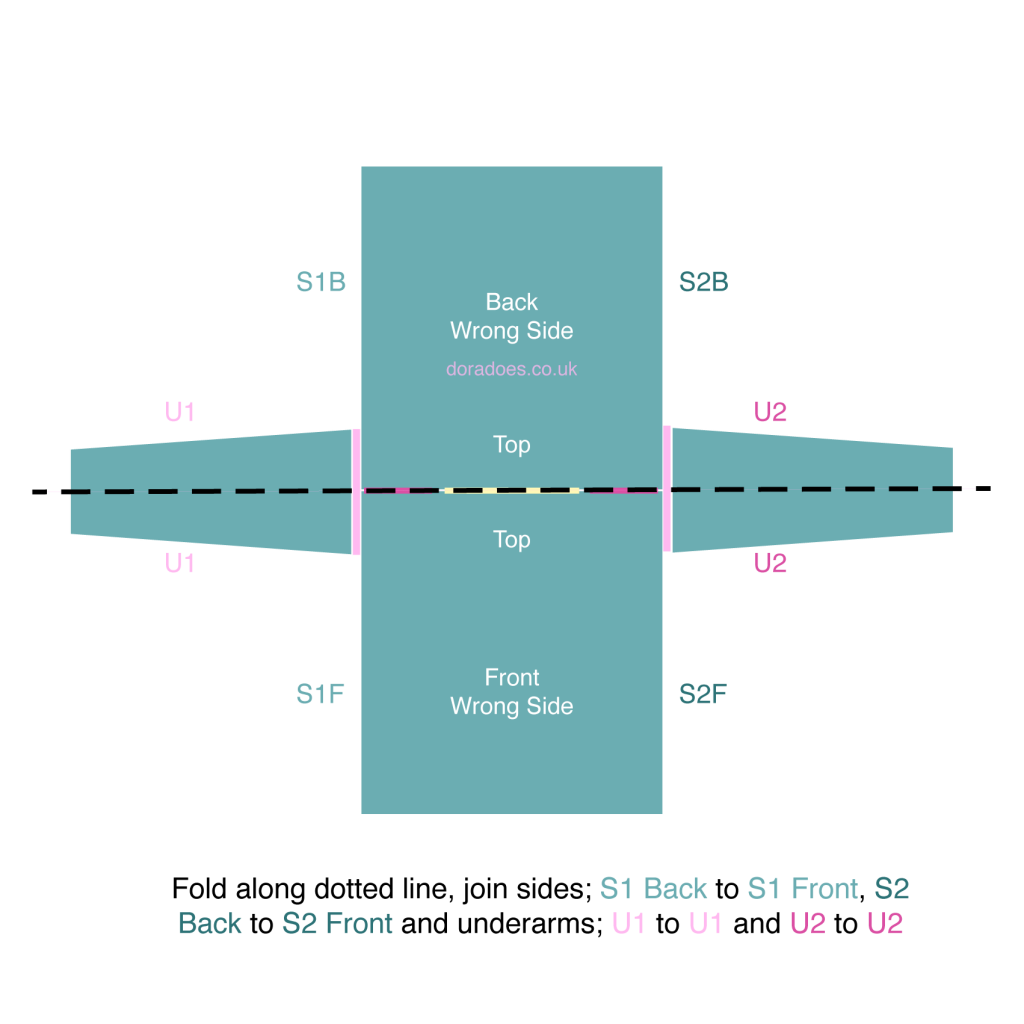
Finish by seaming the side and underarms
With the wrong side still facing, fold your garment in half along the neckline, align the bottom of the front and back panels, the underarms and the cuffs.
Pin in place then sew together from the underarm to the hem (Side 1 Back to Side 1 Front and Side 2 Back to Side 2 Front) and the underarm to the cuff (U1 to U1 and U2 to U2).
Repeat on both sides.
Sew in any remaining ends and turn your garment the right side round.
You can then add a hem or additional cuff if that is part of the design.
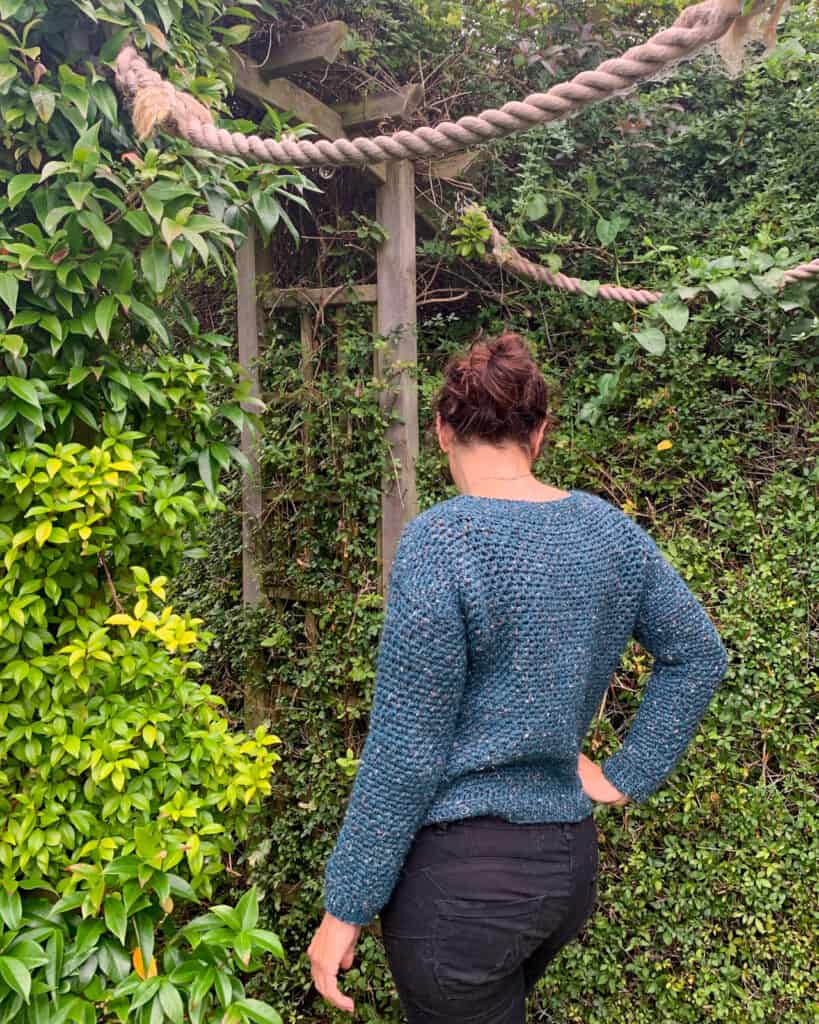
I’ve said it before, I am not a fan of seaming and in many of my earlier designs in particular (such as the upside down sweater (pictured below), which is a drop shoulder sweater with some shaping around the neck), I work the sleeves in rounds directly from the arm holes. I still love doing this today, but it’s not suitable for all designs.
When do you block a drop shoulder sweater?
Although drop shoulder crochet jumpers are simple to make, they should follow the rules of blocking (and most designs, depending on the fibre used) will benefit from blocking.
If you’re not familiar with blocking then you can learn more about it here. I saw a meme recently where it likened a pre and post blocked crochet project to hair that has been left to air dry with frizz, vs hair that has been neatly styled – as someone with mega frizzy hair, it resonated!
Generally I tend to block the panels of drop shoulder garments before I block them. So I would make all four, block them all to size at the same time, and then join them. If i’m adding a trim to the neck, cuffs and a hem etc then I may give it a final spritz block focusing on those areas if needed.
And that is really all there is to it. If you’re newer to crochet garments then starting with a drop shoulder construction is definitely a great place to start.
I hope you find this useful and it gives you a little understanding of how simple crochet garments can be to make!
Happy Hooking
Dx


How do you know how wide to leave your armhole and then how do you know how long to make the sleeves on a simple block sweater or cardigan? Because the shoulder is drop, I find it difficult gauging how long to do the sleeves because everything is made before being sewn up.
I think I just have a problem with sleeves full stop. I’m not too bad at crocheting everything till I get to the sleeves and then everything goes pear shaped. If I decide I’m going to attach and crochet direct from the armhole, I have trouble picking up the required number of chains!
Thankyou for all your help, I’ve picked up quite a few tips from you and have your ebook and I am just waiting to finish something else before starting one of your aywd cardigans which I have the pattern for. Sorry this ended up so long and realise the post is a few years old but wanted to say thankyou anyway.
Hi, these are all important and evergreen questions! With the measurements, you measure the armhole depth from the top of your shoulder to your underarm and then add the required amount of ease. You may want to take a favourite garment from your wardrobe and take its measurements as a guide.
With sleeve length, this will depend on the amount of ease in the body and how wide the shoulder section is. If you’ve got an oversized, boxy garment then the sleeves are going to be shorter as the body finishes half way down your upper arm. The measurement from cuff to cuff (or twice cuff to back neck) is most helpful here as it takes into account the width of the garment across the shoulders.
When picking up stitches around an armhole, try dividing it into sections and marking each section with a stitch marker – half then quarter and maybe even eighths you can then allocate the appropriate number of stitches to each section – so say you needed to pick up 80 stitches around an armhole – the first half would be 40, the first quarter would be 20 and the first eighth would be 10.
You can also check out my post on sleeve shaping which you may find helpful.
I hope that answers everything!
Dora
So does the neckline end up boat style?
Yes – in this one it does as there is no shaping. If you have shaping to the panels or change the width of the shoulders you will get a different shape neckline
Why are you being so bloody helpful, Michelle ? – don’t you WANT folk to use your own patterns ? Eh ? [grin]
Haha. Well you make a good point!! Just filling in the blanks I struggled to find when I was learning!!!
You have a very good heart.
😘