The Corona Summer Crochet Halter Top Pattern

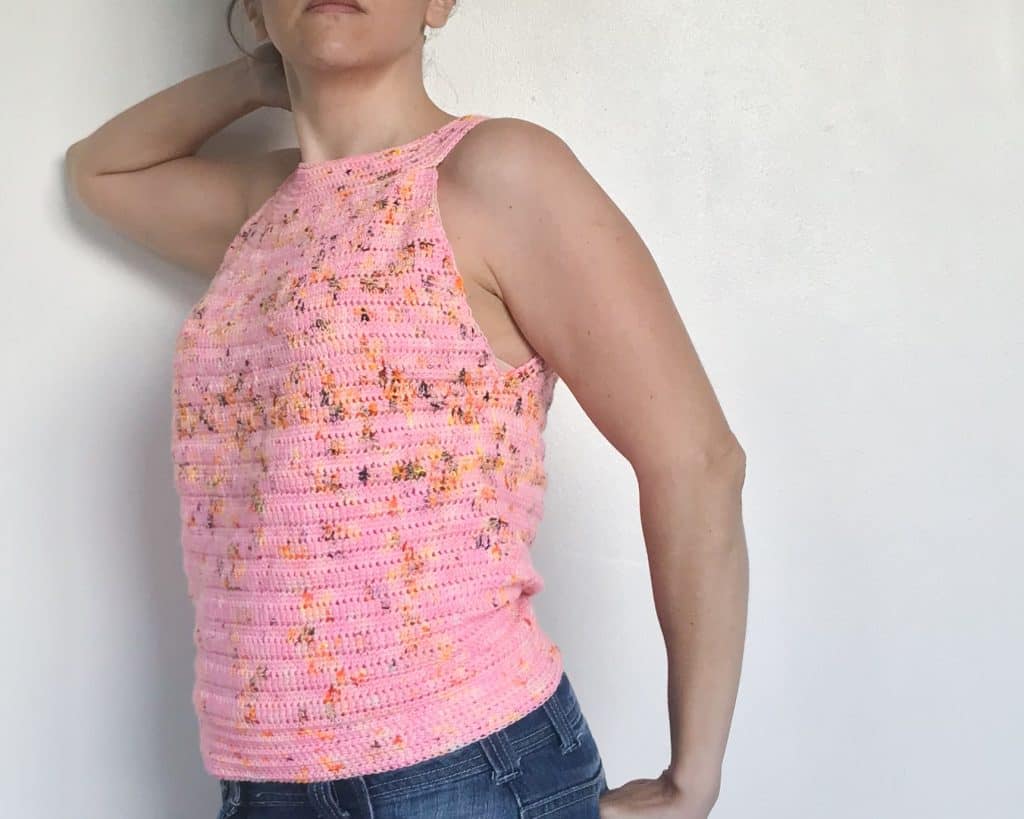
Corona is a sleeveless halter neck summer tee. Worked from the top down this is a fun, practical crochet summer top.
With a keyhole split down the back between the shoulders and a loose airy drape at the front, this top will keep you looking and feeling cool all summer!
For me, this pattern is all about the drape and float which gives it a light and airy summer feel.
The ad-free PDF printable pattern for the Corona crochet top is available to purchase from Love Crafts, Ravelry or Etsy. Alternatively, you can read on and sign up with your email to view the free-to-read crochet pattern.


This post contains affiliate links. This means if you click a link to a product and go on to make a purchase, I receive a small percentage of the sale at no extra cost to you. You can read my full affiliate disclosure policy here


Pattern Notes
- Please read through the pattern and all associated notes before starting your project
- This pattern uses US crochet terms
- Numbers in brackets at the end of a row / round indicate the number of stitches in that row / round and are only given at the start of a section or where there is a change
- Instructions written after or between *asterisks should be repeated as indicated
- Unless otherwise indicated stitches should be worked into consecutive stitches
- Where only one st instruction is given, it is the same for all sizes
- Where you see a ‘-’ for your size, you do not need to work that instruction
- The top uses linked crochet stitches (see below for instructions and tutorial links) so the first stitch is worked into the turning chain – the turning chain itself does not count as a stitch
- The collar is worked in the round (turning at the end of each round) using a 3.5mm hook.
- Using a 5mm hook, the front bib, back left and right shoulders are added to the collar, then the body is joined at underarm and worked in the round
- Shaping is added to the body section which can be easily adjusted to your own fit requirements
- There is a photo guide available at the end of the pattern to give a visual aid for construction
Skills Needed
The top is worked from the collar down in the round. I would class it as an intermediate pattern but a confident beginner could tackle it too!
The collar uses Linked half double crochet stitches (linked half treble if you use UK terms and you can find a tutorial for the linked half double crochet here.
The body uses linked treble crochet (linked double treble in UK terms) which also has a tutorial here
If you’re new to Linked crochet stitches, you might want to try out the free crochet pattern for the ‘Expansions Scarf’ which is designed as a sampler pattern to practice with linked crochet stitches.
The pattern is worked top down, so you can adjust the length and body shaping as you go to ensure it is the right fit for you.

Materials
Crochet Hooks
You will need a 3.5 mm hook for collar and 5mm hook for the body
I used a Clover Amour Crochet Hook for this project – one of my favourites – learn more about different crochet hooks here.
I use a bigger hook than recommended for the yarn for the body because it gives the fabric a great drape. It also makes the linked stitches easier to work. It may feel a bit strange at first but you’ll soon get used to it!
Yarn Requirements
You will need approximately 175(200, 235, 265, 300, 335, 375)g or 735(800, 970, 1120, 1260, 1400, 1570)m of 4 ply / sock weight / fingering weight yarn.
I used 2 skeins of Unbelievawool hand dyed yarn for this project (75% superwash merino, 25% nylon, 100g = 425m).
It had been sitting in my stash for a while and I designed the top with this in mind. As soon as I worked up the swatch, I knew it had to be a garment!
This pattern is a perfect use for that special hand dyed yarn you don’t quite know what to do with!
A similar weight yarn which meets the gauge (detailed in the pattern) will also work for this pattern.
Yarn Substitution Options
A similar sock weight / fingering / 4ply weight yarn which meets gauge should work with this pattern. Acrylic and synthetic fibres can get a bit sweaty in warm weather so they are not recommended.
Other Materials & Notions
- 2 stitch markers or scraps of yarn
- Scissors
- Yarn needle

Measurements & Finished Size
- The vest is designed to be loose fitting at the front and more close fitting at the back (but still retaining some positive ease to ensure comfort)
- The garment is offered in 7 standard women’s sizes from XS-3XL
- The garment is worked top down you can also check and adjust the fit as you work
- Instructions for different sizes are written in increasing order, with the smallest size first and larger sizes in brackets. i.e. XS (S, M, L, 1X, 2X, 3X) sts or Rows / Rounds
- The sample pictured is a size S, worn by me, a UK size 8-10 (US 4-9) 5’2”.
Approximate Finished Measurements
Below are the approximate finished sizes given in cm (based on matching gauge for the pattern).
Finished bust: 85(95, 105, 115, 126, 136, 146)
Length: 53(55, 58, 62, 65, 67, 70)
Collar Circumference: 50(52, 54, 56, 60, 53, 64)
Armhole Depth: 16(20, 22, 23.5, 25, 26.5, 28)
How to purchase a Dora Does crochet pattern:
I sell my PDF crochet patterns in my Etsy, Ravelry and Love Crafts stores. You can purchase this pattern on any of these platforms, depending on your preference. Simply click the relevant links throughout this pattern page to be taken to the listing, or visit the store homepages in the links at the start of this paragraph.

Stitches & Abbreviations: US terms
(UK Equivalent in Brackets)
- ch = chain
- lhdc = linked half double crochet (UK linked half treble) – see special stitches
- ltr = linked treble crochet (UK linked double treble) – see special stitches
- ltr2tog = linked treble 2 together (UK linked double treble 2 together) – see special stitches
- mm = millimeters
- pm = place marker / place stitch marker
- rep = repeat
- rs = right side
- sc = single crochet (UK double crochet)
- sk = skip (UK miss)
- ss = slip stitch
- st(s) = stitch(es)
- ws = wrong side
- yo = yarn over
Special Stitches
Linked Half Double Crochet (lhdc) (UK Linked Half Treble Crochet)
Click here for a full video and photo tutorial
For the first stitch of the row:
Chain 3 to start the row, insert hook into second chain from hook, yarn over, pull up a loop, insert hook into the first stitch, yarn over pull up a loop, yarn over, pull through all 3 loops complete the first stitch.
For all subsequent stitches:
Insert hook under horizontal bar of previous stitch, yarn over, pull up a loop, insert hook into next stitch, yarn over, pull up a loop, yarn over, pull through all 3 loops to complete the stitch.
Linked Treble Crochet (ltr) (UK Linked Double Treble Crochet)
Click here for a full video and photo tutorial
For the first stitch of the row:
Chain 4 to start the row, insert hook into the second chain from hook, yarn over, pull up a loop, insert hook into the third chain from hook, yarn over, pull up a loop (3 loops on hook), insert hook into first stitch, yarn over, pull up a loop (4 loops on hook), *yarn over, pull through 2 loops* 3 times to complete the first stitch.
For all subsequent stitches:
Insert hook into the top horizontal bar of previous stitch, yarn over, pull up a loop, insert hook into the next horizontal bar, yarn over pull up a loop (3 loops on hook), insert hook into next stitch, yarn over, pull up a loop (4 loops on hook), *yarn over, pull through 2 loops* 3 times to complete the stitch.
Linked Treble 2 Together (ltr2tog) (UK Linked Double Treble 2 Together)
Insert hook into first horizontal bar, yarn over, pull up a loop, insert hook into second horizontal bar, yarn over, pull up a loop, insert hook into stitch, yarn over, pull up a loop, yarn over, pull through 2 loops, insert hook into next stitch, yarn over, pull up a loop, *yarn over, pull through 2 loops* 3 times to complete the stitch.
Gauge
If you are not familiar with linked crochet stitches, I suggest using your gauge swatch to get some practice. I recommend starting with the linked treble stitches using a 5mm hook, then move on to working the linked half doubles with a 3.5mm hook.
Gauge measurements are given for unblocked fabric (the top should only require minimal blocking).
Gauge for body (linked trebles)
23 sts x 8 rows of linked treble crochet in 10cm / 5in using a 5mm hook or size needed to obtain gauge.
Gauge for collar (linked half double)
24 sts x 22 rows of linked half double crochet in 10cm / 5in using a 3.5mm hook or size needed to obtain gauge.
It is important is that the yoke collar fits comfortably as it will sustain the weight of the rest of the top.
Learn how to make and measure a gauge swatch here
You can purchase and download the PDF Corona Summer Vest pattern now from Love crafts, Ravelry or Etsy.
The Corona Crochet Top Pattern
Collar
Note that if you prefer, you can leave the collar rounds unjoined and add a hook and eye at the back neck to fasten.
Using a 3.5mm hook, ch114 (120, 126, 132, 138, 144, 150), ss to first st to make a loop. Ensure the loop fits comfortably over your head and sits well around the shoulders.
Round 1 (rs): Ch3, 1lhdc in each st to end, ss to top of first st to join, turn (114, 120, 126, 132, 138, 144, 150 sts)
Round 2: Ch3, *1lhdc in the next 18 (19, 20, 21, 22, 23, 24) sts, 2lhdc in the next st; rep from * to end, ss to top of first st to join, turn (120, 126, 132, 138, 144, 150, 156 sts)
Round 3: Ch3, *1lhdc in the next 19 (20, 21, 22, 23, 24, 25) sts, 2lhdc in the next st; rep from * to end, ss to top of first st to join, turn (126, 132, 138, 144, 150, 156, 162 sts)
Round 4: Ch3, *1lhdc in the next 20 (21, 22, 23, 24, 25, 26) sts, 2lhdc in the next st; rep from * to end, ss to top of first st to join, turn (132, 138, 144, 150, 156, 162, 168 sts)
Round 5: Ch3, *1lhdc in the next 21 (22, 23, 24, 25, 26, 27) sts, 2lhdc in the next st; rep from * to end, ss to top of first st to join, turn (138, 144, 150, 156, 162, 168, 174 sts)
Round 6: Ch3, *1lhdc in the next 22 (23, 24, 25, 26, 27, 28) sts, 2lhdc in the next st; rep from * to end, ss to top of first st to join, turn (144, 150, 156, 162, 168, 174, 182 sts)
Round 7: Ch3, *1lhdc in the next 23 (24, 25, 26, 27, 28, 29) sts, 2lhdc in the next st; rep from * to end, ss to top of first st to join, turn (150, 156, 162, 168, 174, 182, 188 sts)
Round 8: Ch3, *1lhdc in the next 24 (25, 26, 27, 28, 29, 30) sts, 2lhdc in the next st; rep from * to end, ss to top of first st to join, turn (156, 162, 168, 174, 182, 188,194 sts)
Round 9: Ch3, *1lhdc in the next 25 (26, 27, 28, 29, 30, 31) sts, 2lhdc in the next st; rep from * to end, ss to top of first st to join, turn (162, 168, 174, 182, 188, 194, 200 sts)
Round 10: Ch3, 1lhdc into each st to end, ss to top of first st to join, turn
Fasten off
Where your rounds join will form the centre back of the top.
The back shoulders are worked either side if the join and the front bib worked opposite.
Your collar is gentle a hexagon shape but will drop out to a circle as you work.

Front Bib
You will start by adding place markers (pm) where the front bib will be worked.
With the rs facing (turn after round 10 as if you were continuing onto the next row), skip 54 (56, 58, 60, 62, 64, 66) sts and add a pm in the next st. Counting the pm you just added as stitch 1, add 1 more pm after 54 (56, 58, 60, 62, 64, 66) sts. This will mark the edges of the front bib.
Using a 5mm hook, join the yarn in the same st as the first pm
Row 1 (rs): Starting in the same st the yarn is joined, ch4, 2ltr in first st, 1ltr in each st to st before next pm, 2ltr in the same stitch as the second pm, remove pms, turn (56, 58, 60, 62, 64, 66, 68 sts)
Row 2: Ch4, 2ltr in first st, 1ltr in each st to the penultimate st, 2ltr in last st, turn (58, 60, 62, 64, 66, 68, 70 sts)
Rows 3 – 4: As row 2 (62, 64, 66, 68, 70, 72, 74 sts)
Now you will add increases in the centre of the bib as well as at the edges.
You will be increasing your stitch count by 4 stitches each row; one at each end and one in two places across the front of the bib. I have been specific about the stitch counts between increases in the instructions below but if your increase is a stitch or two out then it’s not the end of the world!
Essentially, you will start the row with an increase (working 2ltr in the same st), work to the pm, make the 2ltr increase, move the pm up to the first of the 2 stitches, work to the next pm, make the increase, move the pm up to the second of the two stitches, and carry on to the end of the row where you work 2ltr in the last st for the fourth increase.
Add your pms 21 (22, 22, 23, 24, 25) sts in from each end of the bib section.
Row 5: Ch4, 2ltr in first st, 1ltr in each st to pm, 2ltr in same st as pm, move pm up to first of 2 sts you just made, 1ltr in each st to next pm, 2ltr in same st as pm, move pm up to the second st you just made, 1ltr in each st to penultimate st, 2ltr in last st, turn (66, 68, 70, 72, 74, 76, 78 sts)
Rows 6 – 12 (14, 16, 18, 20, 22, 24): As row 5 (98, 108, 118, 128, 134, 148, 158 sts)
Fasten off
Back
Note that left and right sides are reversed if you are a left handed crocheter.
Back left shoulder
Counting around from where row 1 of the front bib ended, skip 27 (28, 29, 30, 31, 32, 33) sts and join your yarn. On row 1, you will be working from the shoulder towards the centre back.
Row 1 (rs): Starting in same st yarn was joined, ch4, 1ltr in next 25 (26, 27, 28, 29, 30, 31) sts, turn (25, 26, 27, 28, 29, 30, 31 sts)
Row 2: Ch4, 1ltr in each st to end, turn
Row 3: Ch4, 2ltr in first st, 1ltr in each st to end (26, 27, 28, 29, 30, 31, 32 sts)
Rows 4 – 10 (12, 14, 16, 18, 20, 22): As row 3 (33, 36, 39, 42, 45, 48, 51 sts)
Row 11 (13, 15, 16, 19, 21, 23): Ch4, 2ltr in first st, 1ltr in each st to penultimate st, 1ltr in last st, turn (35, 38, 41, 44, 47, 50, 53 sts)
Row 12 (14, 16, 18, 20, 22, 24): As previous row (37, 40, 43, 46, 49, 52, 55 sts)
Fasten off
Back right shoulder
Continuing around the collar from where row 1 of the back left shoulder ended, skip 4 sts and join yarn in the next st. On row 1 you will work outwards from centre back towards the arm hole.
Row 1 (rs): Starting in same st yarn was joined, ch4, 1ltr in next 25 (26, 27, 28, 29, 30, 31) sts, turn (25, 26, 27, 28, 29, 30, 31 sts)
Row 2: Ch4, 1ltr in each st to end, turn
Row 3: Ch4, 1ltr in each st to penultimate st, 2ltr in last st, turn (26, 27, 28, 29, 30, 31, 32 sts)
Rows 4 – 10 (12, 14, 16, 18, 20, 22): As row 3 (33, 36, 39, 42, 45, 48, 51 sts)
Row 11 (13, 15, 16, 19, 21, 23): Ch4, 2ltr in first st, 1ltr in each st to penultimate st, 1ltr in last st, turn (35, 38, 41, 44, 47, 50, 53 sts)
Row 12 (14, 16, 18, 20, 22, 24): As previous row (37, 40, 43, 46, 49, 52, 55 sts)
At the end of the last row of the right back shoulder, ss to the first st of the last row of the left back shoulder to join the two shoulder panels at the mid back.
Turn to begin body.

Body
You will continue from where you finished the last shoulder panel and work the body in rounds, starting and ending each round at the centre back.
Round 1 (rs): Ch4, 1ltr into each ch and st across to end of the back right shoulder panel, ch1 (3, 5, 7, 10, 12, 14), 1ltr into the first st of the front bib, 1ltr into each st around the bib, ch1(3, 5, 7, 10, 12, 14), 1ltr into the first st of the back left shoulder panel, 1ltr into each st to end, ss to first st to join, turn. (170, 190, 210, 230, 252, 272, 292 sts)

Note: When joining rounds of ltr, follow these instructions for the last stitch of the round to avoid gaps in the join: Work the first part of ltr as normal (to get 3 loops on hook), insert hook into last st, yo, pull up a loop, yo, pull through 2 loops, insert the hook into the centre of ltr at start of round (the one you are joining to), yo, pull loop through the stitch, yo, pull through 3 loops, yo, pull through 2 loops to finish the last stitch then join to the top of first st with a ss.

At this point you may want to try on your top to check the fit, particularly around the arm holes. If you need to change the fit, make an adjustment to the number of under arm chains as needed. The top is designed to be loose fitting at the under arm but you can adjust it to suit.
Round 2: Ch 4, 1ltr into each st and each ch around the body, join to the first st, turn

Round 3: Ch4, 1ltr into each st around, join to the first st, turn
Body Shaping
The pattern includes decreases to the back and side of the top which gives it a little more shape. If you want a very loose fitting cami style top, you can continue to work in rounds without changing the stitch count to round 21 (21, 21, 22, 22, 22, 23).
Continue to follow the instructions below for the shaped version. (Once again, the placing of the decreases does not have to be absolutely exact, so don’t worry if you miss-count on the odd row!)
If you’re unsure about fit, just try on the vest as you work – the great thing about top down designs is that you can adjust them as you go!
Round 4: Ch4, 1ltr in first st, 1ltr2tog, 1ltr in each st to end, join to the first st, turn (169, 189, 209, 229, 251, 271, 291 sts)
Round 5: As round 4 (168, 188, 208, 228, 250, 270, 290 sts)
Round 6: Ch4, 1ltr in first st, 1ltr2tog, 1ltr in the next 35 (38, 41, 44, 47, 50, 53) sts, 1ltr2tog, 1ltr in each of the next 88 (102, 116, 130, 146, 160, 174) sts, 1ltr2tog, 1ltr in each st to end, join to first st, turn (165, 185, 205, 225, 247, 267, 287 sts).
Round 7: Ch4, 1ltr in first st, 1ltr2tog, 1ltr in the next 35 (38, 41, 44, 47, 50, 53) sts, 1ltr2tog, 1ltr in each of the next 85 (99, 113, 127, 143, 157, 171) sts, 1ltr2tog, 1ltr in each st to end, join to first st, turn (162, 182, 202, 222, 244, 264, 284 sts)
Round 8: Ch4, 1ltr in first st, 1ltr2tog, 1ltr in the next 45 (48, 51, 54, 57, 60, 63) sts, 1ltr2tog, 1ltr in each of the next 62 (76, 90, 104, 120, 134, 148) sts, 1ltr2tog, 1ltr in each st to end, join to first st, turn (159, 179, 199, 219, 241, 261, 281 sts)
Round 9: Ch4, 1ltr in first st, 1ltr2tog, 1ltr in the next 45 (48, 51, 54, 57, 60, 63) sts, 1ltr2tog, 1ltr in each of the next 59 (73, 87, 101, 117, 131, 145) sts, 1ltr2tog, 1ltr in each st to end, join to first st, turn (156, 176, 196, 216, 238, 258, 278 sts)
Round 10: Ch4, 1ltr in first st, 1ltr2tog, 1ltr in the next 35 (38, 41, 44, 47, 50, 53) sts, 1ltr2tog, 1ltr in each of the next 76 (90, 104, 118, 143, 148, 162) sts, 1ltr2tog, 1ltr in each st to end, join to first st, turn (153, 173, 193, 213, 235, 255, 275 sts)
Round 11: Ch4, 1ltr in first st, 1ltr2tog, 1ltr in the next 35 (38, 41, 44, 47, 50, 53) sts, 1ltr2tog, 1ltr in each of the next 73 (87, 101, 115, 140, 145, 159) sts, 1ltr2tog, 1ltr in each st to end, join to first st, turn (150, 170, 190, 210, 232, 252, 272 sts)
Round 12: Ch4, 1ltr in first st, 1ltr2tog, 1ltr in the next 45 (48, 51, 54, 57, 60, 63) sts, 1ltr2tog, 1ltr in each of the next 50 (64, 78, 92, 108, 122, 136) sts, 1ltr2tog, 1ltr in each st to end, join to first st, turn (147, 167, 187, 207, 229, 249, 269 sts)
Round 13: Ch4, 1ltr in first st, 1ltr2tog, 1ltr in the next 45 (48, 51, 54, 57, 60, 63) sts, 1ltr2tog, 1ltr in each of the next 47 (61, 75, 89, 105, 119, 133) sts, 1ltr2tog, 1ltr in each st to end, join to first st, turn (144, 164, 184, 204, 226, 246, 266 sts)
Round 14: Ch4, 1ltr in first st, 1ltr2tog, 1ltr in the next 35 (38, 41, 44, 47, 50, 53) sts, 1ltr2tog, 1ltr in each of the next 64 (78, 92, 106, 122, 136, 150) sts, 1ltr2tog, 1ltr in each st to end, join to first st, turn (141, 161, 181, 201, 223, 243, 263 sts)
Round 15: Ch4, 1ltr in first st, 1ltr2tog, 1ltr in the next 35 (38, 41, 44, 47, 50, 53) sts, 1ltr2tog, 1ltr in each of the next 61 (75, 89, 103, 119, 133, 147) sts, 1ltr2tog, 1ltr in each st to end, join to first st, turn (138, 158, 178, 198, 220, 240, 260 sts)
Round 16: Ch4, 1ltr in first st, 1ltr2tog, 1ltr in the next 45 (48, 51, 54, 57, 60, 63) sts, 1ltr2tog, 1ltr in each of the next 38 (52, 66, 80, 96, 110, 124) sts, 1ltr2tog, 1ltr in each st to end, join to first st, turn (135, 155, 175, 195, 217, 237, 357 sts)
For size XS, continue to rest of body
For remaining sizes
Round 17: Ch4, 1ltr in first st, 1ltr2tog, 1ltr in the next – (48, 51, 54, 57, 60, 63) sts, 1ltr2tog, 1ltr in each of the next – (49, 63, 77, 93, 107, 121) sts, 1ltr2tog, 1ltr in each st to end, join to first st, turn (-, 152, 172, 192, 214, 234, 254 sts)
For size S, continue to rest of body
For remaining sizes
Round 18: Ch4, 1ltr in first st, 1ltr2tog, 1ltr in the next – (-, 41, 44, 47, 50, 53) sts, 1ltr2tog, 1ltr in each of the next – (-, 80, 94, 110, 124, 138) sts, 1ltr2tog, 1ltr in each st to end, join to first st, turn (-, -, 169, 189, 211, 231, 251 sts)
For size M, continue to rest of body
For remaining sizes
Round 19: Ch4, 1ltr in first st, 1ltr2tog, 1ltr in the next – (-, -, 44, 47, 50, 53) sts, 1ltr2tog, 1ltr in each of the next – (-, -, 91, 107, 121, 135) sts, 1ltr2tog, 1ltr in each st to end, join to first st, turn (-, -, -, 186, 208, 228, 248 sts)
For size L, continue to rest of body
For remaining sizes
Round 20: Ch4, 1ltr in first st, 1ltr2tog, 1ltr in the next – (-, -, -, 57, 60, 63) sts, 1ltr2tog, 1ltr in each of the next -( -, -, -, 84, 98, 112) sts, 1ltr2tog, 1ltr in each st to end, join to first st, turn (-, -, -, -, 205, 225, 245 sts)
For size 1X, continue to rest of body
For remaining sizes
Round 21: Ch4, 1ltr in first st, 1ltr2tog, 1ltr in the next – (-, -, -, -, 60, 63) sts, 1ltr2tog, 1ltr in each of the next – (-, -, -, -, 95, 109) sts, 1ltr2tog, 1ltr in each st to end, join to first st, turn (-, -, -, -, -, 222, 242 sts)
For size 2X, continue to rest of body
For remaining sizes
Round 22: Ch4, 1ltr in first st, 1ltr2tog, 1ltr in the next – (-, -, -, -, -, 53) sts, 1ltr2tog, 1ltr in each of the next – (-, -, -, -, -, 126) sts, 1ltr2tog, 1ltr in each st to end, join to first st, turn (-, -, -, -, -, -, 239 sts)
For size 3X, continue to rest of body
Rest of body
Rounds 17 (18, 19, 20, 21, 22, 23) – 21 (21, 21, 22, 22, 22, 23): Ch4, 1ltr into each st around to end, join to first st, turn (135, 152, 169, 186, 205, 222, 239 sts)
Hem
Still using a 5mm hook;
Round 1: Ch3, 1lhdc in each st around to end, ss to top of first st to join, turn (135, 152, 169, 186, 205, 222, 239 sts)
Rounds 2 – 10: As round 1
Fasten off
Finishing
Change to smaller hook;
With rs facing and working evenly into the row ends, work a round of sc around the arm holes and the keyhole in the back.
I worked 3sc per ltr row but your tension may vary.
Fasten off, block to shape if required and sew in all ends
Enjoy your new top!

How to find me and share your finished makes
- On Instagram, you can use the hashtag #DoraDoes to share your finished projects or just tag me @doraexplored
- Sign up to the WiP Tip for weekly crochet chat, offers and exclusives straight to your inbox – click here to sign up.
- Check out my YouTube Channel for my biweekly ‘Crochet Studio Sessions’ podcast.
Happy Hooking
Dx
Copyright Dora Does Limited, Registered in England, Company Number 13992263. This pattern is for personal use only and may not be shared or reproduced in written, photo, video or any other form without prior written consent. All rights reserved. Terms of service.
Where can I find the written instructions for this pattern? Etsy says ‘not available’ and on Ravelry I can’t find a place that says ‘download’. I would love to do this pattern for my cousin as it is summer here in South Africa.
Hi there, I’m currently reviewing and updating some of my patterns, this one included so it is temporarily unavailable. I hope to have it back up in the next couple of weeks. Thanks for your interest. Dora 😊
Is this reversible? The key hole would look great in the front also….
Hi there, It’s not designed to be reversible. It may work, though I think the back sections either side of the keyhole may not give enough coverage!
What weight of yarn would you consider this???
This is a fingering / sock weight yarn (A size 1 or 2 in US categories) – this post talks about yarn weights in detail: https://doradoes.co.uk/2020/08/22/yarn-weights-explained/
What is the 3x circumference measurement?
Hi Christy, thanks for your patience in my response to this one. I had to check the pattern. The approximate finished bust measurement for the size 3X is 146cm (about 58.5in). I hope that helps.