The Short Row Sleeve Cap Crochet Along (CAL)

I know, I know… not the most catchy title for a crochet along, but it’s gonna do what it says and teach you how to crochet a short row sleeve cap right from the armhole shaping of either a cardigan or sweater, AND you’ll have a beautiful wearable crochet garment at the end!
After the success of last Spring’s Any Yarn Crochet Along, I’m back with another CAL to help you all create beautiful, well fitting crochet garments!
The Crochet Patterns for the CAL
This year I will be featuring the Short Stories Cardigan and the brand new Sequel Sweater Patterns.
The Sequel sweater is essentially a crochet jumper version of the Short Stories cardi, so there is a lot of overlap between the two designs. (Though there are some tweaks in the sizing and shaping of both.)
The common theme of these two patterns is that they both use the top down short row sleeve cap method to create shaping around the shoulders and tops of the arms.
This helps you to get a better fitting garment over the shoulders than a drop shoulder or modified drop design may offer.
This design would be classed as a set in sleeve construction but is designed so the sleeves are crocheted directly into the armhole (or armscye), so no need for crocheting complex sleeve caps or the fiddliness of easing in the shoulder as you sew the sleeve to the bodice.
(Learn more about garment construction styles here.)
The sequel sweater is the second design I’ve made using this technique and I know it’s going to be a game changer for future designs so I am super excited to help you get familliar with it too.
Both tops are crocheted top down in flat panels, which are seamed at the shoulders (using the mattress stitch) and sides, with an easily adjustable body length.
You can purchase the patterns individually or as a bundle;
This is one of the main reasons I selected these designs for the crochet along. The other being that both designs are classic and very wearable garments.
Crochet alongs are a great opportunity to work on a crochet project in a structured step by step way, which can be a great way to get a project finished.
Crochet along on demand!
This crochet along was originally run in real time from March to May 2024. If you’re reading this after the live crochet along, you can still join in and follow along at your own pace.
The crochet long is split into 7 weeks, and you can follow along as if in real time, week by week as you progress through your crochet pattern, or at your own pace.
You can find a youtube video for each week / cal section which will take you through the process on crocheting the short stories cardigan pr sequel sweater on my youtube channel.
If you have any questions, please do drop them in the youtube comments or in the comments section at the end of the post and I will still get notified and be around to answer them, regardless of when you work through the crochet along.

The short row sleeve cap crochet along schedule
I have broken down the patterns into eight sections to make it more digestible and to give you the chance to learn new things about different aspects of garment making and build your skills as you go.
Crochet along schedule and links
The live CAL will formally begin on Saturday 22nd April and run for 7 weeks (with a week to prepare before we start).
Below is the schedule for getting your sweater crocheted.
- Intro & materials: Introduction to cal, materials and pattern information: Watch the intro vlog here
- Week 1: The stitch pattern, swatching, gauge and choosing your size and colourwork; Watch the Week 1 vlog here
- Week 2: Crocheting the back panel, back neck drop and armhole shaping; Watch the Week 2 vlog here
- Week 3: Crocheting the front panel(s), neckline shaping and interim blocking; Watch the week 3 vlog here
- Week 4: Body seaming and length, short row sleeve caps (this is the magic!); Watch the week 4 vlog here
- Week 5: Crochet sleeve shaping and cuffs; Watch the Week 5 vlog here
- Week 6: Crochet collars, hems, button bands; Watch the week 6 vlog here
- Week 7: Finishing and show and tell, sharing your finished makes and clearing up any last queries; Week 7 vlog
If you continue to read through this post, you will see more details on the weekly sections.
This includes useful resources, tips and tricks and discussion on how you might like to adjust your pattern and guidance on where you might come unstuck!
The intention is for this to be a very relaxed crochet along, so you can follow along at your own pace.
The weeks are just a guide. When you finish one sections move onto the next as and when suits you!
If you like to binge the vlogs, then you can also check out the specific youtube playlist for the cal.
I’ll be making along with you (though plan to be one step ahead!) so will share my own progress as a way to offer examples.
So, are you in?
Let’s get to it!

Short Row Sleeve Cap CAL Week 1
Check out the week 1 Vlog here
Week 1 is preparation week and the vlog is probably the most jam packed that I’ll make!
When it comes to garments, so much is about preparation. Whilst this might seem like a slow start, it really is the foundation, it doesn’t look like much but without it, we’ll fall down!
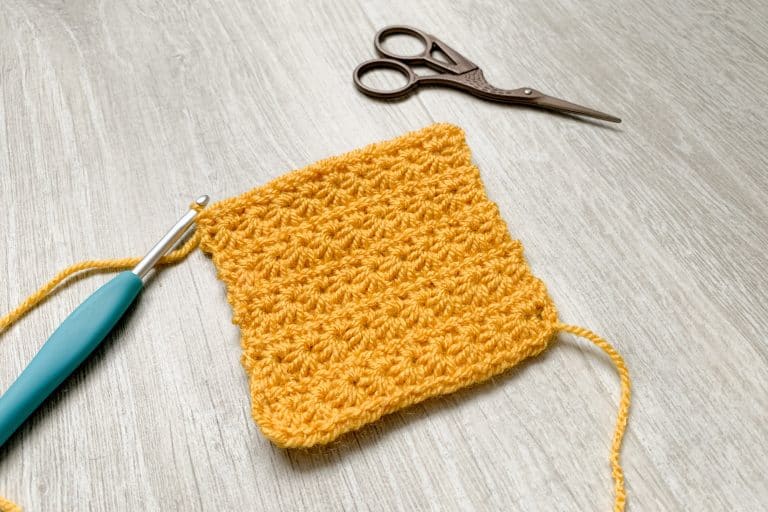
In the vlog, I show you the yarn I’ve chosen, demonstrate the paired extended single crochet stitch pattern, show you how I measure my swatch, block it and check I’m happy with the result before starting my garments.
I also talk through how to select the right size to make for you.
Below you’ll find a summary of the topics I discuss followed by a list of all the resources and references I mention in the video as well as other helpful articles and tutorials.
You can also find a tutorial for the Paired Extended Single Crochet Stitch Pattern here.
Choose your yarn
Both the cardigan and the sweater use a 4 ply / fingering weight yarn.
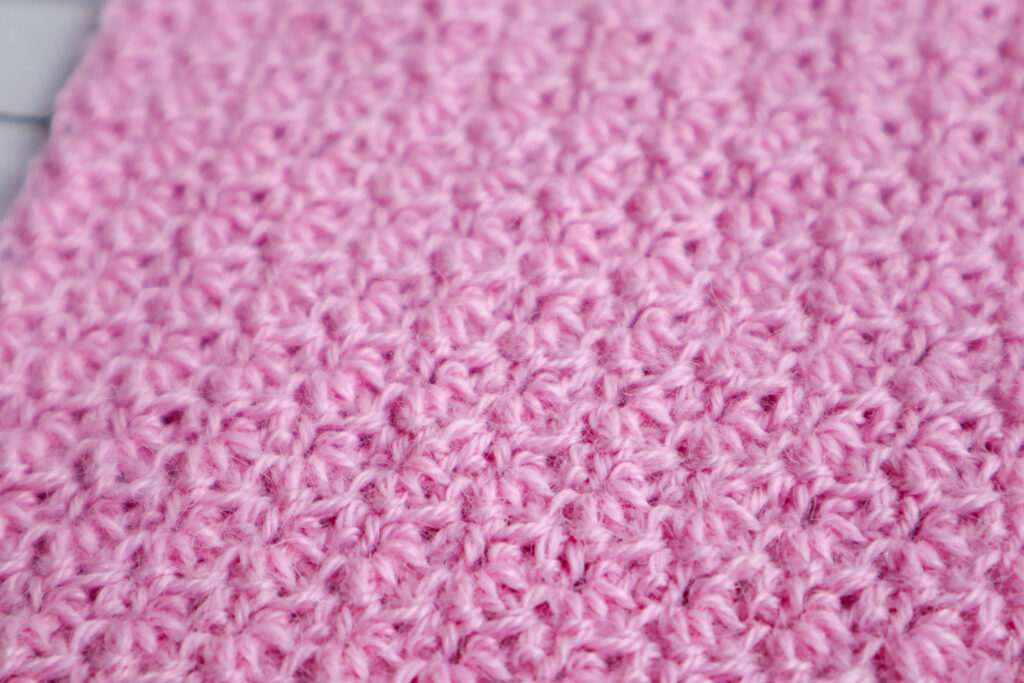
Various fibres will work for this pattern, but I encourage swatching with your preferred yarn to check you’re happy with the resulting fabric (as well as to match gauge) before you make your final decision.
In the video I show swatches of two of the yarns I’m working with and how the different fibres differ.
This post goes into detail on how to choose a suitable yarn for your crochet project.
The stitch pattern we’re using; paired extended single crochet (extended single crochet tutorial here) creates quite a stretchy fabric, so do bear this in mind when assessing your yarn choice.
Swatching
It is essential that you make a swatch for this project to ensure you match gauge. Because the crochet patterns aim to be more fitted around the shoulders, not matching gauge will really show.
Make your gauge swatch, measure the gauge, BLOCK your swatch (because this is a stretchy fabric I strongly suggest blocking your swatch) and check that your swatch matches the pattern gauge.
The reason I encourage you to measure your gauge before and after blocking is so that you can check that your gauge on the project as you work it matches the pre-blocked gauge. This will give you confidence that the final blocked garment will come out the size you expect it to!

How to choose your size
Each of the patterns has a lightly different amounts of ease, so make sure you take some time to choose the most appropriate size for you.
When it comes to choosing a suitable size, make sure you look at the measurements in the pattern, don’t just pick a size that you might pick off a high street shelf.
Grab your tape measure, and take you’re own measurements so you know what you’re working with. Then think about how much ease you want the garment to have in the body and sleeves (learn about ease here).
Looking at the detailed measurements and schematic for the patterns will help you assess how the different sizes at different parts of the body relate to your own body measurements.
Bear in mind, when selecting your size, that this is intended to be a relatively fitted garment, to get the benefit of the tailored short row sleeve cap shaping.
Although I wrote it for budding designers, you might also find this post on crochet sizing standards useful for comparison.

Week 1 Crochet Resources:
Let’s start with a quick refresher on all things gauge and swatching
Crochet Gauge & Swatching Resources
If you’re new to swatching and gauge and all that stuff, then the posts below will help you;
If you’re new to crocheting garments, you may also want to read my blog post ‘how to crochet clothes that fit’ which gives you a good overview of the process of crocheting a garment. It’s a framework I’ll be following throughout the CAL, so I hope you will find it useful!
Choosing your yarn
Choosing your size
Other related crochet patterns
Week 1 is a lot, so take your time to make sure you’re happy with where you’re starting, because in Week 2, we are ready to crochet!! 🙂

Short Row Sleeve Cap CAL Week 2
In week 2 we’ll work on the back panels and look at back neck drop and the underarm shaping. It’s a less intense video than last week as it’s all about crocheting now!
The week 2 vlog walks through the process to crochet the back panel of the sweater and the cardigan, including how to join the back neck drop sections (for the sweater only but it’s a useful technique for other crochet projects).
I also refer you to a helpful tutorial for crocheting into chains.
I talk you through the armhole shaping, share some tips for carrying yarn up the sides and leaving tails to help with seaming.
Here’s my finished back panel pinned out on the blocking board for some inspo! You might need some sunglasses to manage the colours though 🙂

Enjoy crocheting in week 2!

Short Row Sleeve Cap CAL Week 3
In week 3 we’ll concentrate on crocheting the front panel(s) and will look at the necklines, including how you might want to adjust the shaping.
I’ll also talk about how I block the panels flat at this stage. You can learn more about blocking here.

This week I’ll also share how you can calculate what size your piece should be if you’ve made adjustments so you can be sure you’re blocking it to a suitable size.
I have a separate youtube tutorial on how to calculate stitch and row counts using gauge which partners nicely with this.


Short Row Sleeve Cap CAL Week 4
In week 4 we will be seaming the blocked body panels and starting the sleeve caps
I use the mattress stitch to seam all my panels as I find it the most subtle form of seaming but you can use your preferred seaming method if you have one.
Once your garment is seamed at the shoulders and sides, you can begin working the short row sleeve caps. This is where the magic happens!
You can learn the basic principles of short row shaping here and watch my tutorial on short row sleeve shaping here.
The left handed version of the tutorial is here.
Note that you will continue the sleeves directly from the sleeve cap, so will finish one whole sleeve before the next. I will talk about sleeve shaping etc next week, but this week is all about focusing on the short row sleeve cap technique.


Short Row Sleeve Cap CAL Week 5
In week 5 we will be moving on to work the sleeves and cuffs.
Once you’ve completed the short row sleeve cap, you will continue to work the sleeve down to the cuff.
If you like to customise your sleeves, or want to understand sleeve shaping better, I recommend you have a look at this article all about sleeve shaping.
Here’s my WiP with the sleeves completed… look at all those ends though!

You can also learn about how to add cuffs to your sleeves in this post, and explore the different kinds of join as you go ribbing stitches you might want to use in this directory of rib stitches.
If you prefer to use crochet post stitches, part two of my rib stitch directory explores the different ways you can use these raised crochet stitches to create a ribbed effect.

Short Row Sleeve Cap CAL Week 6
This week we will be talking all about cuffs and hems and button bands and finishing.
Button bands, hems, necklines and trimmings
This post goes into lots of detail about how to add ribbed cuffs / hems etc to your crochet garments.
If ribbing is your thing, I have a two part directory on different kinds of crochet ribbing:
- This part talks about ribbing using front and back loops
- This one talks about crochet ribbing using post stitches
Most kinds of ribbing can be used for hems, cuffs and necklines, depending on your preference.
I have a tutorial which illustrates, step by step with photos how to add a button band with button holes, using simple stitches as with the any yarn cardigan. You may find this useful if adding a button band to your cardigan.
If you like to hide your button holes in a ribbed crochet button band, this post on invisible button holes shares my secret trick!


Short Row Sleeve Cap CAL Week 7
The Week 7 Vlog will appear here
Week 7 is wrap up week, we’ll be doing a show and tell style wrap up. It’s your last chance to ask any questions and share what you’ve learned as well as what you want to try next!
Blocking and finishing tips
I share some of the considerations I make when blocking my finished sweater in this vlog. (Including areas to pay attention to and where you can go easy!)
This post gives a thorough overview of how and when to block your crochet garments, as well as some tips and tricks.
Sewing ends in on your garment is also key to get a neat and secure finish. I tend to wait until the end (after blocking) to sew my ends in. This is to allow me to easily undo any work if I need to make an adjustment I hadn’t accounted for and ensures the ends are weaved in to the material at its final tension.
If you weave in ends before blocking you can find that the tension of the sewn in part pulls differently to the rest of the fabric.
You can learn how I sew in my ends in this tutorial (the video is quite relaxing to watch imo!)
And here you can see my finished sweater below!

I hope you’re as pleased with how yours has worked out.
Now that you’re all done, you can learn about how to care for your crochet garments you’ve spent weeks making in this article. This will help you ensure you get to wear your beautiful new garment for years to come.
Thank you so much for crocheting along with me. I hope you’ve enjoyed it, learned a lot and will join me for the next one…
In the meantime, if you have the crochet along bit between your teeth, why not check out the on demand ‘any yarn’ cal?
Happy Hooking
Dx