
The Any Yarn Crochet Along (CAL)

Welcome to the Any Yarn Crochet Along from dora does!
It is a garment cal which I hope will encourage crocheters (like you!) to add to you crochet wardrobe. Whether it’s your first or 50th garment project, all are welcome and I hope you might learn something new.
This crochet along was originally run in April / May 2023, but if you’re finding this page at a later date, you can still join in!
I’ve updated the page so it is now an ‘on demand’ crochet along which you can follow at your own pace.
It’s laid out as an 8 week step by step project, but you can take a month to work through a week, or fly through them in a few days. Whatever works for you, the schedule is optional!
Just as was my goal when this CAL went live, I want this to be a relaxed event that can accommodate all the life stuff that happens around crochet.
You can read through this blog post to find all the resources, vlogs and tutorial videos (with q & a) for the crochet along set out week by week, with an overview of the schedule at the start (click the week to jump to that section)
What crochet pattern will you be using?
The ‘Any Yarn cal’ will be run using my two any yarn will do crochet patterns.
That is the any yarn will do round yoke sweater or the any yarn will do raglan yoke cardigan.
Although these are two different construction styles, they use the same stitch and similar principles.
This gives a ton of scope for makers to use yarn from stash in any of 5 yarn weights. You can learn about the concept behind these two patterns in this post.

This post contains affiliate links. This means if you click a link to a product and go on to make a purchase, I receive a small percentage of the sale at no extra cost to you. You can read my full affiliate disclosure here. As an Amazon Associate I earn from qualifying purchases.
You check out the pattern bundle on Etsy or Ravelry or purchase one or other of the patterns individually.

As a possible third option, you may also want to participate using the any time cardigan pattern which is free on the blog.
It is a round yoke cardigan similar to the any yarn sweater, but it is only available in a single yarn weight.
How the crochet along will work
I have broken down the patterns into eight sections to make it more digestible and to give you the chance to learn new things about different aspects of garment making and build your skills as you go.
Each section is accompanied by lots of resources and a focus on any areas you may come unstuck.
I will also run a live Q&A each weekend (see the weekly guide below for timings) streamed on YouTube.
Use the hashtag #anyyarncal on instagram if you want to join along there. Using the tag means you can both share what you’re making and see how others are getting on.
Crochet along schedule and links
Below is the schedule and topics for the 8 parts of the crochet along. Scroll down or click week by week for resources and details:
- Week 1: Introduction to the patterns, how it will work and yarn selection: View Live Replay on YouTube | View Week 1 vlog
- Week 2: Swatching, gauge and choosing your size: Watch live replay on YouTube | Week 2 vlog
- Week 3: Making the yoke and checking your fit: Watch replay of the YouTube live | Week 3 vlog
- Week 4: Splitting the yoke and working the body: Watch week 4 live replay on YouTube
- Week 5: Sleeves and cuffs: – Watch replay of live YouTube | Week 4/5 vlog
- Week 6: Collars, hems, button bands and pockets: Watch the Week 6 replay | Week 6 vlog
- Week 7: Blocking and finishing, short rows: Watch replay on YouTube | Week 7 vlog
- Week 8: Celebrating and sharing your finished garment: Watch the last live on YouTube |
Can I use a different pattern?
You can if you like, sometimes just working in time with others is a great way to keep you motivated.
However, I will be focusing on the stages of the Any Yarn sweater and cardigans. These are top-down yoke designs so if you’re using a different design, you may find it more rewarding to work from a top down pattern.
You can also use the hashtag #AnyYarnCAL on instagram to share your efforts.

Any Yarn Cal Week 1
Week 1 is preparation week.
This first week is about introducing patterns we will be working with and choosing your yarn.
When it comes to garments, so much is about preparation. Whilst this might seem like a slow start, it really is the foundation, it doesn’t look like much but without it, we’ll fall down!
Choose your yarn
As the title suggests, you can use any yarn, or yarn combinations for this project, but you do need to swatch both the check and match one of the 5 gauge measurements, and to ensure you are happy with the drape, stretch and look of the resulting fabrics.
The posts below talk in detail about yarn weights and what to consider when choosing (or substituting) yarn.
- Yarn weights explained
- How to choose yarn for your crochet project
- Yarn weight and crochet hook size guides
Whilst you can use any yarn (from fine to super bulky weight) for these patterns, you need to check you’re happy with the fabric your chosen yarn creates. There is no right or wrong answer for that. It’s all about the look you want to achieve.
If you’re new to crocheting garments, you may also want to read my blog post ‘how to crochet clothes that fit’ which gives you a good overview of the process of crocheting a garment. It’s a framework I’ll be following throughout the CAL, so I hope you will find it useful!.
For the super organised among you who want to prep for next week, you can make and block your swatch (or swatches if you want to play with different hook sizes). In Week 2, we will discuss how to measure it and choose the right pattern gauge to follow as well as how to select a suitable size.
Both the sweater and cardigan patterns use the extended single crochet throughout. If this stitch is new to you, you can find a full tutorial here.
- Watch the replay of the Live on YouTube Here
- Join the My Crochet Wardrobe Facebook Group to watch on fb
- Check out the Week 1 2 and a half minute vlog

Any Yarn CAL Week 2
This week we are going to be looking at your swatch, checking gauge, choosing which pattern gauge you’ll work with and which size you want to make.
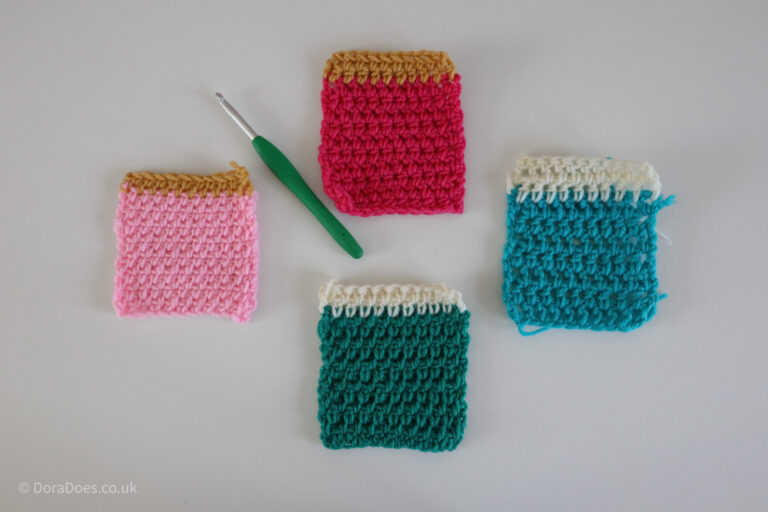
Make a swatch and select a gauge to work with
Once you have your yarn, make a swatch so you know you’re happy with the drape and understand how your garment is going to look.
You will also need to match one of the 5 gauge measurements available and choose a suitable gauge to work with.
Crochet Gauge Resources
If you’re new to swatching and gauge and all that stuff, then the posts below will help you;
- The concept of gauge
- How to make and measure a gauge swatch
- How to adjust row gauge
- Crochet gauge course from Blue Star Crochet (includes video section)
I do encourage you to use blocked gauge for this project. Although the the finished garments should only need a light blocking, It’s an important factor that shouldn’t be ignored.
(And even if you don’t block your swatch, your garment will stretch a little with wearing and washing, so it may come back to bite you as it did me… I’ll talk more about that on the live!)
Pick your size
Once you have decided which gauge / yarn weight version of the pattern you’re working with you can select the size you want to crochet.
When it comes to choosing a suitable size, make sure you look at the measurements in the pattern, don’t just pick a size that you might pick off a high street shelf.
Grab your tape measure, and take you’re own measurements so you know what you’re working with. Then think about how much ease you want the garment to have in the body and sleeves (learn about ease here).
Looking at the detailed measurements and schematic for the patterns will help you assess how the different sizes at different parts of the body relate to your own body measurements.
Although I wrote it for budding designers, you might also find this post on crochet sizing standards useful for comparison.
If you have a favourite piece of knitwear / crochet wear in your wardrobe, measure that to see what the difference is (bear in mind the thickness of the fabric – your swatch will tell you that!)
If you’re newer to crocheting garments, I do encourage you to read this post about how to crochet a garment that fits before you start so you can get an overview of the exciting journey you’re about to start. This post also includes a lot about adjusting garments, so will be a useful reference to come back to throughout the cal, you might want to save it to your favourites for easy access!

Any Yarn CAL Week 3
In week 3, the goal is to crochet your yoke.
The details will vary depending on whether you are working the raglan cardigan yoke or the round sweater yoke.
When crocheting your yoke, you will need to keep an eye on you gauge (and that it is matching your unblocked gauge from your swatch) and fit.
The resources below share my top tips for crocheting yokes as well as some guidance for adjusting them for a custom fit if needed.
Resources for crocheting yokes

Any Yarn CAL Week 4
In week 4 we will be looking at splitting your yokes and working the body.
Splitting your yoke is the part of the construction where you section off your piece into an armhole with a body either side.
The images below illustrate this for the sweater and the cardigan patterns.


And for the round yoke sweater, here are some before and afters;


Once you have split the yoke, you will start to crochet the body section. At this point I encourage you to try on your sweater to see how the fit is around your shoulders and chest.
Remember to allow for blocking.
If your crochet swatch grew with blocking then your finished garment will likely do the same, so ensure you take this into consideration before making any adjustments.
If you want to make some adjustments to the yoke and add any body shaping, now is a good time.
The respires below will help you understand how to make adjustments, depending on what you’re looking for.
- How to crochet clothes that fit (includes section on general adjustments and body shaping)
- How to adjust top down yoke garments – specific to adjusting yoke garments
- How to design a top down yoke garment (if you really want to dig deep into the construction and sizing options)
Any Yarn CAL Week 5
In week 5 we will be moving on to work the sleeves.
Sleeve school!
The sleeves are crocheted directly from the armholes both for the sweater and the cardigan.
The technique of avoiding holes at the underarms is described in the tips for top down crochet sweaters post (which hopefully you’re familiar with by now!).
If you like to customise your sleeves, or want to understand sleeve shaping better, I recommend you have a look at this article all about sleeve shaping.

Any Yarn CAL Week 6
This week we will be talking al about cuffs and hems and button bands
Button bands, hems, cuffs and trimmings
This post goes into lots of detail about how to add ribbed cuffs / hems etc to your crochet garments.
If ribbing is your thing, I have a two part directory on different kinds of crochet ribbing
- This part talks about ribbing using front and back loops
- This one talks about crochet ribbing using post stitches
Most kinds of ribbing can be used for hems / cuffs, depending on your preference.
I have a brand new tutorial which illustrates, step by step with photos how to add a button band with button holes, using simple stitches as with the any yarn cardigan. You may find this useful if adding a button band to your cardigan.
If you like to hide your button holes in a ribbed crochet button band, this post on invisible button holes shares my secret trick!

Any Yarn CAL Week 7
This week we’re going to be talking about BLOCKING and finishing techniques
Blocking and finishing tips
This post gives a thorough overview of how and when to block your crochet garments, as well as some tips and tricks.
If video is more your thing, you might want to check out this blocking masterclass from The Crochet Project.
When blocking my version of the cardigan, I soaked it, used the towel roll method (see the blocking blog for details) to take most of the water out and laid it out flat on a blocking board to dry. I did not feel that it needed pinning…
My cat felt she needed to sit on it though… she knows it’s forbidden and she looks guilty enough, but she cares not for rules.

Short Row Neckline for the any yarn sweater
In the live I discussed how I added short rows to the back neck of the sweater pattern to ‘fill in’ the gap at the nape of the neck.
Here’s how the sweater looked on from the back with the short rows included.
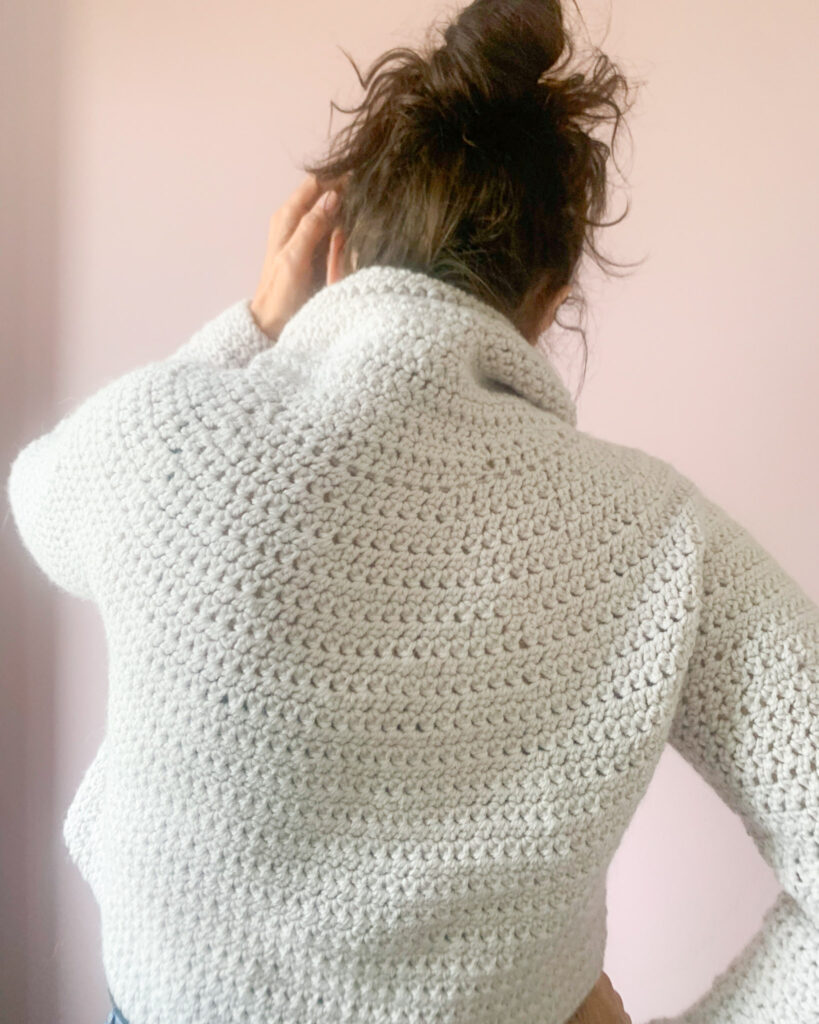
The short rows ‘fill in’ the back neck drop so that the roll neck will come higher at the back and there will be no pulling in other parts of the garment.
You can learn the basics of short rows in this tutorial if this is something you are interested in exploring.
If you want to get more advanced, you can check out the Short row sleeve cap crochet along which takes short rows to the next level!
I mentioned two knitwear design books I have drawn from to learn this technique:
- Knitwear Design Workshop by Shirley Paden
- Sweater Design in Plain English by Maggie Righetti (I have the first edition which cost less than the more recent version and it seems the two editions are very similar)
Any Yarn CAL Week 8
Week 8 is wrap up week, we’ll be doing a show and tell style wrap up. It’s your last chance to ask any questions and share what you’ve learned as well as what you want to try next!
In the meantime, below you can see my finished sweater and cardigan makes that I share in the live!
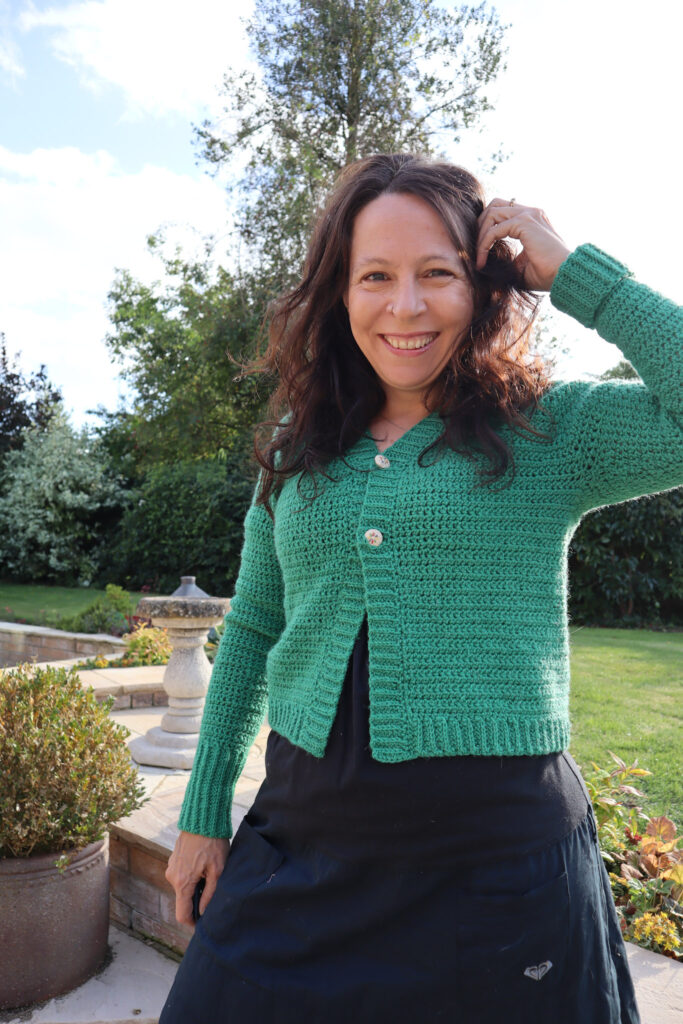
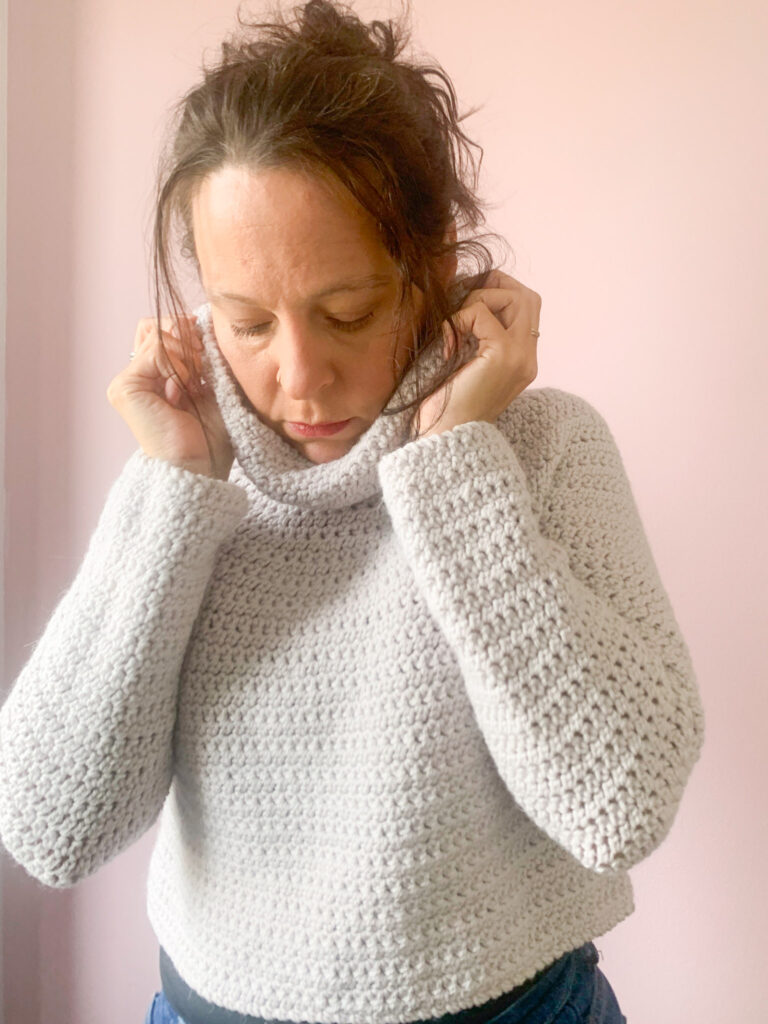
You can learn about how to care for your crochet garments you’ve spent weeks making in this article. (I said I would talk about care in the live but 100% failed because I got a bit overexcited! You can read all about it in the post though!)
Thanks to everyone who joined and if you missed it live, just work through all the videos at your own pace… I will be leaving this page up as an evergreen resource!
Happy Hooking
Dx
Psssst… if you want another crochet along to join, why not try the 2024 Short Row Sleeve Cap CAL?



Hi Dora, (I sent this in an email also, but I’m not sure which is more likely to get it addressed in the live feed. 🙂 )
I hope this is in time to get on the live broadcast. 🙂
I’m struggling with dividing the yoke. I’ve read all the blog posts you’ve provided, and I’m still not sure on this one.
As background, all my measurements fit the Large size. And I’ve measured some of my sweaters (that fit well) and they match up.
But I have a largish bust that is usually lower down than usual measurements… i.e. I have to lengthen bra straps all the way, and when I was sewing I always had to adjust the darts lower, if that makes sense.
So, so far, I have added one non-increase row to the yoke (round 25 on XL, but didn’t do the increase Row 26). Then last night I had my husband help me to fit the yoke to figure out if I wanted to adjust how it was divided. I put the yoke on and he put safety pins on front and back about where the yoke would meet under the arm. The sleeves came out almost perfect, with 44 stitches each (and that’s without counting the underarm chains) But adjusting the front and back came out way off, and I’m not sure I should divide it that way. To make the yoke not be too baggy in the back and to fit the bust well, I came out with about 80 stitches in front and 50 in back! But as I thought about that, and I thought about what sweaters usually look like when you lay them flat, there’s very little difference between the bust and the back. So I don’t know what to do….I suppose I should put a few stitches more toward the front than the back, but I’m not sure how many actually makes sense.
I will appreciate your thoughts!
Hi Sylvia, hopefully I covered this in the live, but I’ve left the comment here in case anyone else has a similar issue. If that’s you, check out the Week 4 live where we discuss this in a bit of detail.
Okay, another question about size. I’ve measured several sweaters I have, and I know I probably want it longer. All the measurements work for the large size, except maybe the bicep measurement. :/ I noticed I don’t have to make a decision between L and XL til about row 25, so I’ve started on the yoke 🙂 Is there a way to make the bicep measurement slightly larger without going up to the XL for the whole pattern?
Hi there, I replied to the email you sent on this too, but for completeness, there are a couple of ways you can tackle this. This post on adjusting top down sweaters covers the most common approaches! https://doradoes.co.uk/2019/12/04/how-to-adjust-top-down-yoke-crochet-sweaters-to-fit/#growSource=search
I’ve had an awful time with the swatch! I picked a yarn… it’s a Lion Brand Mandala Ombre, it says weight 4, but it’s a lot thinner than Hobby Lobby’s I Love This Yarn worsted. I had to size down a hook (it seems that’s always true of me and gauges), went too far, and finally got the stitch count right with a 4.5mm. But I had too many rows. So I did the Golden Loop trick and finally managed to get the 11 rows. So I need to be really careful pulling the loop up. Are there ways to adjust if I pull too tight and my rows get short?
Great work on persevering with the swatch! It’s good for you to know that your tension is often tight so you can start with a smaller hook! If you’re working the sweater, it is relatively simple to add rows to the yoke of you need more length, so of all the deviations from gauge, this is probably the easiest to manage with this pattern! 🙂
thanks!
Really hoping to be there Sunday but that is getting ready for church time so it depends on how early I can get ready. I have a gauge/blocking question. I make a lot of items for my grandkids. I know from past experience, despite my instruction, the sweaters and cardigans go right into the washing machine and dryer. Thankfully, I use mostly durable acrylics for them and nothing has been ruined. So…wanting to do this project “by the book”, I matched gauge and blocked my swatch, then for good measure, threw it in with the wash. The swatch actually survived and stayed accurate! Do you think this is a reasonable way to go about doing the gauge/block for items that will be treated roughly or do you have a better suggestion? SusanB from Arkansas
I watched the replay of your week one video. As I was watching I was frogging a project and decided to use that yarn. I also tried a swatch and it came out perfect! First time for that to happen. I am excited for this CAL maybe all will go correctly. LOL.
This is great on both fronts! So glad it’s motivating you – you got this!! 🙂
I’ve had the pattern and yarn for months, just not the mental space to venture into unknown territory, as a beginner crocheter who’s never tackled a garment. I was so pleased to see you’re doing a CAL of the exact pattern I’ve been trying to find the courage to start! Really looking forward to it!
This is one of the main reasons I’m running this! The first proper garment I ever made was as part of a CAL and I know the support and step by step nature helped me so much – fingers crossed I can do the same! You got this 🙂
I’m in!
Whooop!!
MEEEEEEEEEEEEEEeeeeeeeeeeeeeeeeee !!! [grin]
Yay!!!