The Any Time Cardigan: Free Crochet Pattern

The Any Time Cardigan is a seamless top-down crochet cardigan pattern.
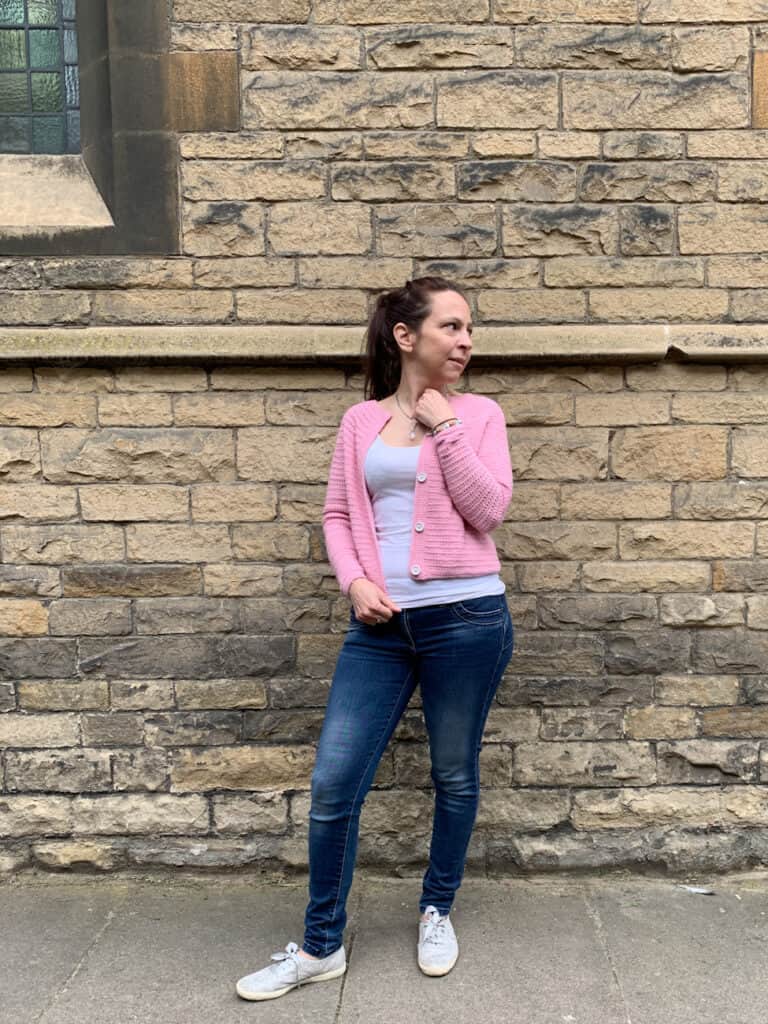
Cropped to finish just above the hips, you can pair this with your favourite jeans or wear it over a dress, buttoned up or left open. With its close fit, you can layer it over a tank top on summer evenings and still have room to wear a jacket or coat on top on cooler days.
Perfect to wear any time!

This post contains affiliate links. This means if you click a link to a product and go on to make a purchase, I receive a small percentage of the sale at no extra cost to you. You can read my full affiliate disclosure here. As an Amazon Associate I earn from qualifying purchases.

You’ll find the free crochet pattern, in women’s sizes XS – 3XL, including photo guidance on this page.
You can also purchase the ad-free, printable PDF version of the crochet pattern from Ravelry, Etsy or Love Crafts.
The design was inspired by my popular Any Yarn Will Do sweater pattern, which I have adapted to create this simple, more closely fitted cardigan, using dk weight yarn.
The pattern was originally designed as a Furls CAL and the yarn was provided to me free of charge by Furls for that purpose.

Pattern Notes
General Notes
- Please read all the pattern notes before starting your project
- This pattern uses US crochet terms (UK equivalents are given in brackets in the abbreviations list)
- Numbers at the end of a row or round indicate the number of stitches in that row or round and are only given at the start of a section or where there is a change
- Turning chains do not count as stitches
- Instructions written after *asterisks should be repeated as indicated
- Unless otherwise indicated, stitches should be worked in consecutive stitches
- A photo guide is included after the main pattern
Construction
- The cardigan is made top down in rows, turning at the end of each row
- Work the yoke from the neck down, split the yoke to form the body and arm holes, work the body then sleeves
- If you’re new to working top down garments, this post includes lots of tips for crocheting yokes
- For help with adjusting top down round yoke garments for the perfect fit, you may find this blog post useful


Skills Used
- Knowledge of basic crochet stitches and terminology
- Working in rows and rounds
- Simple increases and decreases
- Chainless foundation rows (modification given)
- Extended single crochet (UK extended double crochet) – see special stitches
You can find additional tips on how to crochet top down yoke garments here.
Materials
Hook: 4mm Furls Streamline crochet hook, or size needed to meet gauge
Yarn: 6(6, 7, 8, 8, 9, 10) balls Furls Whims Merino DK in Pink, 50% Superwash Merino, 50% Nylon, 100g ball = 196yds / 180m
See measurements table for approximate meterage by size
Other:
- 5 x 20mm buttons
- 5 x Stitch markers (to mark out buttonholes)
- Yarn needle & scissors
Measurements & Finished Size
The Any Time Cardigan is written in 7 sizes from XS – 3XL
Finished Bust size: 82, 92, 102, 113, 123, 133, 144cm
Additional measurements are given in the schematic below to help you in choosing the correct size.
- The Cardigan is a fairly cosy / tight fit with around 6cm of positive ease around the chest and more closely fitting sleeves
- It is fitted around the neck so you may wish to leave off buttons at the top. No garment should ever feel too tight around the neckline so please adjust to suit as necessary to ensure your comfort
- If you prefer a more relaxed fit, you may wish to go up a size
- The body length, which drops to the top of the hips and can easily be adjusted by changing the number of body rows worked. This will impact yarn requirements
- Instructions for different sizes are written in increasing order, with the smallest size first and larger sizes following in brackets i.e. XS (S, M, L, 1X, 2X, 3X, 4X, 5X) sts or Rows / Rounds (note that different sizes also have different numbers of round repeats, so do not get caught out here!)
- The button band measures 3cm wide on each side and the hem and cuffs measure around 1cm deep for all sizes. You could increase the width of the button band if desired (suggestions given in button band section).
- The item you see pictured is a size S worn by me, UK size 8-10 (US 4-6), 5ft 1in.

Gauge
16 sts and 14 rows in 10cm of esc (extended single crochet – see special stitches) using a 4mm crochet hook or size needed to obtain gauge.
Make a 15cm square gauge swatch using extended single crochet in order to check your gauge.
Learn how to make and measure a gauge swatch here
How to purchase a Dora Does crochet pattern:
I sell my PDF crochet patterns in my Etsy, Ravelry and Love Crafts stores. You can purchase this pattern on any of these platforms, depending on your preference. Simply click the relevant links throughout this pattern page to be taken to the listing, or visit the store homepages in the links at the start of this paragraph.

Stitches & Abbreviations: US terms
(UK Equivalent in Brackets)
- ch = chain
- dec = decrease (denotes decrease round)
- esc = extended single crochet (UK extended double crochet) – see special stitches
- esc2tog = extended single crochet 2 together (UK extended double crochet 2 together) – see special stitches
- fsc = foundation single crochet (UK foundation double crochet) – see special stitches
- FLO = front loop only
- rep = repeat
- RS = right side
- sc = single crochet (UK double crochet)
- sk = skip (UK miss)
- sp = space
- ss = slip stitch
- st(s) = stitch(es)
- WS = wrong side
- yo = yarn over
Special Stitches
Foundation Single Crochet (fsc) click here for a tutorial
Ch2, insert hook into second chain from hook, yo and pull up a loop (2 loops on hook). *Yo and pull through 1 loop (this creates the base stitch/chain for the next fsc), yo and pull through 2 loops to complete the stitch. To start the next stitch, insert the hook into the ‘v’ of the base stitch, yo and pull up a loop. Repeat from * for required number of sts.
Extended Single Crochet (esc) click here for a tutorial
Insert hook, yo, pull up a loop (2 loops on hook), yo, pull through 1 loop (2 loops on hook), yo, pull through 2 loops to complete the stitch.
Extended Single Crochet 2 Together (esc2tog)
Insert hook, yo, pull up a loop (2 loops on hook), yo, pull through 1 loop (2 loops on hook), insert hook into next st, yo, pull up a loop (3 loops on hook), yo, pull through 1 loop (3 loops on hook), yo, pull through all 3 loops to complete the decrease stitch.
Disclaimer
Whilst I endeavour to ensure all patterns are error free, occasional typos or errors may slip through. No liability is accepted for this or subsequent variation in finished projects. However, please do contact me if you think the pattern contains an error or you are unsure about interpreting the instructions.
Information in this crochet pattern is given for reference only. Any reliance on information given on this website is at your own risk. This pattern falls under Dora Does Terms of Service

You can purchase an ad-free printable PDF version of this pattern from Etsy, Ravelry or Love Crafts.
The Pattern
The yoke is worked in a similar way to how you would work a typical flat circle for the crown of a beanie hat, or something similar, only in rows, without joining at the end.
As you follow the instructions, you will also notice that each increase row you will alternate between starting the row with an increase and finishing the row with one. This is important to ensure that the front opening of the cardigan says symmetrical. If you started all increase rows with an increase then you would find one side looked quite different to the other!
Yoke
Row 1 (WS): make 50(55, 55, 60, 60, 65, 65)fsc
Row 2 (RS): Ch1 (does not count as st throughout), *1esc in next 4 sts, 2esc in next st; rep from * to end, turn. 60(66, 66, 72, 72, 78, 78) sts
Row 3: Ch1, 1esc in each st to end, turn
Row 4: Ch1, * 2esc in next st, 1esc in next 5 sts; rep from * to end, turn. 70(77, 77, 84, 84, 91, 91) sts
Row 5: As Row 3
Row 6: Ch1, *1esc in next 6 sts, 2esc in next st; rep from * to end, turn. 80(88, 88, 96, 96, 104, 104) sts
Row 7: As Row 3

Row 8: Ch1, *2esc in next st, 1esc in next 7 sts; rep from * to end, turn. 90(99, 99, 108, 108, 117, 117) sts
Row 9: As Row 3
Row 10: Ch1, *1esc in next 8 sts, 2esc in next st; rep from * to end, turn. 100(110, 110, 120, 120, 130, 130) sts
Row 11: As Row 3
Row 12: Ch1, *2 esc in next st, 1esc in next 9 std; rep from * to end, turn. 110(121, 121, 132, 132, 143, 143) sts
Row 13: As Row 3
Row 14: Ch1, *1esc in next 10 sts, 2esc in next st; rep from * to end, turn. 120(132, 132, 144, 144, 156, 156) sts
Row 15: As Row 3
Row 16: Ch1, *2esc in next st, 1esc in next 11 sts; rep from * to end, turn. 130(143, 143, 156, 156, 169, 169) sts
Row 17: As Row 3
Row 18: Ch1, *1esc in next 12 sts, 2esc in next st; rep from * to end, turn. 140(154, 154, 168, 168, 182, 182) sts
Row 19: As Row 3
Row 20: Ch1, *2esc in next st, 1esc in next 13 sts; rep from * to end, turn. 150(165, 165, 180, 180, 195, 195) sts
Row 21: As Row 3
Row 22: Ch1, *1esc in next 14 sts, 2esc in next st; rep from * to end, turn. 160(176, 176, 192, 192, 208, 208) sts
Row 23: As Row 3
Row 24: Ch1, *2esc in next st, 1esc in next 15 sts; rep from * to end, turn. 170(187, 187, 204, 204, 221, 221) sts
Row 25: As Row 3
Row 26: Ch1, *1esc in next 16 sts, 2esc in next st; rep from * to end, turn. 180(198, 198, 216, 216, 234, 234) sts
Row 27: As Row 3
Row 28: Ch1, *2esc in next st, 1esc in next 17 sts; rep from * to end, turn. 190(209, 209, 228, 228, 247, 247) sts
Row 29: As Row 3
For Size XS Only
Continue to splitting the yoke
For Size S Only
Row 30: As Row 3
Continue to splitting the yoke
For Size M Only
Row 30: Ch1, *1esc in next 18 sts, 2esc in next st; rep from * to end, turn. 220 sts
Rows 31-32: As Row 3
Continue to splitting the yoke
For Size L Only
Row 30: Ch1, *1esc in next 18 sts, 2esc in next st; rep from * to end, turn. 240 sts
Rows 31 – 33: As Row 3
Continue to splitting the yoke
For Size 1X Only
Row 30: Ch1, *1esc in next 18 sts, 2esc in next st; rep from * to end, turn. 240 sts
Row 31: As Row 3
Row 32: Ch1, *2esc in next st, 1esc in next 19 sts; rep from * to end, turn. 252 sts
Row 33: As Row 3
Row 34: Ch1, *1esc in next 20 sts, 2esc in next st; rep from * to end, turn. 264 sts
Row 35: As Row 3
Continue to splitting the yoke
For Size 2X Only
Row 30: Ch1, *1esc in next 18 sts, 2esc in next st; rep from * to end, turn. 260 sts
Row 31: As Row 3
Row 32: Ch1, *2esc in next st, 1esc in next 19 sts; rep from * to end, turn. 273 sts
Row 33: As Row 3
Row 34: Ch1, *1esc in next 20 sts, 2esc in next st; rep from * to end, turn. 286 sts
Rows 35 – 37: As Row 3
Continue to splitting the yoke
For Size 3X Only
Row 30: Ch1, *1esc in next 18 sts, 2esc in next st; rep from * to end, turn. 260 sts
Row 31: As Row 3
Row 32: Ch1, *2esc in next st, 1esc in next 19 sts; rep from * to end, turn. 273 sts
Row 33: As Row 3
Row 34: Ch1, *1esc in next 20 sts, 2esc in next st; rep from * to end, turn. 286 sts
Row 35: As Row 3
Row 36: Ch1, *2esc in next st, 1esc in next 21 sts; rep from * to end, turn. 299 sts
Row 37: As Row 3
Row 38: Ch1, *1esc in next 22 sts, 2esc in next st; rep from * to end, turn. 312 sts
Rows 39 – 40: As Row 3
Continue to splitting the yoke

Splitting the yoke
Next, and without fastening off, you will split the yoke to create the body and arm holes.
To do this, you crochet along the front section of the yoke as instructed, make a chain for the underarm, skip the given number of stitches, which will become the armhole, crochet across the back, make a second underarm chain and skip the same number of stitches for the second armhole and finish by crocheting across the other side of the front to the end.

Once the yoke is split, you will then continue to work the body of your cardigan in rows.
Note that there is no RS or WS until you split the yoke, so I recommend you allocate the one you prefer and add a stitch marker to it. I have allocated the first body and sleeve rounds as RS Rows.
The WS and RS do matter when working the hem, cuffs and button band so what’s important is that you’re consistent.
After the last row of the yoke, you should have 190(209, 220, 240, 264, 286, 312) sts
Continuing from the last yoke row;
Yoke split Row (RS): Ch1, 1esc in next 26(29, 31, 35, 40, 42, 46) sts, ch8(10, 13, 14, 15, 17, 19), sk 40(43, 44, 46, 51, 56, 62) sts for the arm hole, 1esc in next 58(65, 70, 78, 82, 90, 96) sts, ch8(10, 13, 14, 15, 17, 19), sk 40(43, 44, 46, 51, 56, 62) sts for the other arm hole, 1esc in each st to end, turn. 126(143, 158, 176, 192, 208, 226) sts (including ch)

You should have 48(53, 57, 60, 66, 73, 81) sts for each of the arm holes, including the underarm chains. I recommend checking this now as once you have finished the body, you won’t be able to adjust this without frogging it!
I also recommend trying on your cardigan at this stage to check you are happy with how it fits around your chest and arms.
If the yoke is too short you can add some non-increase rows (Row 3 repeats) or remove them if it’s too long.
You can also alter the number of underarm chains used when you split the yoke. But do bear in mind, this will impact both the fit on the chest and the stitch count around the arms.

Body
Body Row 1 (WS): Ch1, 1esc in each st and ch to end, turn. 126(143, 158, 174, 190, 204, 220) sts

Body Row 2: Ch1, 1esc in each st to end, turn
Body Rows 3 – 36(36, 34, 34, 32, 32, 30): As Body Row 2
Do not fasten off, continue to hem

At this stage, you should have 65(66, 66, 67, 67, 69, 69) rows in total for the yoke and body.
For a longer body, add more repeats of Body Row 2 until the cardigan reaches your desired length. For a more cropped cardigan, work fewer body rows
Hem
The hem works with slip stitches so you may wish to go up to a 4.5 or 5mm crochet hook to work the hem. This will stop any gathering. If you want to allow the hem to pull in the base of the cardigan then you can stick with a 4mm.
Check you are happy with your tension as you work.
With WS facing, continue from the last row of the body (your stitch count will remain unchanged);
Row 1 (WS): Ch1, ss in FLO of each st to end, turn
Row 2: Ch1, 1sc in FLO of each ss to end, turn
Row 3: Ch1, ss in FLO of each st to end
Fasten off
Sleeves and Cuffs
Next you will create the sleeves, which are worked in rounds. At the end of each round, you will slip stitch to the top of the first stitch and turn to start the next round.
Remember that the Ch1 used to start each round does not count as a stitch so make sure you ignore it!
You will work the first sleeve round into the yoke split row and underarm chain. Then you’ll make a 1 stitch decrease every 2 rounds until you reach the narrowest point (the cuff measurement) and work the remainder of the rounds without decreasing. In a similar approach to the yoke, you will alternate the decrease between near the beginning and end of the round. This ensures you will get a nice neat underarm seam.

Tip for working sleeves without gaps at the underarm:
On the first round of the sleeves, you will work an esc into each stitch on the armhole and the back of each of the underarm chains made when you split the yoke.
It can be quite easy to pick up extra stitches here. This is because the edges of the stitches made just before and after the underarm chain in the Body Set-up Row can look like additional stitches. When you skip these, it can create a gap at the underarm, so the natural tendency is to work into them increasing your stitch count.
In order to avoid these gaps without altering your stitch count, you can use a simple technique:
On the first round of the sleeve, when working into the last of the underarm chains, make an esc2tog, working both into the last underarm chain and the side of that pesky stitch from the Yoke Split Row.
When you have worked round the sleeve, you will repeat this on the other side of the underarm chain, working the esc2tog into the side of the stitch and the chain.
This post explains this technique in more detail (with photo guides).
Sleeves
Repeat on both sides
Join your yarn in the centre of the underarm chain and, making sure you are working in the opposite direction to the last yoke round;
Round 1 (RS): Ch1, 1esc in each ch and st round to end, ss to top of first st, turn. 48(53, 57, 60, 66, 73, 81) sts
Round 2 (dec): Ch1, 1esc in first st, esc2tog, 1esc in each st to end, ss to top of first st, turn. 47(52, 56, 59, 65, 72, 80) sts
Round 3: Ch1, 1esc in each st to end, ss to top of first st, turn
Round 4 (dec): Ch1, 1esc in each st to 3 from end, esc2tog, 1esc in last st, ss to top of first st, turn. 46(51, 55, 58, 64, 71, 79) sts
Round 5: As Round 3
Round 6 (dec): As Round 2

Rounds 7 – 36(40, 40, 40, 40, 40, 40): Rep Rounds 3 – 6, ending on a decrease round. 30(33, 37, 40, 46, 53, 61) sts
Work 19(17, 17, 19, 19, 19, 19) more rounds as Round 3, giving a total of 55(57, 57, 59, 59, 59, 59) rounds
Do not fasten off, continue to Cuff
You can work fewer or more rounds to change the length of the sleeve as desired.
The sleeves are intended to be close fitting, but if you want a looser fitting sleeve at the forearm and wrist, you can stop decreasing sooner.
Cuff
Continuing from last round of the sleeve (your stitch count will remain unchanged);
Round 1 (WS): Ch1, ss in FLO of each st around, ss to top of first ss, turn
Round 2: Ch1, 1sc in FLO of each ss around, ss to top of first st, turn
Round 3: Ch1, ss in FLO of each st around, ss to top of first ss
Fasten off and sew tail to first ss to complete the cuff

Button band and finishing
To finish you will create the button band for your cardigan, block it and weave in all those ends.
Adding buttons is optional, and if you choose not to, you can just skip the buttonhole row, replacing it with a row of single crochet.
Button band

As with the hem, monitor your progress on the button band to ensure you achieve an even tension and do not get any gathering up the front.
You will start by working a row of slip stitches into the row-ends (including the row-ends of the hem). This is what will set the tension for the rest of the button band. I recommend working 5 slip stitches into every 4 row-ends to achieve a band which lies flush with the front of the cardigan. However, you can adjust this to suit your crochet style. This is why you will not see a stitch count in this section.
Once again, you may wish to go up a hook size when working slip stitch rows to ensure you maintain an even tension.
First side – Button band
With the RS facing, join your yarn to the front of the cardigan on the side you wish to add the buttons. This may be at the top or the bottom of the front opening, depending on your preference and handedness.
Row 1 (RS): Ch1, evenly ss into the row-ends along the front opening, turn
Row 2 (WS): Ch1, 1ss in FLO of each ss to end, turn
Row 3: Ch1, 1sc in FLO each ss to end, turn
Row 4: Ch1, 1sc in each st to end, turn
Rows 5 – 6: As Row 4
Row 7: Ch1, 1sc in FLO of each st to end, turn
Row 8: Ch1, 1ss in FLO of each st to end
Fasten off
Second Side – Buttonhole band
Decide where you would like to place your buttons / buttonholes and add a stitch marker to the unworked side of the front opening to indicate where the buttonholes should be placed. Move these markers up as you work.
With RS facing, join your yarn to the front of the cardigan opening, again, this may be at the top or the bottom depending on which side you worked first;
Row 1 (RS): Ch1, evenly ss into the row-ends along the front opening, turn
Row 2 (WS): Ch1, 1ss in FLO of each ss to end, turn
Row 3: Ch1, 1sc in FLO each ss to end, turn
Row 4 – Buttonhole Row: Ch1, *1sc in each st to buttonhole marker, ch2, sk 2 sts, 1sc in next st; rep from * to last button hole marker and make 1sc into each of the remaining sts to end, turn
Depending on the size of your buttons, you may wish to chain and skip more or fewer stitches. At this point, check that your buttons just fit through the hole you created. There should be just enough space for the buttons so that they remain fastened. If there is too much space, I recommend reducing the size of the buttonhole so your buttons don’t pop open when worn.

As you work the buttonholes, you may find it useful to transfer your markers to the corresponding stitch on the opposite button band to mark where the buttons will be attached. Leave these markers in place whilst blocking (and block before attaching buttons).
Row 5: Ch1, 1sc in each st and ch to end, turn
Row 6: Ch1, 1sc in each st to end, turn
Row 7: Ch1, 1sc in FLO of each st to end, turn
Row 8: Ch1, 1ss in FLO of each st to end
Fasten off
Finishing
I recommend wet or steam blocking your cardigan to get the best out of it. This will flatten out any curl you may find on the button band.
You can learn more about blocking, including how to do it, here.
Checking that the button markers are still aligned with the button holes after blocking, sew on your buttons.
Weave in all ends to finish.

Sharing your finished makes
I love seeing your finished makes – it gives me all the happy feels!
Here’s how you can share them on social media, if that’s your cup of tea!
- On Instagram, you can use the hashtag #HookMeHappy or #AnyTimeCardigan or just tag me @doraexplored
- You can share your photos on my Facebook page
- If you have the bug for creating garments, why not join my dedicated facebook group “My Crochet Wardrobe” and share them there?
- If Pinterest is your happy place, you can add them there too – check out my Pinterest account for lots more crochet inspiration from makers across the web!
Happy Hooking
Dx
Copyright Dora Does Limited, Registered in England, Company Number 13992263. This pattern is for personal use only and may not be shared or reproduced in written, photo, video or any other form without prior written consent. All rights reserved. Terms of service.
What a cute cardi! Any chance you can share where the dress is from? The outfit is divine!
Ahh, thank you! The dress was from a little indie shop in Cambridge called Lilac Rose – it’s a few years old now though
Hi, for row 8 of the yoke you wrote « 1 esc in next st, 1 esc in next 7st » and the total of stitches is 90 (99,99,108,108,117,117) sts.
It seems that it should be « 2 esc in next st, 1 esc in next 7st ».
Could you confirm that it is correct.
Thank you for your answer.
Hi there, you are quite right! Thanks for letting me know. The typo has been corrected 🙂
Dora
Oh Gosh! Thanks for sharing this detailed pattern! I started making it and I’m so excited!! Looking at your other patterns!
Vicki
you’re welcome – I hope you enjoy crocheting it! 🙂