
10 Tips for successfully making crochet garments

If you’re new to making crochet garments it can seem a bit intimidating at first.
But if you break it down into steps then it’s not nearly as complex as it seems. You’ll soon realise, that if you can crochet a granny square or a flat circle, you can also crochet sweater!
I’ve been writing a lot about crochet fundamentals recently and this has been intentional. Understanding the building blocks gives you a solid grounding to make sure that your crochet projects are a success (whatever success means to you!).
In this post, I want to bring together a lot of those fundamentals in one place – my list of tips for making crochet clothing. After all, it’s my mission to get you crocheting your wardrobe!
I know that so may people are reticent about crocheting clothes, especially their first attempt. So my aim is to show you that you can totally do it, you just need to follow the basics!
If you want to learn more about crocheting garments using any pattern, why not check out my ebook ‘how to crochet clothes that fit (and you actually want to wear)’? You can learn more here, or get your copy now!

Without further ado, here is my list:
1. Choose your pattern with thought
This one matters, so I’m going to break it down into a few considerations.
Pattern Quality
Your crochet pattern is your road map. A good one will help you fly through your project, whereas a bad one will confuse you and dent your confidence.
Make sure that the pattern you choose is well written!
How do I know if it’s well written? I hear you ask!
Here’s what to look for:
- Have a look at this post about what a well written pattern should cover.
- Check the pattern reviews, or other people’s projects (Ravelry is great for this!)
- If the design has a hashtag, check that out on instagram
- Do you know or follow someone on social media who has made the pattern you’re considering? Ask them how they got on with it
- If you’ve made accessories from a designer and like their writing style why not see if they design garment patterns too?
Design Complexity
When it comes to complexity of design, I am all for being ambitious with crochet, which often leads me biting off more than I can chew! Whilst for me this is a great learning curve, I know that for some this can be utterly counter productive!
When choosing your garment design, think about what best suits your personal style.
Are you happy to dive in (and potentially mess it up with a shrug of the shoulders)? Or would you rather start with something simpler where you are more likely to get it right first time and build your confidence that way?
Most people start garments using a drop shoulder design. That is where you work flat in rows to make a front panel, a back panel (essentially rectangles with no or little shaping), and 2 sleeves, then you sew all your pieces together.
The So What Sweater is a great example of this. The cabled stitch pattern keeps it interesting, but the construction is super simple! It is also a free pattern using chunky yarn, so there’s nothing to loose with this one!
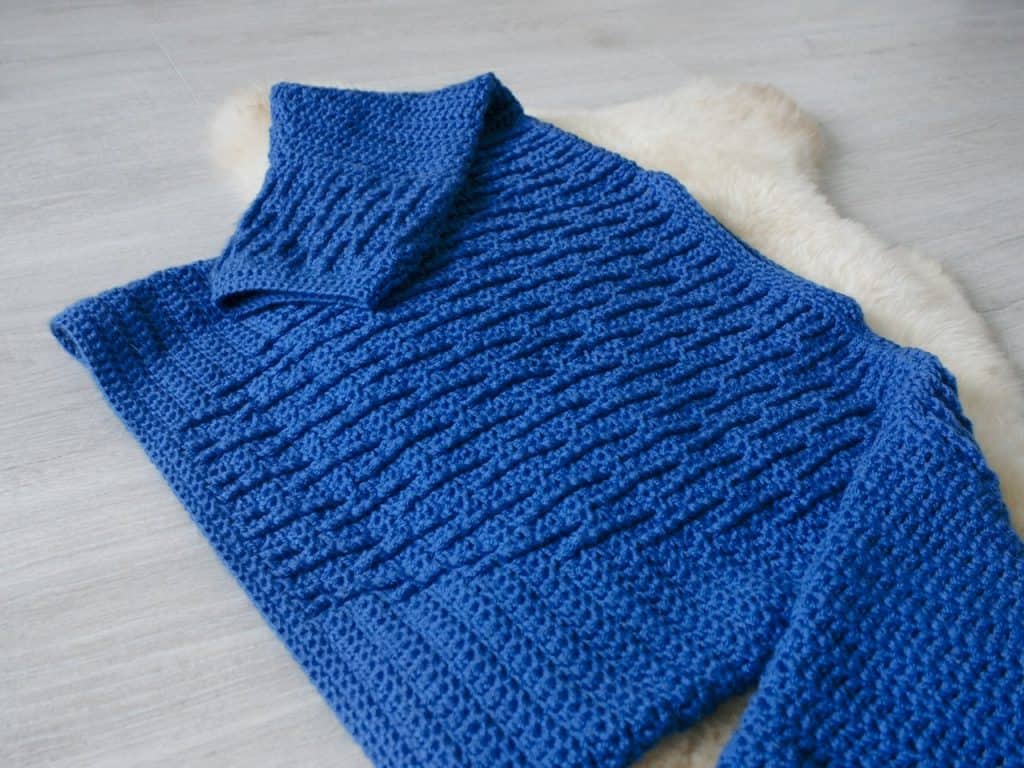
So if you’re not into kamikaze going for it, this is a great place to start.
If it’s your first garment, I’m all for keeping not simple. And simple does not have to mean ugly!!!
Yarn Weight
Another thing to consider is yarn the weight your pattern uses. It’s fairly safe to assume that if you choose thicker yarns then your project will work up more quickly.
If you’re nervous about investing a lot of time in a project then this is a good way to keep it short!
Choose a yarn weight and fibre you’re used to working with. If you’re familiar and comfortable working with worsted acrylic yarn, then you probably aren’t going to want to dive into a complex laceweight mohair pattern!!
Stick to learning one new thing at a time!
2. Read the pattern through before you start
Reading the pattern through is one of those really simple things which so many people skip… and end up in a muddle!
You don’t have to go in-depth on the instructions themselves, but get an idea about all the materials you’ll need, how your garment is constructed and what’s involved in the overall process.
As I discussed in my ‘how to read a crochet pattern’ post, it’s like looking at a map before starting a journey.
Having a sense of direction when working on a crochet pattern will make it go much smoother!
3. Make sure you understand how your garment is constructed before you start
I have separated this out from reading the pattern because it is worth emphasising.
Before you pick up a hook, you should make sure you know how your garment is going to fit together.
For example, you should know if it’s worked top down or bottom up, flat or in the round, one piece or seamed. This kind of information will help you visualise what part of the garment you’re making as you work and what the final thing will look like
If your pattern has a schematic, this will be a great help with getting your head round the construction. You will know which piece you are working on rather than blindly making shapes with no context!
You can learn more about construction styles here.

4. Make a Gauge Swatch
Learn about gauge!! When it comes to crocheting anything that needs to fit, gauge wins out!
I’m sorry but there’s no getting around this one. Just do it – MAKE THE SWATCH! What is 20 mins of swatching compared to 20 hours of time making a sweater that doesn’t fit?
If your swatch isn’t right, try a different hook size, a different yarn or even work a different pattern size.
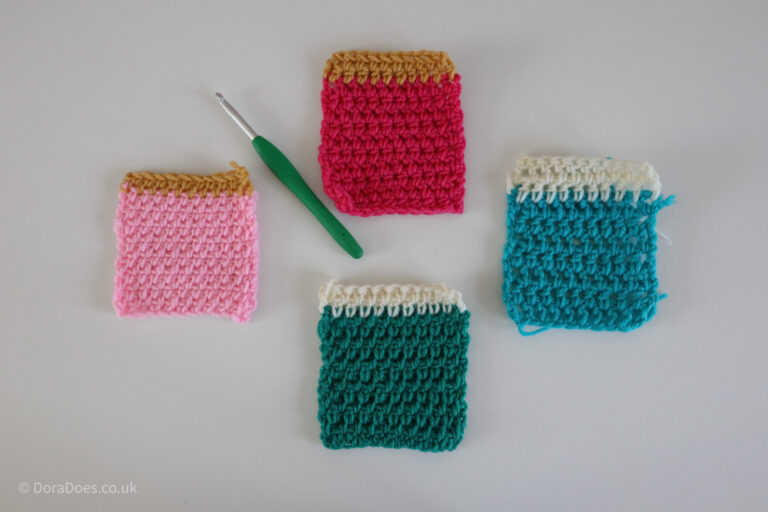
Not only will the swatch make sure you are on gauge (so your item will fit!) but it also gives you the opportunity to practice any stitches you may not be used to. That way when you do start the pattern you’re going to have more even tension. Win-win!!

I’m a realist, so if you refuse to make a gauge swatch then at least check it once you start working. If it’s off then you can catch and modify it early on!
5. Check your yarn is suitable for the item you’re making
Most patterns will tell you what yarn they have used in the sample, some will also suggest substitutes. Not all yarns are easily available in different countries so it’s helpful to learn about substituting yarn.
This article will help you choose a yarn which is suitable for your project, but it can be a very personal choice. Think about what intuition says and what you want the drape to be like.
Because you’ve followed the rules and made a swatch (!!), you will already have an idea about how the garment is going to work up in the yarn you’ve chosen.
If you don’t like how your swatch is working up then stop and choose something else.
I’m working on a design at the moment and I must have swatched with 5 different yarns before finally finding the right weight and fibre content I was looking for.
Trial and error is sometimes unavoidable but also very valuable and saves time in the long run!
6. Check your work as you go!
It only takes minutes and is so helpful. I have been guilty of ignoring this tip, cracking on with the pattern to the end, only to find that it’s not turned out at all how I expected!!!
If you’re working on a design using flat panels, measure them as you work and compare them to the sizes in the schematic or written pattern. Do this for each piece before you join anything!!
To check fit on a panelled garment, you can pin certain sections together before sewing them.
If you’re working on a top down seamless garment then it is much easier to try on as you go. Try it on when you get to the section where the yoke splits to check bust and arm fitting. Then try it on again to check the body and again when you are working the sleeves!

If you’re having trouble with the fit of a top garment, you can get some general tips on adjusting it to fit in this post.
Lastly – don’t sew in ends until you’re sure it fits!
7. Ask questions if you get stuck
Thanks to the awesome online crochet community, there are so many places you can ask questions if you’re stuck.
Whether it’s in a generic facebook group, the designer’s ravelry, facebook or instagram pages or contacting the designer themselves, there are a lot of people willing to help you.
Have a look on ravelry to see if someone else has created the project. Maybe they got stuck on the same part?
The My Crochet Wardrobe facebook group I run is a great place ask questions about garment making – it’s the whole reason I started it!
8. Learn some seaming techniques
This was one of my biggest roadblocks when I started making clothes. Sewing is not my strong point (which is probably why I minimise it in so many of my designs!), but it’s not as scary as you think.
Knowing whats kind of seams you can create is super helpful so you can adapt to the needs of the project.
Sometimes a slip stitch or single crochet seam, using your hook is perfect and quick to make, but other times it might be too bulky and you need to get the needle out!
I am not a great at hand sewing but have learned it is worthwhile to take some time with it to get it right.
Mattress or interlocking mattress stitch, which I learned not long after my garment journey are great for creating neat flat seams. But something different like a whip stitch will also work.
You can find a tutorial for mattress stitch here (which is my favourite approach to seaming.)
Garments like sweaters often hang from the shoulders, so the structure of the rest of the garment is dependent on getting that bit right.
Seams can be an important part of the structure of a garment in other ways too. They might stop the fabric from stretching out of size or shape in certain areas, so it’s important to pay attention to them.
9 Block it if needed
Blocking was another thing I struggled with for a long time. Though not for any reason. It’s not as mystical as I thought it was!
Essentially, blocking is used to shape your garment, show off the stitch pattern, improve drape and support fit.
If you want to learn more about blocking (including how to actually do it!) this post explains why and when you should do it and will help you get started!
If you are seaming separate pieces, you should block your work before sewing it together.
I also recommend blocking your work before sewing in your ends.
Blocking adds that finishing touch which shows just how much time and effort you put into it your crochet. The icing on the cake!
10 Learn lessons
My last tip is a simple pragmatic take away.
Don’t be afraid to try something new. Mistakes are part of the process.
At some stage you are going to end up frogging something. It’s not a matter of failing, it’s a case of building your experience and learning as you go.
I have frogged hours and hours of work over the years. I try not to see that as wasted time, but as schooling myself in new ways not to make a sweater or a sleeve or a button band.
Having to start over doesn’t mean you’re no good, it means you’re learned something new!

I hope you found those tips useful and are excited about future adventures on crochet garment making!
Do you have any other tips I might have missed? Drop a note in the comments if you have your own crochet clothing hacks to share!
And if this inspires you to try that garment you’ve been thinking about, please do let me know how you get on!!
Happy Hooking
Dx
P.S. If I’ve got you excited about garment making and you’re looking for a pattern, here are a few suggestions from my own designs which I would suggest for new (and developing) crochet clothes makers!
- First Sweater – The Upside Down Sweater (Aran yarn, worked Flat in pieces, simple stitches, simple neck shaping on the front, easy no sew sleeves)
- First Cardi – Got Your Six Cardi (Aran Yarn, worked flat, Simple textured stitches)
- New to gauge – try the Everyday Hugs Cardi (Aran yarn, simple stitches and worked flat – oversized with a wider range between sizes so more forgiving with gauge!)
- First top down – The Light Fandango (4 ply yarn, worked top down in rows and rounds using Herringbone Double Crochet)
- For maximum customisability, The Heart of Yarn Sweater (Aran Yarn, worked flat with multiple options)
- For top down cable lovers willing to try something a bit adventurous, try the Southern Pines Sweater (DK yarn, worked with a round yoke)
- For something completely different, why not try the Slow Living Skirt… yes, you can crochet skirts too!! (Worked waist down, mainly in the round using 4 ply Yarn)
To be fair, most of my designs are relatively beginner friendly and I offer yarn support if you get stuck, but I know it can be helpful to have some sign posts!



What an incredibly helpful post! Thank you for your time and wisdom 🙂
I did see in #9 Blocking, you said to sew in your ends after blocking. I would assume you want to sew in your ends, then block so the design is all ready to connect the pieces. But maybe you intended that.
I prefer to wait until the end to sew my ends in on garments. So after blocking. This way I know the tension with which I weave in the ends is the final tension.
And I’m glad to hear you found the post helpful! 😊
Bottler of a post – as ever ! 🙂
Thank you! 😊