How to crochet a short-row heel on toe up socks
If you have always been intimidated by crocheting socks, I want to reassure you that they are much more straightforward than you imagine.
In fact, when constructed with a short row heel, crochet socks are worked all in one piece. That’s only 2 ends to sew in (and one of them is hidden inside the toe so who will know?).
This article will explain what a short row heel is and the how to crochet one. If you want to learn the basics of how to crochet a sock, check out my article introducing crochet sock anatomy which compares 3 ways to crochet socks.
Back to this tutorial, short row heels are a simple but ingenious design. So let’s take a look at what’s involved.
What are short row heels?
A short row heel starts by crocheting progressively shorter rows. Once you reach the shortest row, you start increasing row length again, picking up the decrease rows as you go. This causes the heel to turn, creating the cup shape.
You’ll continue increasing until your rows reach the same length you started with.


This technique uses what is sometimes called a ‘double ended short row’. If you’re new to the concept of short rows and want to understand the concept, check out this article which explains how short rows are used in crochet.
Short row heels can be worked with toe-up or cuff-down socks so are really versatile.
For the purposes of this tutorial, I am using the Step On sock pattern as an example which is free to read with email sign up or grow log in. It’s an easy toe-up short row heel sock design. If you like you can crochet the sock along with this tutorial.

What are the pros and cons of short row heels?
For me, the biggest benefit of short row heels is that you get to work your sock in one piece… no seaming or coming back to finish that bit off later. It makes for a nice flow in your crochet project. It’s also really satisfying to see that heel start to curl up.
The minus point is that they are harder to replace when they wear out (which well worn socks will inevitably do). But an opportunity to learn to darn! If this is something that concerns you, then afterthought heels are easiest to replace (read about all heel types and sock construction in my anatomy of a sock post).
How to crochet a short-row heel
That’s the basics out the way, lets get stuck into how to actually crochet a short row heel. I promise this isn’t as complicated as you think!!
The foot and ankle of a sock are usually worked in the round ( which may be turned or unturned), so when it comes to the heel, you will switch to working in rows. As stated at the beginning, you start by working decrease rows, then increase again, picking up the decreased stitches.
Most commonly, as in this case, heels are worked in single crochet (UK double crochet) as this is a robust hard wearing stitch.
We are using a toe-up sock to demonstrate here but the same principal will apply to a cuff-down heel.
The Short Row Decrease
As a general rule of thumb, the heel set-up row will require working half the number of stitches used in the circumference foot or ankle, though if there is a gusset involved in the design (see anatomy of a sock for ankle gusset talk) then it may not be exactly half.
Stitch count aside, the set-up row will be worked directly into the previous round.
You will be working rows on the underside of the foot if you are working toe up and the back of the ankle if you’re working cuff down.
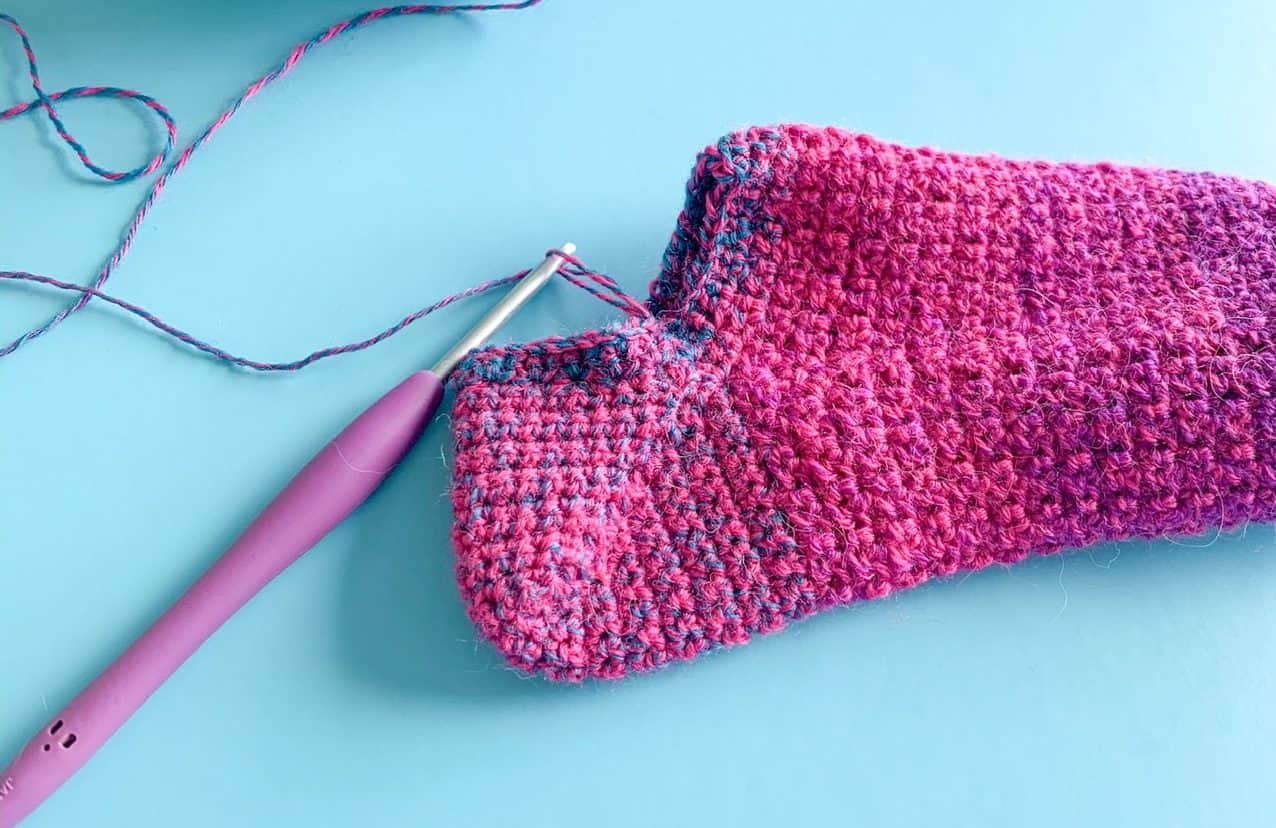
In this example we worked 22 single crochet onto the wrong side of the bottom of the foot. (where the circumference of the foot used was 44 stitches)

You will then decrease by 1 stitch at the beginning of each row.
In this example, the decrease is made by chaining 1 (turning chains do not count as stitches), missing the first stitch of the row, then working 1 single crochet (UK double crochet) into each stitch to the end of the row.
It might help you to add a stitch marker to the beginning of each row where the decrease is as this will help you to pick up the stitch later, when you begin to increase.

Some patterns will decrease at the end of the row.
Turn to start the next row.
Repeat the decrease row until you reach your minimum stitch count, which should be about a third the number of stitches on the first row.


The Short Row Increase
Once you have finished your decrease rows, you will begin increasing the number of stitches in each row.
You will increase by working 1 single crochet into each stitch along the previous row, then making a single crochet in the the ‘missed’ stitch from the decrease row 2 rows down. This is what is meant by ‘picking up stitches’.

In the example you see here, you will work your single crochet over the chain 1 space. (The one you made when missing the first stitch of the row on the decrease section.)

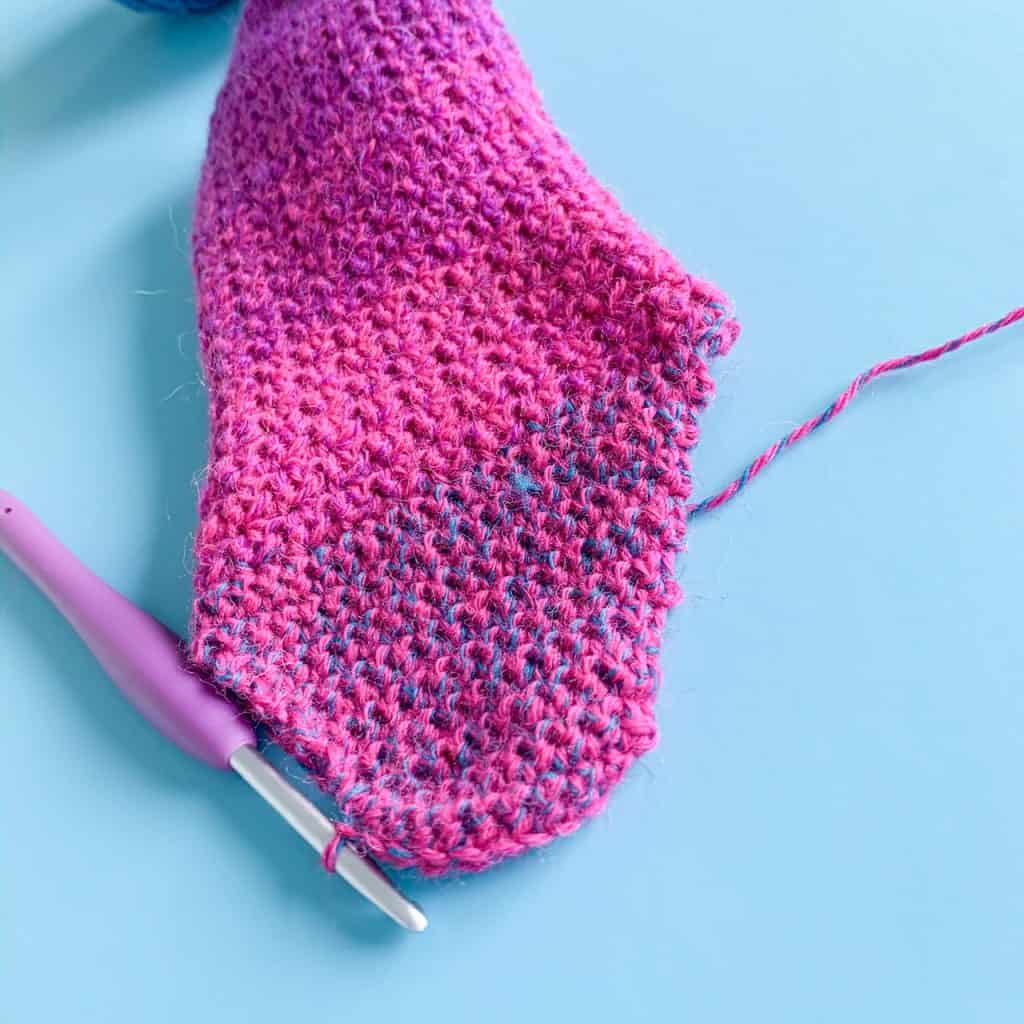
As you repeat the increase row, the flat rows will start to curl up and you will ‘turn the heel’.

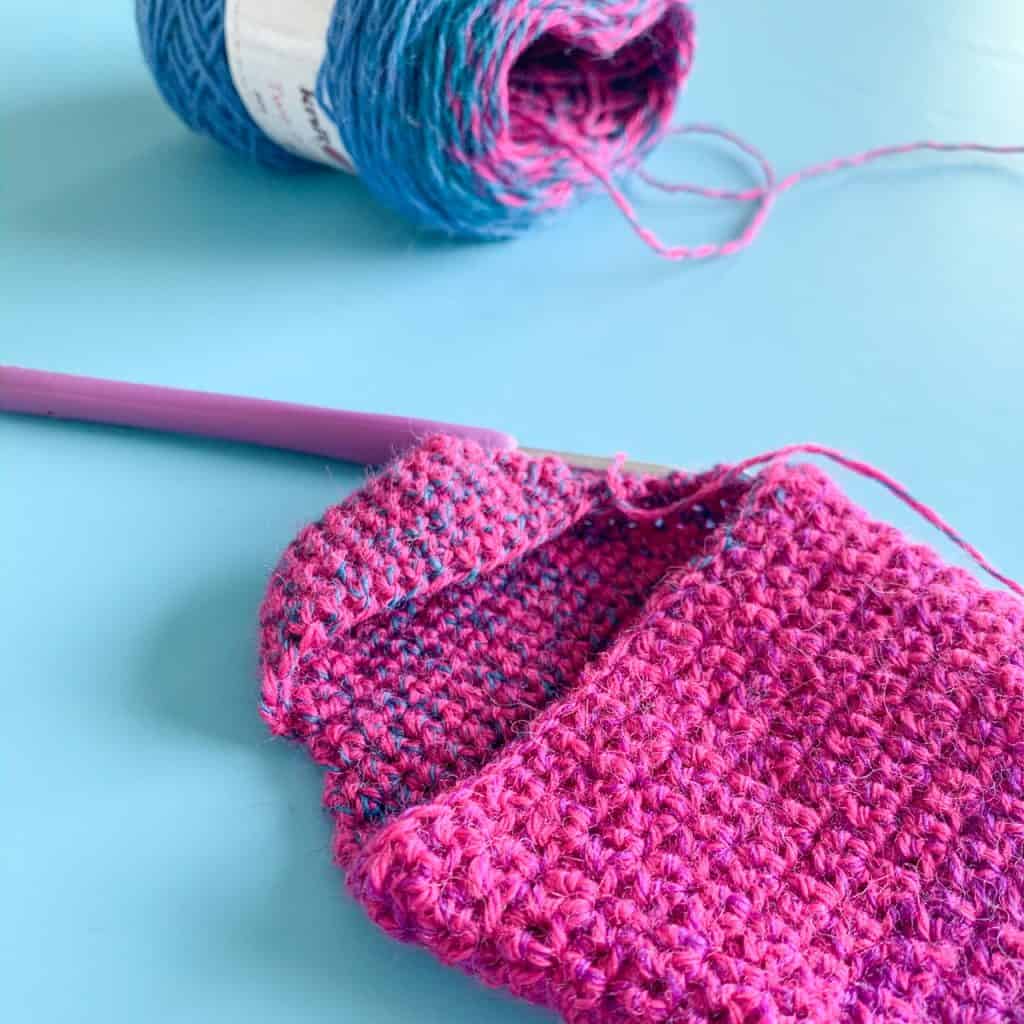
Repeat the heel increase row until you return to the same number of stitches you started with. In our Step on Sock, this will be a wrong side row.

Ankle Set-up
In this patten, you will set up to work the ankle by continuing from the end of the last heel row and working in pattern across the front of the sock.
Join to the top of the first stitch of the last heel row using a slip stitch and turn.
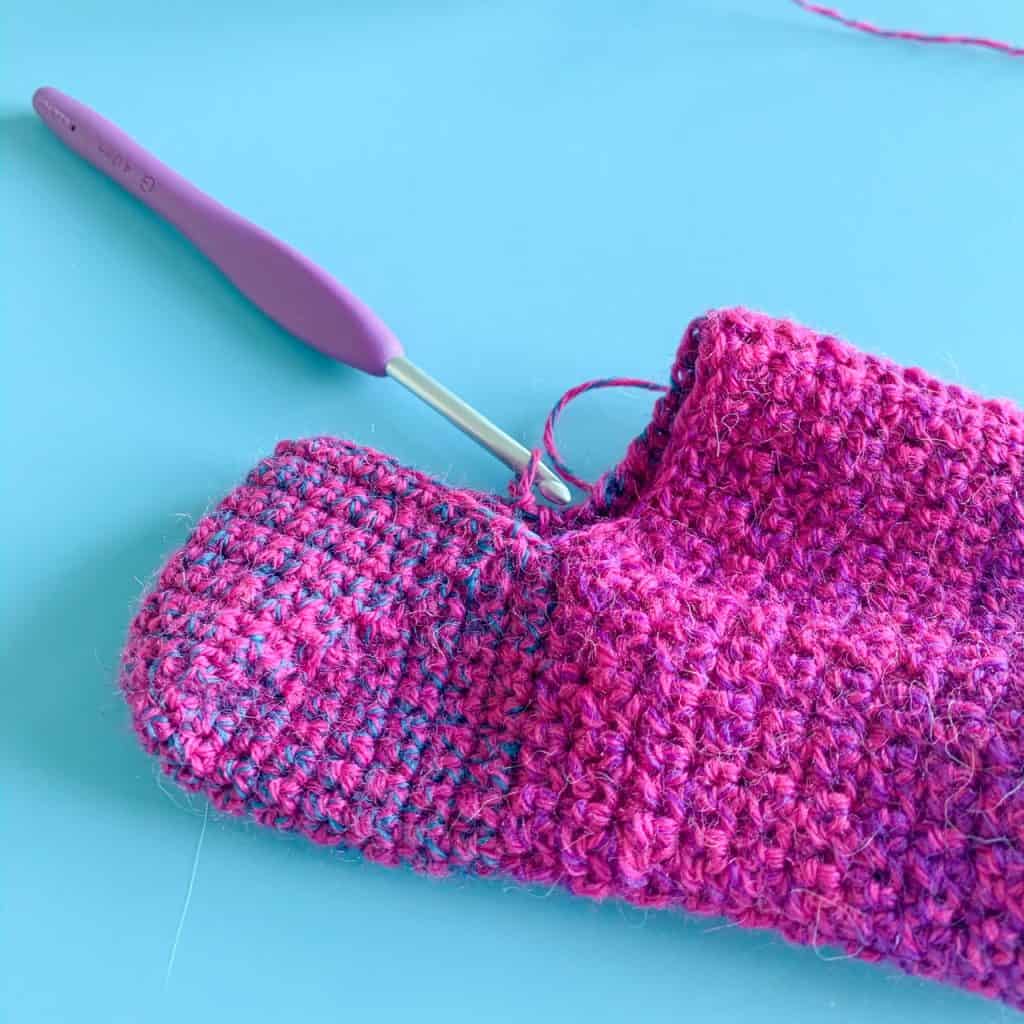
You are now back to working in rounds again! working the last row of the heel around the front of the sock.
Your heel is complete!
You can now continue working your ankle until your sock reaches it’s desired height!

You may want to try your sock on to check the fit before continuing too far into the ankle.

That is really all there is to it!!
There are of course many modifications on this technique in different patterns but the basic principle remains the same.
I hope this convinces you to give sock making a go!
You can get the generic Step On sock pattern for free on the blog (in size adult small) or download the add free PDF containing 6 sizes from toddler to large adult from Ravelry, Etsy or Love Crafts Crochet.
Any more sock questions, just ask!
Happy Hooking
Dx
More Crochet Design Related Blog Posts
Copyright Dora Does Limited, Registered in England, Company Number 13992263. This pattern is for personal use only and may not be shared or reproduced in written, photo, video or any other form without prior written consent. All rights reserved. Terms of service.


I’m finding I have little ‘holes’ along the seams of the heel increase rows – it’s as if the distance to pick up the extra stochastic is too big – I’ve marked all the chains from the descreas rows so I know I’m not missing any. Are there naturally goals along this seam? My yarn is thin ( and experiment to use something in my stash) and this might be making the gaps appear bigger than the would otherwise Thanks!
Hi, that is something that can happen. It will depend how loose the turning chains are. If you’re finding the gaps are larger than you would expect, you can try working over the chains into the row ends to close them up a little.
You could try picking up a loop over the turning chain but leave it unworked on the hook. Pick up the stitch from the row below as usual and work all the loops on the hook together as a decrease. This should maintain your stitch count and help eliminate gaps.
Yes, this is a great way to help reduce any holes. Thanks for sharing 🙂
What if a person were to work in a coordinating size 10 crochet thread while doing the heel (and possibly the toe area)? Might be slightly thicker and not quite as soft, but if it gives the heel some extra durability….? 🙂
I think that could be a really interesting approach. If you’re adding an extra strand then you would need to think about how this might impact your gauge. I would be tempted to swatch to check that it’s comfortable too. I used cotton for the first pair of socks I ever made and they looked nice but weren’t very comfy to walk around on. Admittedly that was dk so you are looking at something different, but I would still suggest swatching!
Excellent explanation of this technique. Is it possible to repair this type of heel or is all lost? I made a pair of Slippers with a short row heel and the heel wore out within a month.
Repairs are possible, but not my specialty! Like repairing any crochet item where there is wear in the fabric, it takes some careful attention. You may want to think about the yarn you use. Many sock yarns have a nylon element because it is more hard wearing.
Hi
I recently discovered your wonderful website ❣️ I’m wondering if this pattern can be worked to turn it into slippers? Thank you
Happy Holidays 🎇
Thank you! I guess you could just stop once you’ve completed the heel to create slippers, but with the step on sock pattern they would still reach to the ankle on the top side which may not be what you’re looking for.
HAPPY BIRTHDAY FOR TUESDAY !!! I wish you a wonderful day, Michelle – truly. You spend a shitload of time being amazingly helpful to us; so Tuesday is your turn, OK ? Like, don’t think ONCE of all this: just drink lots of champagne.
[grin]
Big hug from Downunder
Ahhh. Thank you! I will do my best! 😘