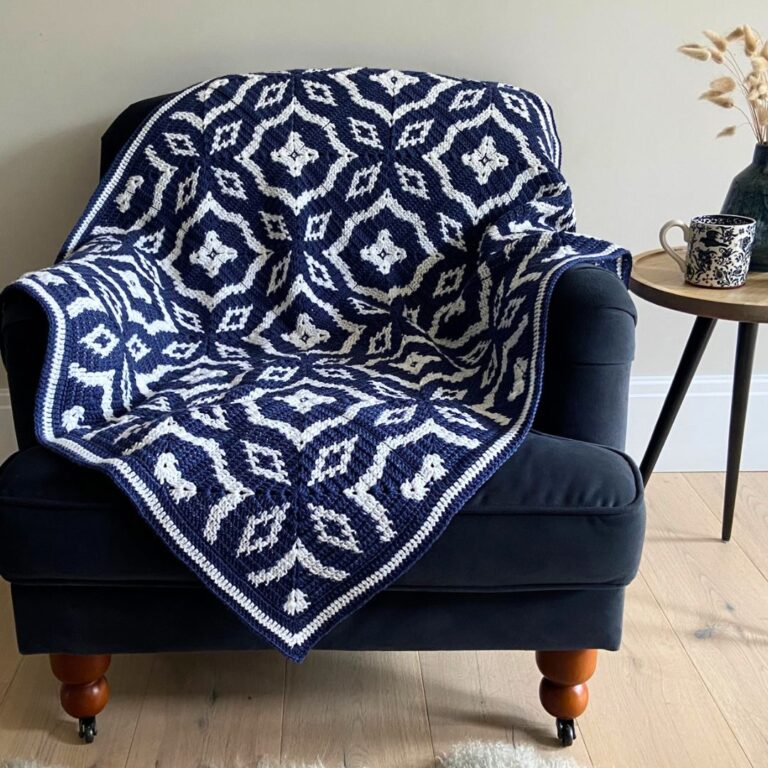
How to Crochet a Mitred Square: Step-by-step free tutorial
What is a mitred square?
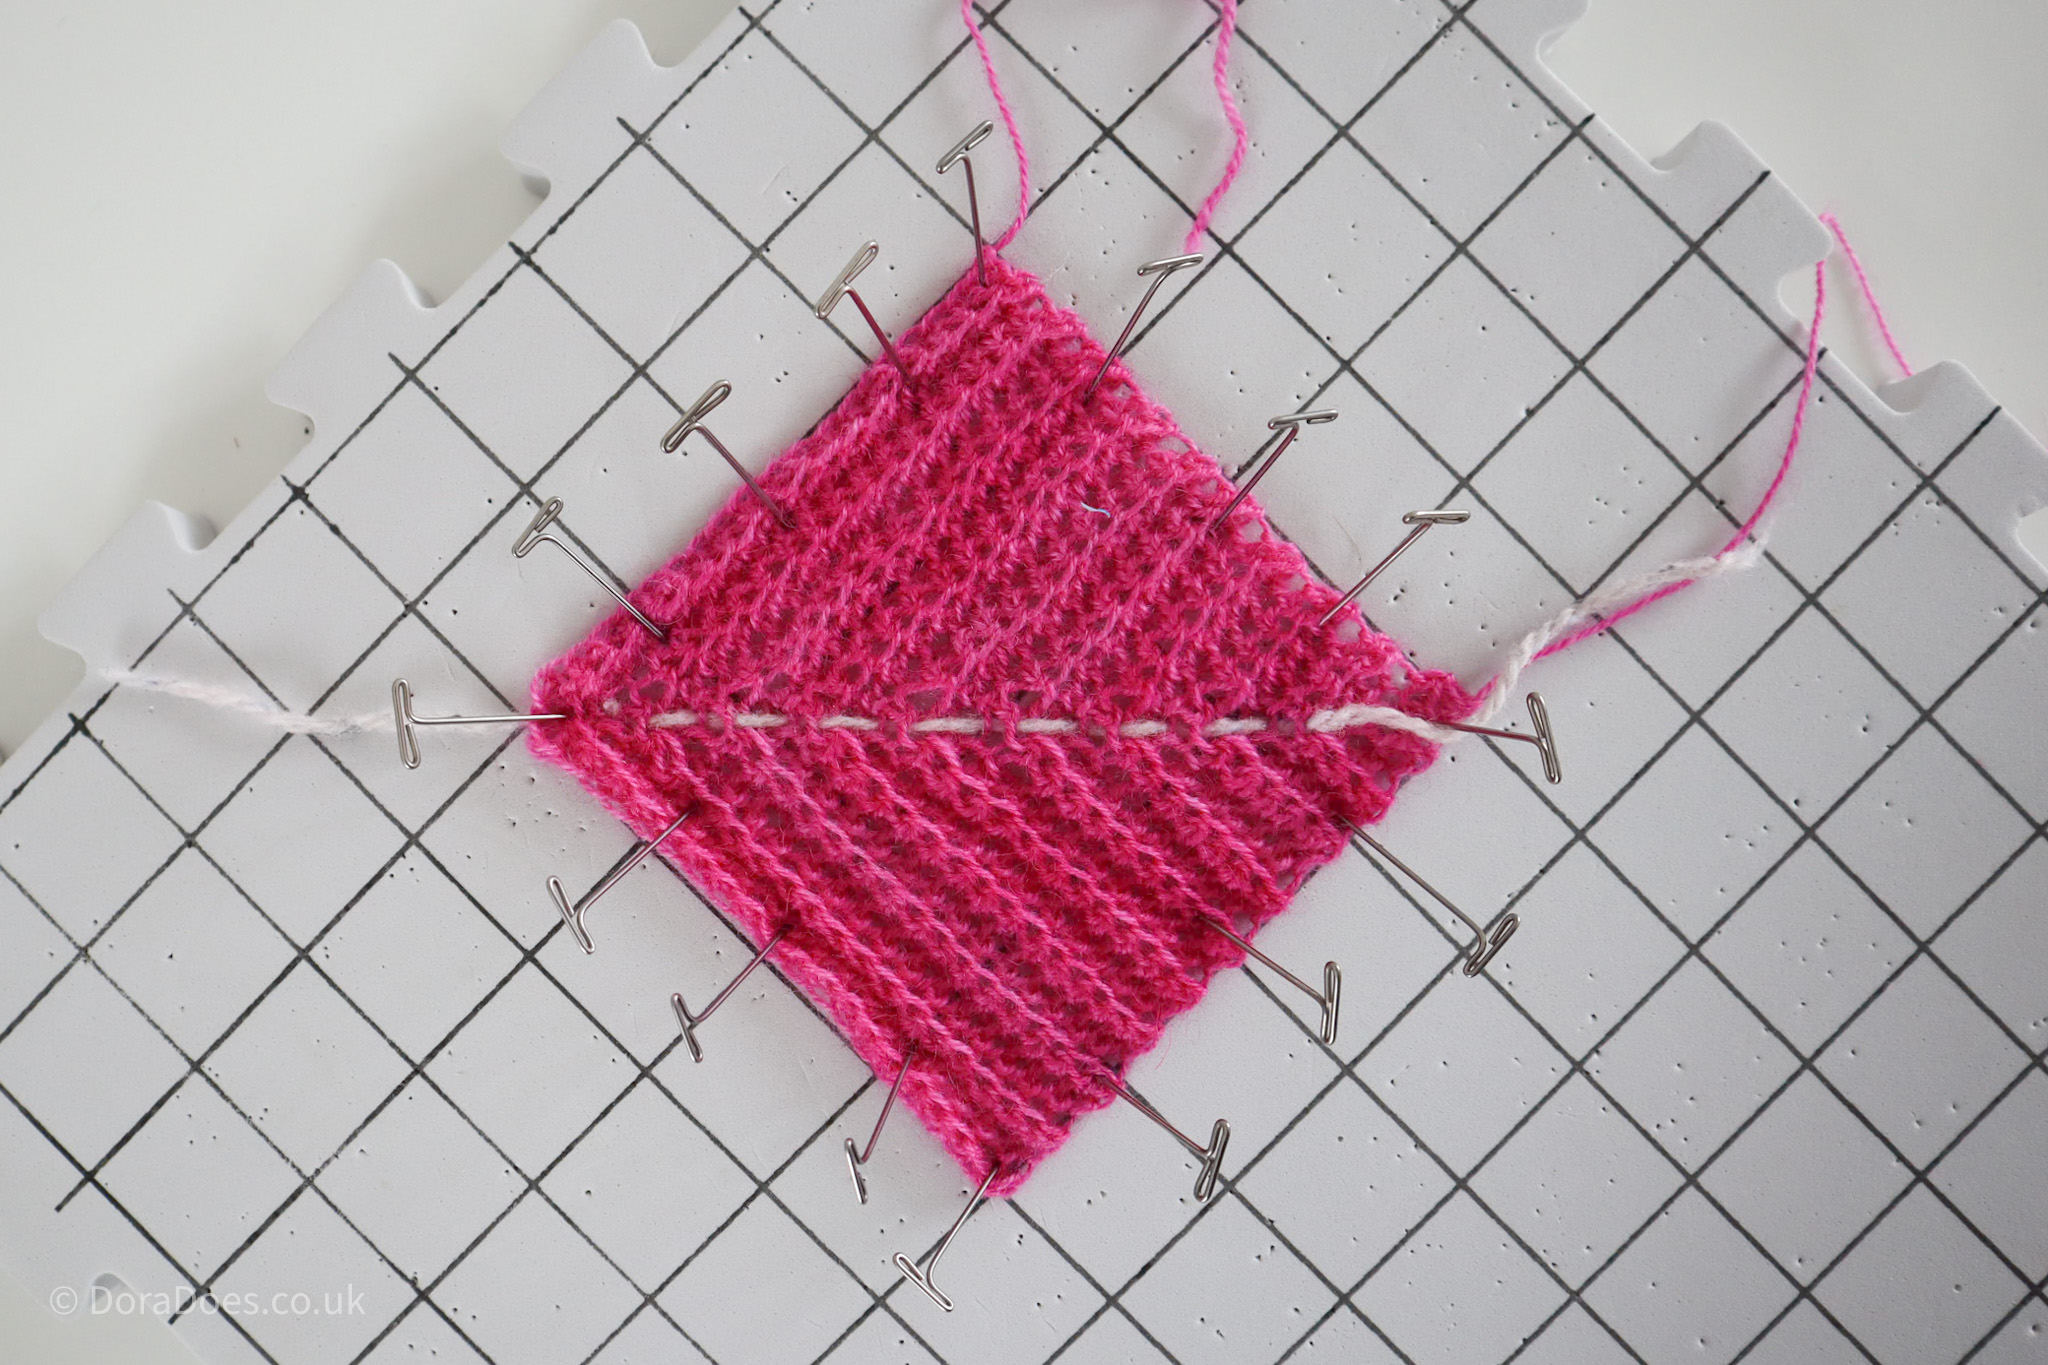
A crochet mitred square is a motif with a distinct seam (mitred join) that runs diagonally across the square from one corner to the opposite corner.
In the context of crochet or yarn crafts, the term ‘mitre’ refers to the join between two pieces of material which create a 90 degree angle (a corner). The join itself bisects this corner at 45 degrees.
A crochet mitred square pattern typically involves creating a decrease in the centre of a long row of US single crochets (UK double crochets).
A two stitch single crochet decrease is used at this creates a 90 degree angle. This decrease is what creates the diagonal seam, which is a faux join.
The first row of chains should be long enough to make two sides of the square.
The decrease pattern is repeated, with each row pulling the edges inward until the square is complete. The row-ends of the decrease rows are what create the other two sides of the square.


This post contains affiliate links. This means if you click a link to a product and go on to make a purchase, I receive a small percentage of the sale at no extra cost to you. You can read my full affiliate disclosure here.
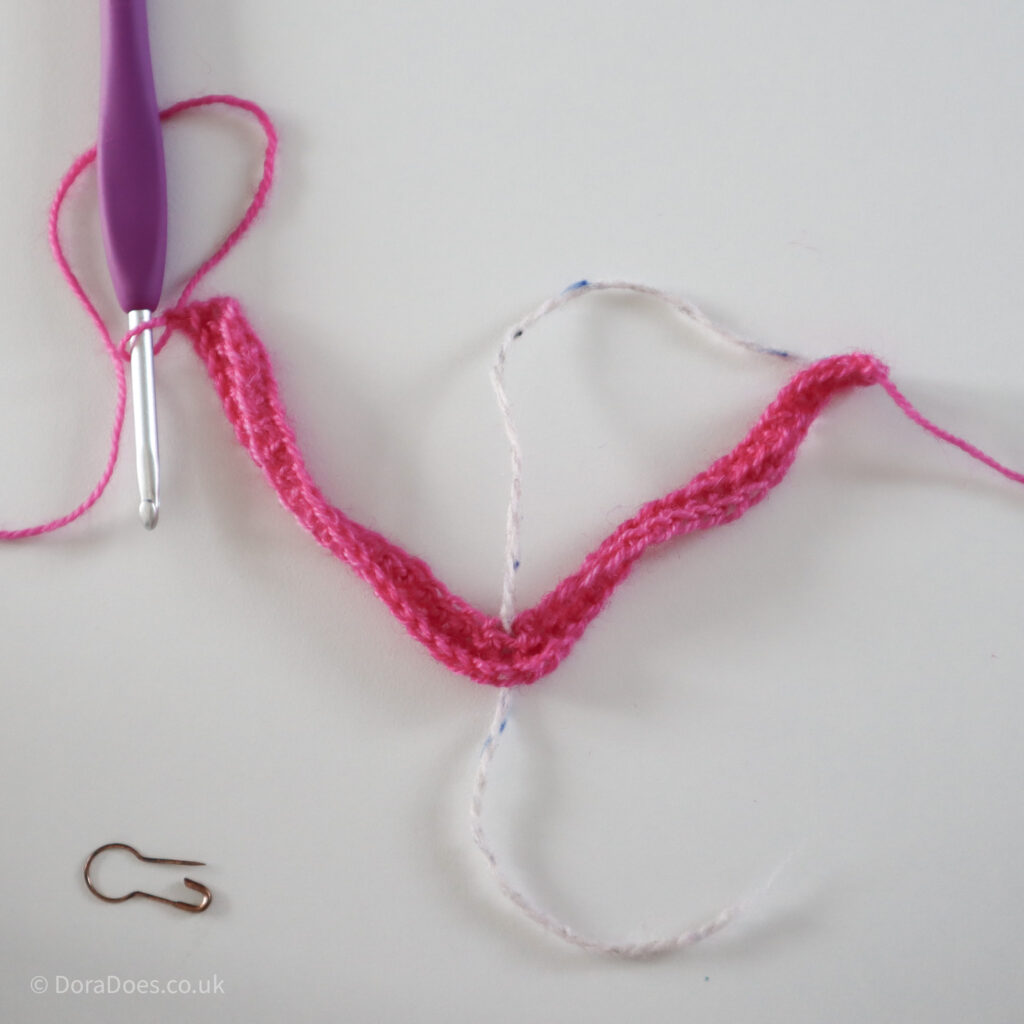
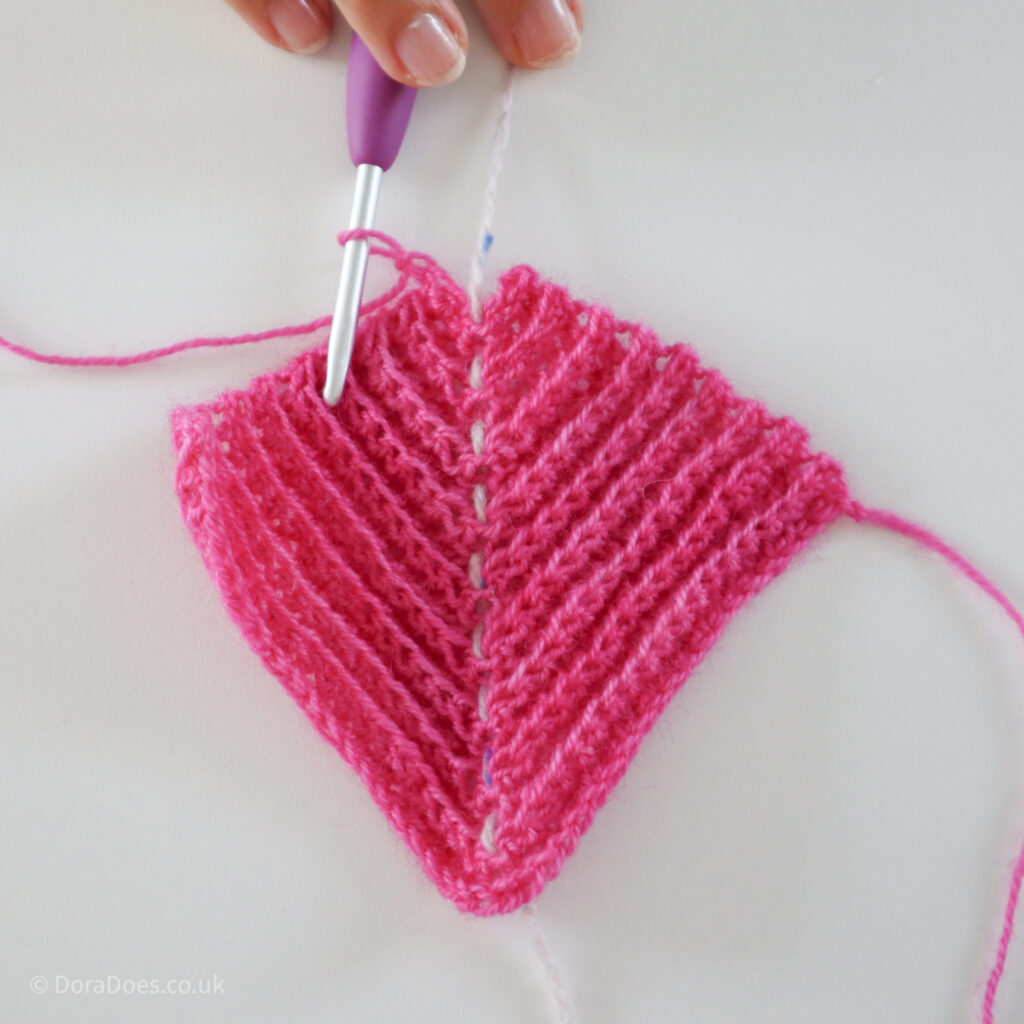
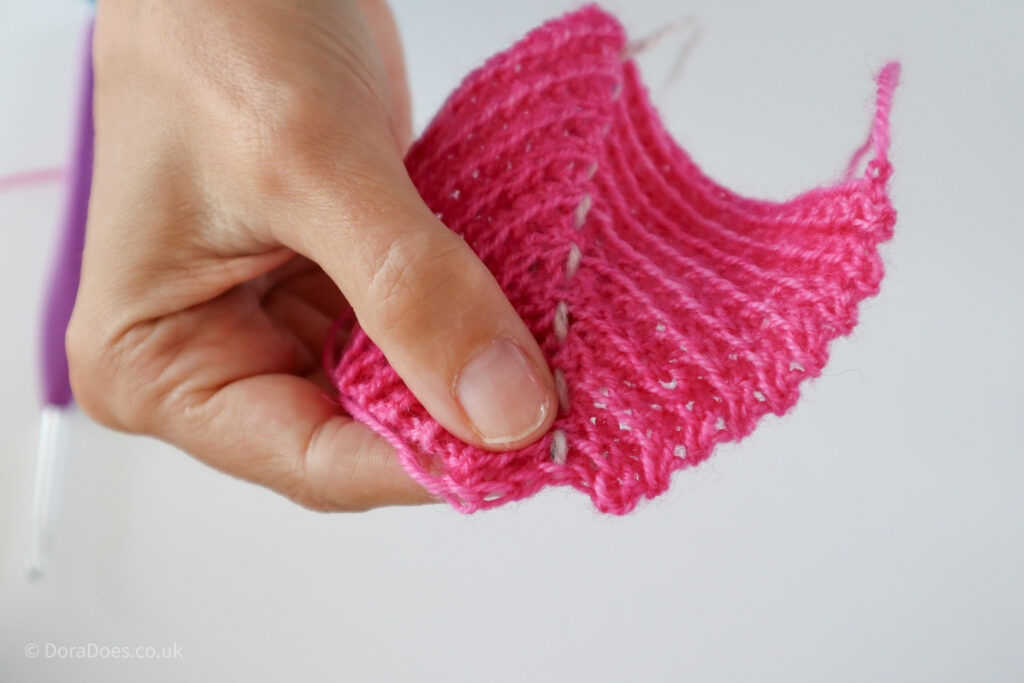
The contrasting white yarn you see running diagonally across the square in the images is what I term a ‘running stitch marker.’ I use this scrap of yarn as a stitch marker, pulled through the decrease stitch each row, without removing it from the previous row.
Using this technique helps track the direction of the mitred join and is an easy visual way to check your seam is in the centre. So long as you keep the yarn loose, you can just easily pull it out when you’re finished.
I use this same process in raglan yoke sweaters. It’s one of my favourite tips for crocheting anything with angled seams.
Is it spelt mitred or mitered?
I had to google this as I was second guessing myself, but it seems that in the UK the spelling is a mitre join or mitred square. US English uses the spelling miter or mitered.
I’ve mainly used the UK spelling in this tutorial.
Types of crochet mitred squares
What crochet stitches do mitred squares use?
Typically, crochet mitred squares are made using single crochet stitches (UK double crochet), as these are square stitches in themselves – so the rows are as high as the stitches are wide.
This creates a nice dense, opaque crochet motif, great for joining or using in modular crochet patterns.
(You can learn more about my favourite opaque stitches here.)
In this tutorial, I have added some variation and used single crochets worked in the back loops as it creates a lovely ribbed texture. The resulting fabric has lots of stretch, making it perfect for cozy crochet accessories or blankets.
Mitred squares can be made with other types of crochet stitches but you will have a different number of rows to stitches so the pattern will be less straightforward. Think about cutting a classic crochet granny square in quarters; each quarter is essentially a mitred square.
Are mitred squares always crocheted outside in?
The crochet mitred square pattern is typically worked from the outside in.
The starting chain is calculated to be long enough to stretch for two sides of the squares. The subsequent rows make decreases in the centre to create the mitred join, pulling the ends in and ‘filling in the gap’ as described above.
This means that each row gets progressively shorter – making mitred squares very satisfying to crochet – in my humble opinion anyway :).
However, mitred squares can also be crocheted from the centre out by making increases instead of decreases. Here you would start with 3 stitches (if working in single crochet) and making a two stitch increase by crocheting 3 stitches in the leading corner on each row.
The advantage of this is that you can just keep crocheting until your square reaches the desired size.
The disadvantage of working centre out is that it makes it much trickier to join crochet the squares together as you go.
I have separate photo and video tutorial explaining how to join mitred squares together as you go.
Crochet Mitred Square Tutorial
Below you will find the written crochet mitred square pattern followed by links to a video tutorial (right and left handed tutorials are offered) and finally a step-by-step photo tutorial.
After the tutorials, I address some other questions you may have about crochet mitred squares. This includes how to change the size, different types of yarns you can use and different ideas for using mitred squares.
I have a separate tutorial showing how you can join multiple crochet mitred squares as you crochet them.
Crochet Pattern Notes
- This tutorial uses standard US crochet terminology (UK equivalents are given in brackets in the abbreviations list where applicable)
- Numbers at the end of a row indicate the number of stitches in that row
- Turning chains do not count as stitches
- Unless otherwise indicated, stitches should be worked in consecutive stitches
- You will work in the back loop only throughout
- The first stitch of each row should be worked into the top of the last stitch from the previous row
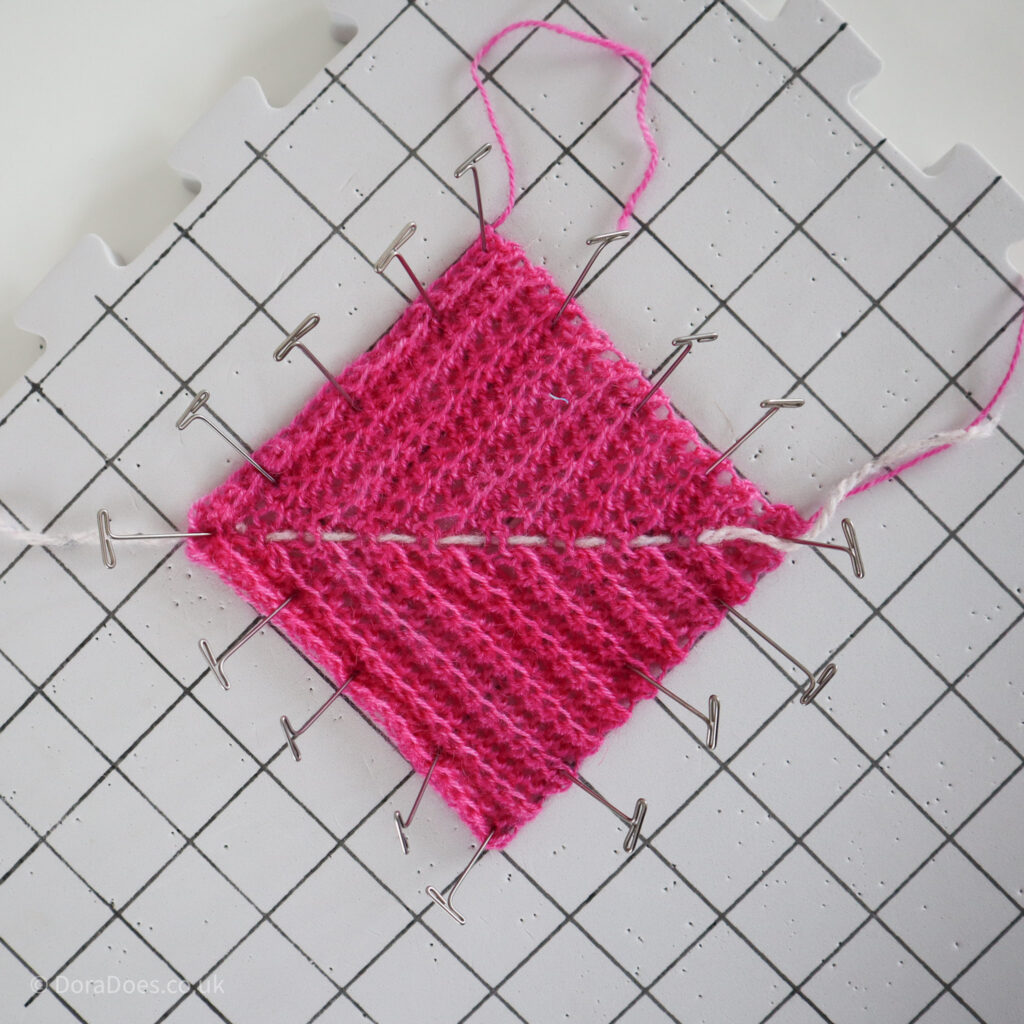
Before we start, I just want to emphasise that you are going to need to block your crochet mitred squares!
For the most part, and especially when using the ribbed version I have chosen, your mitred squares are going to need a little encouragement to be truly square. But it’s a very satisfying encouragement to give 🙂
You can learn all about blocking here.
If you’re joining multiple crochet mitred squares as you go (learn how in this tutorial), then you can wait until you’ve finished your project to block it.
Materials
This tutorial uses a 4mm crochet hook and around 15m of 4ply yarn. You can change your hook to suit the yarn you are working with and your own tension.
I used my clover amour hook.
The item pictured used River Knits Nene 4 ply minis, 100% Bluefaced Leicester Wool, 20g mini skein = 80m/88yds.
Having made many mitered square samples using this pattern, each square weighed approximately 4-4.5g and used about 15-18m/ 16-20yds of yarn. This will vary with different yarn weights and hook sizes.
Crochet Stitches and Abbreviations
(UK Equivalent in Brackets)
- BLO = work into the back loop only
- ch = chain
- PM = place (stitch) marker
- rep = repeat
- RS = right side
- sc = single crochet (UK double crochet)
- sc3tog = single crochet 3 together (UK double crochet 3 together) – see special stitches
- sk = skip (UK miss)
- yo = yarn over
Special Stitches
Single Crochet 3 Together (sc3tog)
Insert hook into first st, yo, pull up a loop (2 loops on hook), insert hook into next st, yo, pull up a loop (3 loops on hook), insert hook into next st, yo, pull up a loop (4 loops in hook) yo, pull through all 4 loops to complete the stitch.
Written Crochet Mitred Square Pattern
Row 1 (RS): Ch42, 1sc in second ch from hook, 1sc in next 18 ch, sk next ch, 1sc in next ch, PM in st just made, sk next ch, 1sc in each ch to end, turn. 39 sts
Row 2: Ch1 (does not count as a st throughout), 1sc BLO in next 18 sts (up to st before marked st), sk next st, 1sc BLO in marked st, move marker up to st just made, sk next st, 1sc BLO in each st to end, turn. 37 sts
Row 3: Ch1, 1sc BLO in next 17 sts (to st before marker), sk next st, 1sc BLO in marked st, move marker up to st just made, sk next st, 1sc BLO in each st to end, turn. 35 sts
Row 4: Ch1, 1sc BLO in each st across to st before marker, sk next st, 1sc BLO in marked st, move marker up to st just made, sk next st, 1sc BLO in each st to end, turn. 33 sts
Rows 5-19: Rep Row 4 until you have 3 sts remaining
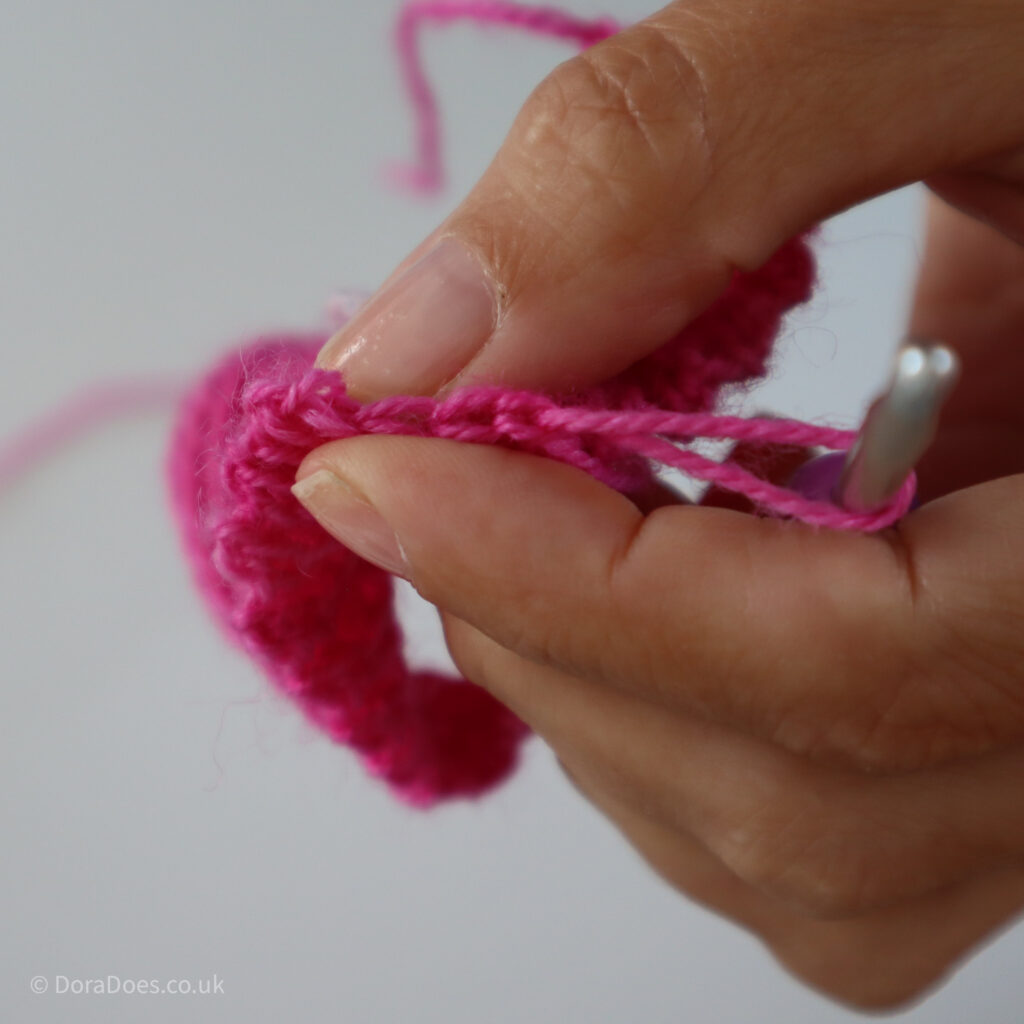
Row 20: Ch1, sc3tog BLO
Ch1 to secure the final stitch (does not count as a st) and fasten off.
Block to shape and weave in ends.
Mitred Square Video tutorial
You can find a right handed video tutorial showing how to crochet a mitred square here:
The left-handed mitred square tutorial can also be seen on YouTube here:
Mitred Square Step-by-Step Photo Tutorial
Row 1 (RS)
Ch42;
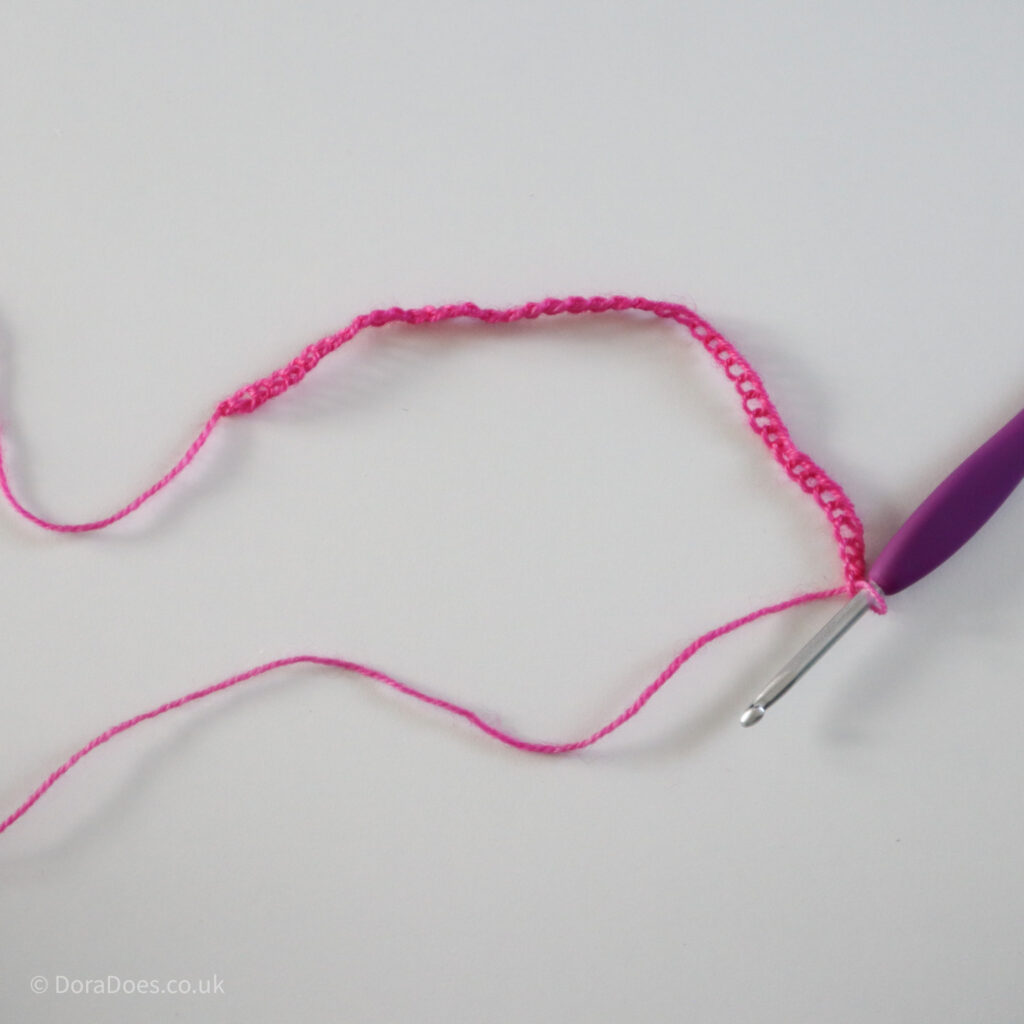
1sc in second ch from hook, 1sc in next 18 ch;
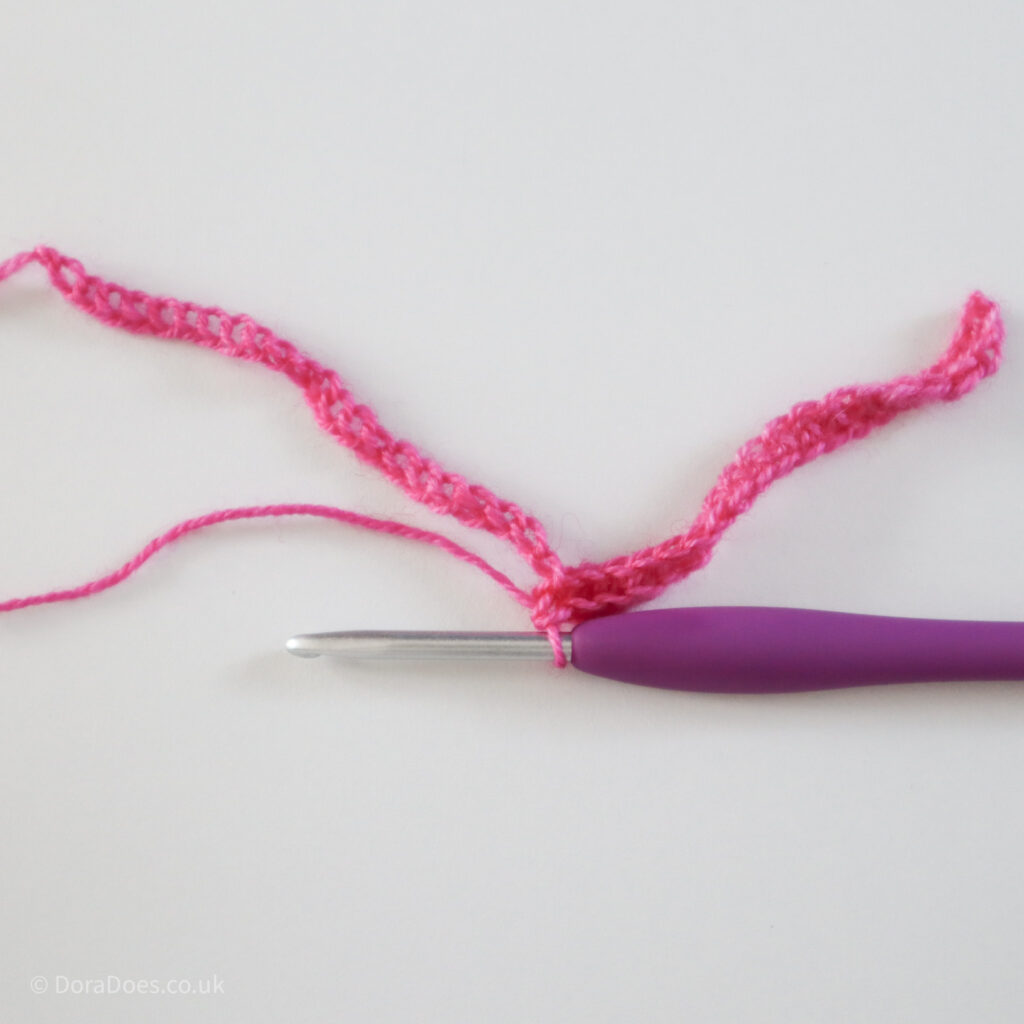
I always work into the ‘back bumps’ of the chain. You can learn more about crocheting into chains in this tutorial.
Sk next ch, 1sc in next ch;
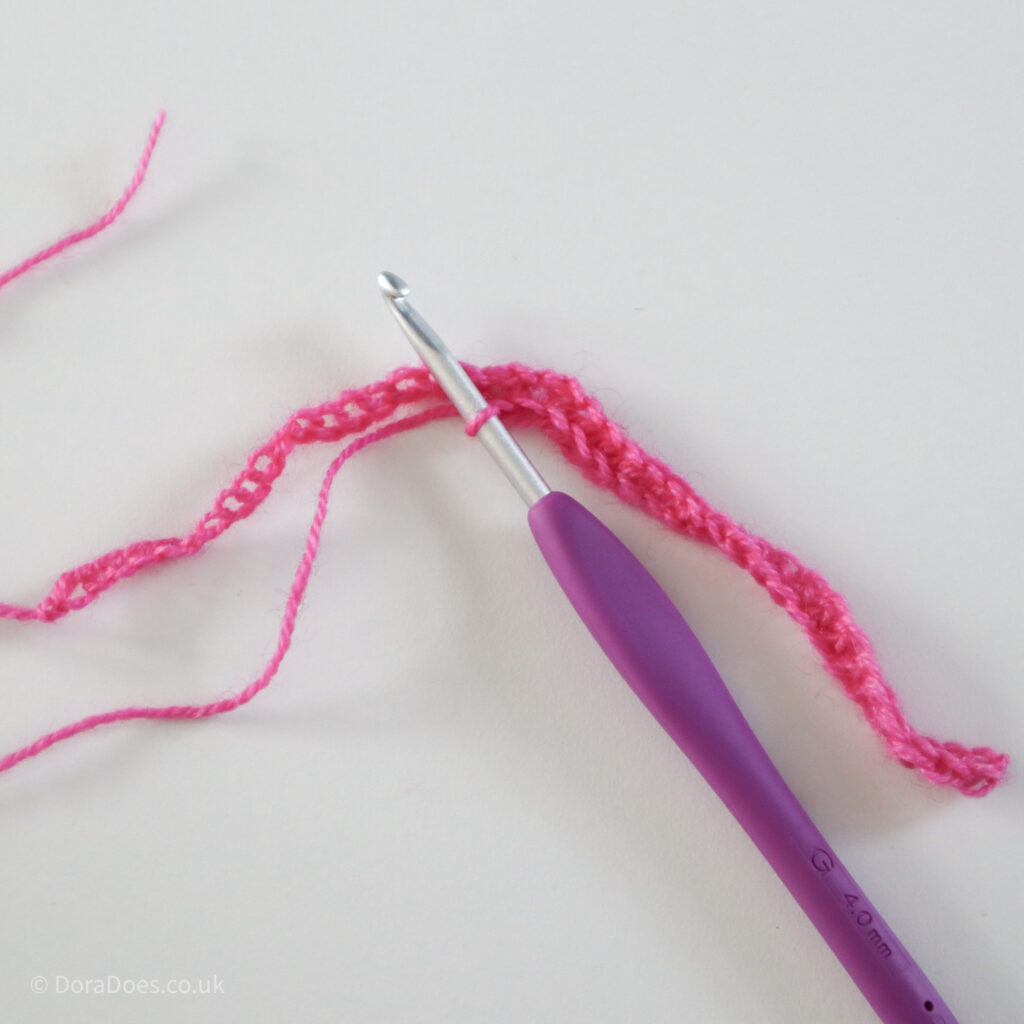
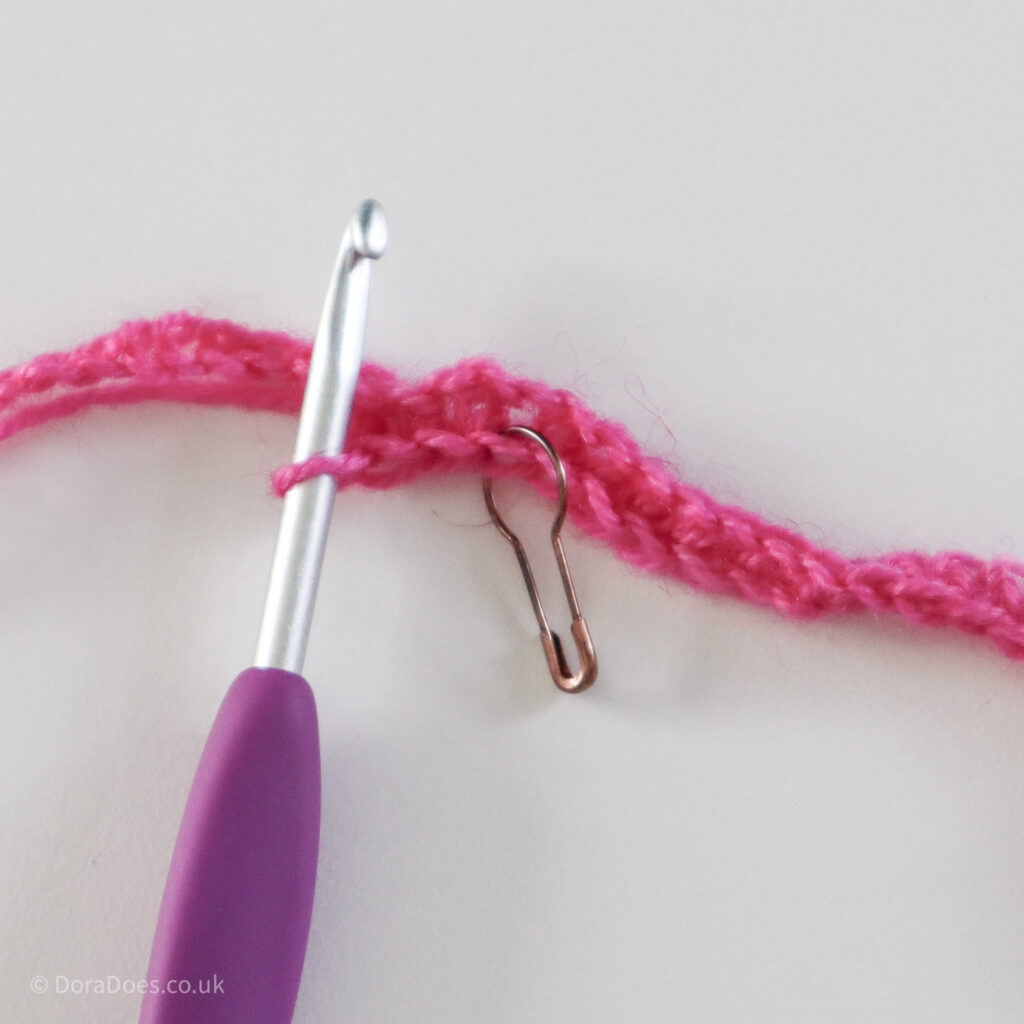
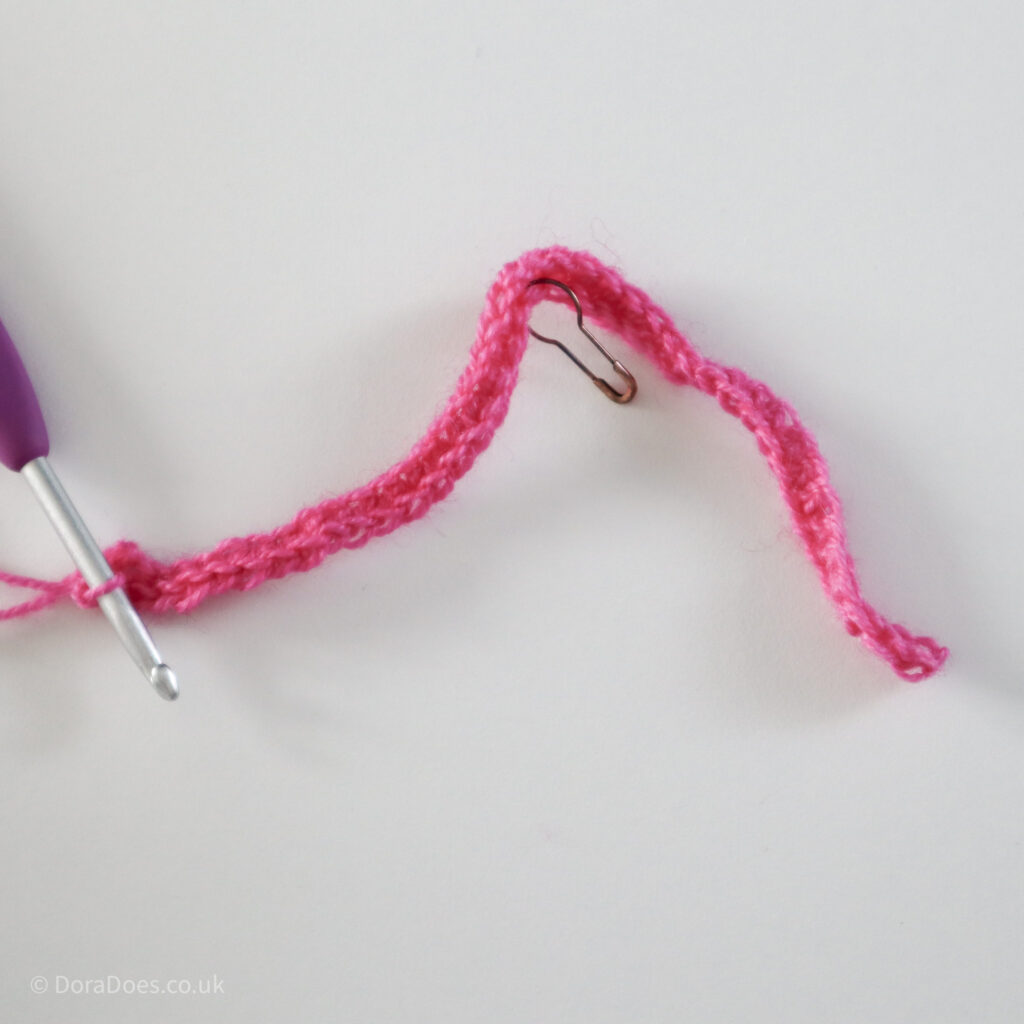
Place your stitch marker in the st you just made, sk next ch, 1sc in each ch to end, turn. 39 sts
Row 2
Ch1 (does not count as a st throughout), 1sc BLO in next 18 sts (up to st before marked st), sk next st, 1sc BLO in marked st, move marker up to st just made, sk next st, 1sc BLO in each st to end, turn. 37 sts
This is where I joined my running stitch marker, instead of removing and replacing a marker each row.
Row 3
Ch1, 1sc BLO in next 17 sts (to st before marker), sk next st, 1sc BLO in marked st, move marker up to st just made, sk next st, 1sc BLO in each st to end, turn. 35 sts
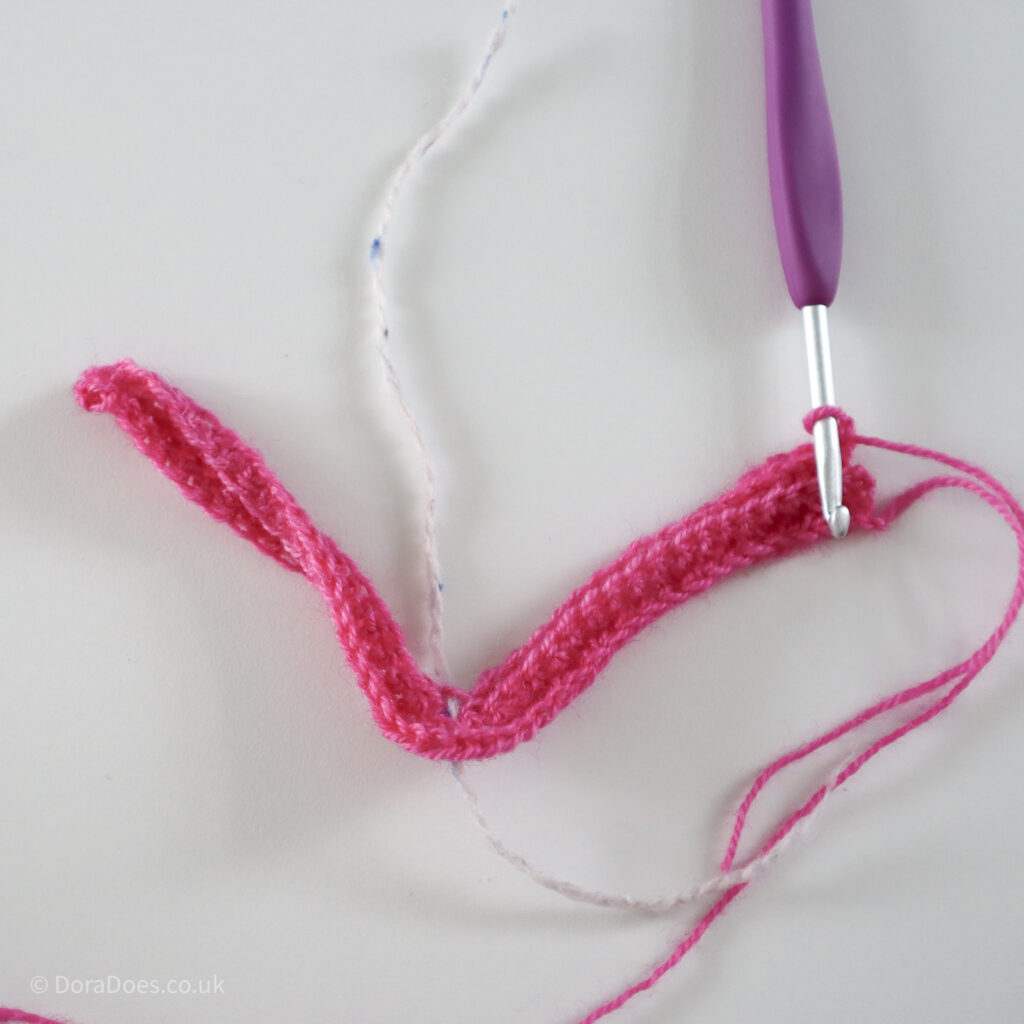
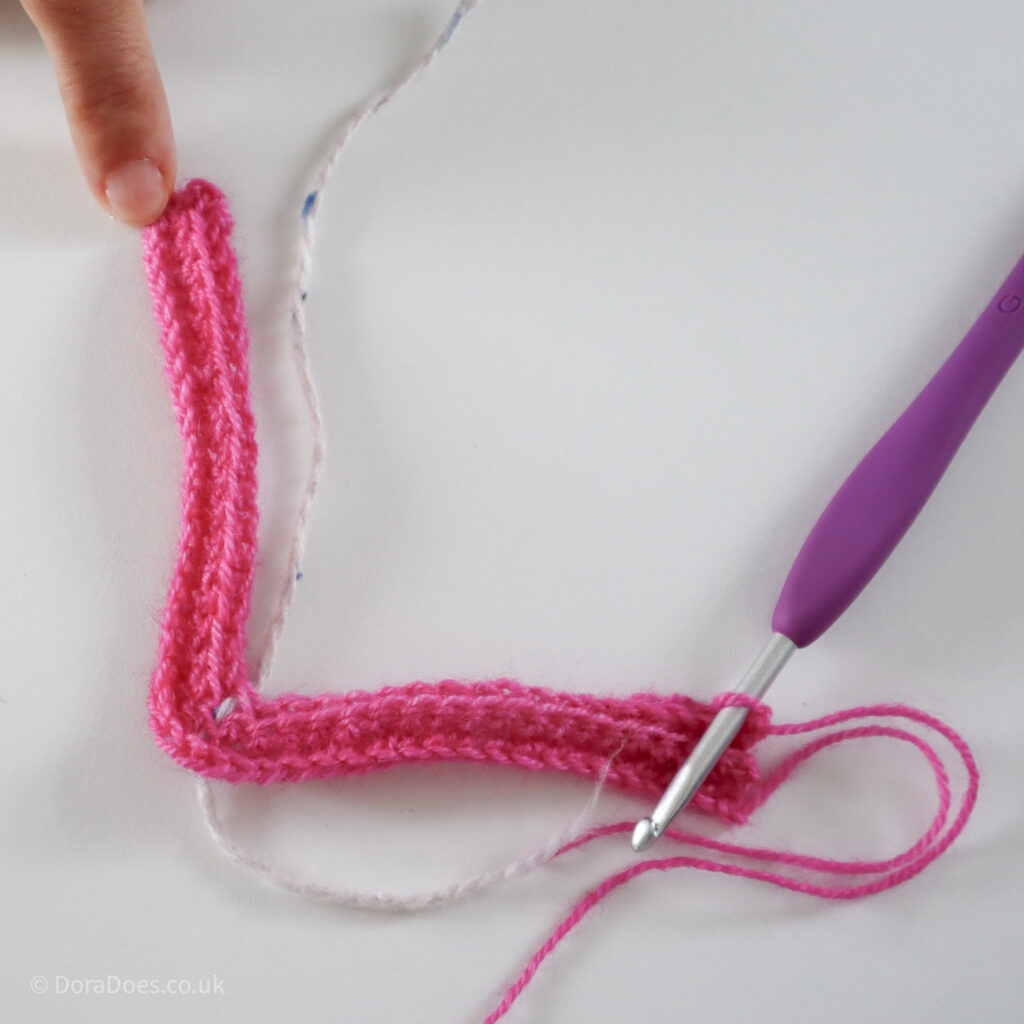
You are going to get some twisting in the first few rows. This will straighten out the more rows you crochet and blocking will help with the final shape.
Row 4
Ch1, 1sc BLO in each st across to st before marker, sk next st, 1sc BLO in marked st, move marker up to st just made, sk next st, 1sc BLO in each st to end, turn. 33 sts
Rows 5-19
Rep Row 4 until you have 3 sts remaining
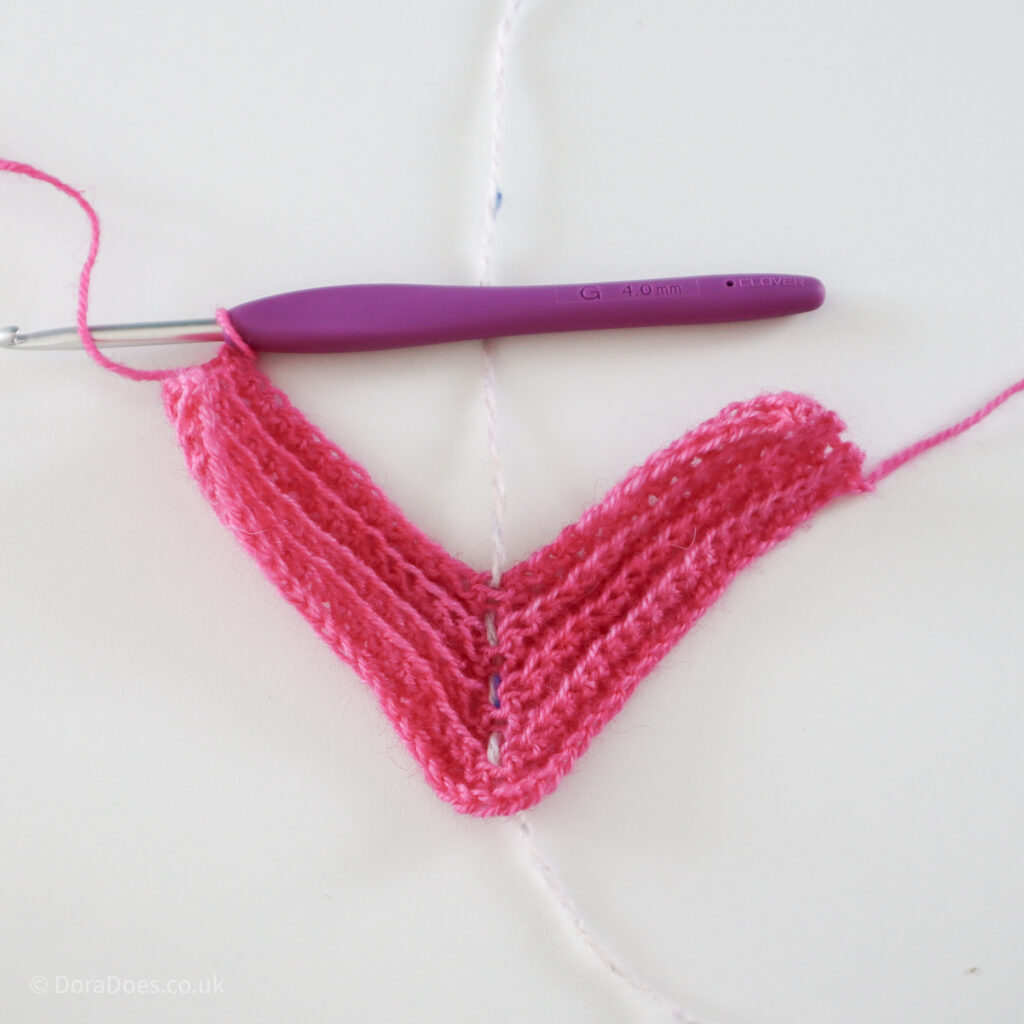
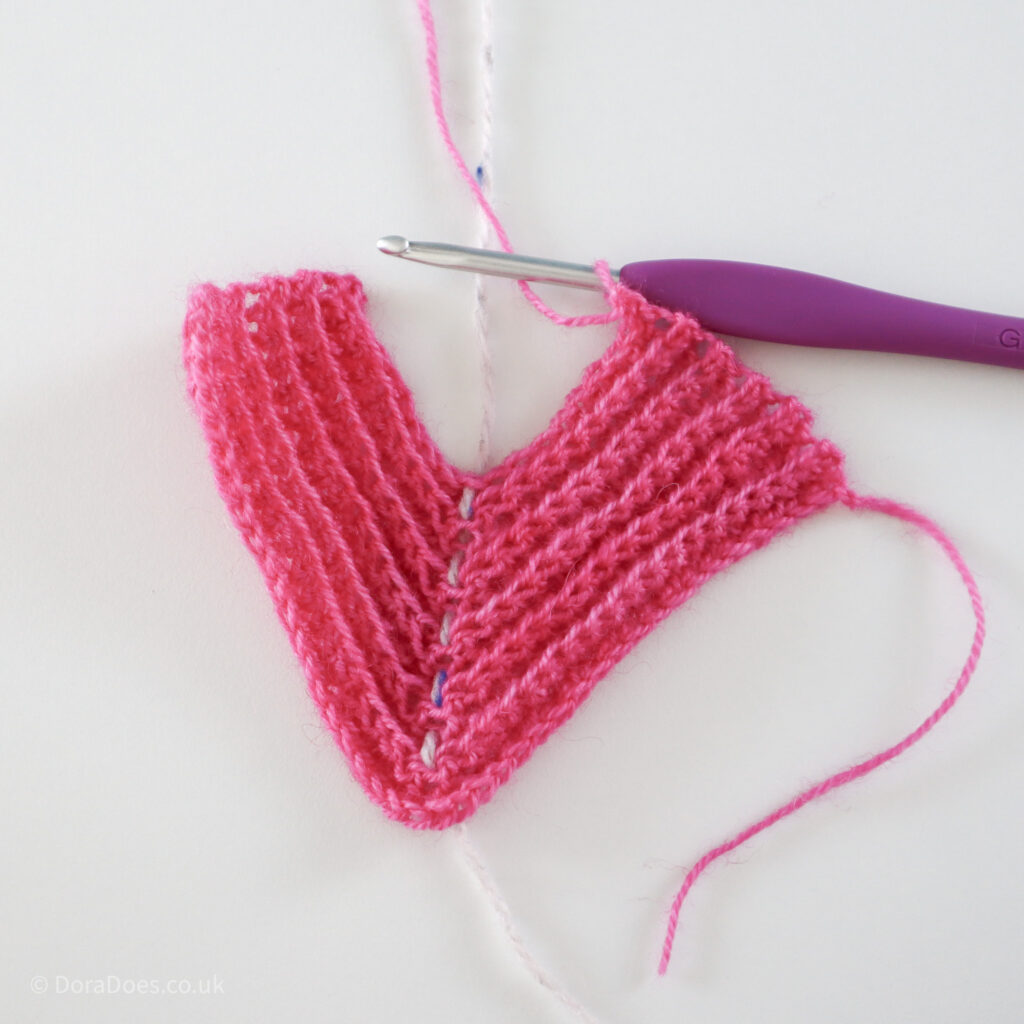
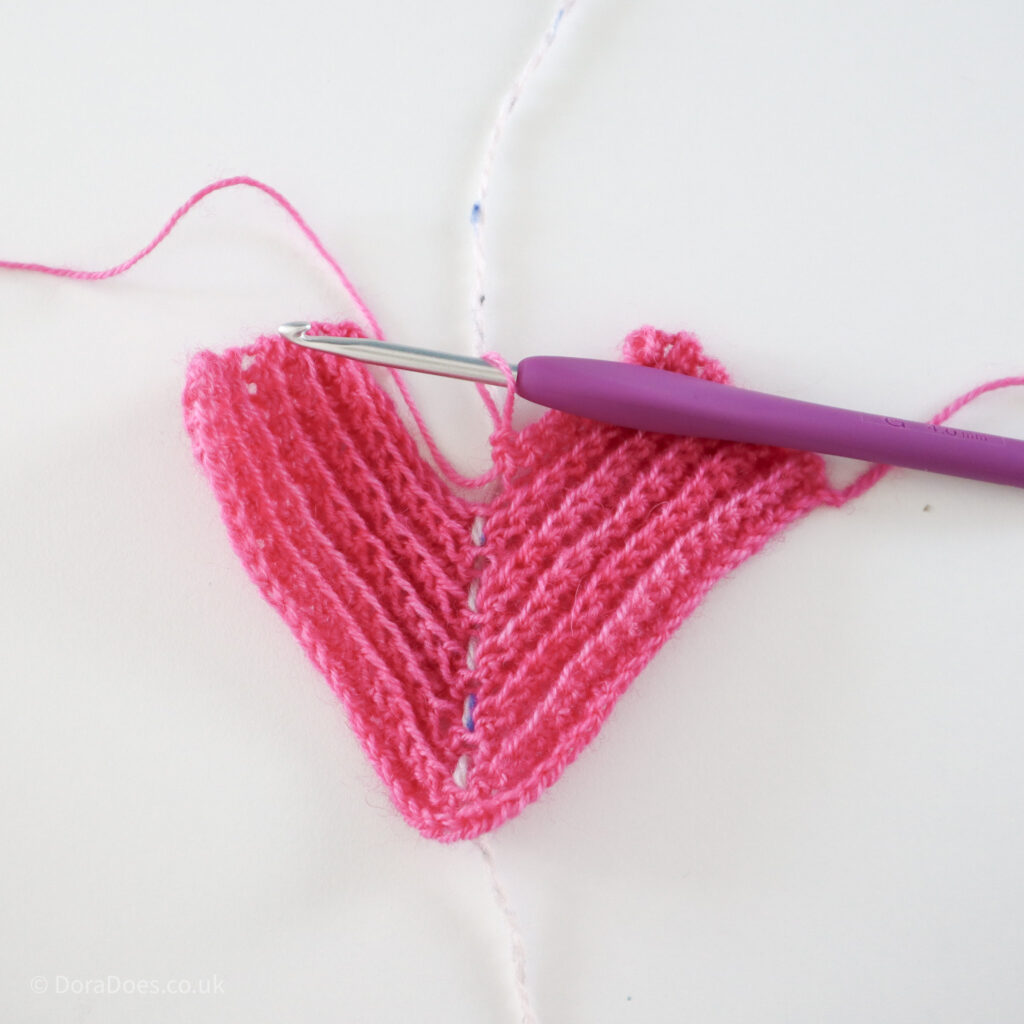

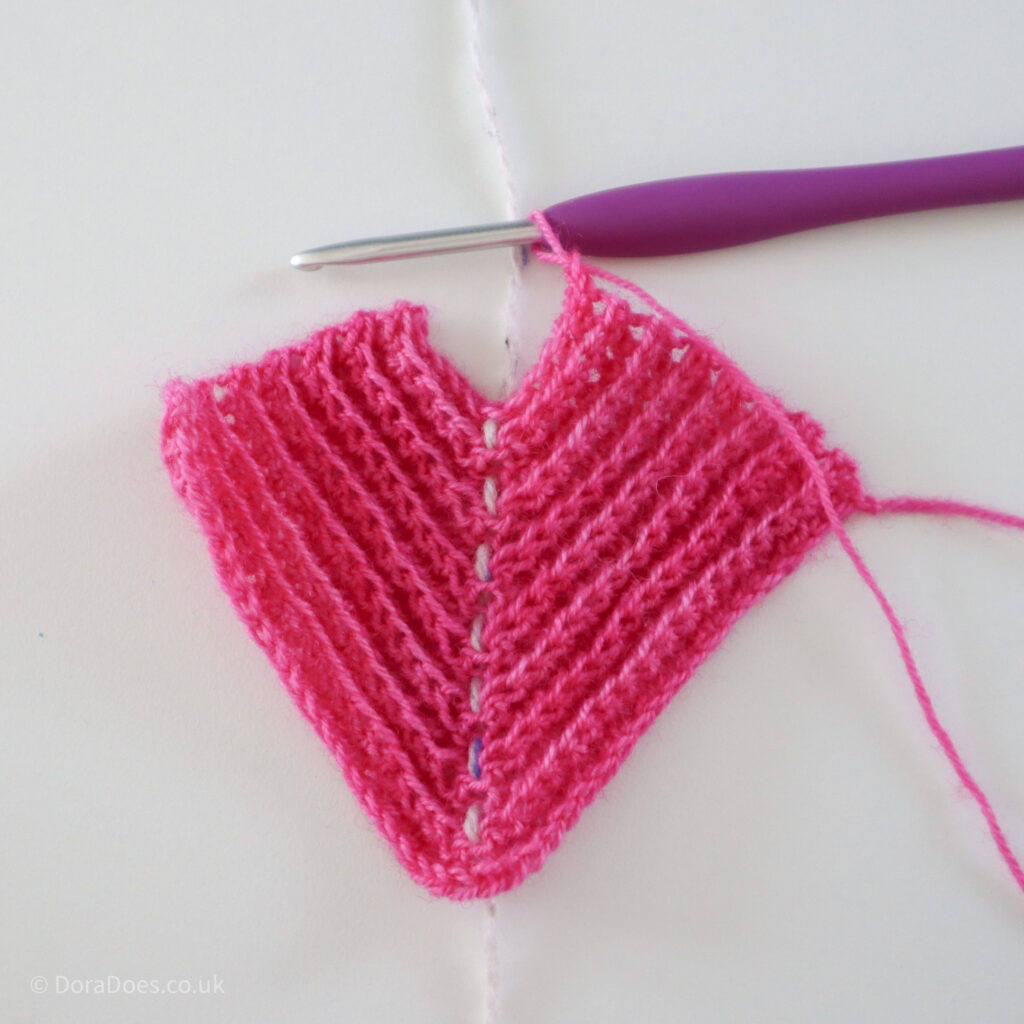
Row 20
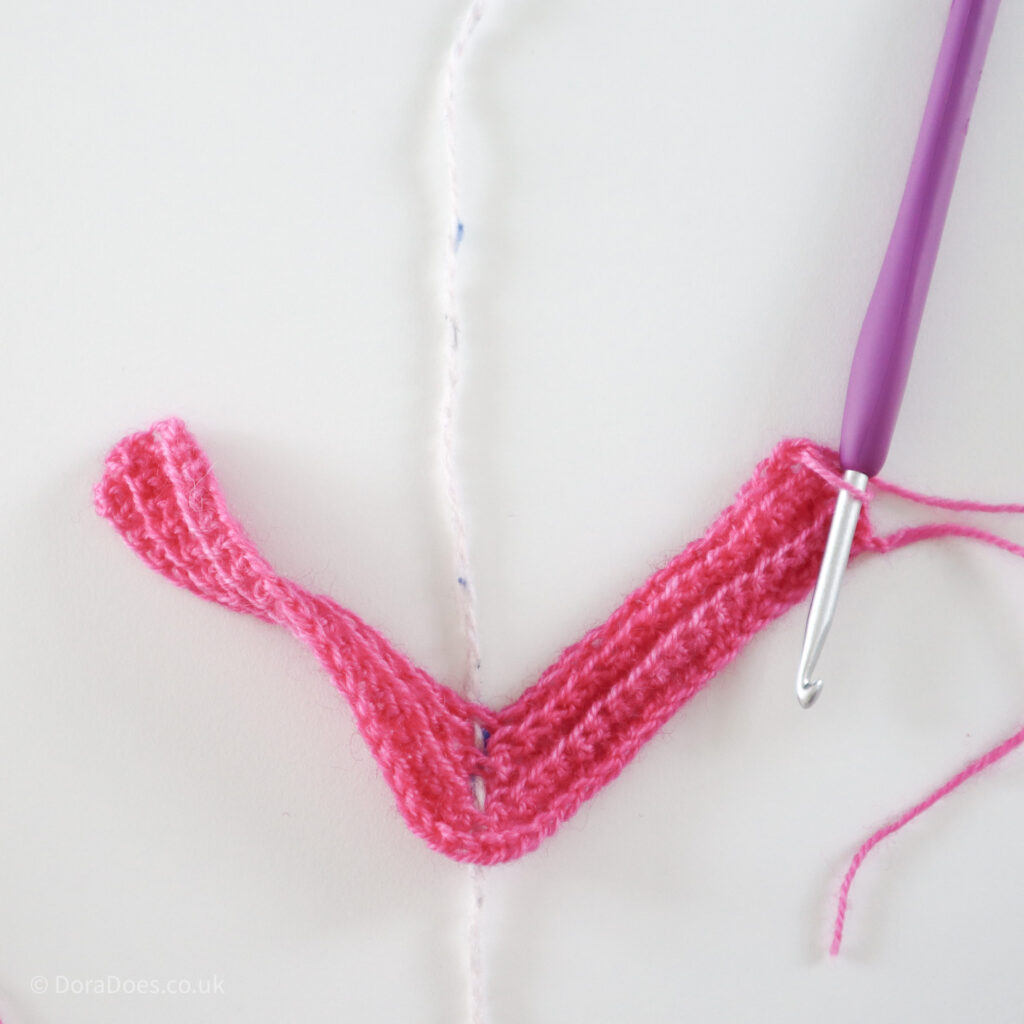
Ch1, sc3tog in the BLO

Ch1 to secure the final stitch (does not count as a st)

Fasten off.


Block to shape and weave in ends.

Tips for Crocheting Mitred Squares
Below is some more information about mitered squares which you might find helpful when crocheting your own project using them.
What yarn do you need to crochet a mitred square?
Mitred squares can be crocheted using any yarn and a suitable hook. I like to go up a hook size compared to that recommended for the yarn. However, your own tension will dictate whether this works for you.
Using different yarn weights and fibres will give a different look to the finished square.
Different fibres also have differing amounts of stretch and respond to blocking differently. As wool is generally responsive to blocking, it’s a great fibre to crochet squares with.
Changing the size of mitred square
You can crochet mitred squares of any size.
The key to the size of a mitred square is the length of the starting chain. It should be long enough to cover two sizes of the square.
For the version described above, I start with an even number of chains; 42.
One of those chains counts as a turning chain (and not a stitch). This leaves you with 41 stitches on the outside of the square. That’s 20 stitches each side and one for the corner. On Row 1 you only crochet 19 single crochet as the 20th stitch becomes part of the decrease.
If you want to work out how many chains to start with and know how many stitches you want on each side of your square (which will be the same number of rows you work), then it is fairly simple to calculate it.
Multiply the number of stitches along one side by two and then add two to finish.
So if you wanted 30 stitches on each side of your square, that would be calculated as follows:
30 x 2 = 60
60 + 2 = 62
So you would chain 62, start in the second chain from hook and crochet 29 single crochet, skip the 31st chain, single crochet in the 32nd (which is actually the 31st stitch because of that turning chain), skip a stitch and then make 29 single crochet along the other side.
To change the size of mitered squares that are crocheted centre-out, you can keep working until it reaches your chosen size
The size will also depend on your gauge, yarn weight and hook size.
Does it matter how you decrease?
In this tutorial, I have made my two stitch decrease by missing a stitch either side of the corner stitch.
When working on this tutorial and the ‘Mitred Minis’ pattern, I tried various ways of decreasing in the corner.
I chose this method because it results in a nice clear mitred join and has minimal bulk. This helps the squares have lots of drape when joined and blocked.
Other ways you might like to decrease at the corners could be to work a single crochet 3 together, or work a split single crochet 2 together (missing the centre corner stitch).
Both of these are valid and I’m sure there are other ways too. So long as it produces the result you’re looking for, there are no hard and fast rules.
What crochet projects use mitred squares?
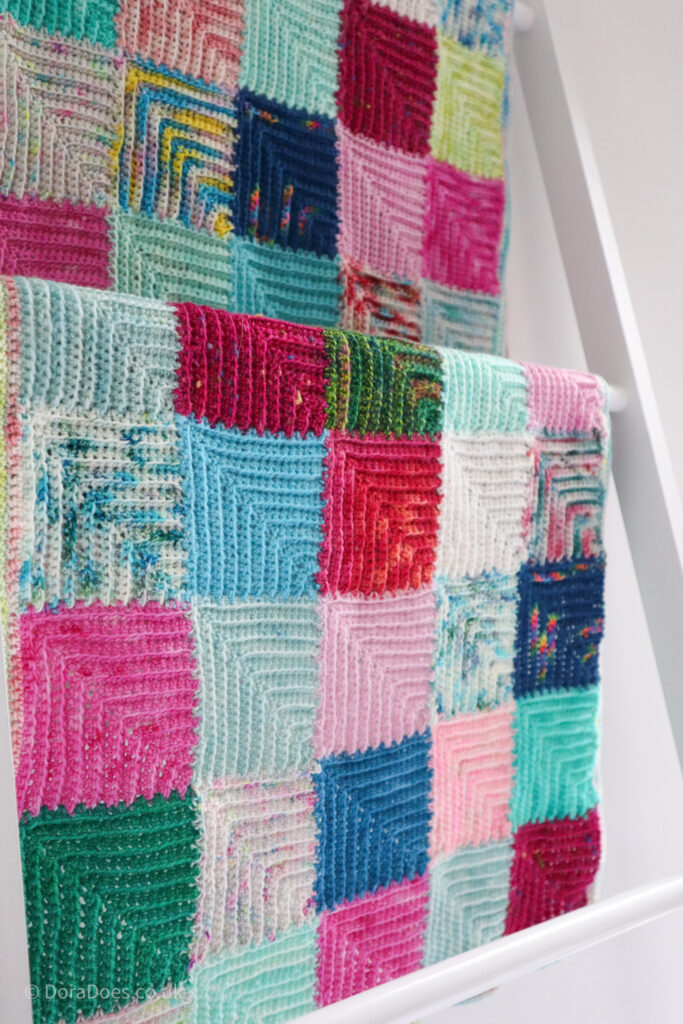
I have designed the Mitred Minis crochet pattern which offers 4 crochet projects to use your mitred squares with; a cowl, a scarf, a wrap and a small blanket.
This pattern is designed to work with mini skeins and yarn advents but is also a great pattern for using up leftover yarn. Each square only takes a few grams of yarn so it’s a super versatile crochet motif.
From a design perspective, mitred squares are incredibly flexible and can be used in any crochet project which uses square motifs.
Any crochet project that uses a granny square can be worked with mitred squares. That will give you an idea of the numerous options!
If you have any further questions about this technique, be sure to drop them in the comments below.
And if you’re ready to start your project, head over the the joining tutorial!
Happy Hooking
Dx
Copyright Dora Does Limited, Registered in England, Company Number 13992263. This pattern is for personal use only and may not be shared or reproduced in written, photo, video or any other form without prior written consent. All rights reserved. Terms of service.