How to join crochet mitered squares as you go: Photo and video tutorial
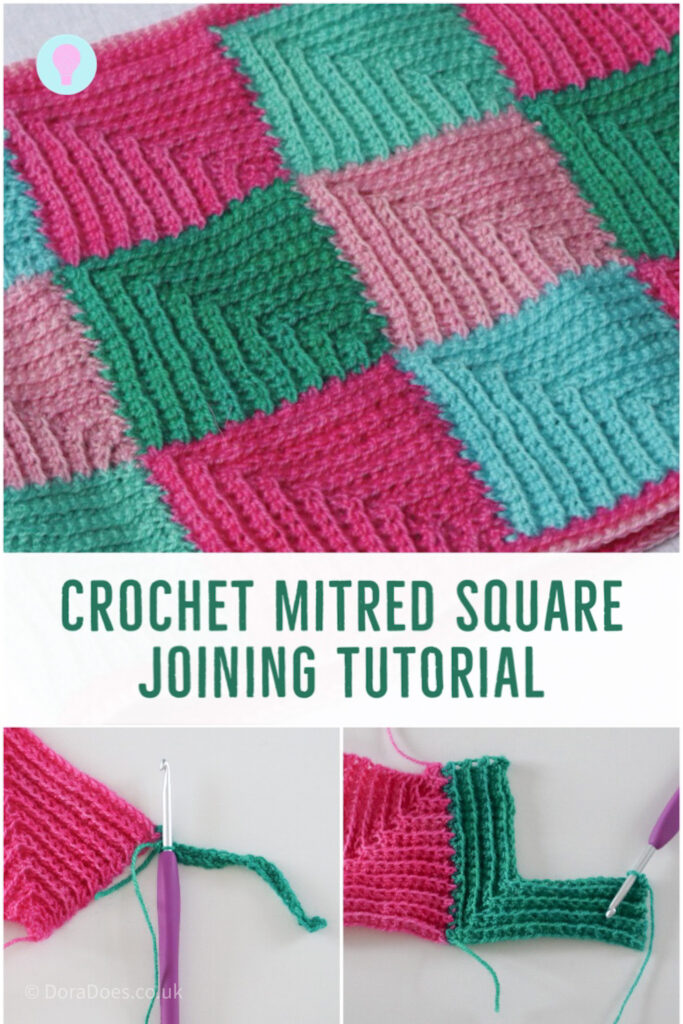
In this tutorial, I will teach you how to join crochet mitered squares together as you go.
This technique can be used to create a huge range of crochet projects from winter accessories like scarves, to homewears such as blankets or pillows or garments.
Pretty much any crochet pattern that uses square motifs can be created with joined mitred squares.

This post contains affiliate links. This means if you click a link to a product and go on to make a purchase, I receive a small percentage of the sale at no extra cost to you. You can read my full affiliate disclosure here.
You can find a separate tutorial for a basic mitred square here. This tutorial focuses on the joining technique and includes a step by step photo guide as well as both right and left handed video tutorials.
Joining Tutorial Notes
I use US terms throughout this tutorial and have worked with 4mm crochet hook and around 15m of 4ply yarn. You can change your hook to suit the yarn you are working with and your own tension.
I used my clover amour hook.
The yarn used for this tutorial was River Knits Nene 4 ply minis, 100% Bluefaced Leicester Wool, 20g mini skein = 80m/88yds.
Stitch abbreviations
US terms given. (UK Equivalent in Brackets)
- BLO = back loop only
- ch = chain
- PM = place marker
- rep = repeat
- RS = right side
- sc = single crochet (UK double crochet)
- sc3tog = single crochet 3 together (UK double crochet 3 together) – see special stitches
- sk = skip (UK miss)
- yo = yarn over
Special Stitches
Single Crochet 3 Together (sc3tog)
Insert hook into first st, yo, pull up a loop (2 loops on hook), insert hook into next st, yo, pull up a loop (3 loops on hook), insert hook into next st, yo, pull up a loop (4 loops in hook) yo, pull through 4 loops to complete the stitch.
How to join crochet mitred squares
The video tutorials demonstrating how to join mitered squares can be watched below. These are followed by a written and photo tutorial which includes a schematic outlining the joining process. You may find it useful to watch the video in conjunction with the written instructions.
Video Tutorial
You can find the right handed video tutorial here:
And a left handed version here:
Written and photo tutorial
Begin with the ‘first square’ – Square A
You will start by working a single crochet back loop mitered square, which will be known as the ‘first square’ or Square A.
The first square begins with a chain of 42 and has 20 stitches / rows along each side. The tutorial is written using this size square, but you can use the same principle with any size or style of mitered square.
Below are the basic written instructions for Square A, You can find a full written, photo and video tutorial here.
Written instructions for square A
Row 1 (RS): Ch42, 1sc in second ch from hook, 1sc in next 18 ch, sk next ch, 1sc in next ch, PM in st just made, sk next ch, 1sc in each ch to end, turn. 39 sts
Row 2: Ch1 (does not count as a st throughout), 1sc BLO in next 18 sts (up to st before marked st), sk next st, 1sc BLO in marked st, move marker up to st just made, sk next st, 1sc BLO in each st to end, turn. 37 sts
Row 3: Ch1, 1sc BLO in next 17 sts (to st before marker), sk next st, 1sc BLO in marked st, move marker up to st just made, sk next st, 1sc BLO in each st to end, turn. 35 sts
Row 4: Ch1, 1sc BLO in each st across to st before marker, sk next st, 1sc BLO in marked st, move marker up to st just made, sk next st, 1sc BLO in each st to end, turn. 33 sts
Rows 5-19: Rep Row 4 until you have 3 sts remaining
Row 20: Ch1, sc3tog BLO
Ch1 to secure the final stitch (does not count as a st) and fasten off.
Block to shape and weave in ends.

Decide on your layout
Decide how you want to join your squares.
In this example, I start at the sop right and work backwards and downwards (see schematic below).
The key to being consistent using this method is to ensure you’re always joining the new square to the row-ends of the previous one(s).
The two types of join
There are two ways to join your new mitred square as you work it.
The first is to join it to one side of another square. This may be a square above or one to the side. This is seen as square B in the schematic below.
The second way is where you join the new square to the sides of two previous squares – one above and one to the side. This is seen as square C in the schematic.
The joining diagram below will help you visualise this process, showing you where to start and where to join each new square:
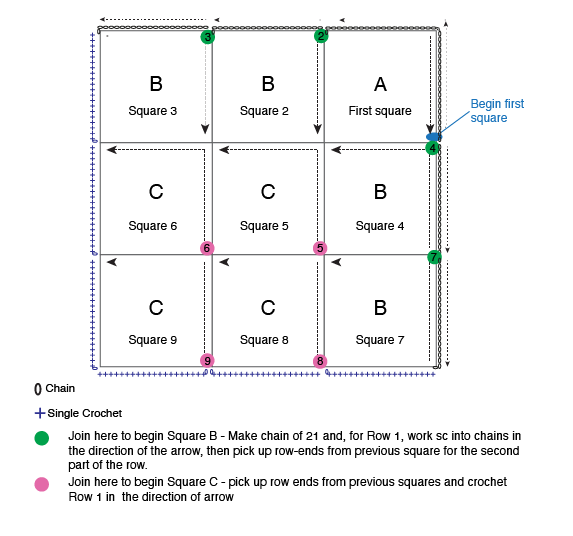
Note that this diagram includes 9 squares but the tutorial only demonstrates with a total of four squares to show you the basic principle.
Join the second square (Square B)
To begin the second square, you will join your yarn to the corner of the previous square (as demonstrated in the joining diagram);
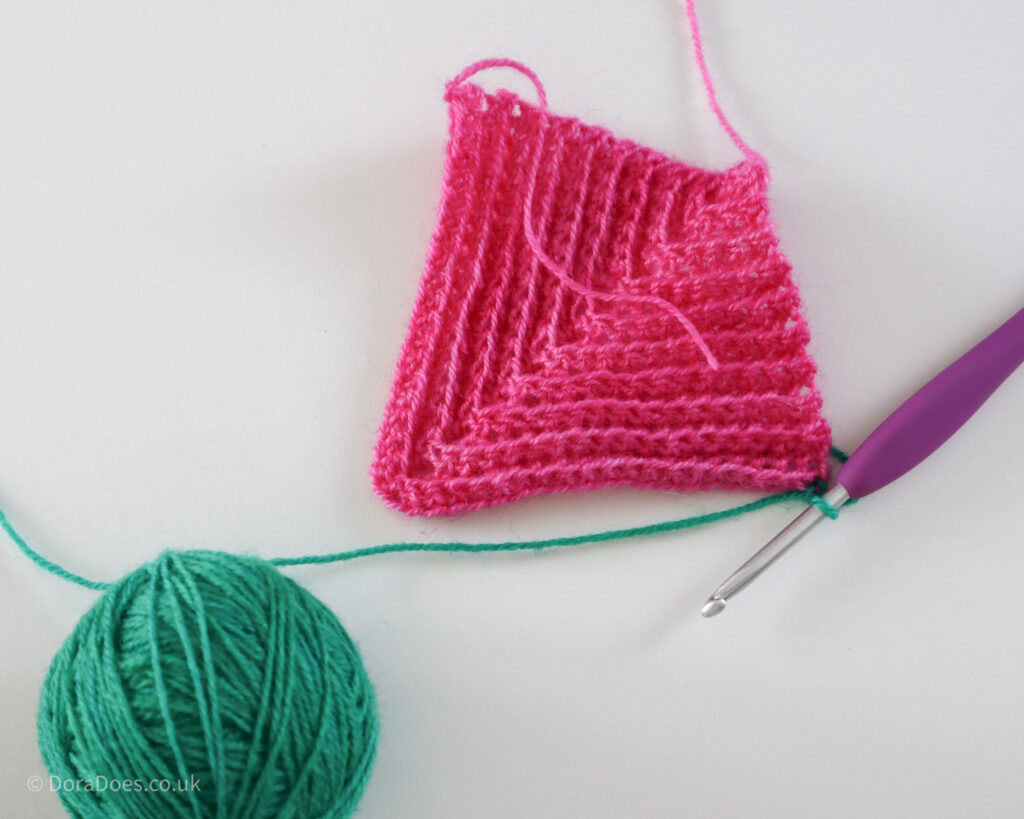
Row 1 (RS):
Ch21 (where 1 stitch is a turning chain which does not count as a stitch).
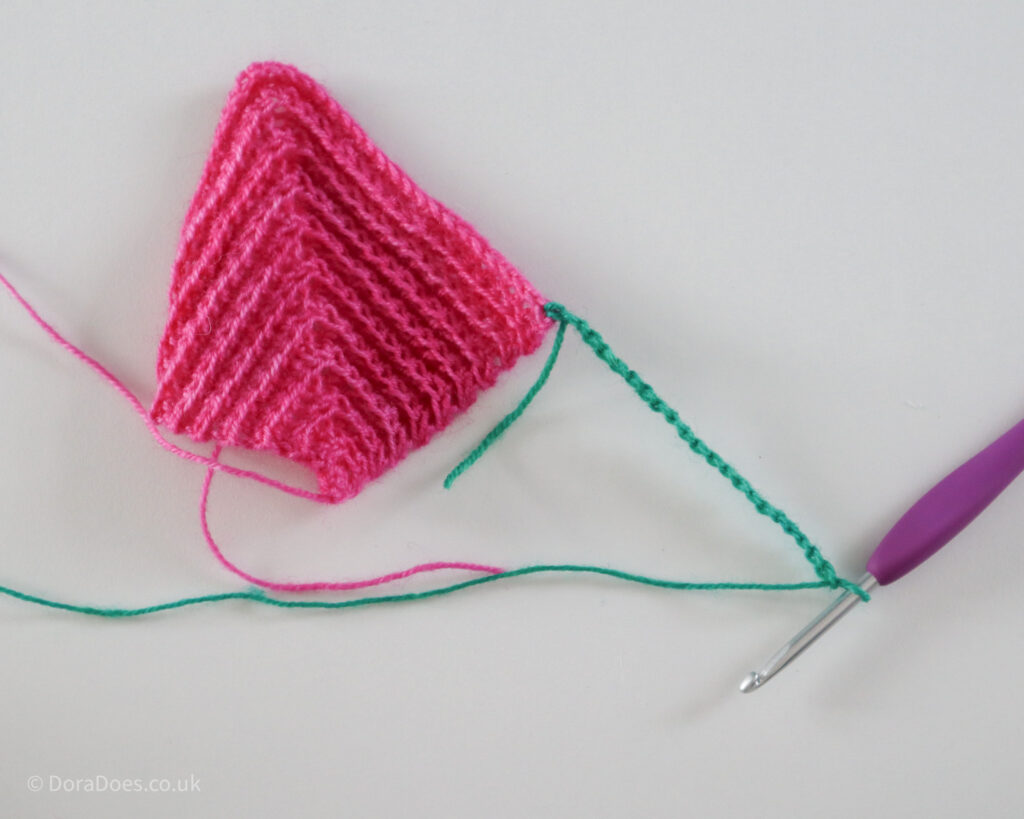
1sc in second ch from hook and next 18 ch;
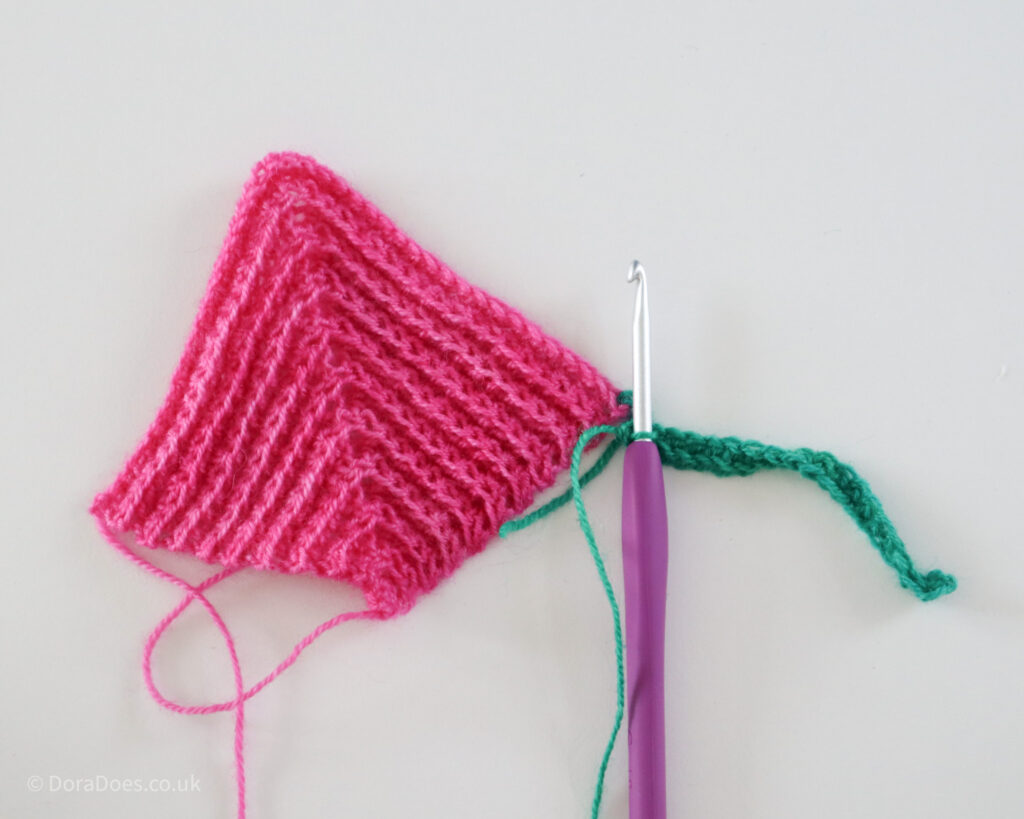
sk last ch, 1sc into corner where yarn was joined, sk first row-end on the previous square, 1sc into next 19 row ends, turn. 39 sts;
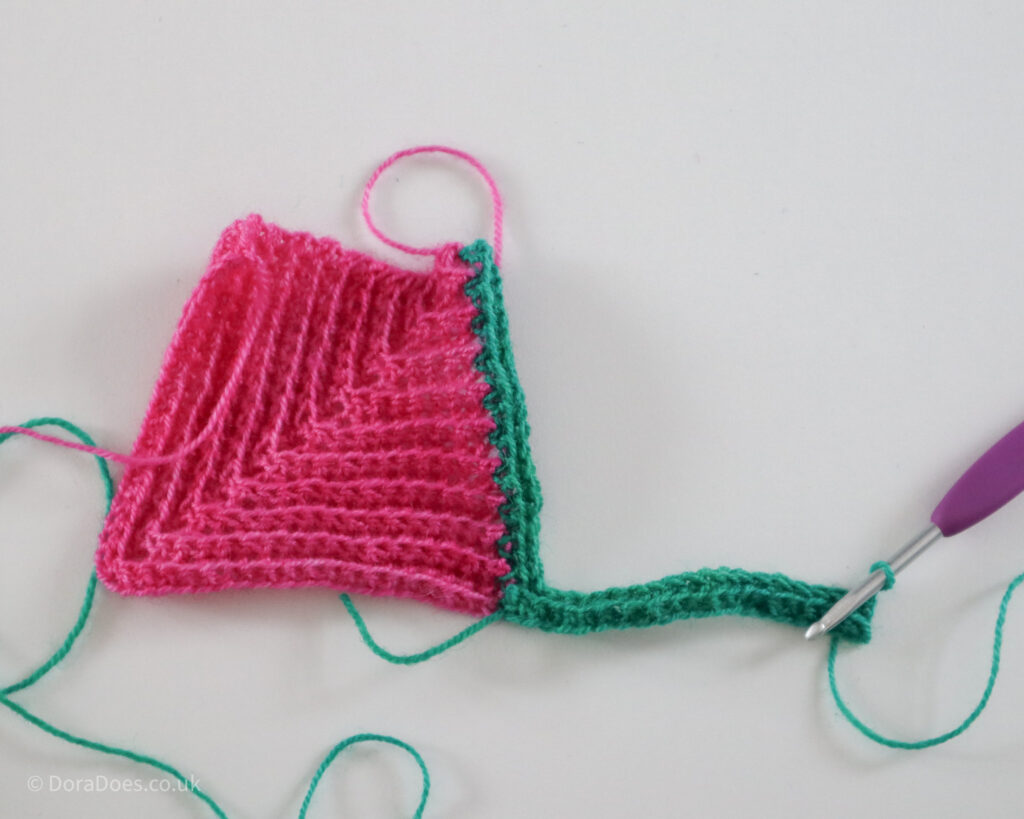
When working into the row ends, you can work one stitch in each row end because single crochets are square. It can create a nice neat join as seen below.
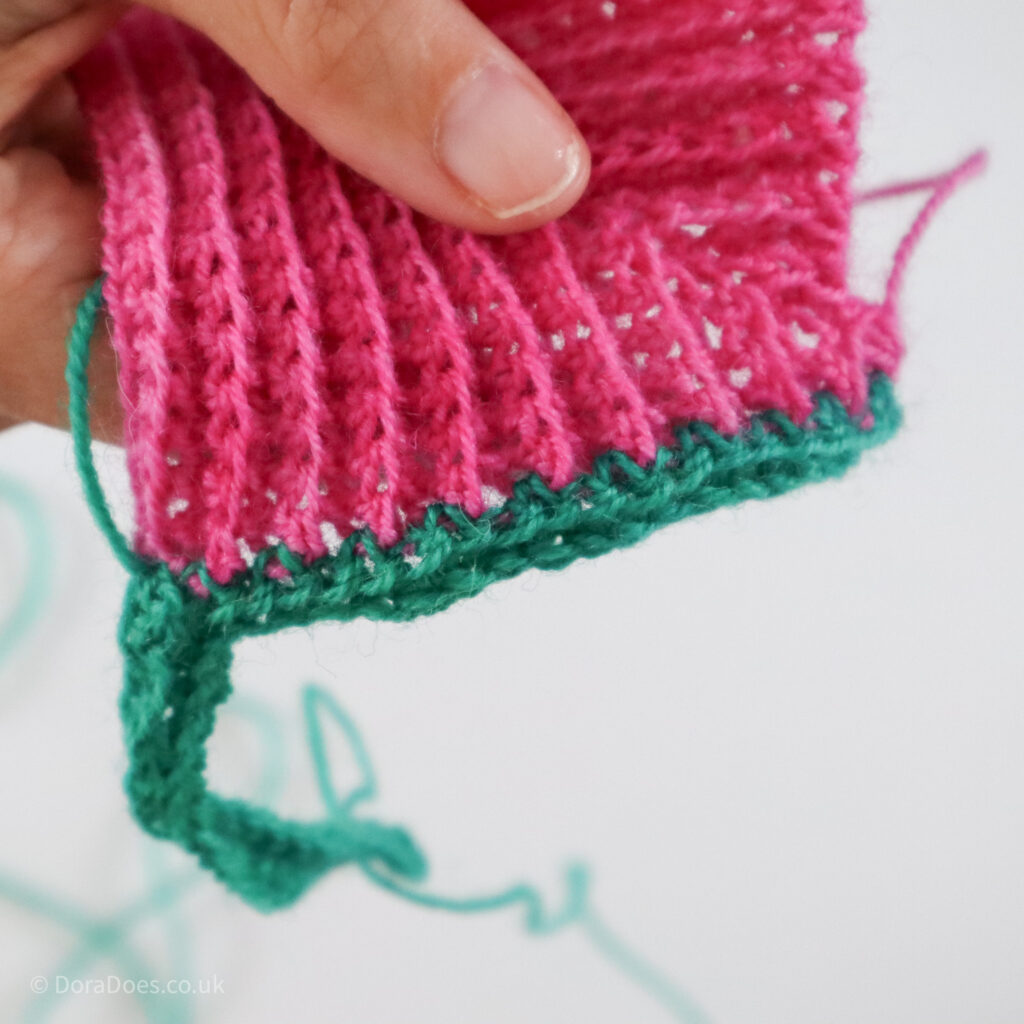
Rows 2-20: As Square A
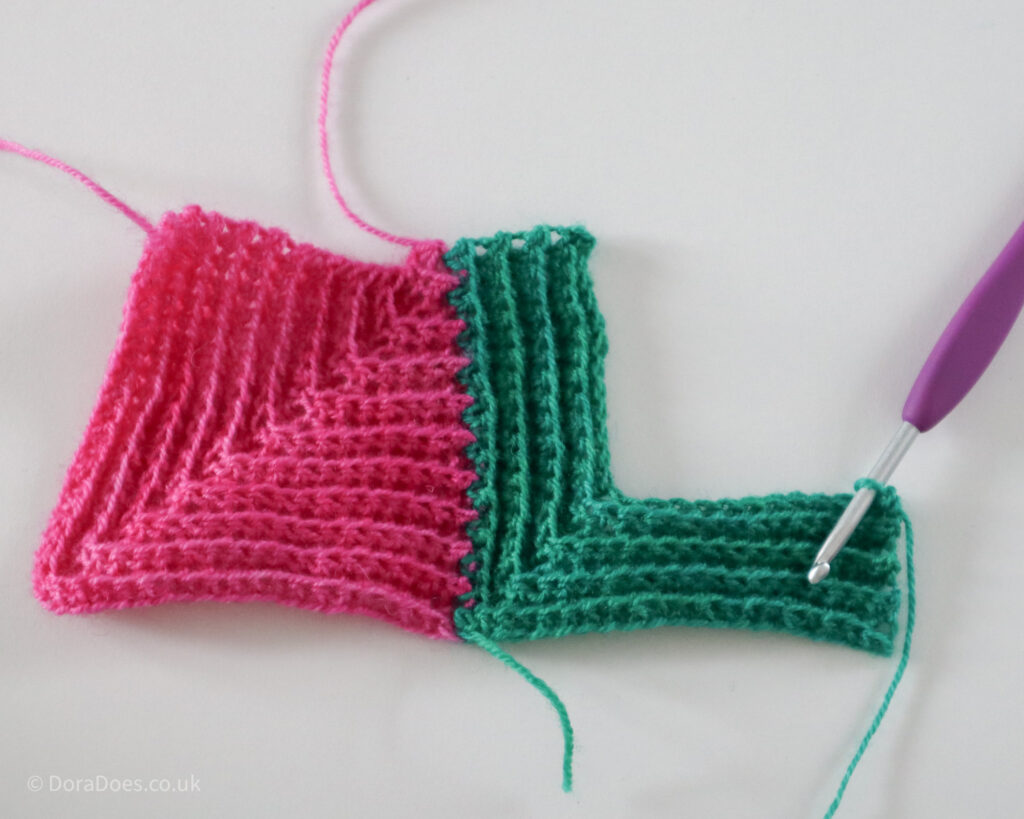
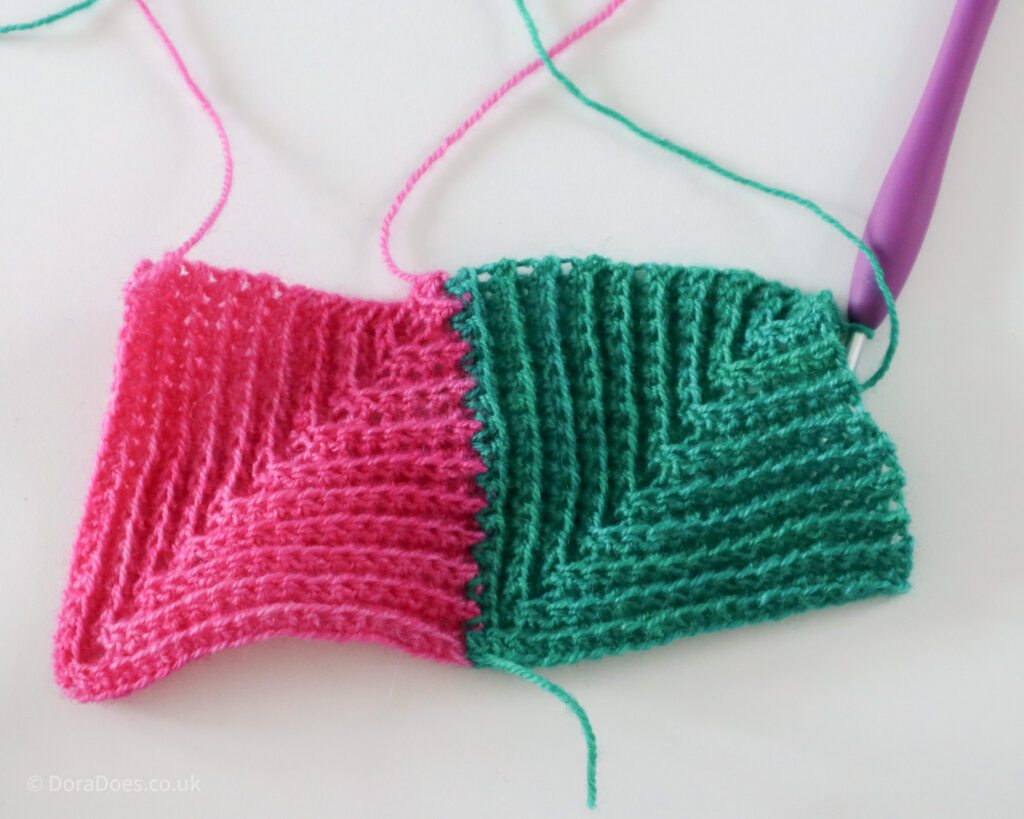
Joining the Third Square (Square B)
The third square will be worked the same way as the second, but joined on the opposite corner as seen in the turquoise yarn below;
Row 1 (RS):
Ch21 (where 1 stitch is a turning chain which does not count as a stitch).
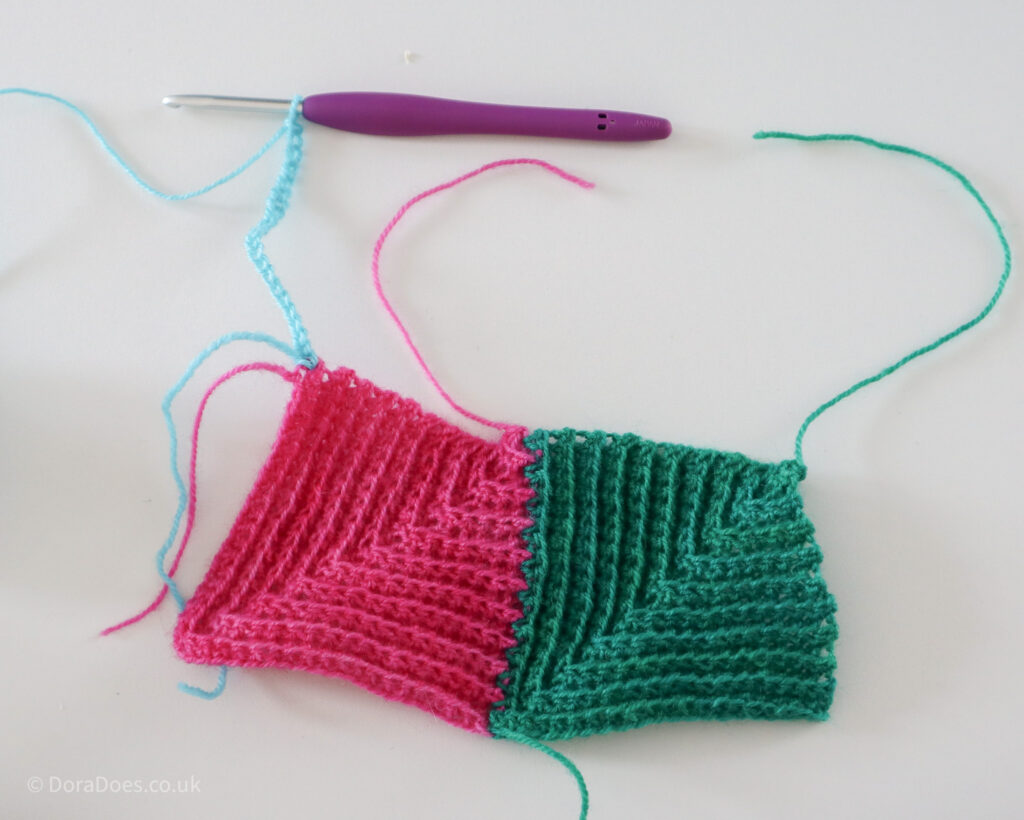
1sc in second ch from hook and next 18 ch;
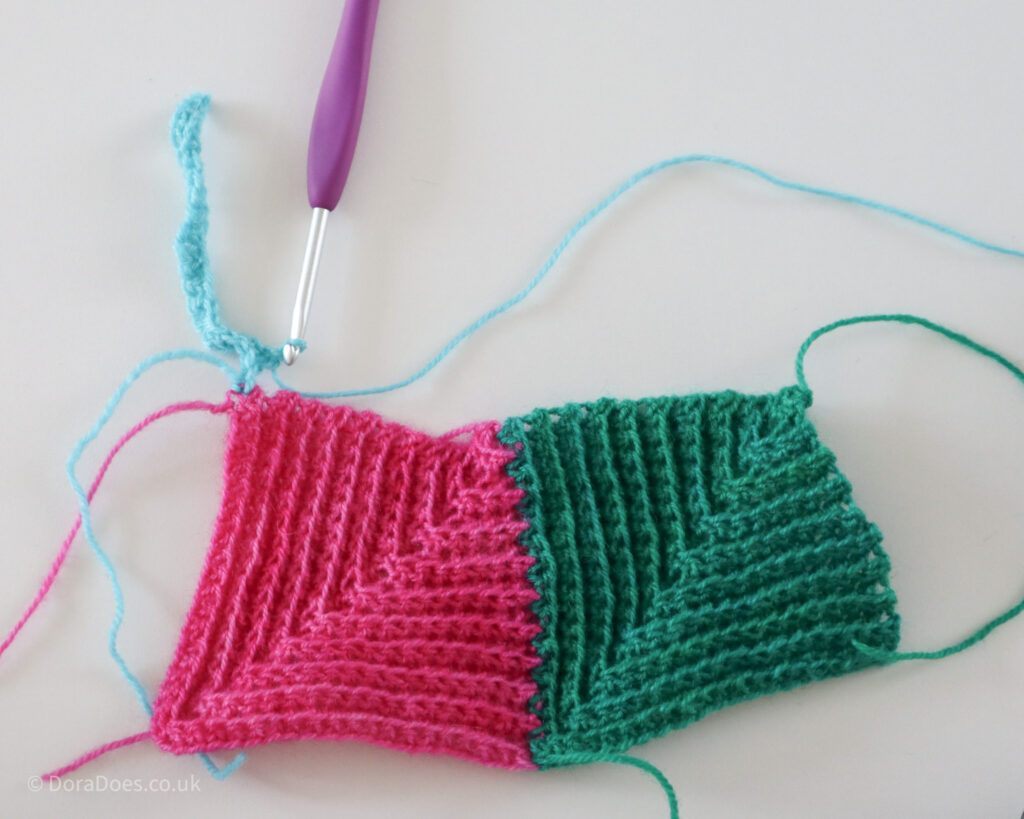
sk last ch, 1sc into corner where yarn was joined,
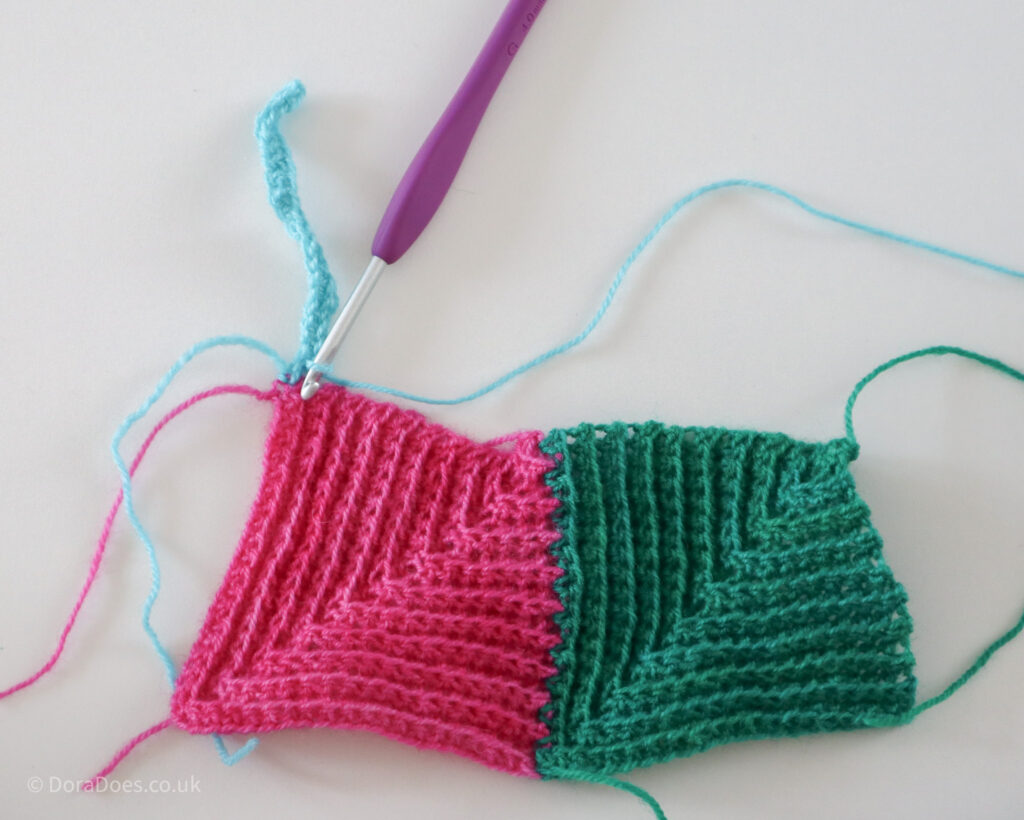
sk first row-end on the of previous square, 1sc into next 19 row ends, turn. 39 sts;
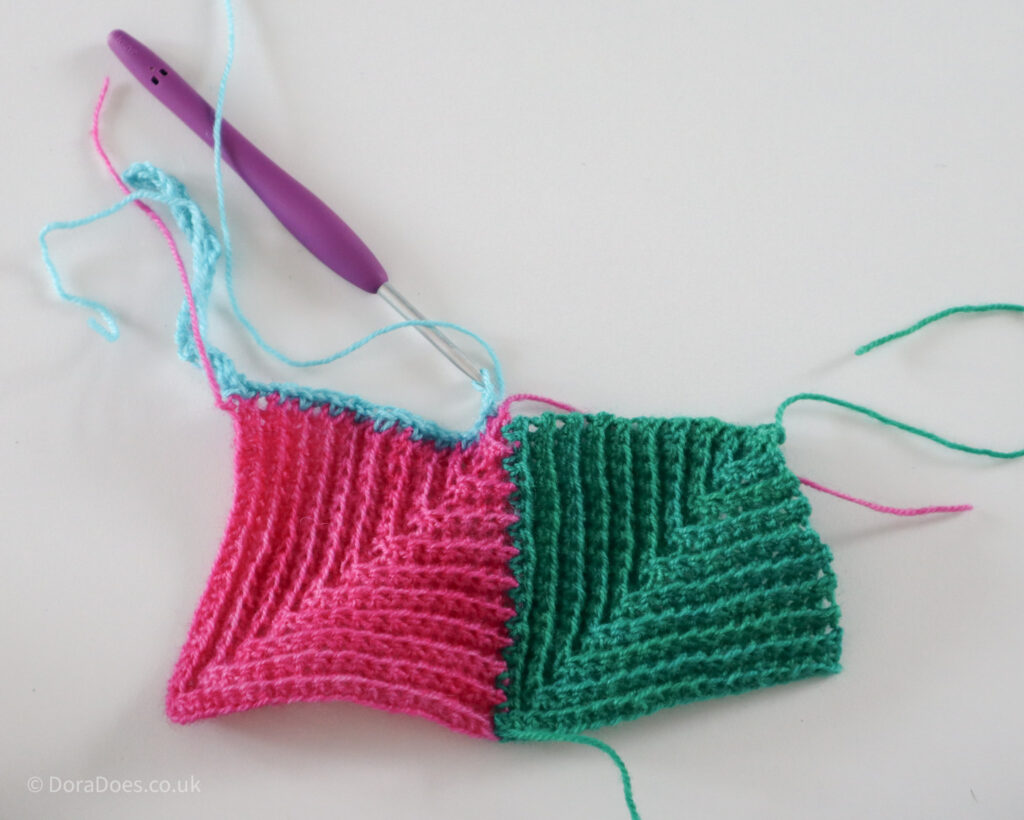
Rows 2-20: As Square A
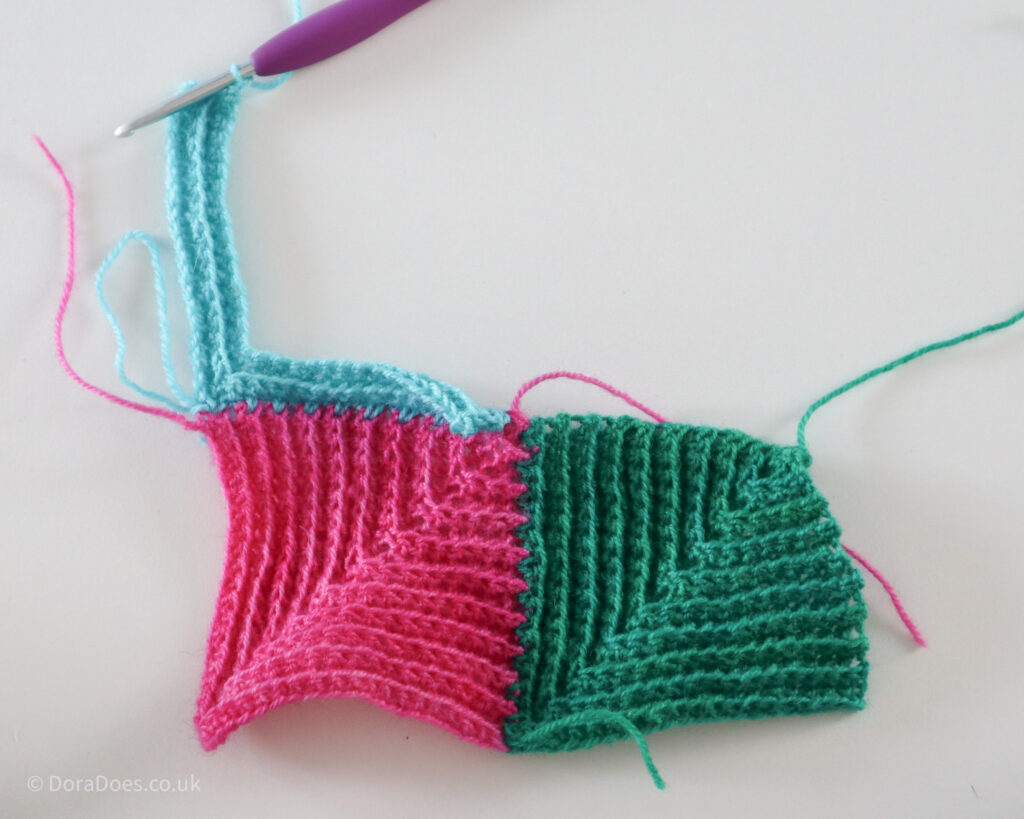
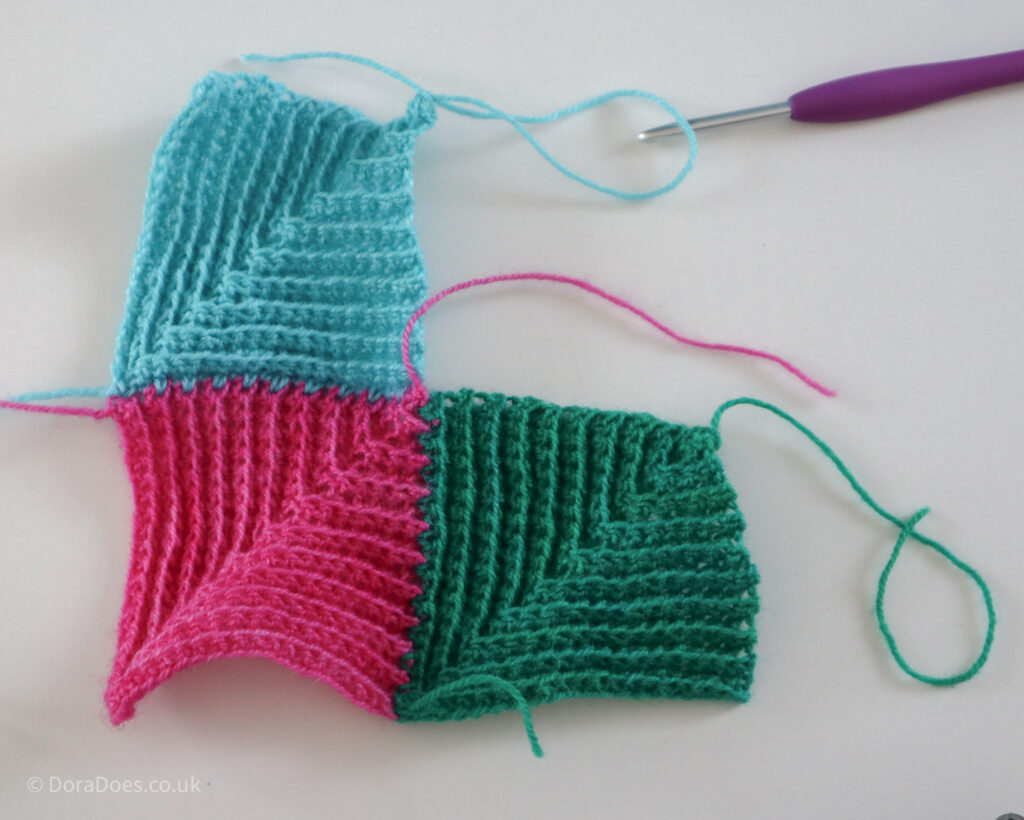
Make the Fourth Square (Square C)
Square C is made by working into two sides of previous squares.
The square will start by picking up row-ends on each side, so no chaining here.
Join yarn to base of back of previous square so that you have the sides of two squares ‘in front’ of you;
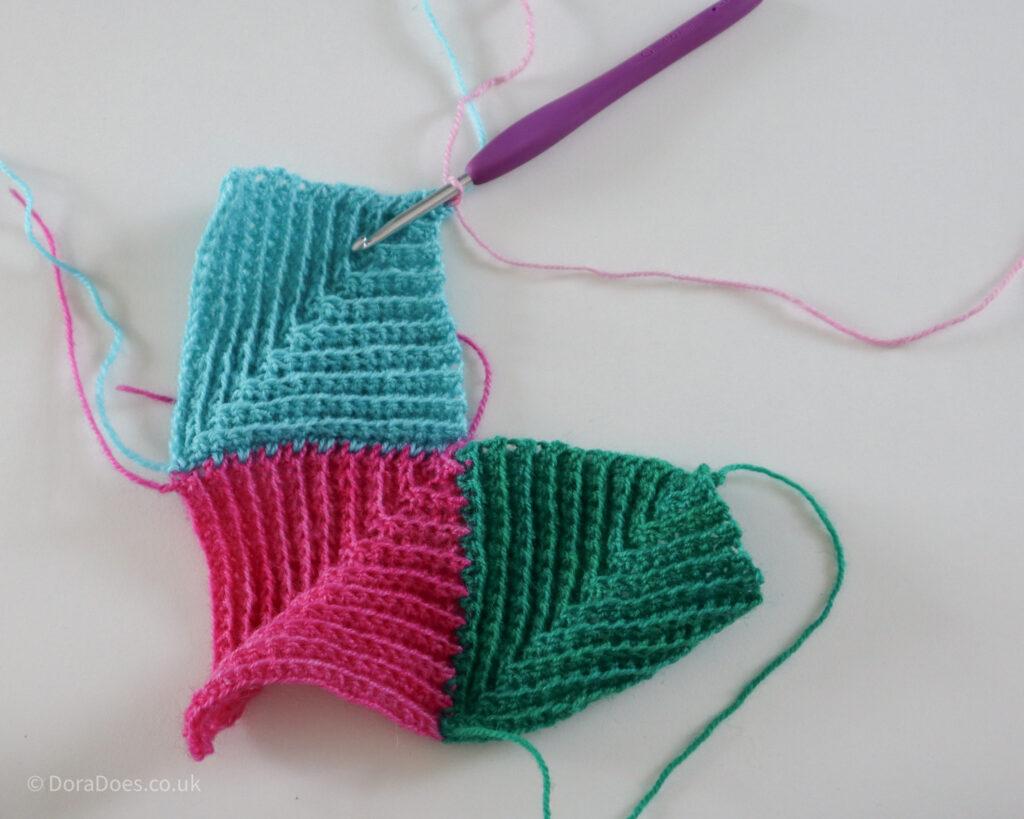
Row 1: Ch1 (does not count as a st), 1sc into each of the first 19 row-ends up the back of the previous square, sk last row-end, 1sc into corner where 3 squares join, sk first row end of next square, 1sc in next 19 row-ends to end of square, turn. 39 sts
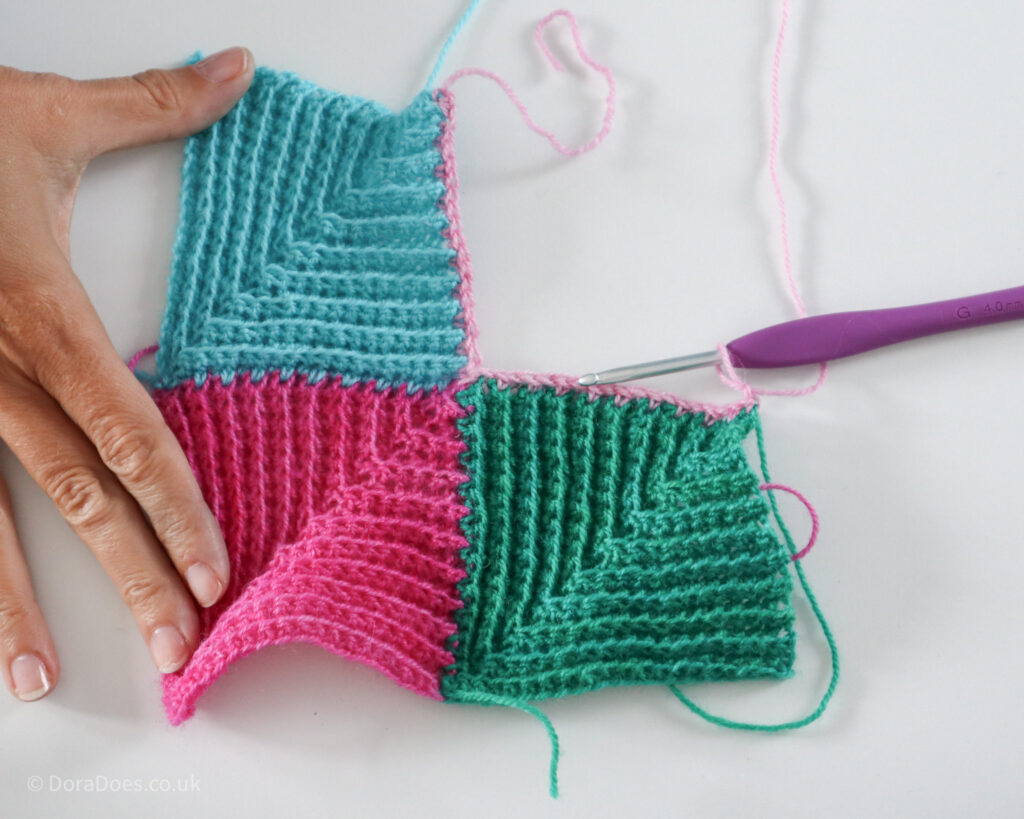
Blow is a close up of what that first row of Square C looks like.
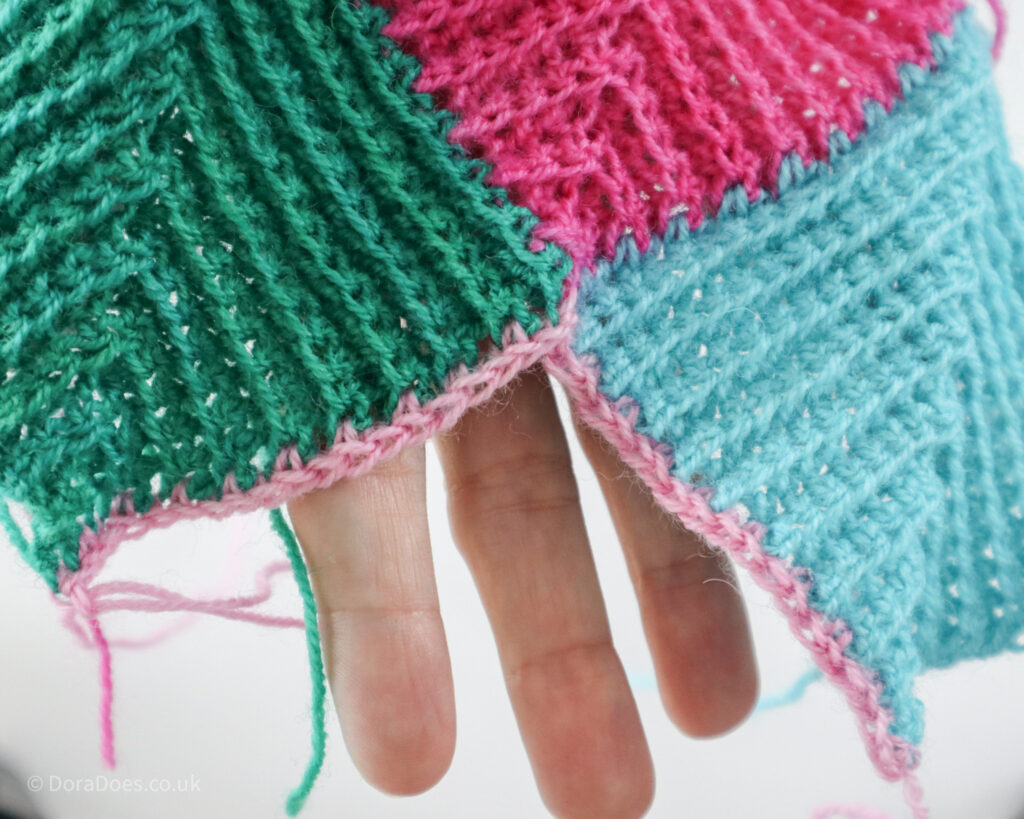
Rows 2-20:
As Square A.
You will work the final square the same as the others, once you have picked up the row ends.
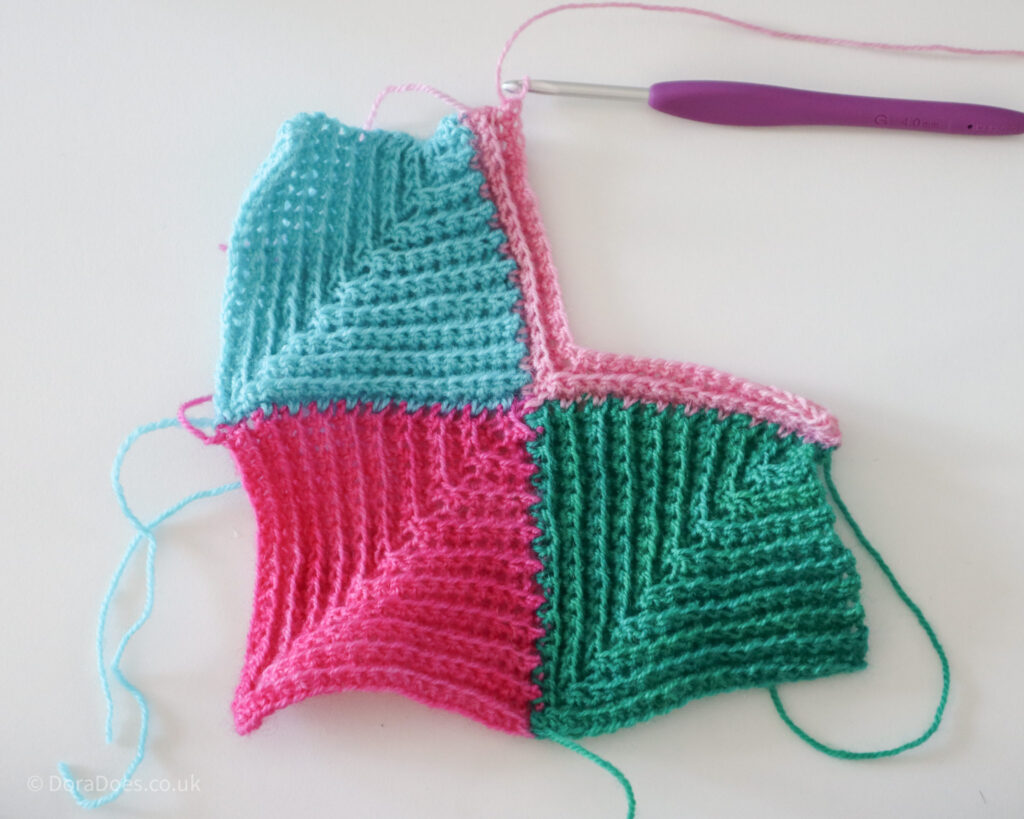
Below you see the finished four square join. You can continue to join your squares in this way – using Squares B and C to create whatever combination is desired for your project.
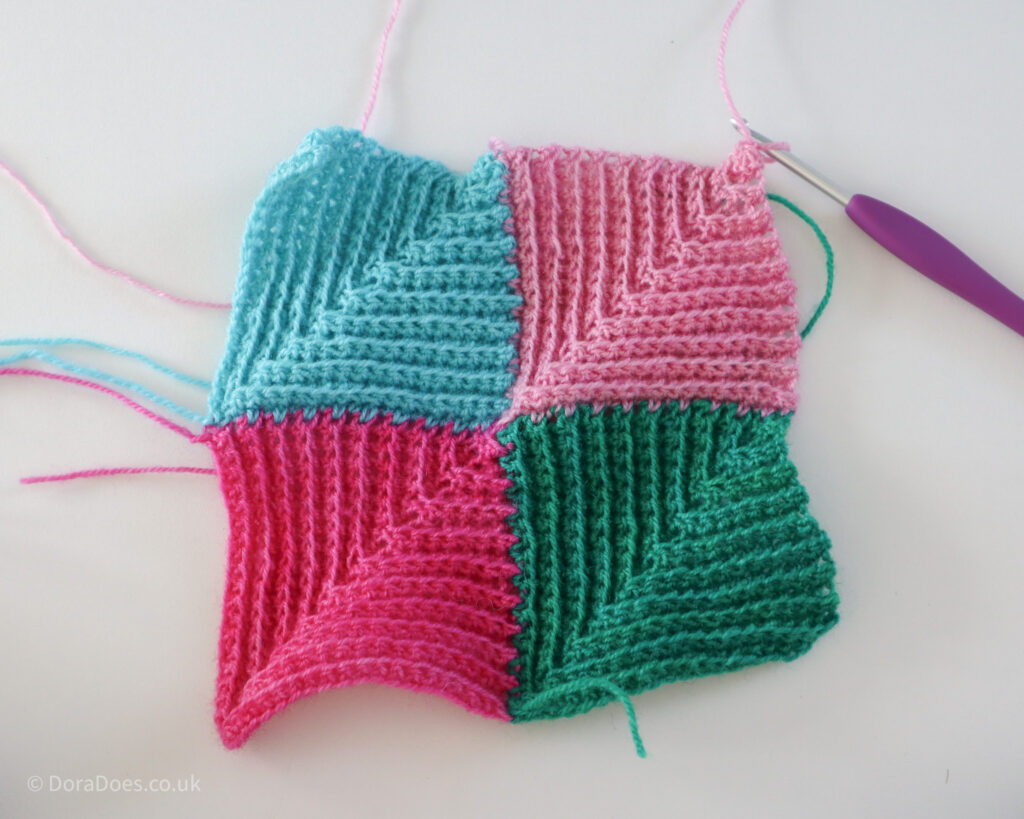
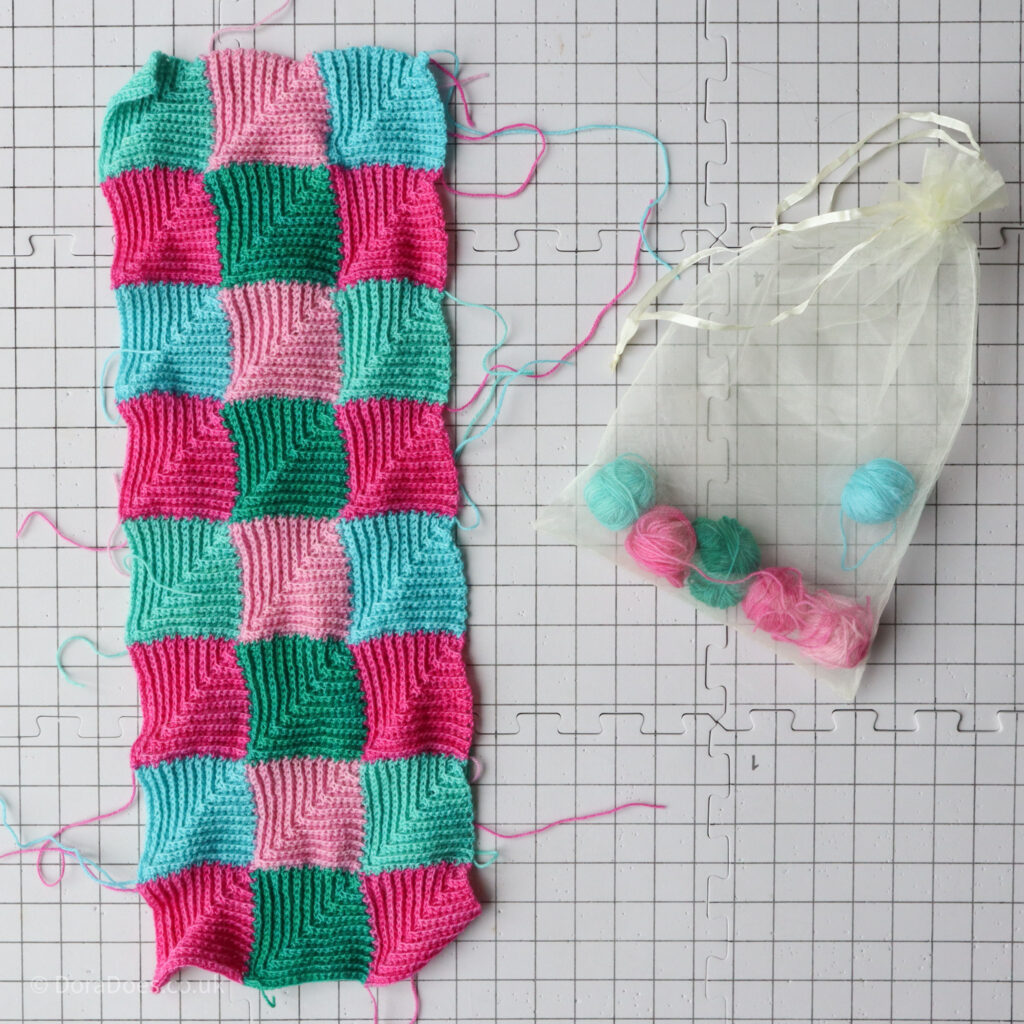
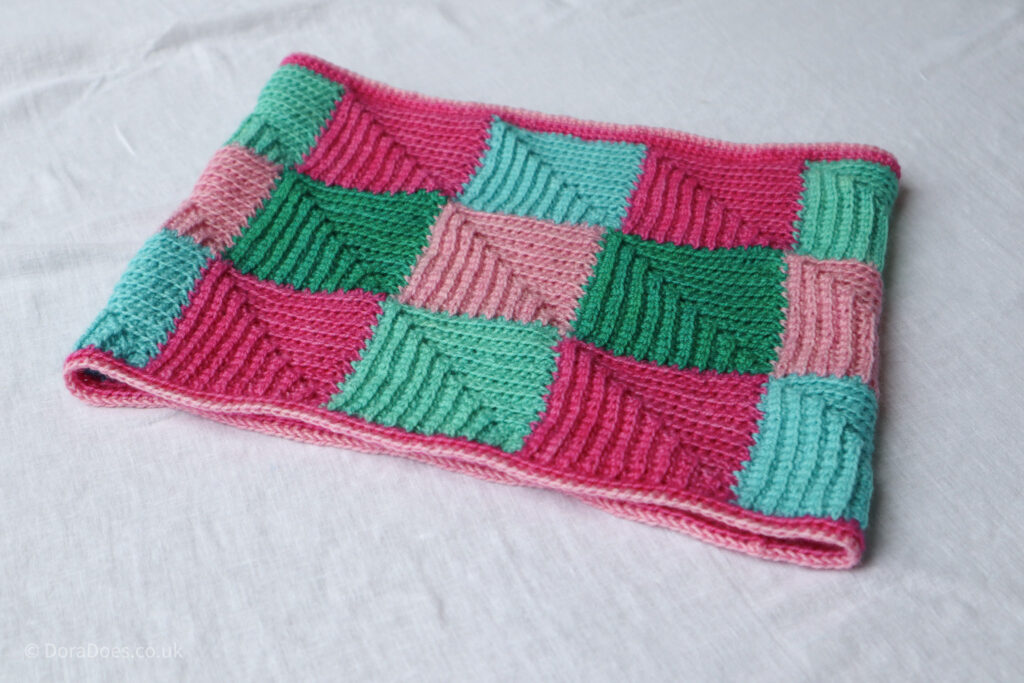
In the case of this tutorial, I continued joining squares to make my crochet mitred minis cowl.
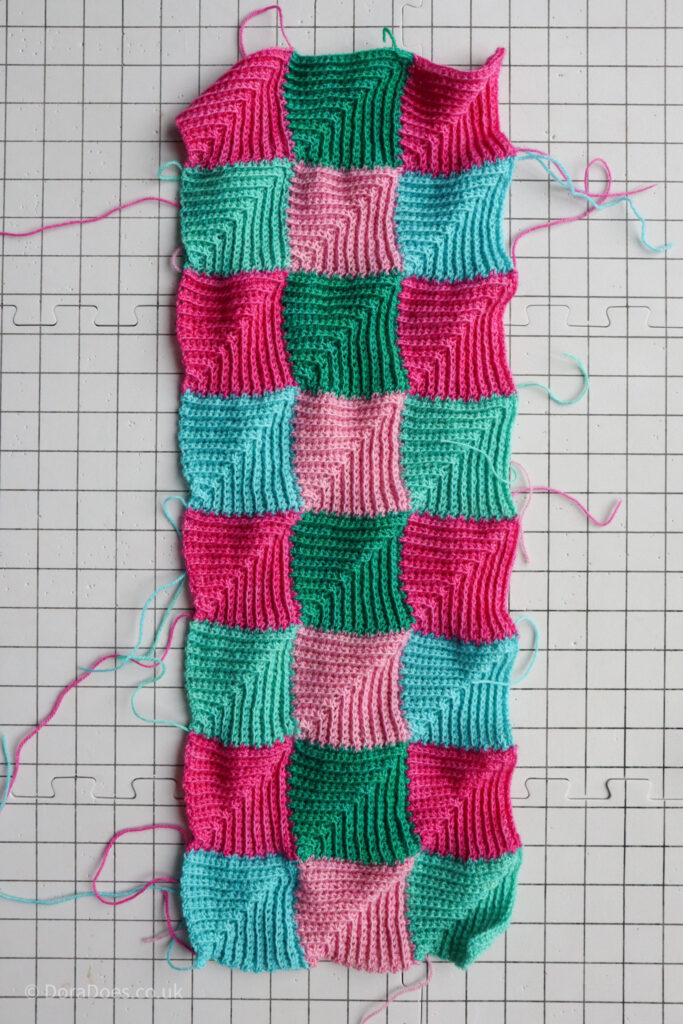
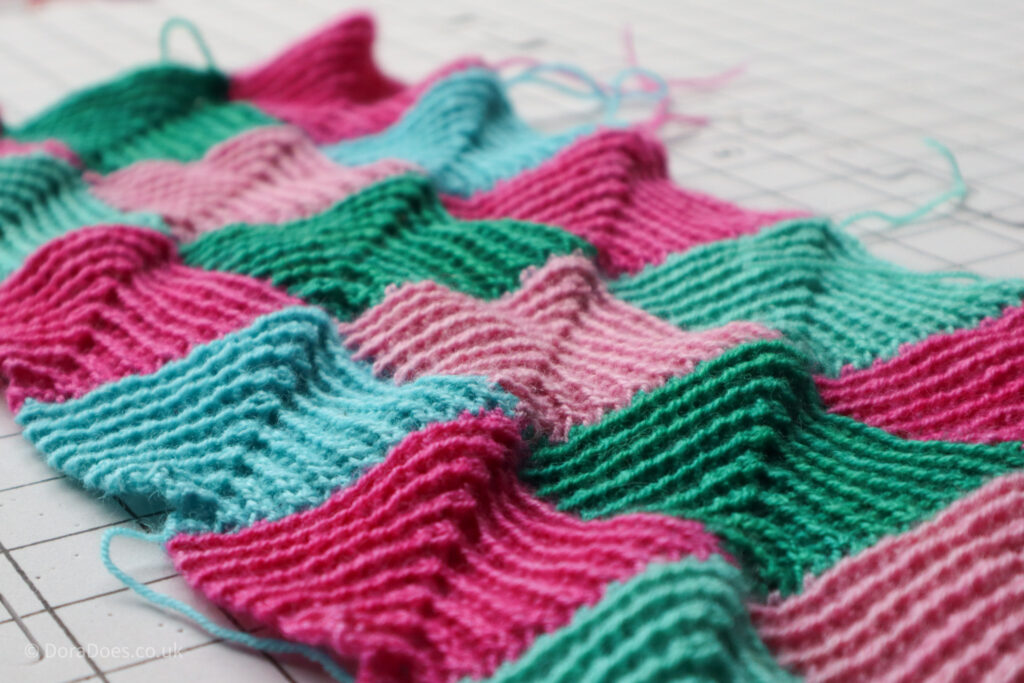
Below you can see the right side of the fabric before it was blocked or joined.
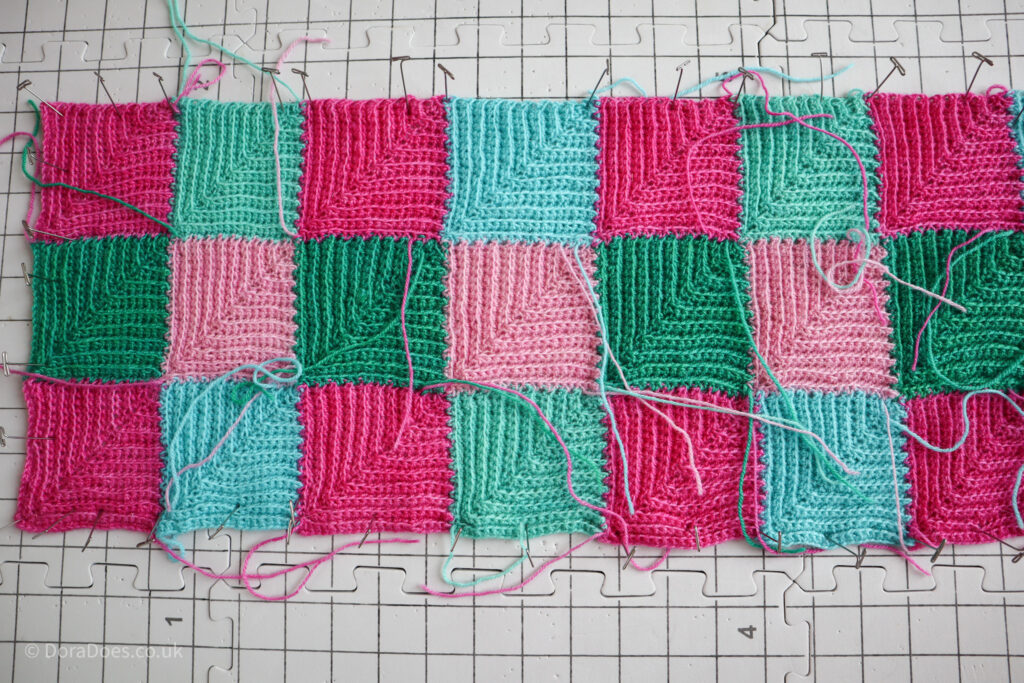
Here it is on blocking board – excuse the ends, I usually wait until after blocking to sew them in.
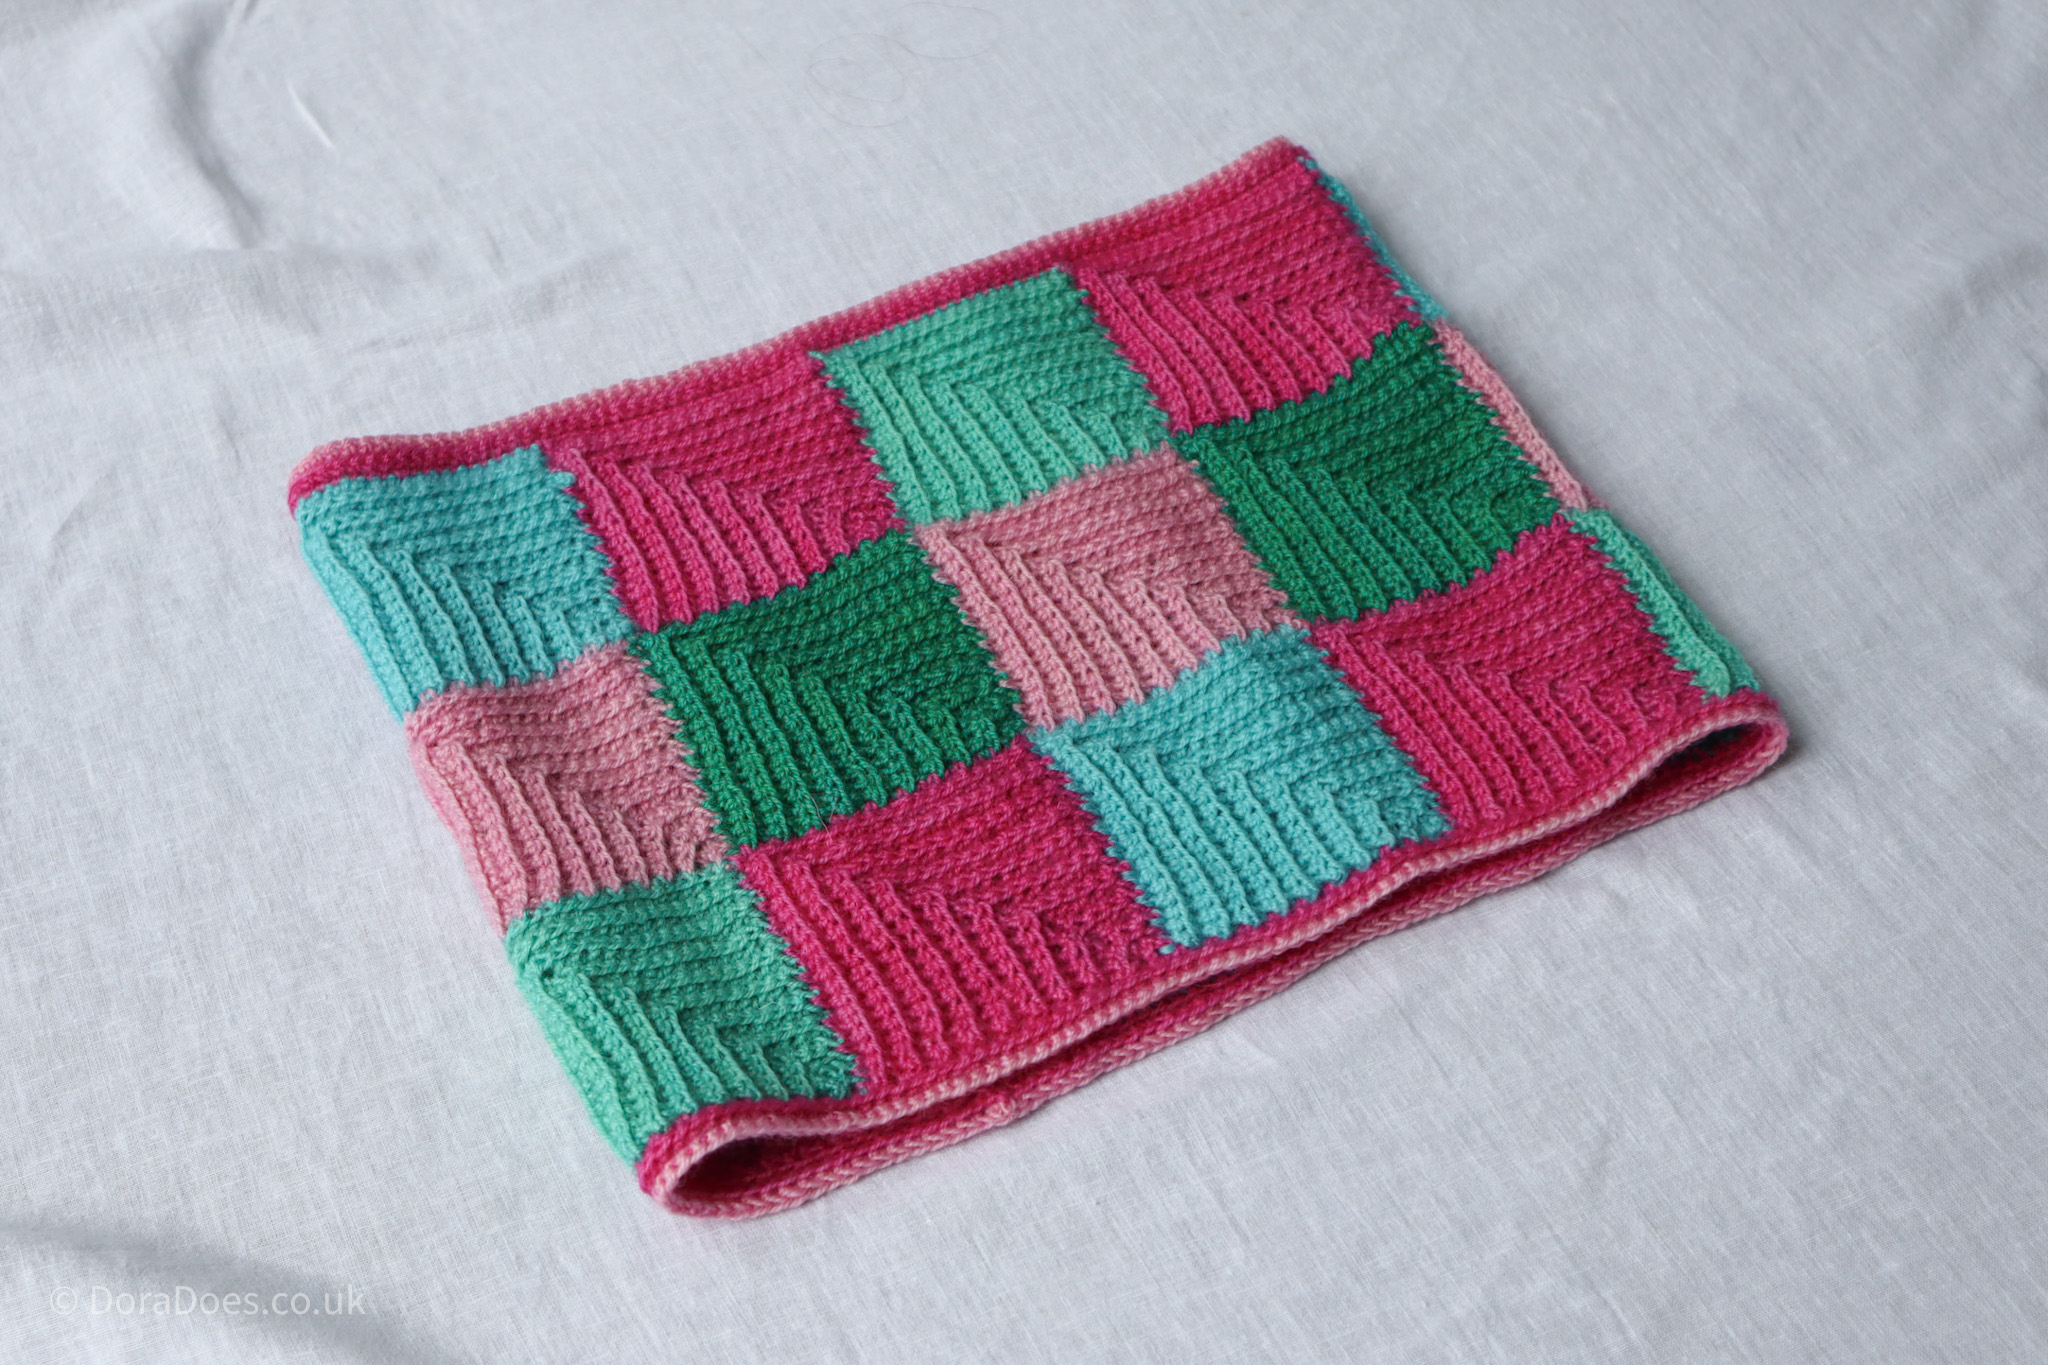
And here is the finished ‘mitred minis’ cowl complete with trim.
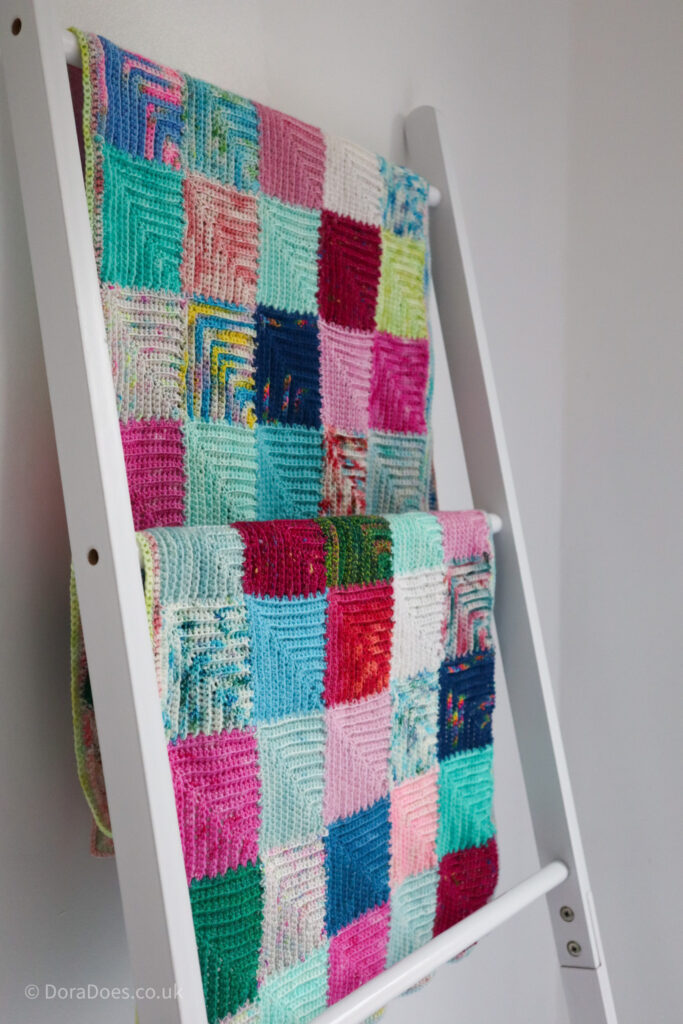
I hope you have found this tutorial useful and are ready and raring to get your squares joined. If you want to go really large joining your mitred squares, check out the Mitred Minis wrap pattern – perfect for using yarn advent minis or stash yarn.
If you have any questions about the process, please feel free to drop it in the comments.
Happy Hooking
Dx
Copyright Dora Does Limited, Registered in England, Company Number 13992263. This pattern is for personal use only and may not be shared or reproduced in written, photo, video or any other form without prior written consent. All rights reserved. Terms of service.