Easy Crochet Ribbing Tutorial: How to crochet a ribbed ear warmer

Have you ever seen a crochet hat, sweater or cardigan with a neat ribbed edging and wondered how on earth it is achieved?
In this tutorial I’m going to share with you my favourite way of crocheting ribbing. It’s incredibly versatile and a crochet stitch that can be used to finish a garment or on it’s own to create a stretchy fabric.
Common crochet rib stitch techniques
There are a couple of classic ways to create ribbing in crochet: using the ‘back loops’ and using post stitches.
Note that I do a deep dive into crochet ribbing stitches and techniques here. This post is an introduction which is ideal for newer and beginner crocheters.
Ribbed Post Stitches
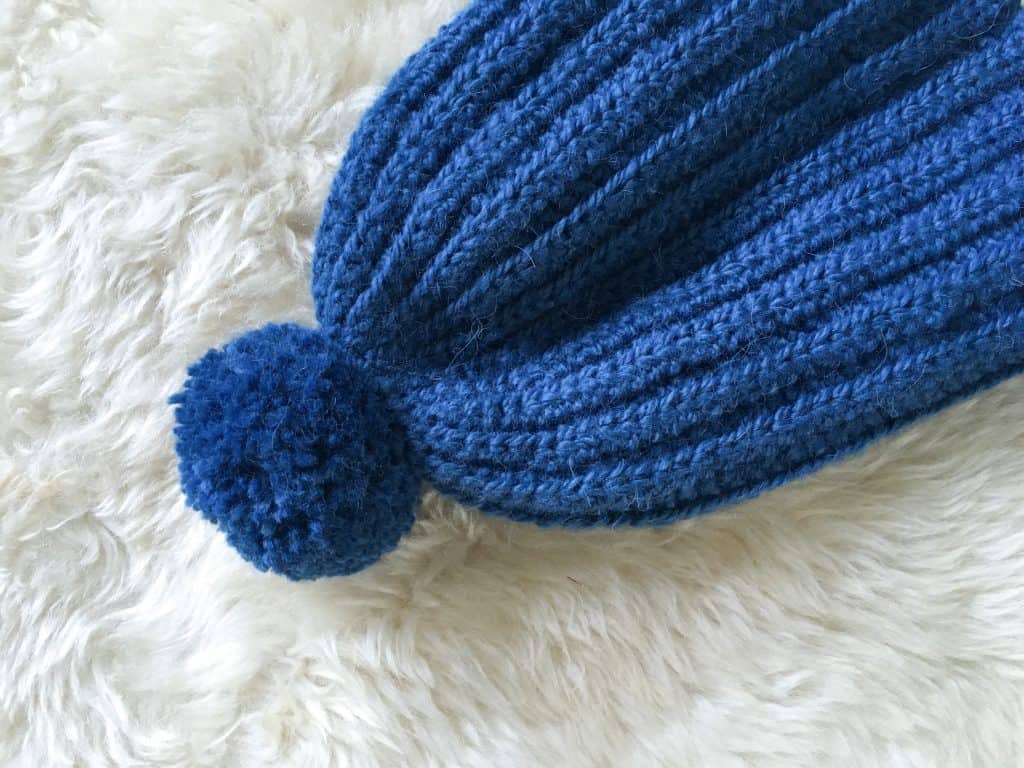
The first is to use post stitches. This is where you work your stitch around the post of the stitch from the previous row. You can find a tutorial for front and back post stitches here. In UK terms they are known as raised stitches.
It’s the same method used to create crochet cabling, only with the rib you tend to evenly alternate post stitches with standard stitches or alternate front post and back post stitches for extra texture.
Typically this is worked with double crochets (UK trebles) but it also works with shorter and taller stitches.
The effect given is raised pillars of cables between the regular stitches which sit flush against the work.
The tension of post ribs tends to be a little tighter than regular stitches and the fabric will contain less drape.
The fabric doesn’t stretch out that for, but there is a good amount of elasticity – i.e. it bounces back!

Working in the back loop only (BLO)
The second main method of creating ribbing is to work stitches in the back loops of the stitches on the previous row.
This is the technique which I’m going to share with you in detail today. It creates a fabric with more stretch than the post option, which is why I favour it over the post approach.
The stretch and elasticity serves a useful function. What I mean by that is that it helps the hat stay on your head, it helps you gather a cuff round your wrist.
Keep reading for a picture and written tutorial showing how to create the ribbing, but a few words before I start about how to use it.

More than just cuffs and hat brims, this type of ribbing is in readily effective over larger areas. As seen in the Winter solstice sweater dress pattern below.

The type of yarn and stitch definition can also make a big difference to the final appearance which is why I have included a few examples of different projects throughout the post where the same technique is used.
What Stitch should I use for back loop crochet ribbing?
The back loop only method can be used with any of the basic crochet stitches to create a rib. The smaller the stitch, the tighter the fabric will be.
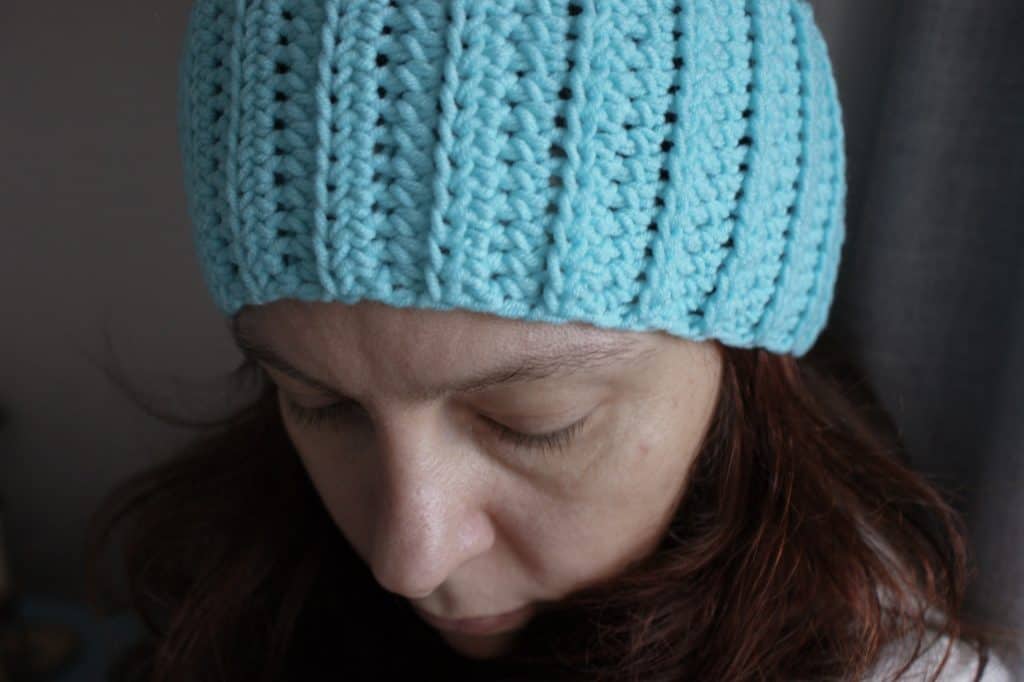
My personal preference for cuffs and hems tends to be half double crochet (UK half treble) as this is often the most practical, however in the video tutorial below demonstrating how to create a hat band, I have used single crochet (UK double) so you can get an idea of how both look.
Do I crochet the rib first or add it at the end?
This is really a matter of choice and dependent on the pattern you are working.
If I am adding a cuff or hem to a sweater for example, I tend to add the ribbing at the end by slip stitching onto the main piece at the end of each ribbed row.
However, there are plenty of patterns which start of with creating the ribbed band and then working the stitch pattern into the row ends.
Like so many things in crochet, there is no right or wrong!

How to Create Simple Crochet Ribbing
Ribbed Crochet Ear Warmer Pattern
For the purposes of this tutorial, I am going to make a quick ear warmer using the back loop only ribbing technique.
Stitches and Abbreviations (U.S. Terms)
- ch
- hdc = half double crochet (UK half treble)
- blo = back loop only
- ss = slip stitch
Turning Chains
Turning chains do not count as stitches.
Note that I have used a ch1 as a turning chain. This is my preference as it keeps the end of the rib looking tight and neat and stops it from over stretching which is particularly useful for accessories like hat bands and cuffs.
If you want a little more flexibility in your ribbing (for example on a roll neck which will need to fold over itself), work a ch2 to start the row.
Materials
I have used a 5mm hook and some aran weight yarn from my stash. It’s a cotton blend yarn so there is quite high stitch definition.
The ear warmer measures approximately 4in wide and is around 18in circumference (it will stretch to fit), but instructions are given on how to alter both measurements to fit.
Obviously my cat Millie had to get involved…

Note that when adding a cuff or hem to a sweater, I like to go down a hook size or two as this gives a more compact denser finish and a more professional look.
Crochet ear warmer pattern
Row 1: Ch16, 1hdc in the second ch from hook and each ch to end, turn. 15 hdc


Row 2: Ch1, 1hdc in the blo of each hdc across to the penultimate st, 1hdc through both loops of the final st, turn (14 blo hdc, 1 hdc)
Note that I work the last stitch of the row through both loops as this gives a neater finish. This can reduce the stretch so make sure you take this into account.

Row 3: Ch1, 1hdc in the blo of each hdc across to the penultimate st, 1hdc through both loops of the final st, turn (14 blo hdc, 1 hdc)


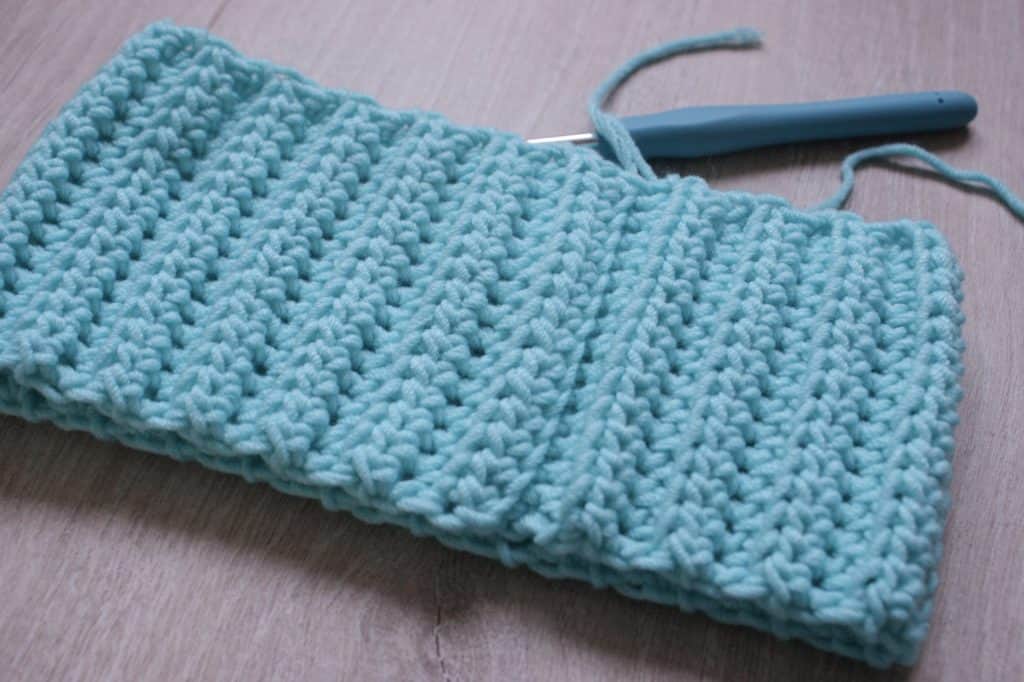
Rows 4 – 49*: Repeat Row 3
*Or until it reaches the desired length. I worked 49 rows but this may be different for you so keep checking.
Continue repeating until your work is long enough to just reach round your head when stretched.
This should be a couple of inches smaller than your head measurement as it will stretch to fit (i.e. it will have negative ease). I worked mine to around 18in, a couple more rows from this picture.

If you want to alter the width of the ear warmer (if you’re making it for a child for example), then decrease the number of stitches in your starting chain until you reach your desired width.
How to join back loop crochet ribbing
At the moment there is no right or wrong side so it doesn’t matter if you join on an odd or even row.
To join the two ends, ch1 to start a new row then ss through the blo of the hdc in the previous row and the back loop of your starting chain, matching stitch to stitch.
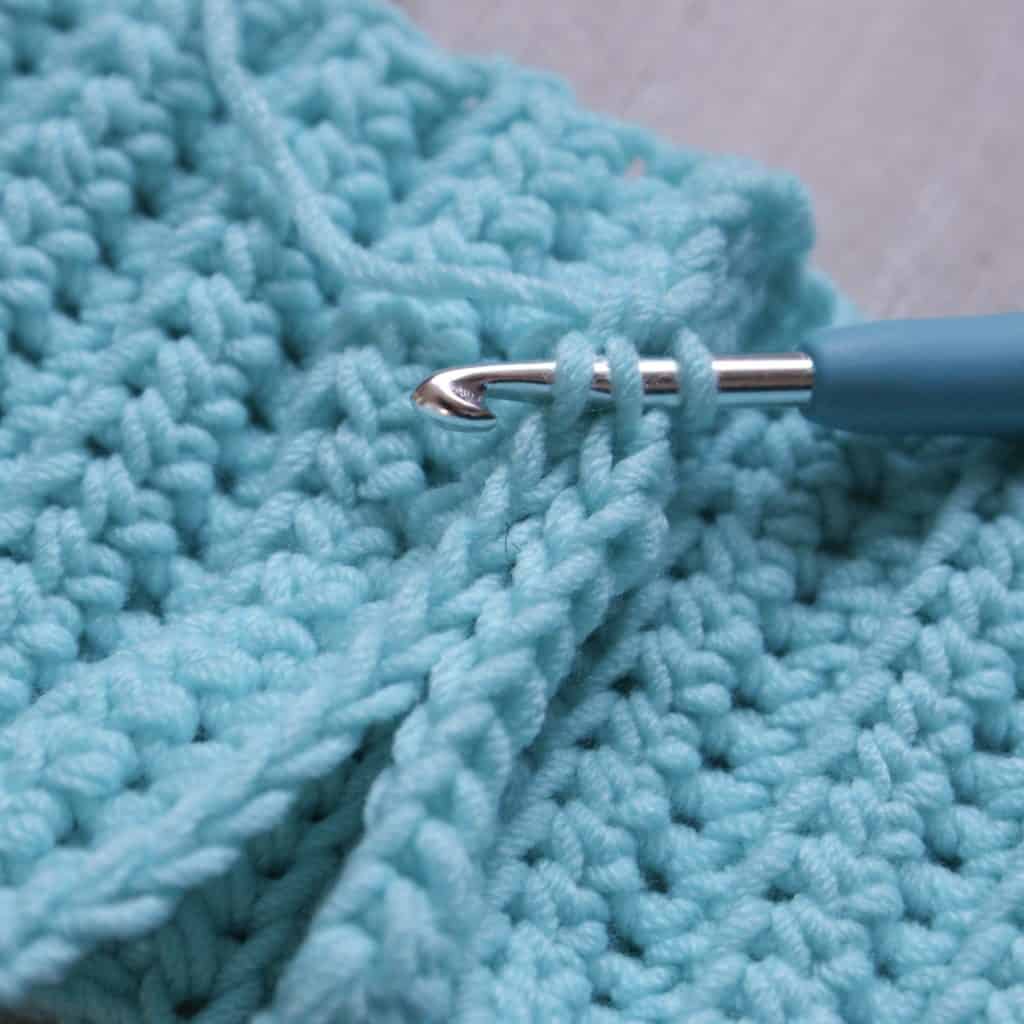
This is why it was important to just work into the humps of the starting chain for the first row!
This join will now be on the wrong side of your work

Fasten off, sew in ends.

Easy Pattern Variations
If you want to modify this to make a feature knot on the ear warmer, take a long length of yarn, pinch the sides of the ear warmer together and wrap the yarn neatly round and round the ear warmer.
Use a yarn needle to sew in the end on the inside of the ear warmer


Video Tutorial
I have created a video tutorial demonstrating the hdc blo method and 11 other methods of crocheting rib effects.
Right handed crochet ribbing video tutorial:
Left handed crochet ribbing video tutorial:

I Hope you find this tutorial useful and would love to hear your thoughts about this method in the comments below!
Happy Hooking
Dx
Copyright Dora Does Limited, Registered in England, Company Number 13992263. This pattern is for personal use only and may not be shared or reproduced in written, photo, video or any other form without prior written consent. All rights reserved. Terms of service.


What type of yarn to work with for head warmer?
Hi there, It was an Aran weight cotton / acrylic blend yarn I used for this project (I think it was something I got off Amazon at some stage but don’t have the brand info). You can make this pattern with most types of fibres. I hope that helps. Dora
I HAD GREAT FUN MAKING ONE OF THESE FOR MY TEENAGED GRANDDAUGHTER TO WEAR TO PLAY NETBALL.!!!!!! N OW HER WHOLE TEAM WANTS ONE TO WEAR FORTHEIR NETBALL MATCHES!!!!!!!
MANY THANKS FOR THE ” INSPIRATION” TO DO SO!!!!!!
JENNY BOOTHBY
sOUTH AUSTRALIA
Thank you for sharing Jennifer, I’m so glad your granddaughter appreciated your work 😊