
Mitred Minis crochet pattern (for yarn advents and leftovers)
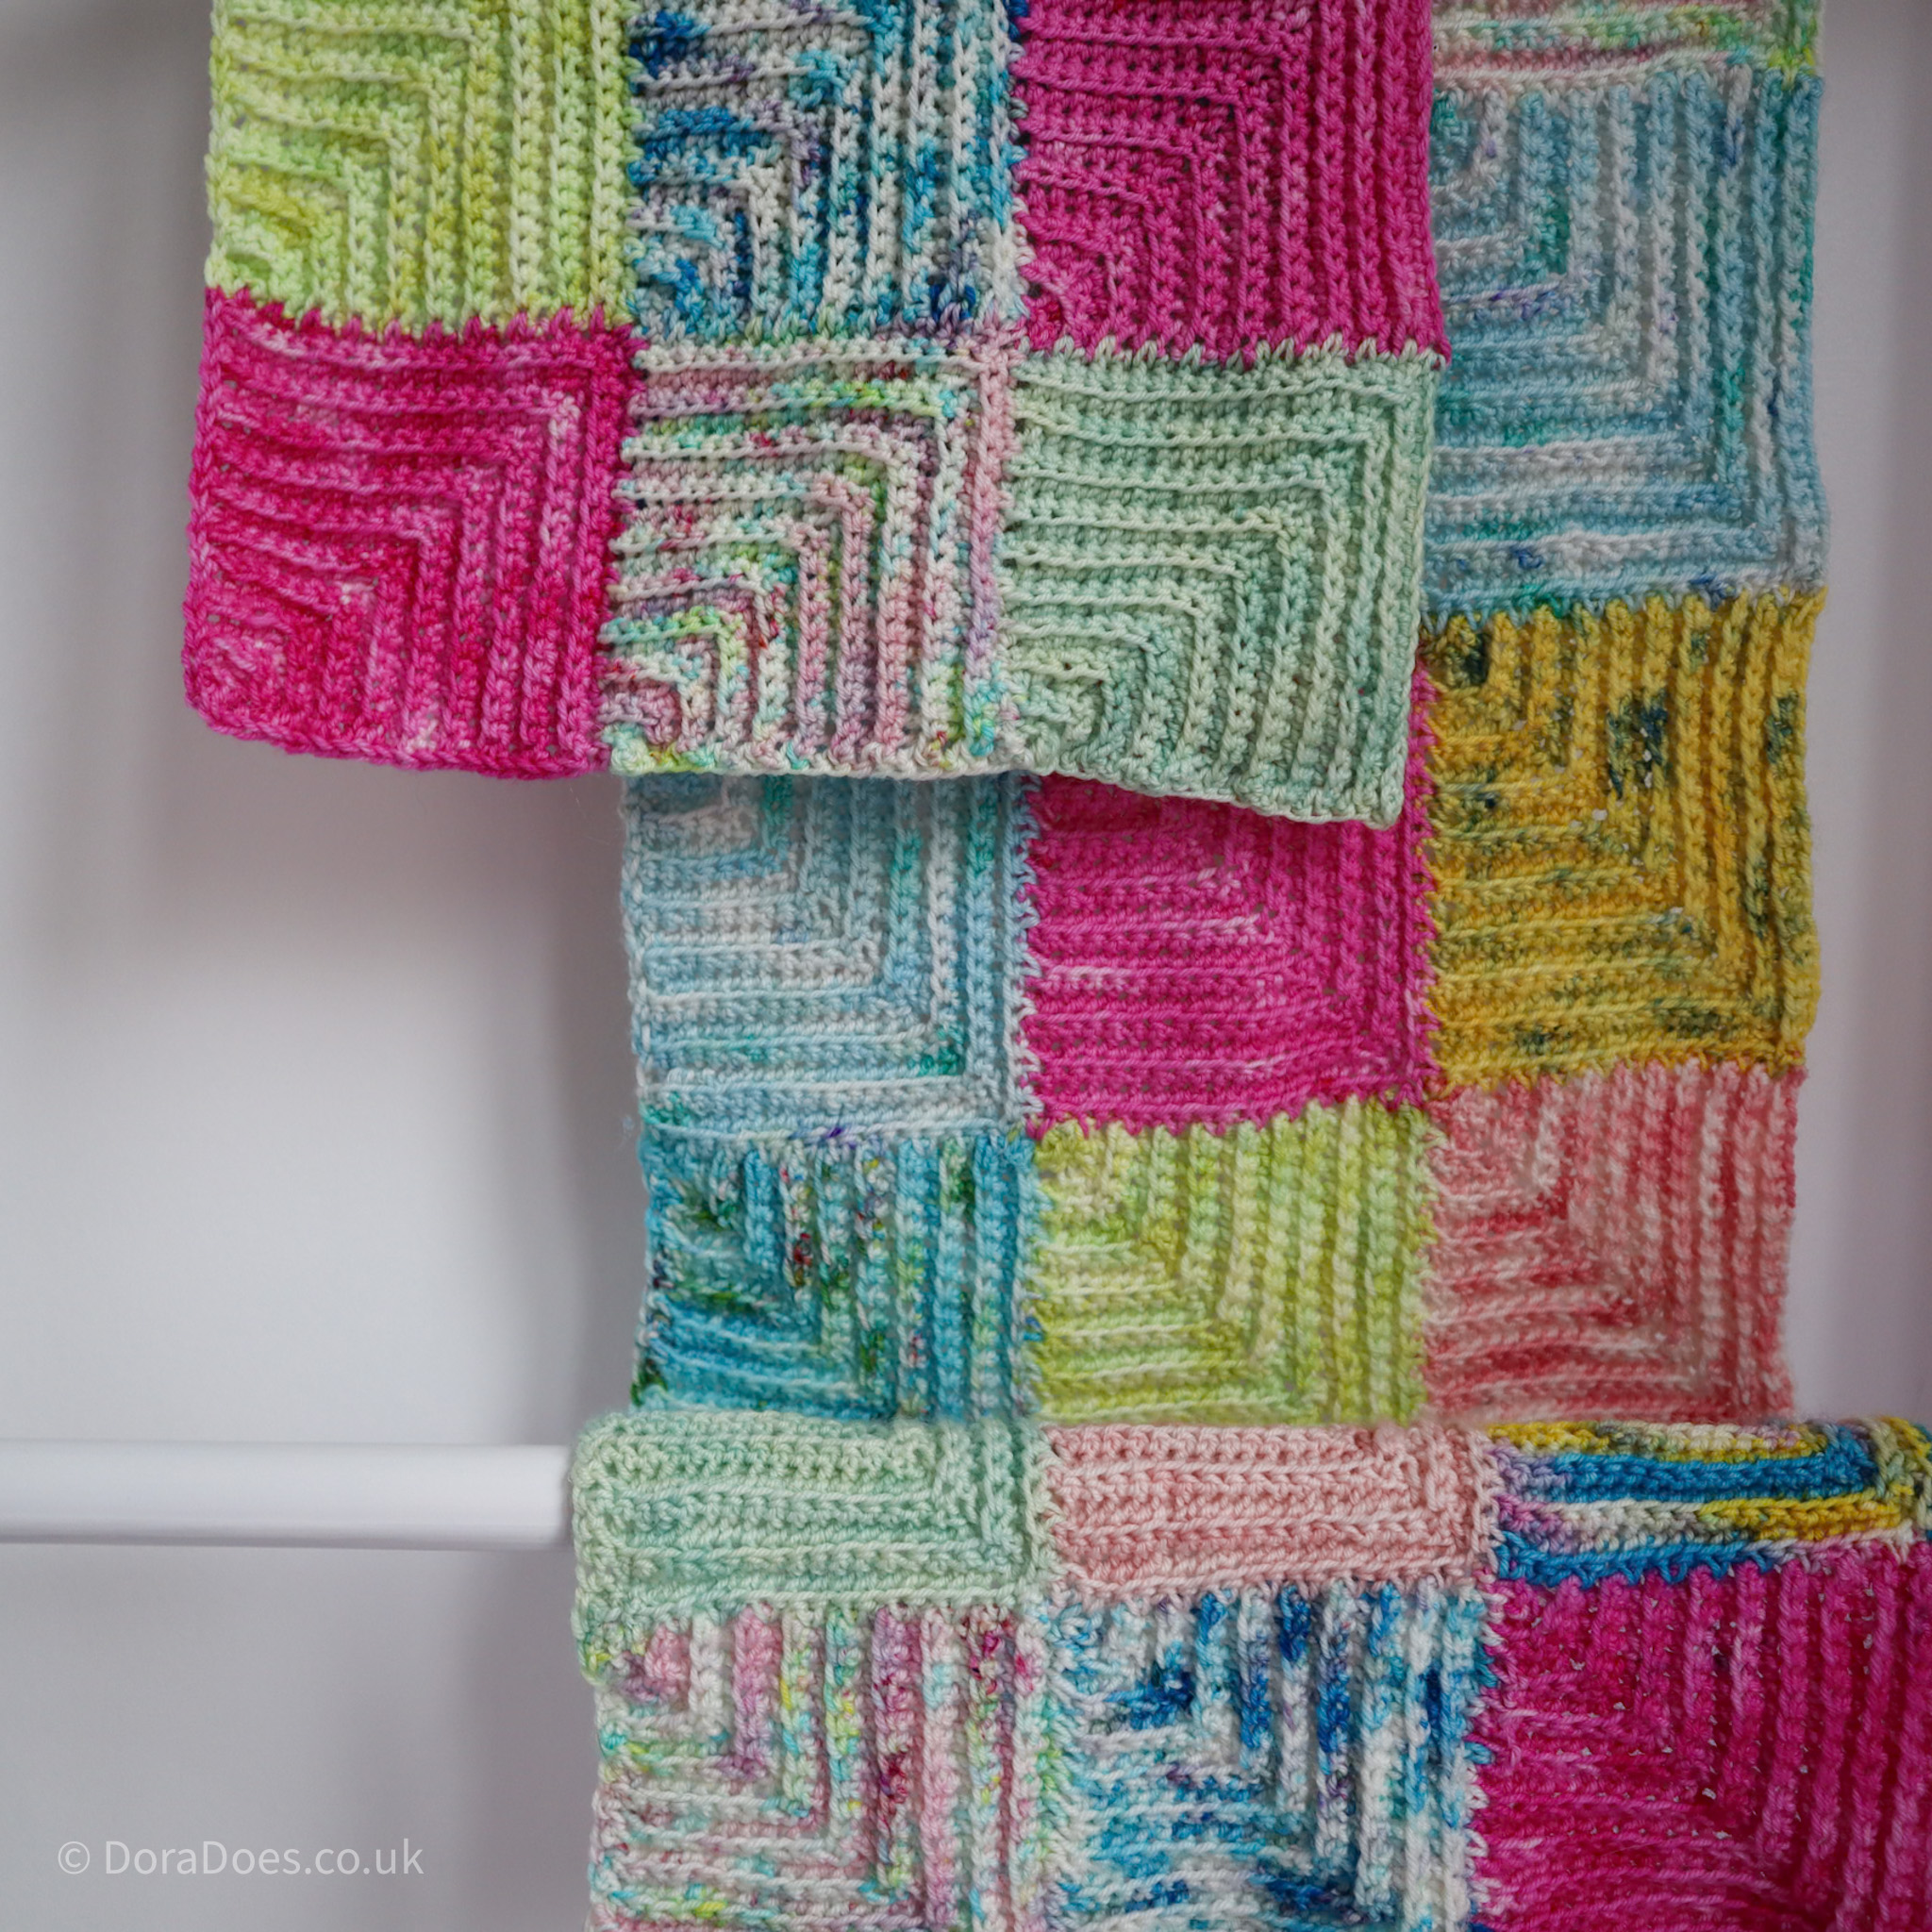
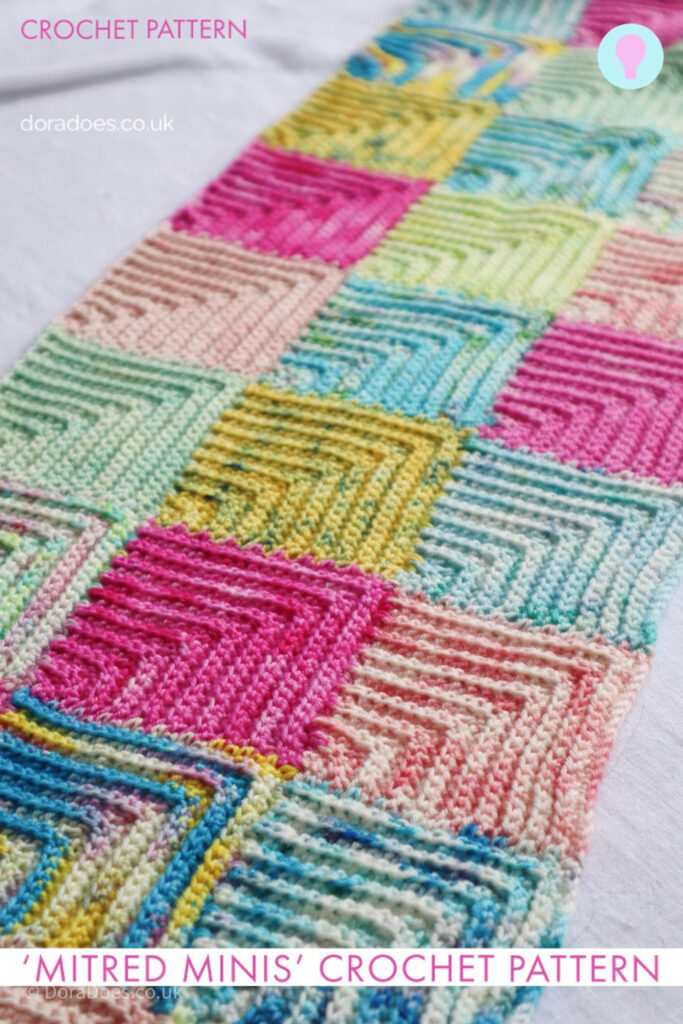
The Mitred Minis crochet pattern is a little different than a typical crochet pattern. It is a crochet pattern designed to use mini skeins (or left over yarn) to make a variety of projects from mitred squares
You can purchase an ad-free printable version of this pattern from Ravelry, Lovecrafts or Etsy

This post contains affiliate links. This means if you click a link to a product and go on to make a purchase, I receive a small percentage of the sale at no extra cost to you. You can read my full affiliate disclosure here.
I designed this technique led pattern as a way to showcase beautiful hand dyed mini-skeins of 4ply / fingering weight yarn.
This may be those you have collected over time or those you may have received in an indie dyer yarn advent, which are becoming ever more popular!
This project is also ideal for stashbusting and using left over yarn as each square only requires a few grams of yarn.
The crochet pattern will teach you how to crochet and join ribbed mitred squares and provide instructions to make one of four projects; a cowl, a scarf, a wrap or a lap blanket.
The projects are designed to work with different quantities of yarn:
- The cowl uses around 120g yarn / 6 x 20g minis / 12 x 10g minis
- The scarf uses around 240g yarn / 12 x 20g minis / 24 x 10g minis
- The wrap or lap blanket use around 480g yarn / 24 x 20g minis
The design is written with 4 ply / fingering weight yarn in mind but can be adjusted to suit any yarn weights.
In the pattern below, you will find instructions on how to make each item including a schematic to demonstrate the layout.



Pattern Notes
General Notes
- Please read through the pattern and all associated notes before starting your project
- This pattern uses standard US crochet terminology (UK equivalents are given in brackets in the abbreviations list where applicable)
- Numbers at the end of a row indicate the number of stitches in that row and are only given at the start of a section or where there is a change
- Turning chains do not count as stitches
- Unless otherwise indicated, stitches should be worked in consecutive stitches
- The first stitch of each row should be worked into the top of the last stitch from the previous row, unless otherwise indicated
- Instructions written between [square brackets] should be worked the specific number of times instructed
- The pattern is designed to work with 4ply mini skeins, yarn advents or for left over yarn
- The pattern includes joining instructions for 4 projects based on the amount of yarn you have available; a cowl (120g), a scarf (240g) and a large wrap or small blanket (480g)
Construction
- Each of the four projects outlined in this pattern is created by making and joining your mitred squares as you go in the layout given by the relevant schematic and pattern specific instructions
- The pattern begins with instructions for the ‘first’ mitred square – Square A – full mitred square tutorial here
- Subsequent mitred squares are then made using the join as you go method in order to create your chosen item
- Instructions are given to join mitred squares as you go either to one side (Square B) or two sides of existing mitred squares (Square C) – full joining tutorial here
Skills Used
- Knowledge of basic crochet stitches, techniques and terminology is assumed
- The pattern uses basic stitches, mainly single crochets worked in the back loop only
- You will work stitches into row-ends as part of the joining process
- Although I would not class this as a beginner pattern, it is achievable for newer crocheters with a sense of adventure
Materials
Crochet Hook
You will need a 4mm crochet hook, or size needed to obtain gauge. You can change your hook to suit the yarn you are working with and your own tension.
I used my clover amour hook.
For the cowl, I sized down to a 3.5mm crochet hook for the trim.
Yarn Requirements
The projects pictured all used a range of 4ply / fingering weight / sock yarns which offered between 400 and 420m per 100g.
I made many sample squares during the design process in different fibres. Each square weighed approximately 4-4.5g and used about 15-18m/ 16-20yds of yarn.
I have, therefore, based the yarn quantities given on you getting a minimum of 4 mitred squares out of each 20g skein.
In many cases I got 5 squares from one mini skein, but for the purpose of this pattern, I have erred on the side of caution. If you have yarn left over from your skein you can add more squares to your project, or perhaps a tassel or some fringing.
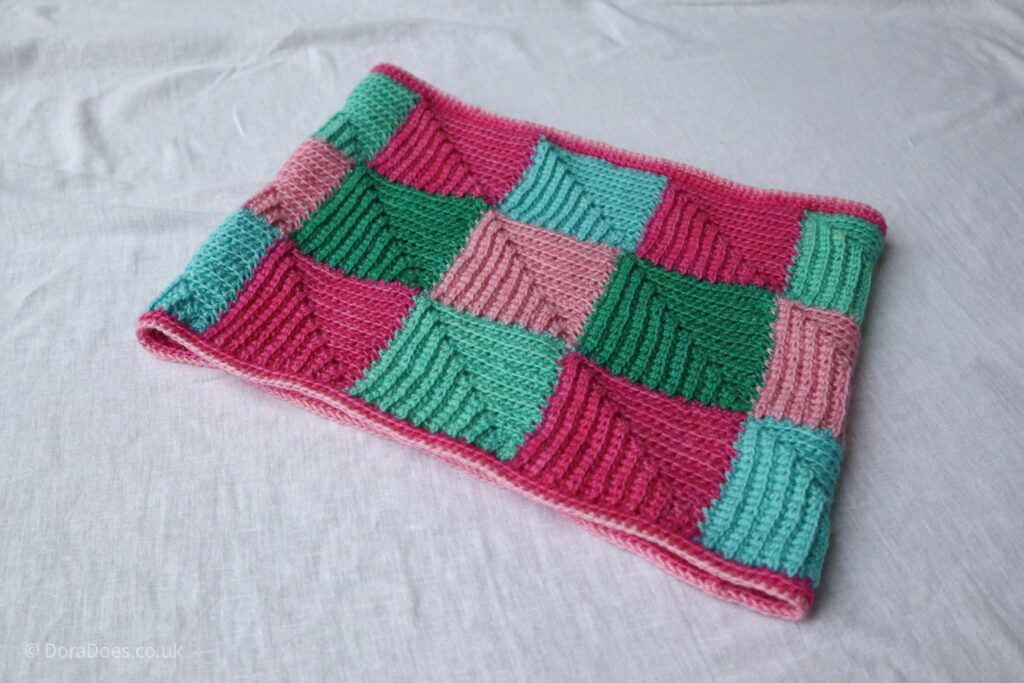
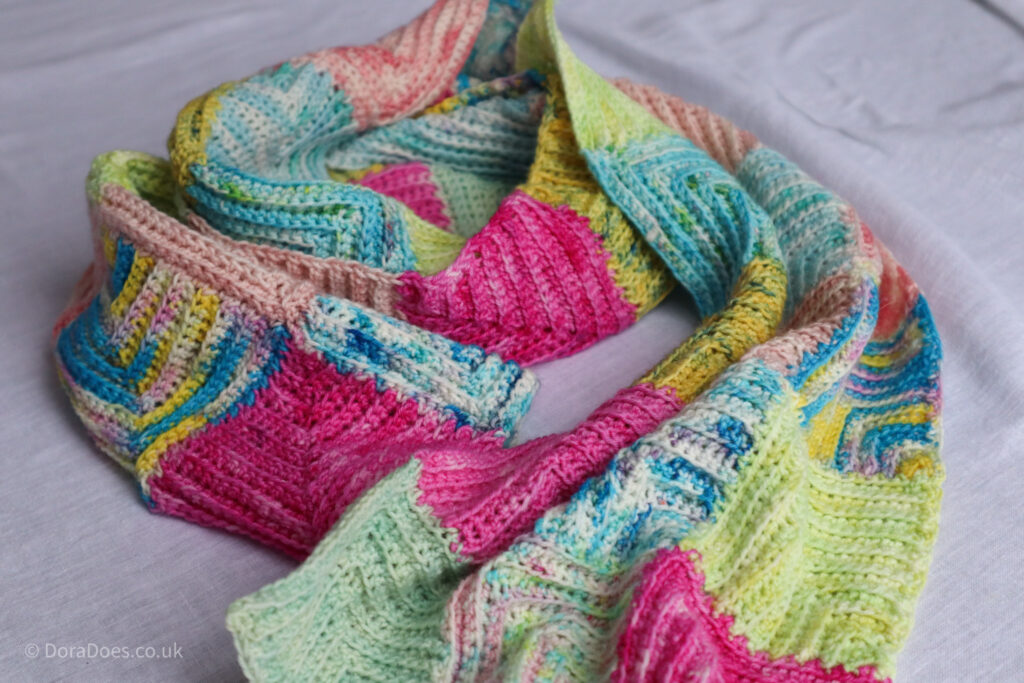
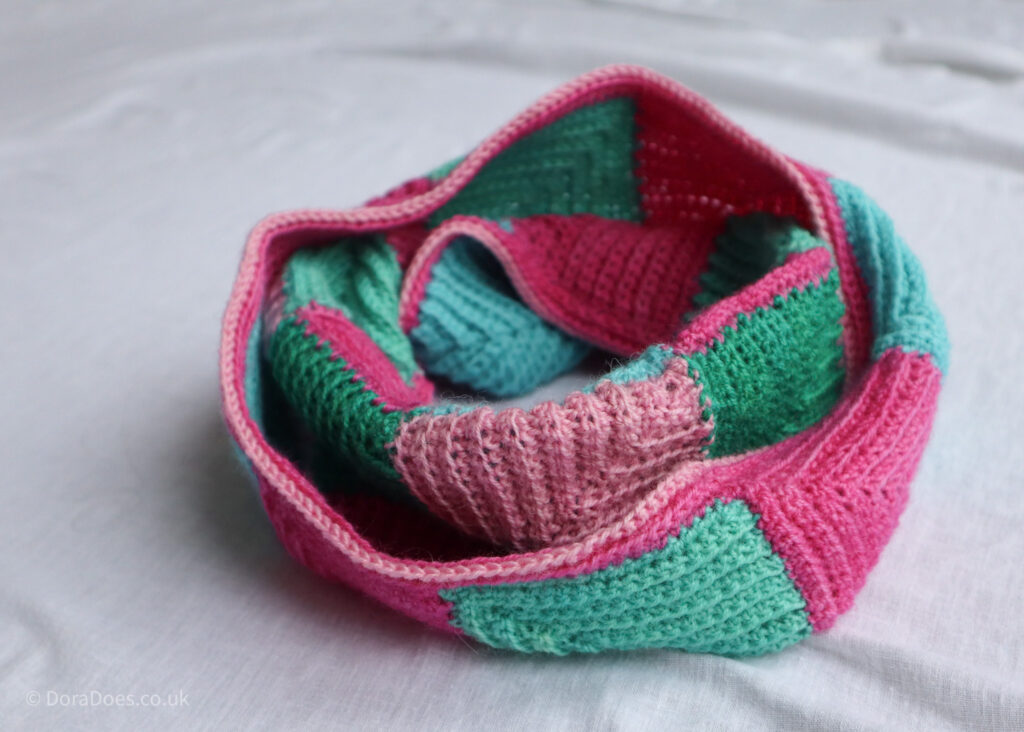
The cowl requires approximately 120g or 480m/530yds of 4ply or fingering weight yarn. That could be 6 x 20g minis or 12 x 10g minis.
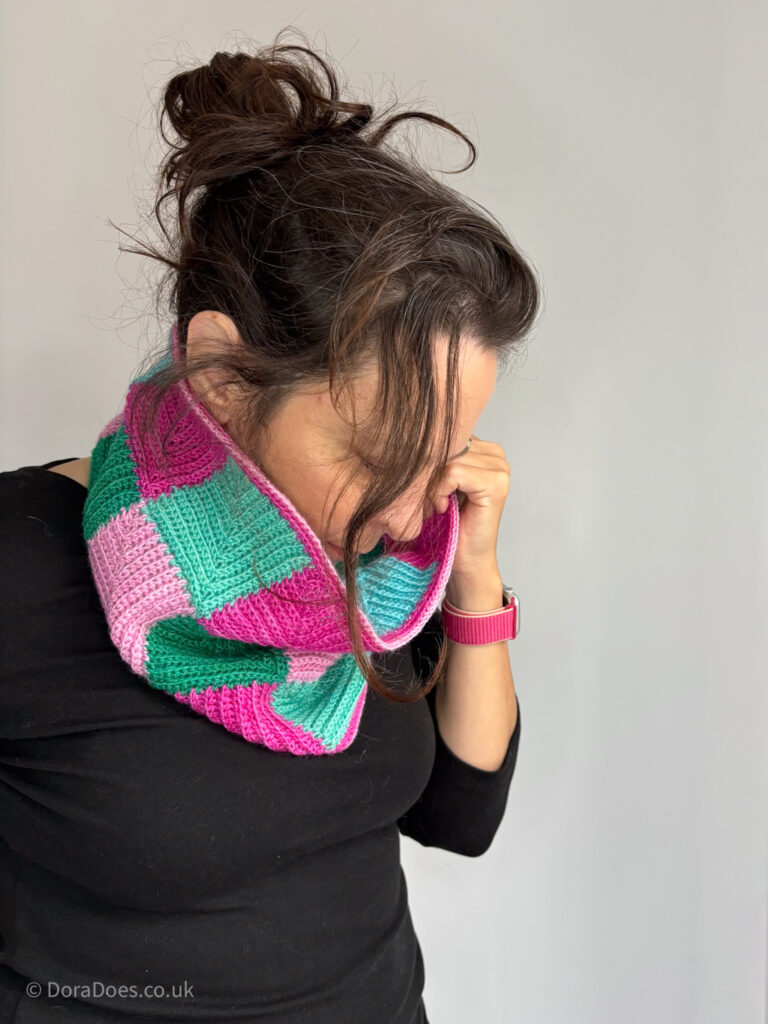
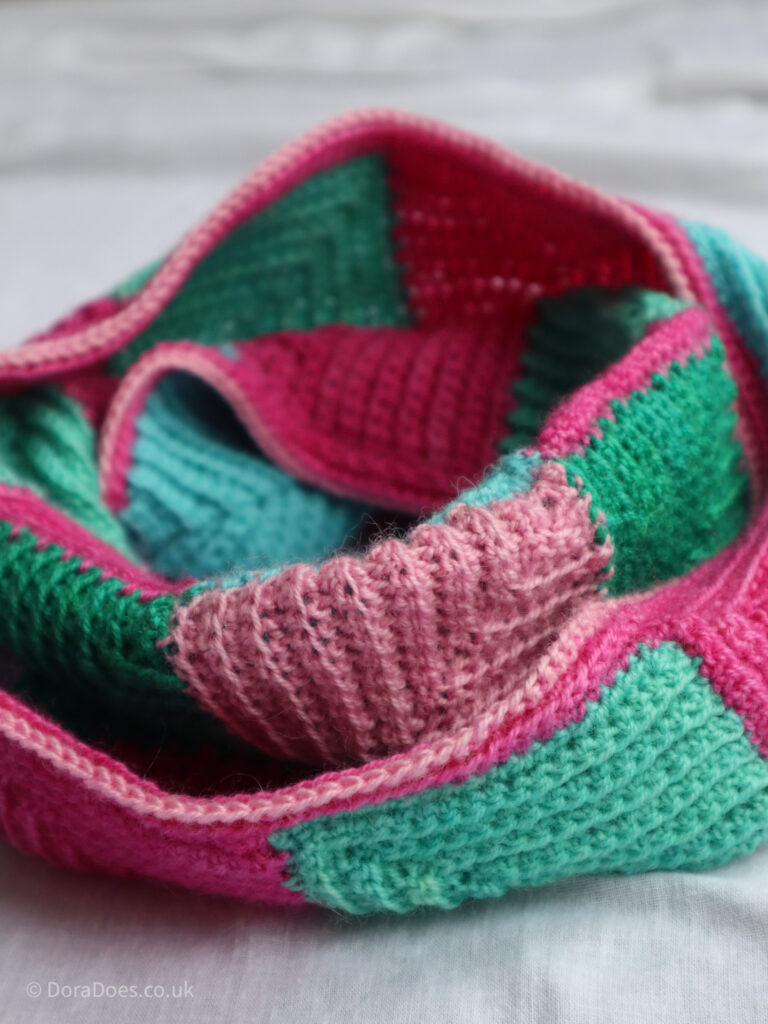
The item pictured used 6 x 20g River Knits Nene 4 ply minis, 100% Bluefaced Leicester Wool, 20g mini skein = 80m/88yds. This range comes in tonal colours. I used two skeins of the same shade of bright Crimson, a lighter pink and 3 shades from the Jade and Turquoise range.
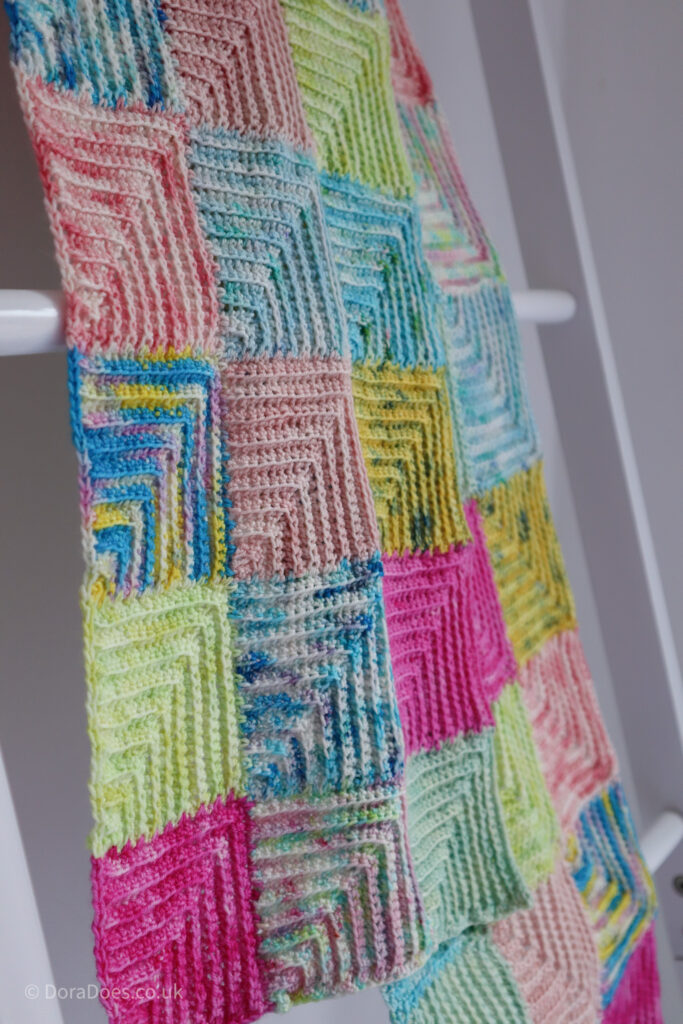
The scarf requires approximately 240g or 960m/1050yds of 4ply or fingering weight yarn. That could be 12 x 20g minis or 24 x 10g minis.
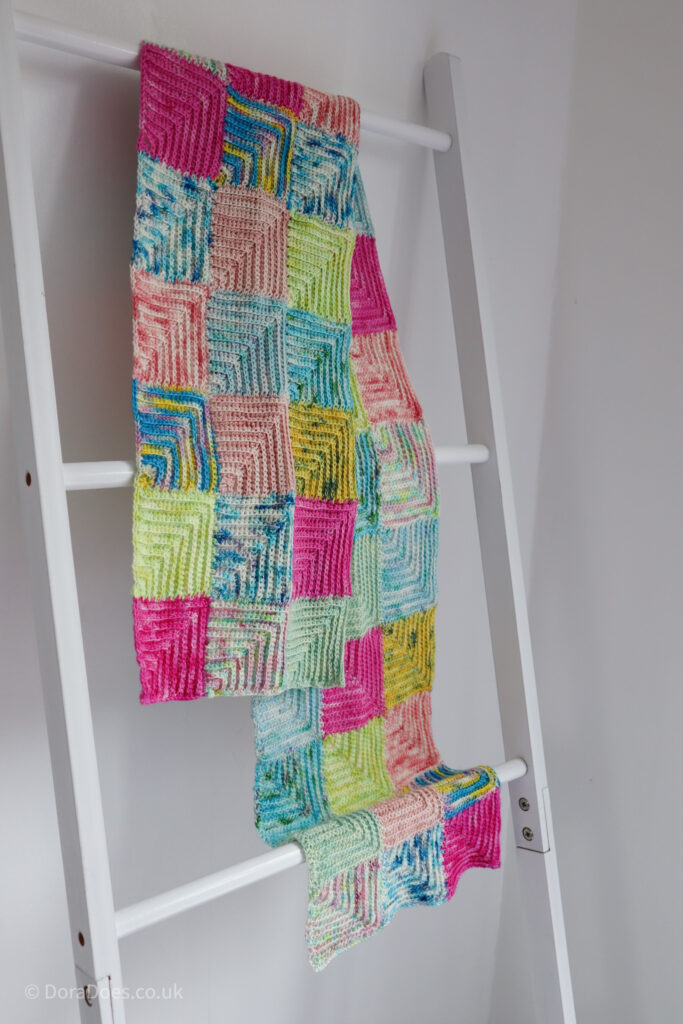
In the item pictured I used mainly Vicki Brown designs’ Sock minis, 75% superwash merino 25% nylon. 20g mini skein = 85m/95yds.
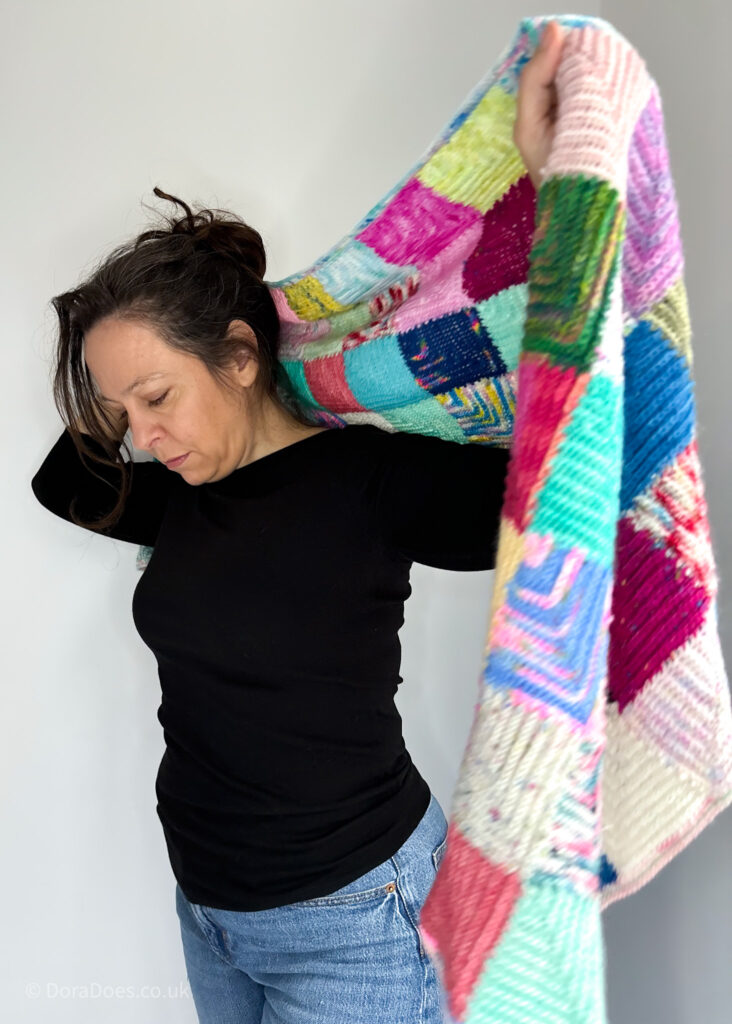
The wrap or lap blanket requires 480g or 1920m/2110yds of 4ply or fingering weight yarn. That could be 24 x 20g minis – the traditional full sized yarn advent – or a range of yarn leftovers and partial balls if you want to go full stash bust!
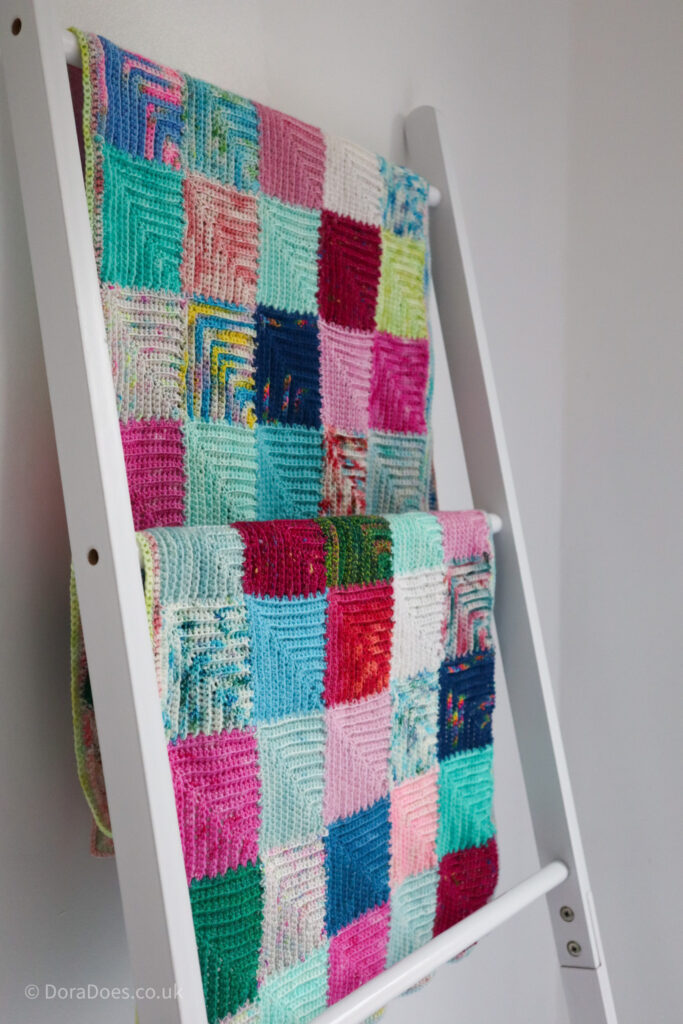
In the wrap pictured, I used a range of different fingering weight and sock yarns from my stash. I incorporated a range of fibres including merino, alpaca, linen blends, cashmere and silk to give it a rustic patchwork feel. I also used some leftover yarn from the cowl and the scarf as in some of the yarns I was able to make 5 squares.
Yarn Substitution Options
To create the projects shown, you will need similar yarn quantities and fibres as described. Different fibres and yarns will produce a different finished result.
However, you can really use any yarn to crochet mitred squares. The wrap pattern shows how it might look if you mix up your fibres too. This is a very versatile technique.
If you wish, you can create squares out of different yarn weights. Of course this means that the finished squares will be different sizes and use a different amount of yarn. If you are experimenting with different yarn weights or fibres, make one square and then weigh it to see how much yarn you used and therefore how much you will require to complete your chosen project.
You can get help with calculating your yarn usage here.
You may find this post useful when choosing yarn.
Other Materials & Notions:
- Stitch marker to mark the centre decrease stitch
- Yarn needle, scissors and a tape measure
- This project will require blocking to make it look its best, so I recommend a Blocking board and pins. Learn more about blocking here.
Colour selection
You can select the placement of different colours before you begin, or just add each one randomly if you are working from an advent.
For the cowl, I planned out the placement of the different colours.
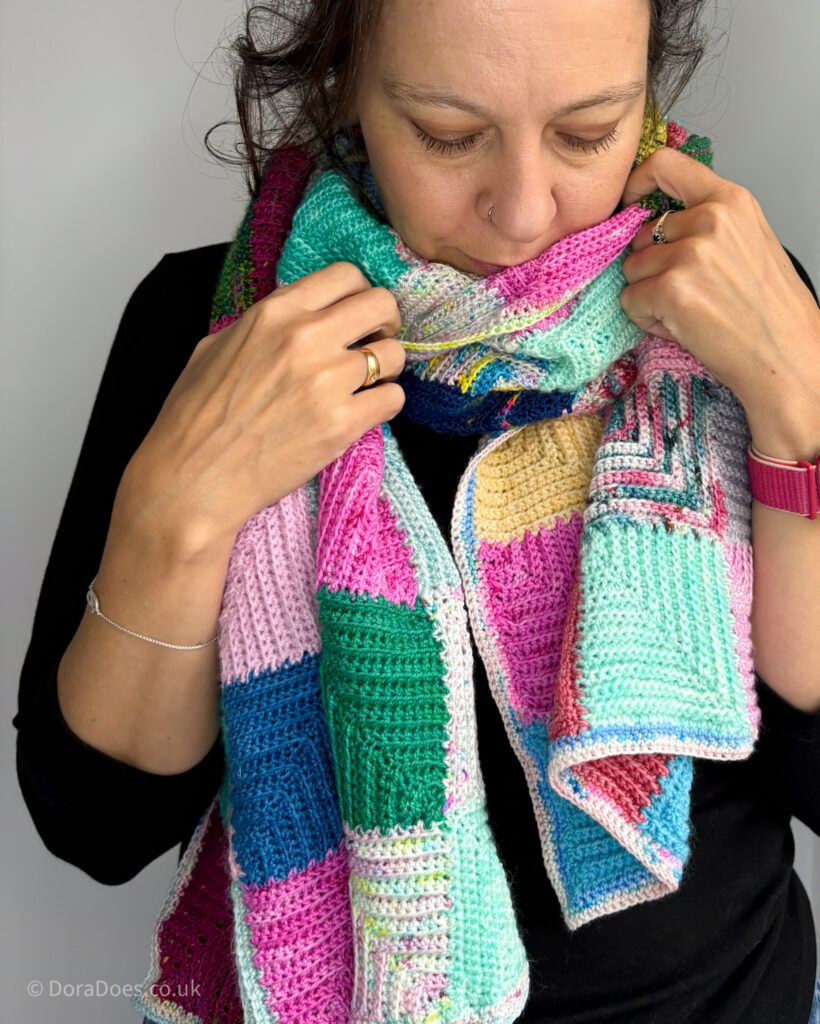
For the scarf, I worked in quarters – I could get 4 squares from each mini, then used each mini once, for the first 12 squares, then again and again and again. This gave a part planned and part random-seeming arrangement which had a nice distribution of the colours overall.
For the wrap I went freestyle deciding on colours row by row
Depending on the yarn you are working with, you could arrange your colours as stripes, in a fade, as chequers, in a colour block or fun shapes like tetris. Or you could just pick each one randomly.

Measurements & Finished Size
After blocking, each square measured around 8cm across each side
The size of each square before blocking varied, with different fibres, from 7cm to 7.5cm.
Based on these measurements the finished, blocked items, designed for adults, should measure as follows:
- Cowl: 26cm deep by 64cm in circumference / 10in by 25in
- Scarf: 24cm wide by 128cm long / 9.5in by 50in
- Wrap: 42cm wide by 155cm long / 17in by 61in (includes border)
- Blanket: 64cm wide by 96cm long / 25in by 38in
How to purchase a Dora Does crochet pattern:
I sell my PDF crochet patterns in my Etsy, Ravelry and Love Crafts stores. You can purchase this pattern on any of these platforms, depending on your preference. Simply click the relevant links throughout this pattern page to be taken to the listing, or visit the store homepages in the links at the start of this paragraph.

Stitches & Abbreviations: US terms
(UK Equivalent in Brackets)
- BLO = back loop only
- ch = chain
- PM = place marker
- rep = repeat
- RS = right side
- sc = single crochet (UK double crochet)
- sc3tog = single crochet 3 together (UK double crochet 3 together) – see special stitches
- sk = skip (UK miss)
- ss = slip stitch
- WS = wrong side
- yo = yarn over
Special Stitches
Single Crochet 3 Together (sc3tog)
Insert hook into first st, yo, pull up a loop (2 loops on hook), insert hook into next st, yo, pull up a loop (3 loops on hook), insert hook into next st, yo, pull up a loop (4 loops in hook) yo, pull through 4 loops to complete the stitch.
Gauge
Whilst gauge is not essential for this project, a variation in gauge will lead to a variation in the finished size and yarn requirements of your project
The squares I worked all measured from 7-7.5cm square before blocking. Each square was easily blocked to 8cm along each side. Blocking was only undertaken after the panel was completed.
This equates to the following, blocked, stitch and row gauge;
25 sts and 25 rows in 10cm of single crochet worked in the back loop only (BLO) using a 4mm crochet hook or size needed to obtain gauge.
Learn how to make and measure a gauge swatch here
Mitred Minis Instructions
Purchase the complete PDF version of this pattern from Ravelry, Etsy or Love crafts.
The instructions below outline how to make each of the 3 types of mitred square; A, B and C. It’s essential that you read and understand the mitred square and joining instructions before beginning your project.
The joining diagram (below) uses 9 squares as an example of how to join the squares as you go, and you can refer back to this for any of the projects.
Square A – First square
(Full mitred square tutorial here)
Row 1 (RS): Ch42, 1sc in second ch from hook, 1sc in next 18 ch, sk next ch, 1sc in next ch, PM in st just made, sk next ch, 1sc in each ch to end, turn. 39 sts
Row 2: Ch1 (does not count as a st throughout), 1sc BLO in next 18 sts (up to st before marked st), sk next st, 1sc BLO in marked st, move marker up to st just made, sk next st, 1sc BLO in each st to end, turn. 37 sts
Row 3: Ch1, 1sc BLO in next 17 sts (to st before marker), sk next st, 1sc BLO in marked st, move marker up to st just made, sk next st, 1sc BLO in each st to end, turn. 35 sts
Row 4: Ch1, 1sc BLO in each st across to st before marker, sk next st, 1sc BLO in marked st, move marker up to st just made, sk next st, 1sc BLO in each st to end, turn. 33 sts
Rows 5-19: Rep Row 4 until you have 3 sts remaining
Row 20: Ch1, sc3tog BLO
Ch1 to secure the final stitch (does not count as a st) and fasten off

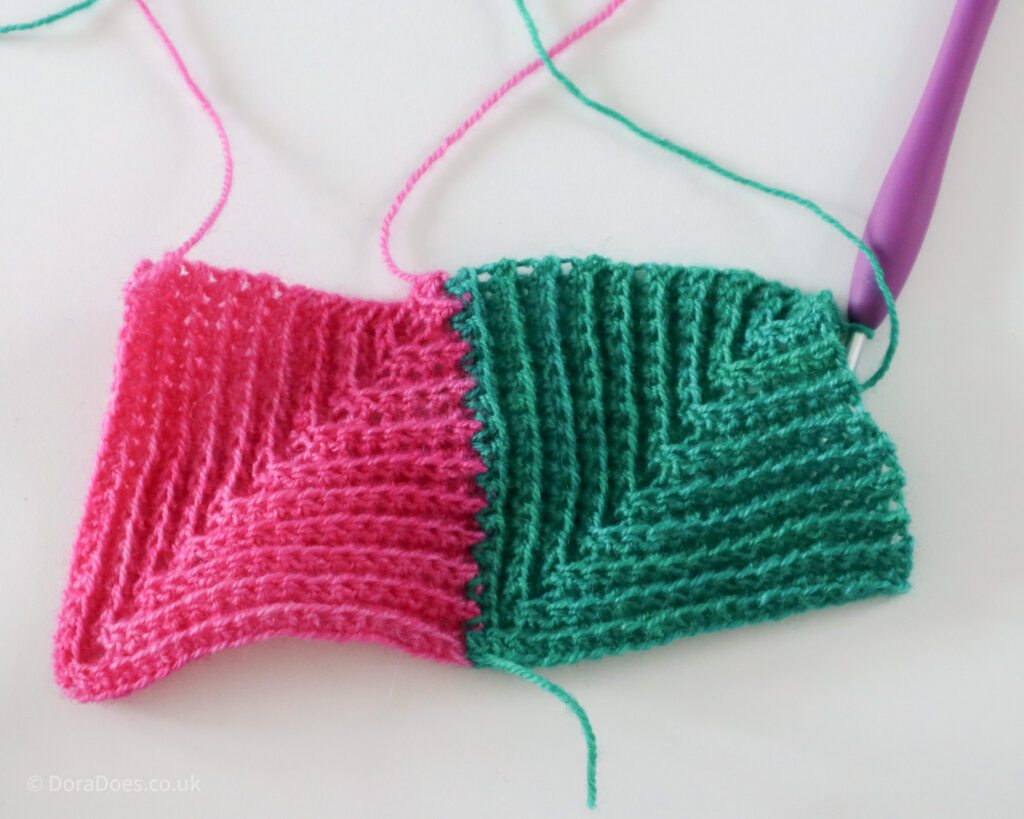
Square B – Working into one side of another square
Join yarn to to the corner of the previous square (as demonstrated in the joining diagram);
Row 1 (RS): Ch21, 1sc in second ch from hook and next 18 ch, sk last ch, 1sc into corner where yarn was joined, sk first row-end on the previous square, 1sc into next 19 row-ends, turn. 39 sts
Rows 2-20: As Square A
Ch1 to secure the final stitch (does not count as a st) and fasten off
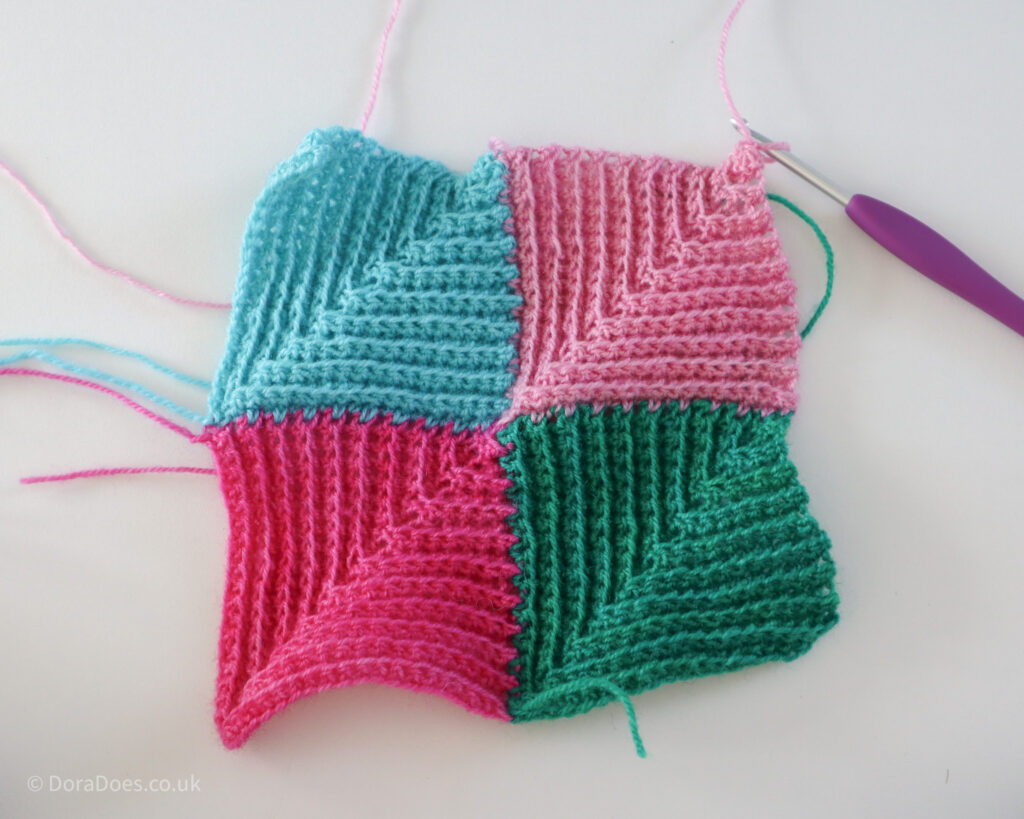
Square C – Working into two sides of previous squares
Join yarn to base of back of previous square so that you have the sides of two squares ‘in front’ of you;
Row 1: Ch1 (does not count as a st), 1sc into each of the first 19 row-ends up the back of the previous square, sk last row-end, 1sc into corner where 3 squares join, sk first row-end of next square, 1sc in next 19 row-ends to end of square, turn. 39 sts
Rows 2-20: As Square A
Ch1 to secure the final stitch (does not count as a st) and fasten off
How to add a border as you go
You may wish to add a border to the square on the outside edge of your project as you crochet it so that you can match the edging with the colour of the outside square (as I have done in the scarf pattern).
In order to add the border, you can add a row of single crochet into the row-ends on the outer edges after you finish the square, but before you fasten off.
On the joining diagram (over) on Squares 3, 6, 7 and 8, this is done by simply turning 90 degrees after finishing your square, chain one and crochet one single crochet into each row-end across the exposed edge.
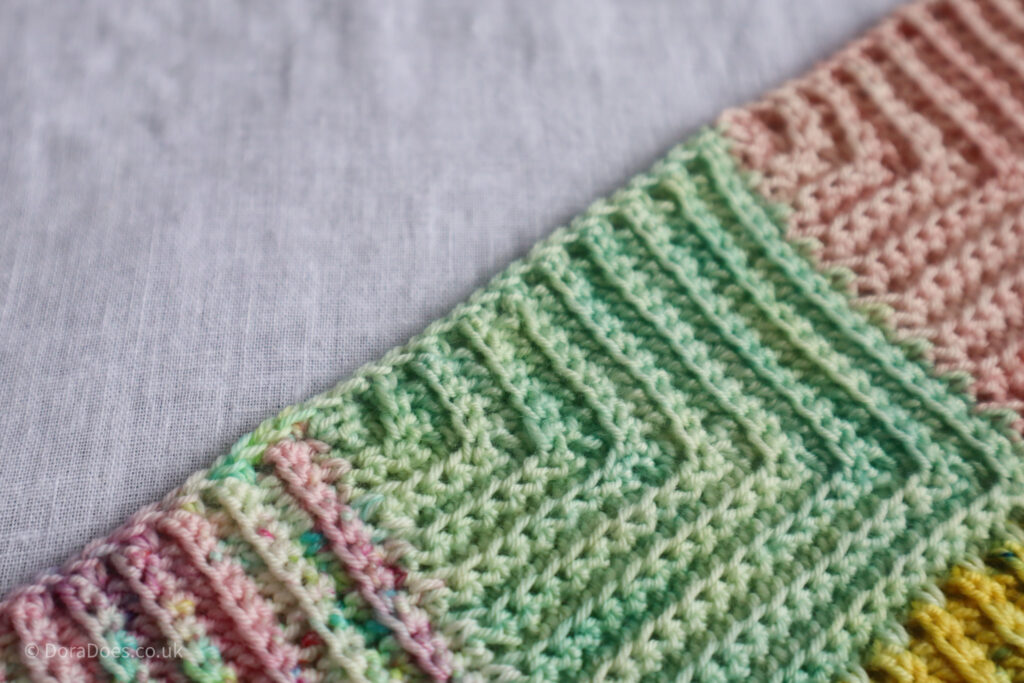
For Square 9 in the joining diagram, or the final square of your project, you will need to crochet into two sides of row-ends.
The left side can be worked as squares 3 and 6. Rather than joining new yarn for the base of the square, you can leave a starting tail that’s long enough to crochet into the row-ends along the base.
You can see these rows of single crochet charted in dark blue on the joining diagram over the page.
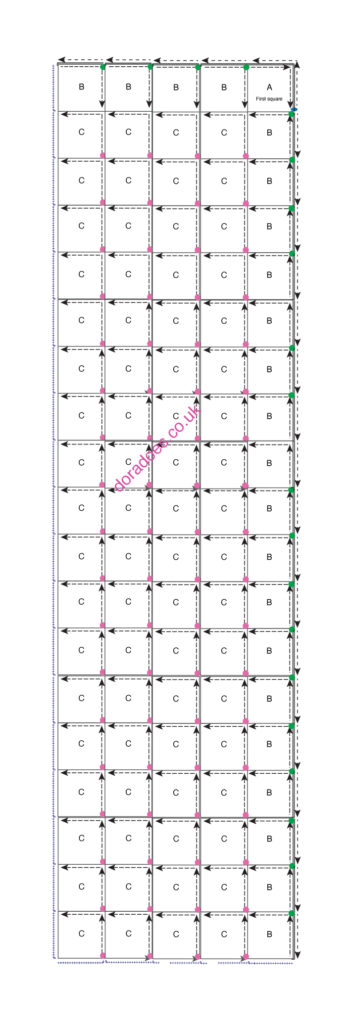
Joining diagram
The joining diagram below shows you which order to add the different types of squares with the pink and green dots showing you where to join your yarn for each new square
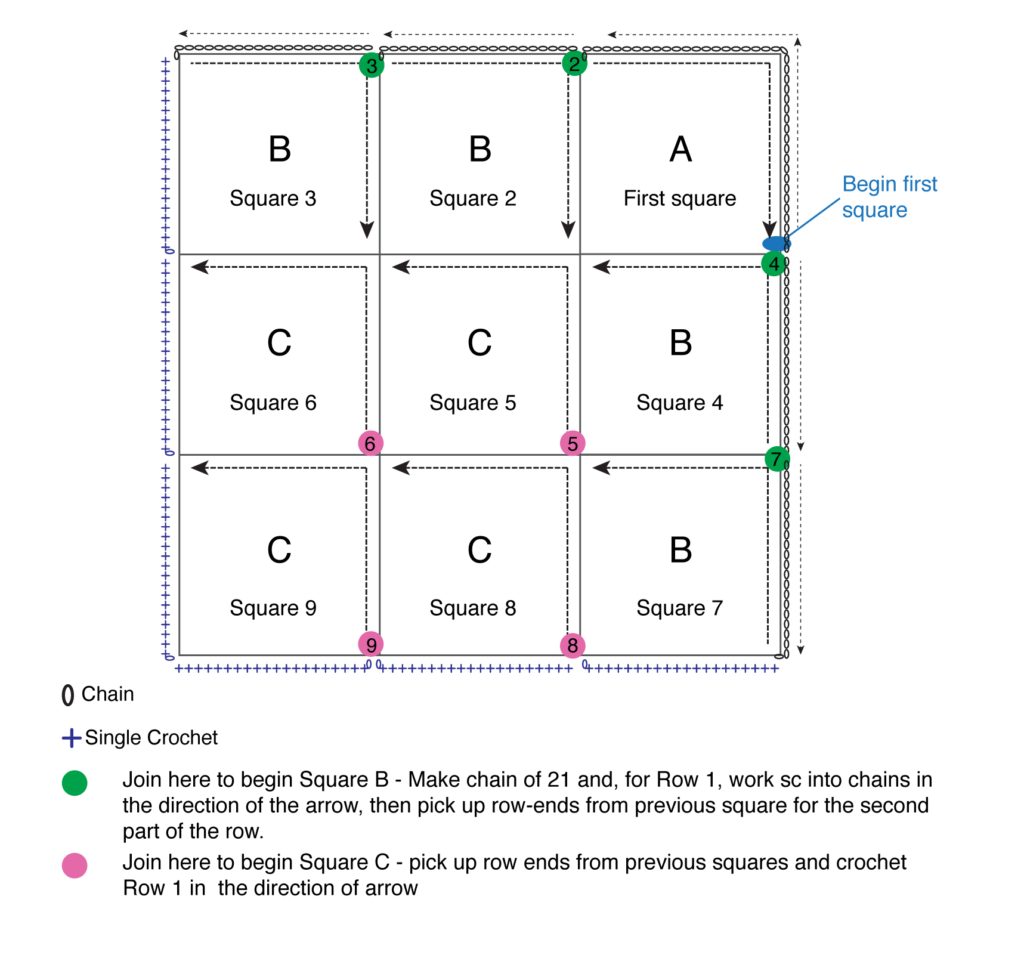
The arrows show the relative direction that the rows will be worked in. Depending on which side of the work you have facing you, you may see a mirror image.
Mitred Minis Cowl Pattern
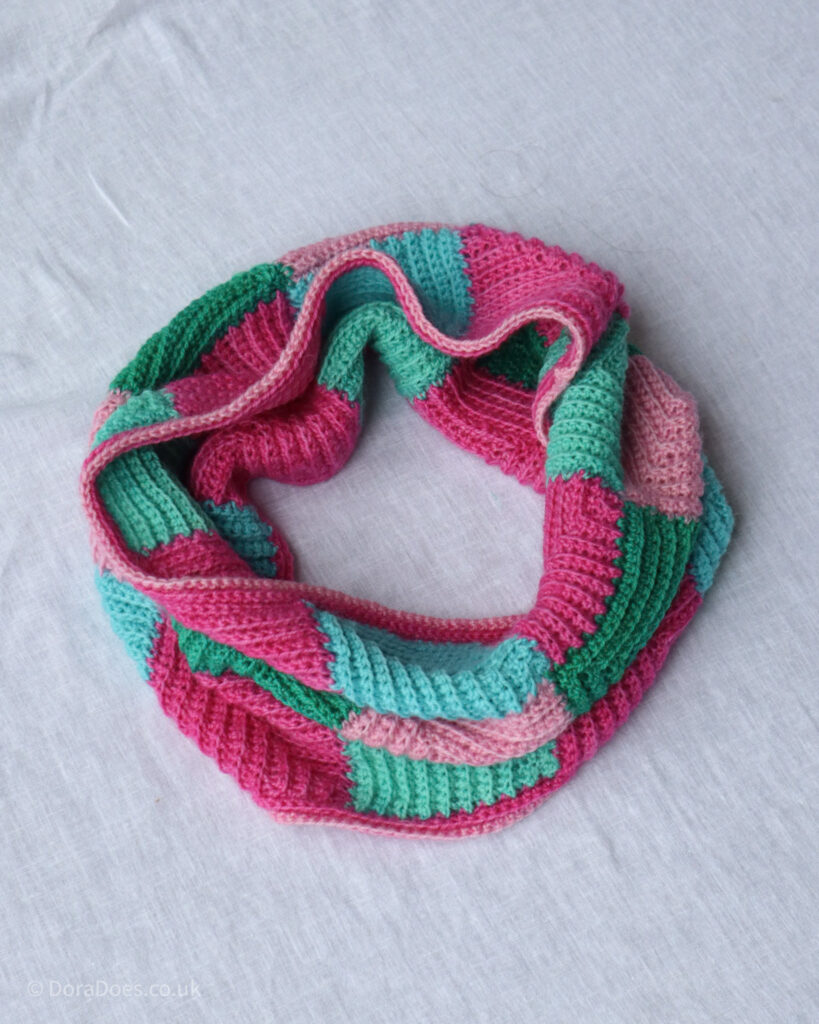
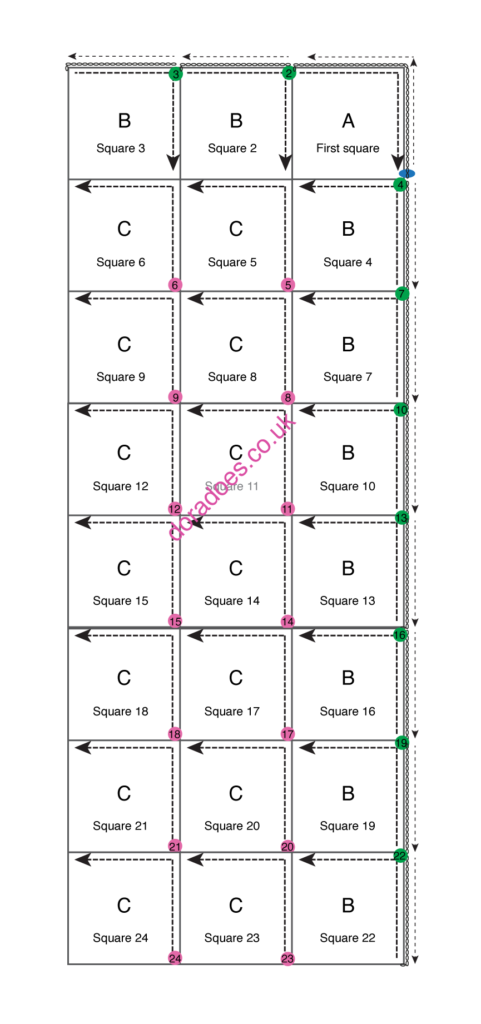
To crochet the cowl, join 24 mitred squares together in a 3 x 8 grid as outlined by the schematic below.
You do not need to work a border on the outer squares as you will create a trim once you join the ends. Block the rectangle ensuring the squares are even.
Putting it together
To put the cowl together, sew the outer edges or squares 1, 2 and 3 to squares 22, 23 and 24 with WS facing. I used mattress stitch for the seam and colour matched the yarn I used to sew the ends together to the top squares.
Adding the Trim
Repeat on the top and bottom of the cowl
Using your choice of yarn colour, join your yarn to the top of the seam, with right side facing.
Using a 3.5mm crochet hook;
Row 1 (RS): Ch1 (does not count as a stitch), 1sc in each row-end or chain (depending if you’re working on the top or bottom) around the long edge of the cowl, ss to top of the first stitch, turn
Row 2: Ch1, 1sc BLO in each st around, ss to top of first st, turn
Rows 3-4: Rep Row 2
Fasten off and weave in ends
Mitred Minis Scarf Pattern
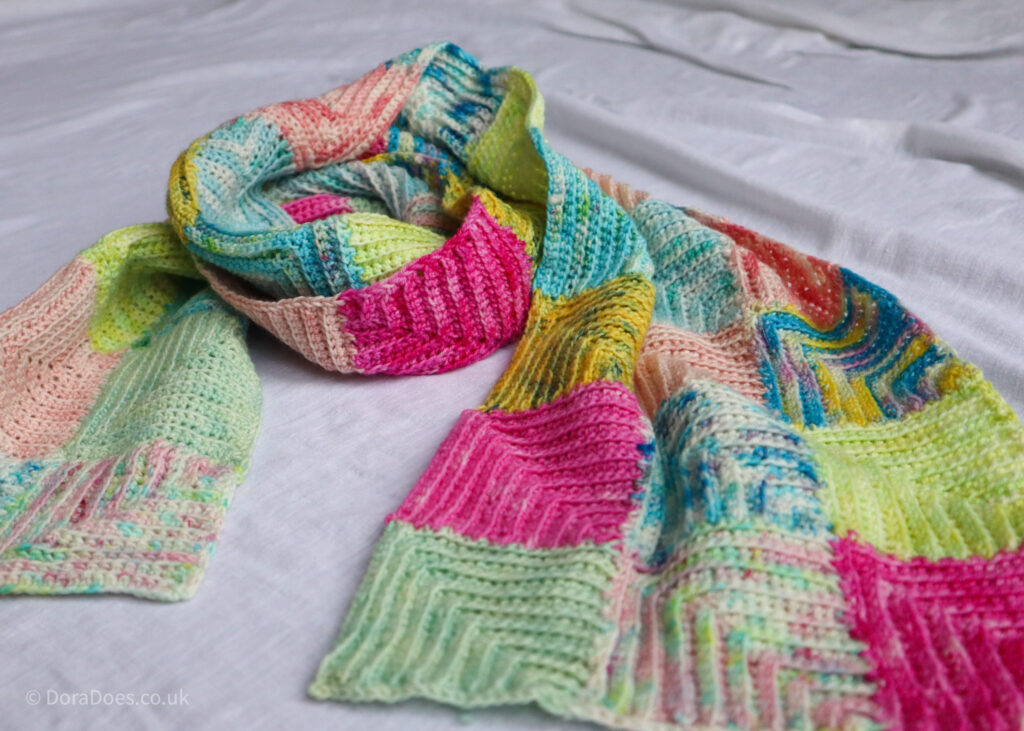
To crochet the scarf, make and join together 48 mitred squares in a 3 x 16 grid as outlined by the schematic below.
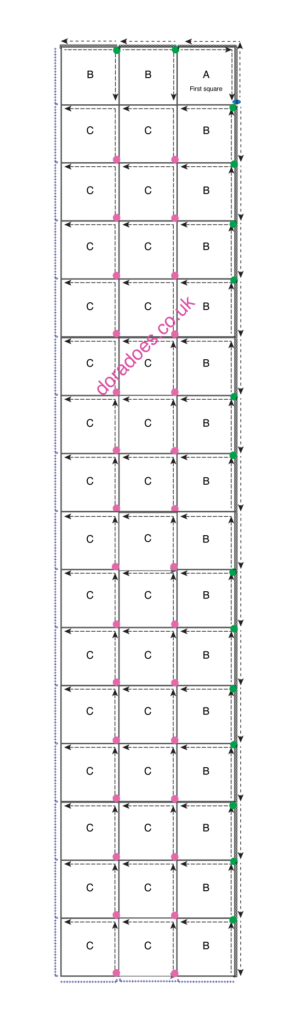
Work a border on the outside squares as outlined in the joining instructions.
Fasten off, block to shape and weave in ends

Mitred Minis Large Wrap Pattern
To crochet the wrap, make and join together 95 mitred squares in a 5 x 19 grid as outlined by the schematic to the below.
Work a border on the outside squares as outlined in the joining instructions. (This is optional as I also added a separate border.)
Border
For my border, I used the small amounts of yarn left over from my minis, joining one scrap to the last using the ‘magic knot’.
With right side facing, join yarn to one of the corners of the wrap.
Row 1 (RS): Ch1 (does not count as a st), 3sc in the corner, PM in second of the 3 sts just made, [1sc in each st down the side of the wrap, 3sc in the next corner, PM in 2nd of the 3 sc] three times, 1sc in each st to end, ss to top of first sc, turn
Row 2: Ch1, [1sc in each st to marked st, 3sc in marked st, mover marker up to 2nd of 3sc] four times, 1sc in each st to end, turn
Row 3: Rep Row 2
Fasten off, block to shape and weave in ends
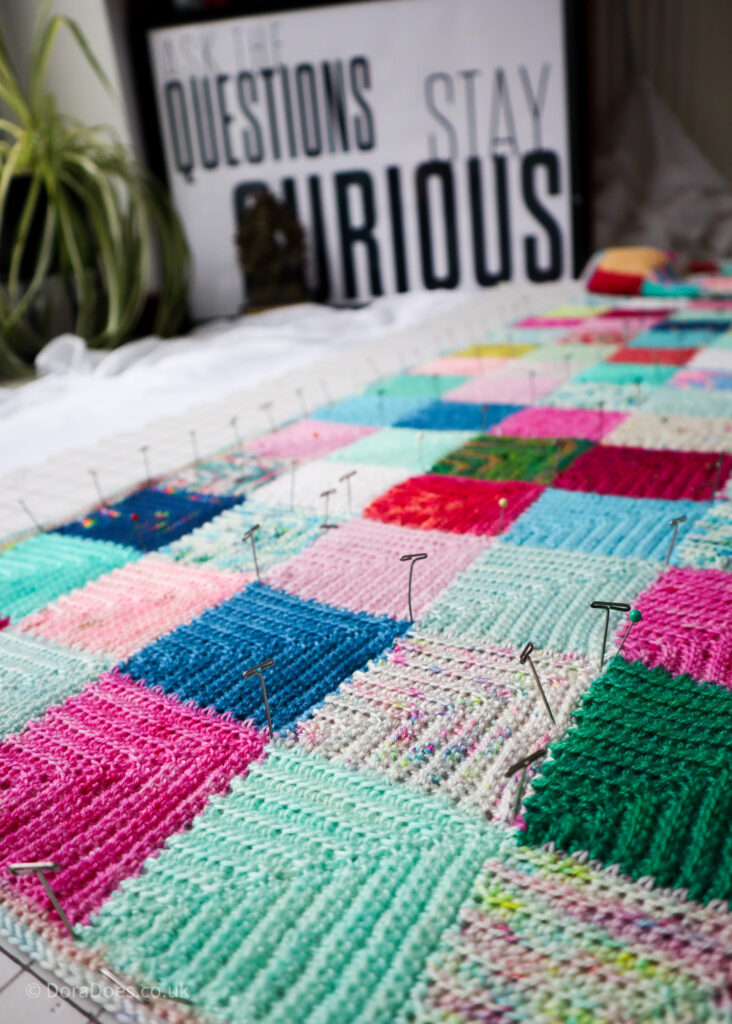
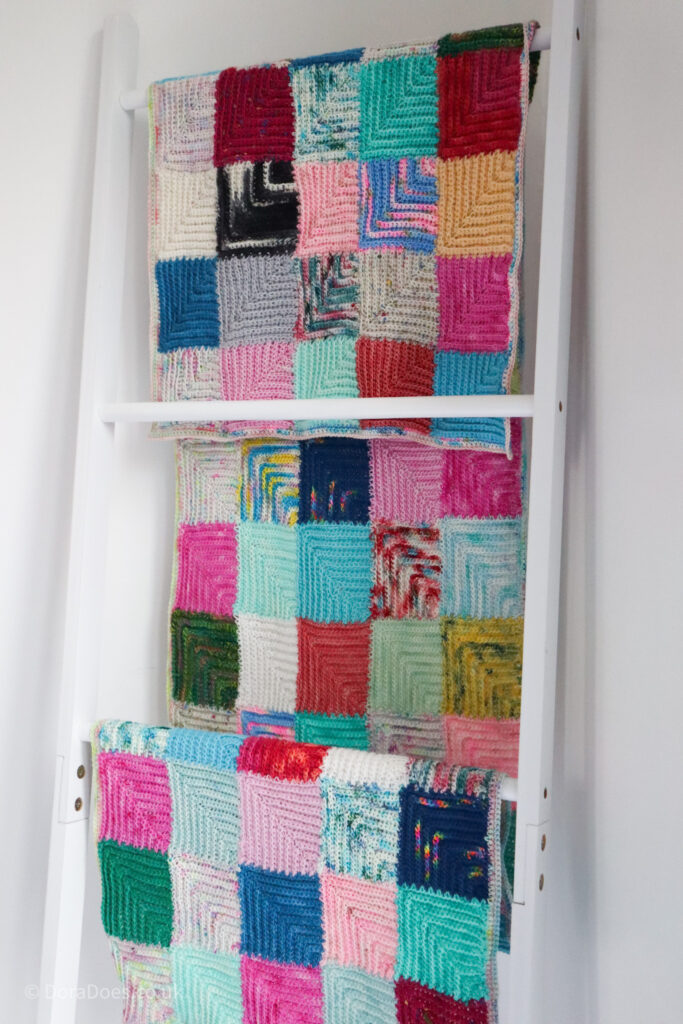
Mitred Minis Lap Blanket
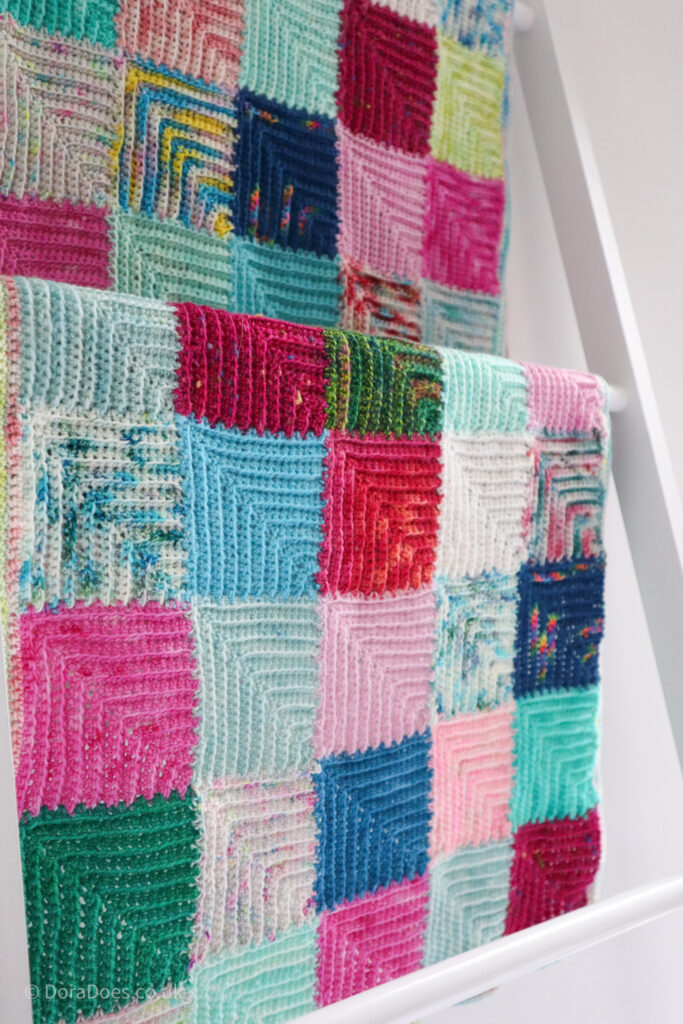
To crochet the wrap, make and join together 96 mitred squares in a 8 x 12 grid as outlined by the schematic to the below.
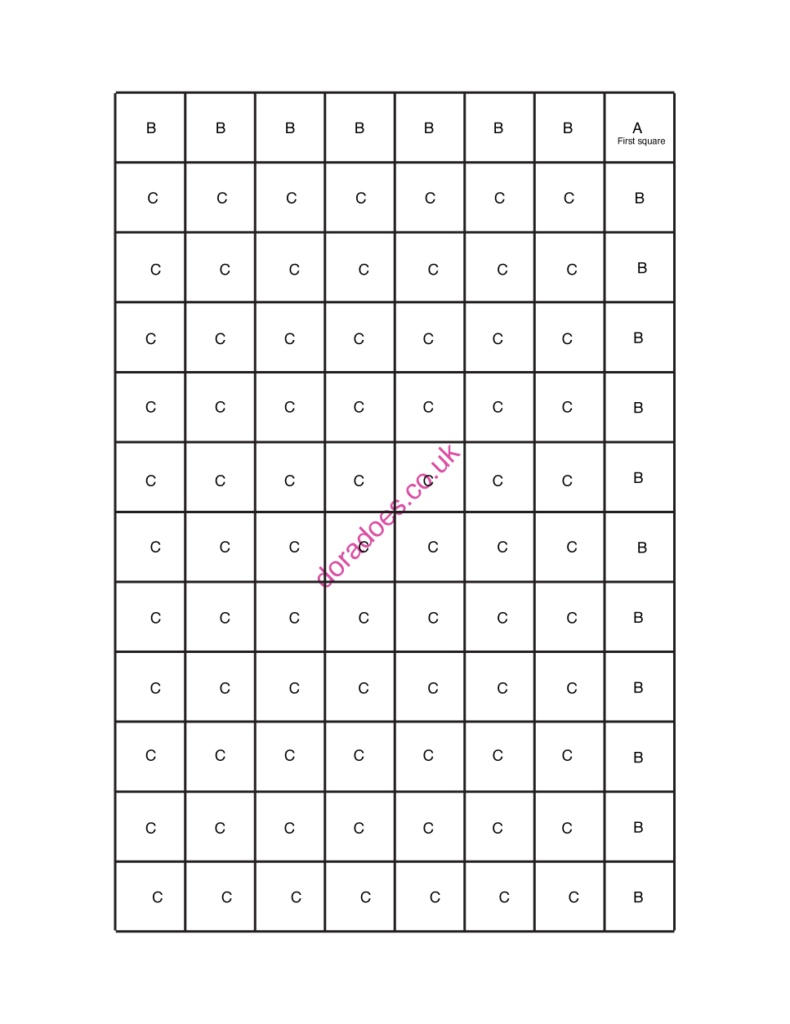
Work a border on the outside squares as outlined in the joining instructions.
If you desire, you can add a border using the same method described for the wrap.
Fasten off, block to shape and weave in ends
How to find me and share your finished makes
- On Instagram, you can use the hashtag #DoraDoes to share your finished projects or just tag me @doraexplored
- Sign up to the WiP Tip for weekly crochet chat, offers and exclusives straight to your inbox – click here to sign up.
- Check out my YouTube Channel for my biweekly ‘Crochet Studio Sessions’ podcast.
Happy Hooking
More Crochet Scarf, Cowl and Shawl Patterns
Copyright Dora Does Limited, Registered in England, Company Number 13992263. This pattern is for personal use only and may not be shared or reproduced in written, photo, video or any other form without prior written consent. All rights reserved. Terms of service.

This is so exciting … it has endless possibilities !! I have already started learning the technique, it is perfect for a dog blanket which I have been thinking about for a some time. Thank you as always for your brilliant instruction. Cathy B
Thank you for the lovely feedback. The blanket sounds great – lucky dog!