How to crochet a rectangle using the corner to corner (c2c) stitch
In this post I want to expand a bit on my corner to corner crochet stitch tutorial by showing you how to crochet a rectangle using the corner to corner (c2c) stitch pattern.
When you work the traditional c2c pattern, you increase equally along both sides to the widest point, then start to decrease equally. This creates a square piece of fabric.
However, there are many reasons you may wish to create a rectangular shape instead. For example, you may want to crochet a scarf or blanket or afghan, so it’s a useful technique to learn.
You can also apply the same principle to any other stitch pattern worked from one corner to the other. (more about that at the end!)
Summary of Corner to Corner Stitch
I’ve added a few reminders about the basics of c2c below, but if you’re new to corner to corner, you may wish to check out my c2c photo tutorial first as this post assumes you know the basics.
Stitches and abbreviations (US Terms)
- ch = chain
- dc = double crochet (UK treble crochet)
- sp = space
- ss = slip stitch
Traditional c2c increase and decrease pattern rows
Let’s just remind ourselves of the typical increase and decrease pattern row repeats for square corner to corner stitch:
Increase Row: Ch6, 1dc in 4th ch from hook and next 2 ch, *ss into ch3-sp in next block, ch3, 3dc in the same ch3-sp; rep from * to end, turn
Decrease Row: Ss into the 3 dc from the end of the last row and into the next ch3-sp, *ch3, 3dc in ch3-sp, ss into next ch3 sp, rep from * to the end of the row turn – do not make a block in the last ch3-sp (i.e., stop at the ss in the last ch3-sp)
How to crochet a rectangle in the corner to corner stitch
Now you’ve been reminded of how to make the typical square c2c pattern, below I’ll outline how to modify this to create a rectangle.
C2C Regtangle Step 1:
Work in the traditional corner to corner pattern until one side of your work reaches the width of the shortest side you want your rectangle to be.
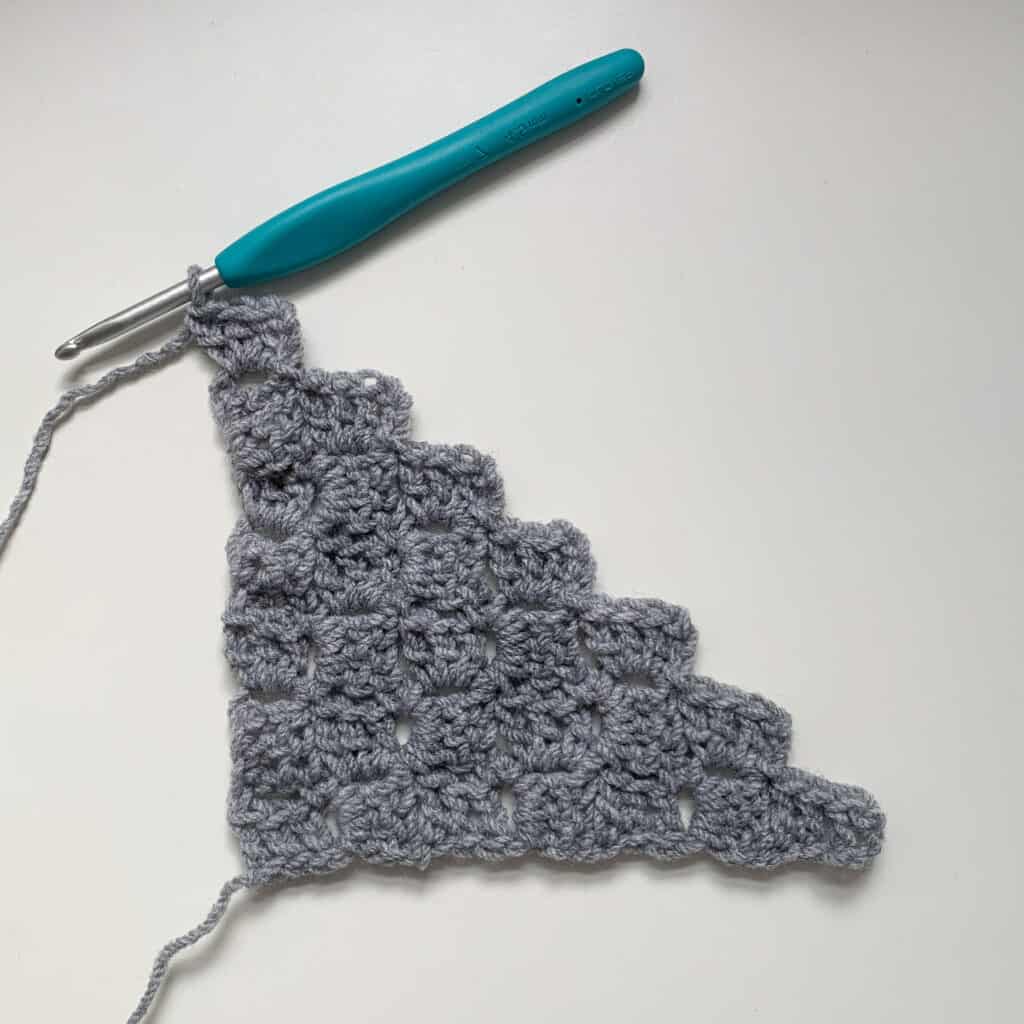
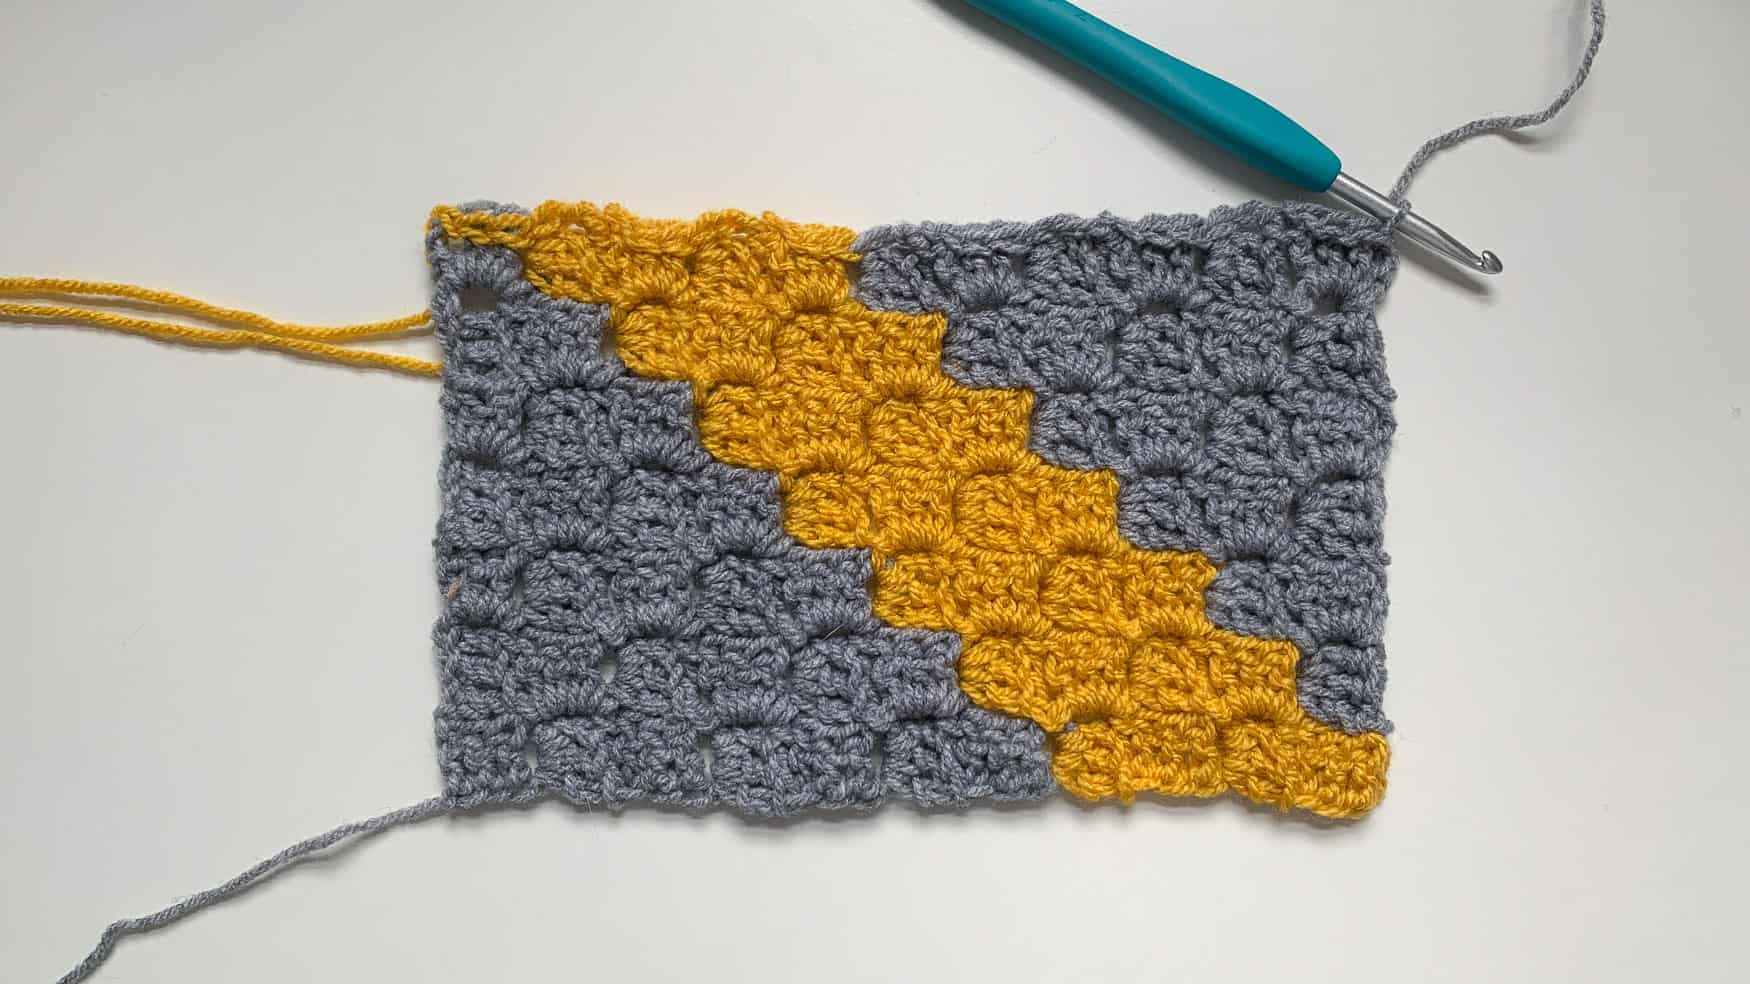
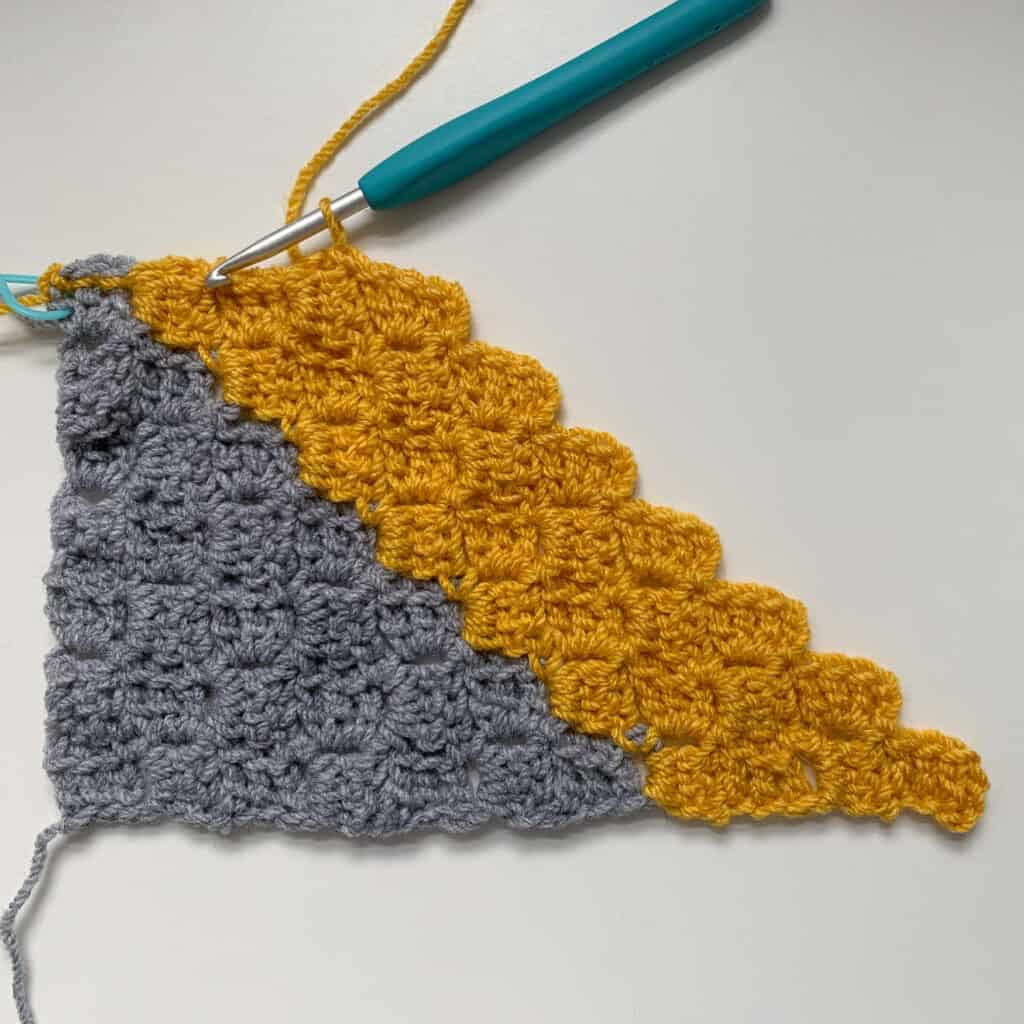
In the swatch above, we are going to keep the vertical side the same height (7 blocks tall) and increase along the horizontal bottom side.
C2C Rectangle Step 2:
To continue with a consistent height requires you keep the same number of blocks in each row. This is done by working an increase on one end of the row and decrease on the other, over a 2 row pattern repeat.
The first row starts with a decrease and finishes like an increase row, the second row starts like an increase row and finishes like a decrease row. This insures all your decreases are on one side and your increases are all on the opposite side.
I have written this out in pattern form below along with a picture guide of each step.
Rectangle C2C Row 1:
Ss into the 3 dc from the end of the last row (making your decrease), *ss into ch3-sp in next block, ch3, 3dc in the same ch3-sp; rep from * to end, turn
The images below show how this is worked.
I have changed to a yellow contrasting colour yarn to help you see the ‘rectangle rows’
Start by slip stitching across the dc and ch3-sp from the previous row, then chain 3. This is essentially the decrease.

Next, work the 3dc block into the ch3-sp, ss into the next ch3-sp and ch3 to continue (below).
You can add a stitch marker to the side where the decreases will be worked to help keep yourself on track if you find it useful.
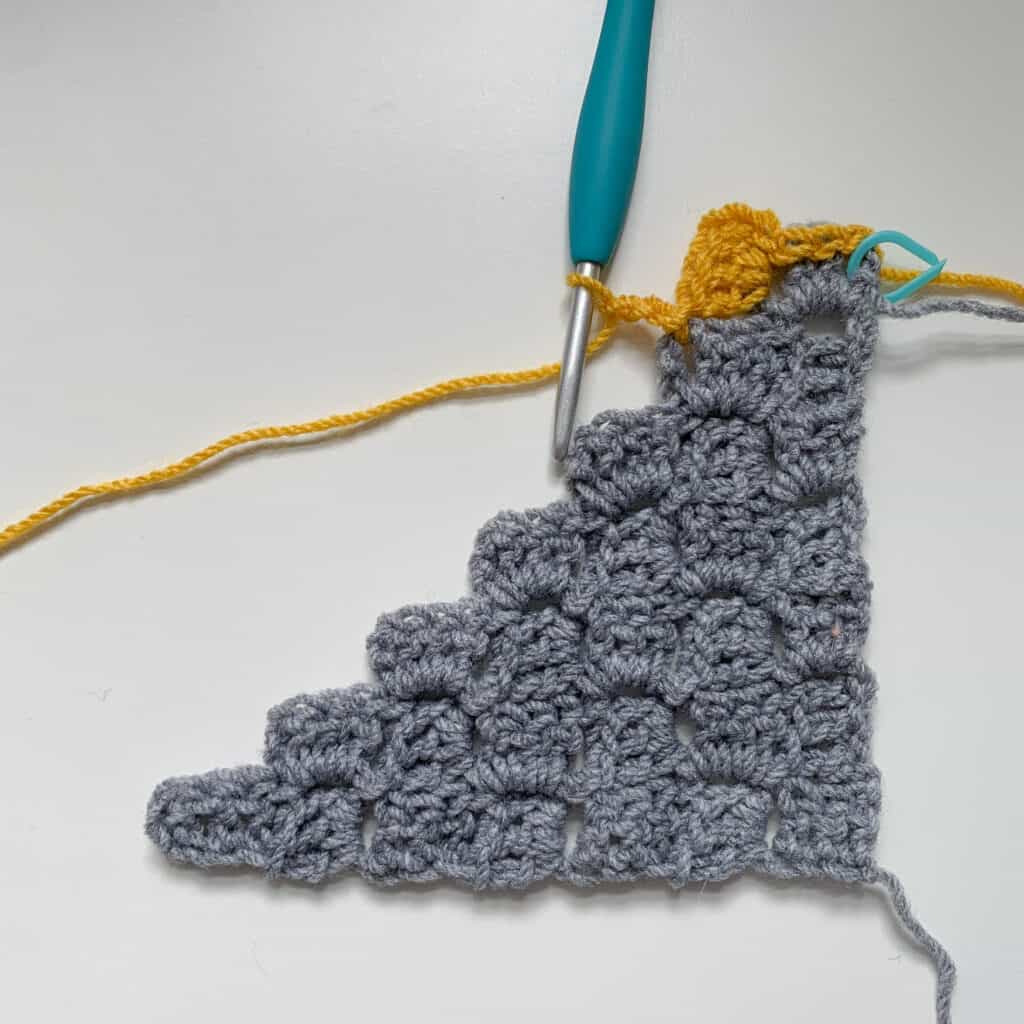
Continue working in the c2c pattern to the end of the row, working a block in the last ch3-sp as with a normal increase row. (below)
You can see above that atthe end of Rectangle C2C Row 1 I still have 7 blocks on the vertical, 7 blocks on the diagonal but 8 blocks along the bottom on the horizontal.
Now you’re ready for the second row repeat.
Rectangle C2C Row 2:
Ch6, 1dc in 4th ch from hook and next 2 ch, ss into next ch3-sp, *ch3, 3dc in ch3-sp, ss into next ch3 sp, rep from * to the end of the row turn.
Let’s take a look at how this second row looks.
You start by chaining 6 as with a normal increase row (below)

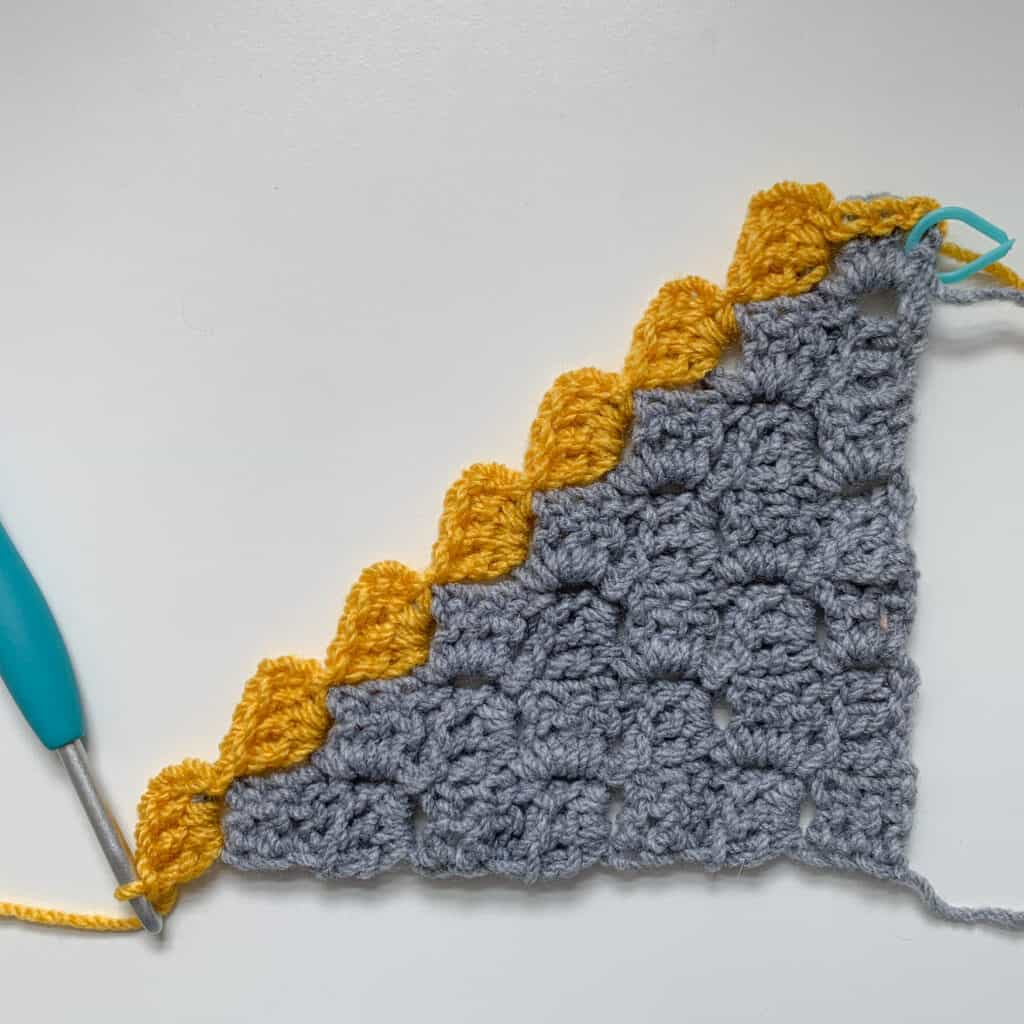
Then you work in the normal c2c pattern to the end, but you do not make a block in the last ch3-sp. (This is the same as the second half of the decrease row.)

After Row 2 you can see there are still 7 blocks on the diagonal but 9 across the bottom.
To continue working your rectangle, simply repeat Rectangle Rows 1 and 2 until your rectangle reaches your desired length.
Just to reiterate, that to keep straight sides, it’s important you keep all the increases on one side and all the decreases on the other side. This is why you have a two row, alternating pattern repeat.
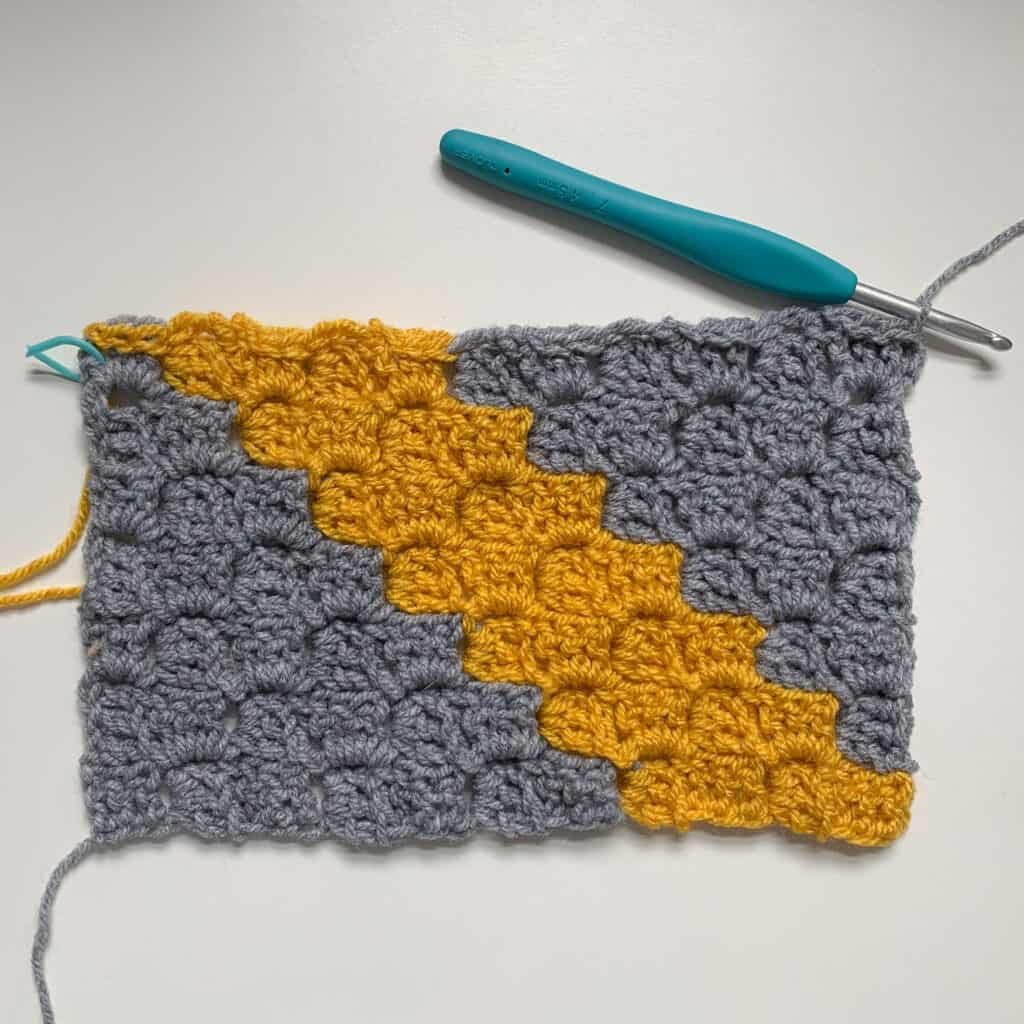
Below you can see I have worked another repeat of each row so I now have 11 blocks across the bottom and still 7 across the diagonal.
C2C Rectangle Step 3:
The last stage is to finish the rectangle by decreasing to the end.
I have changed back to the grey yarn to show you where the decrease is placed.

From here, you simply start working the traditional decrease row from the repeat pattern until you reach one single block.
Decrease row: Ss into the 3 dc from the end of the last row and into the next ch3-sp, *ch3, 3dc in ch3-sp, ss into next ch3 sp, rep from * to the end of the row turn – do not make a block in the last ch3-sp
The first two decrease rows are shown in grey below. This just works like a traditional c2c decrease (and always goes super fast!).


And here is the final rectangle after all the decreases:
That’s all there is to it!
C2C Decrease Tip
When beginning any c2c decrease row, you may want to experiment with slip stitching in between the posts of the first 3 dc and ch3-sp (3ss in total), rather than into the top of the stitches and into the ch3-sp.
This can give a flatter edge to the project which is great if you’re not adding a border.
I have used this technique on the swatched pictured, but I leave it to you to decide which you prefer!
Crochet a rectangle in any corner to corner construction
I have written before (here) about the distinction between the corner to corner stitch pattern and the construction style of corner to corner.
As I mentioned at the start, the technique I have showed you here, for turning a square into a rectangle when working corner to corner, can be applied to both to the c2c stitch AND construction style.
That means that you can adapt it to any crochet stitch worked from one corner to the other.
The key is to decrease on one side and increase on the other by the same amount. This will keep your numbers the same and your edges straight.
The precise details will vary depending on your chosen crochet stitch or stitch pattern, but the principle remains the same.
As an example of this, my striped bolster pattern uses the corner to corner construction style with US single crochets. It’s worked in a rectangle using this decrease / increase method to create a rectangle that is wrapped around the cushion.

I hope you have found this post useful and will find new ways to work with the lovely c2c stitch.
For more corner to corner crochet project ideas, check out this recent round up.
Happy Hooking
Dx
Copyright Dora Does Limited, Registered in England, Company Number 13992263. This pattern is for personal use only and may not be shared or reproduced in written, photo, video or any other form without prior written consent. All rights reserved. Terms of service.


Im having trouble with my rectangle c2c. Could you please help me.
Sure, Can you be a bit more specific about what the issue is / where you’re going wrong?
Thanks for this tutorial. It helped me a lot. I was wondering if I want to make a blanket 1.1 x 1.4. If I stop increasing at 1.1 wil I be able to get the other side to 1.4? If so how do I do it please? Sorry if this is a stupid question although I crochet for many years this is a first for me
Hi, sounds like you’ve got it! You work until one side is the desired length then you stop increasing at that part and continue crocheting along the other edge until the longest side reaches your desired length, then you start to crochet the decrease.
I have all the skeins of Caron Simply Soft to crochet an afghan for a friend. She wants a 60 x 60 inch square – and a soft feel.
Will your pattern provide for such a square and softness??
Thank you very much.
Hi there, I would advise making a swatch in this stitch pattern with your intended yarn and crochet hook to see if you like how the fabric comes out. That way you can decide if it’s suitable. Corner to corner crochet blankets are pretty popular. Though for a square blanket you wouldn’t need to make the decreases for a rectangle as described in this post.
THANK YOU!! I was at a loss for years re how to do a c2c rectangle. I could only do a square. I printed someone else’s directions some time ago and tried to follow them and just couldn’t. This past weekend, I decided to look online again and found this page. You explained it in such a straightforward manner that the lightbulb went on. It’s exciting to finally be able to create a c2c project in any size I want!! I referred members of my Facebook crochet group to your page. Thanks again!!
Ahh, thank you! I was so glad I was able to help it slot into place 🙂
Thank you for all the information! Most crocheters would make you pay for it. I don’t think that making other crocheters pay is the way to make money. They are on here to learn and share. It’s one thing to sell great patterns and another to answer questions and share knowledge. Don’t get me wrong, I have met a lot of really nice people on my quest so far but there are a few that just see dollar signs. I asked a question the other day about garments, I don’t even remember what it was, now I am being hounded by one person to take a class from her for only $97. She said there is no way I can learn without her class. So now I am determined to learn on my own as fast as I can. I have been practicing on doing shawls and I am attempting a top for my daughter.
I’m so glad you found the information useful. The monetisation is a tricky one, because for most it’s about sharing the craft they love but also paying their bills and putting food on the table. It takes years to build experience and audience as a designer, and most share a lot of their knowledge for free, or via blogs with ads. Blogging is incredibly time consuming and has it’s own costs which need to be covered.
It is definitely possible to learn to crochet garments for free through various blogs and free resources (I am self taught), but with a course you are paying for ease of access to all the information you need in one place in an organised way without ads etc., so I do support those who share their knowledge in this format as putting them together is an incredible amount of work (though misleading or pushy sales tactics are not for me!).
It’s great that people can choose which way they wish to learn. Though I always say there is no substitute for experience and trial and error!
I hope your top is a great success 🙂