Crochet Corner to Corner (C2C) Stitch Pattern Tutorial
The Corner to Corner, or C2C stitch pattern is hugely popular among the crochet community. It’s worked on the diagonal, from one corner, increasing to the widest point and eventually decreasing back to the opposite corner (hence the name).
It creates an easily worked dense fabric making it perfect for home decor and garments.
The pattern is worked in diagonal blocks with each block being made up of a chain 3 and 3 double crochets (UK trebles). You turn at the end of the row and work more blocks into the space either side of the block on the previous row.
It looks pretty complicated but is actually a really fun and easy stitch to work. Because it is a simple repeating pattern, it’s great for large projects you can work without too much thinking or counting!


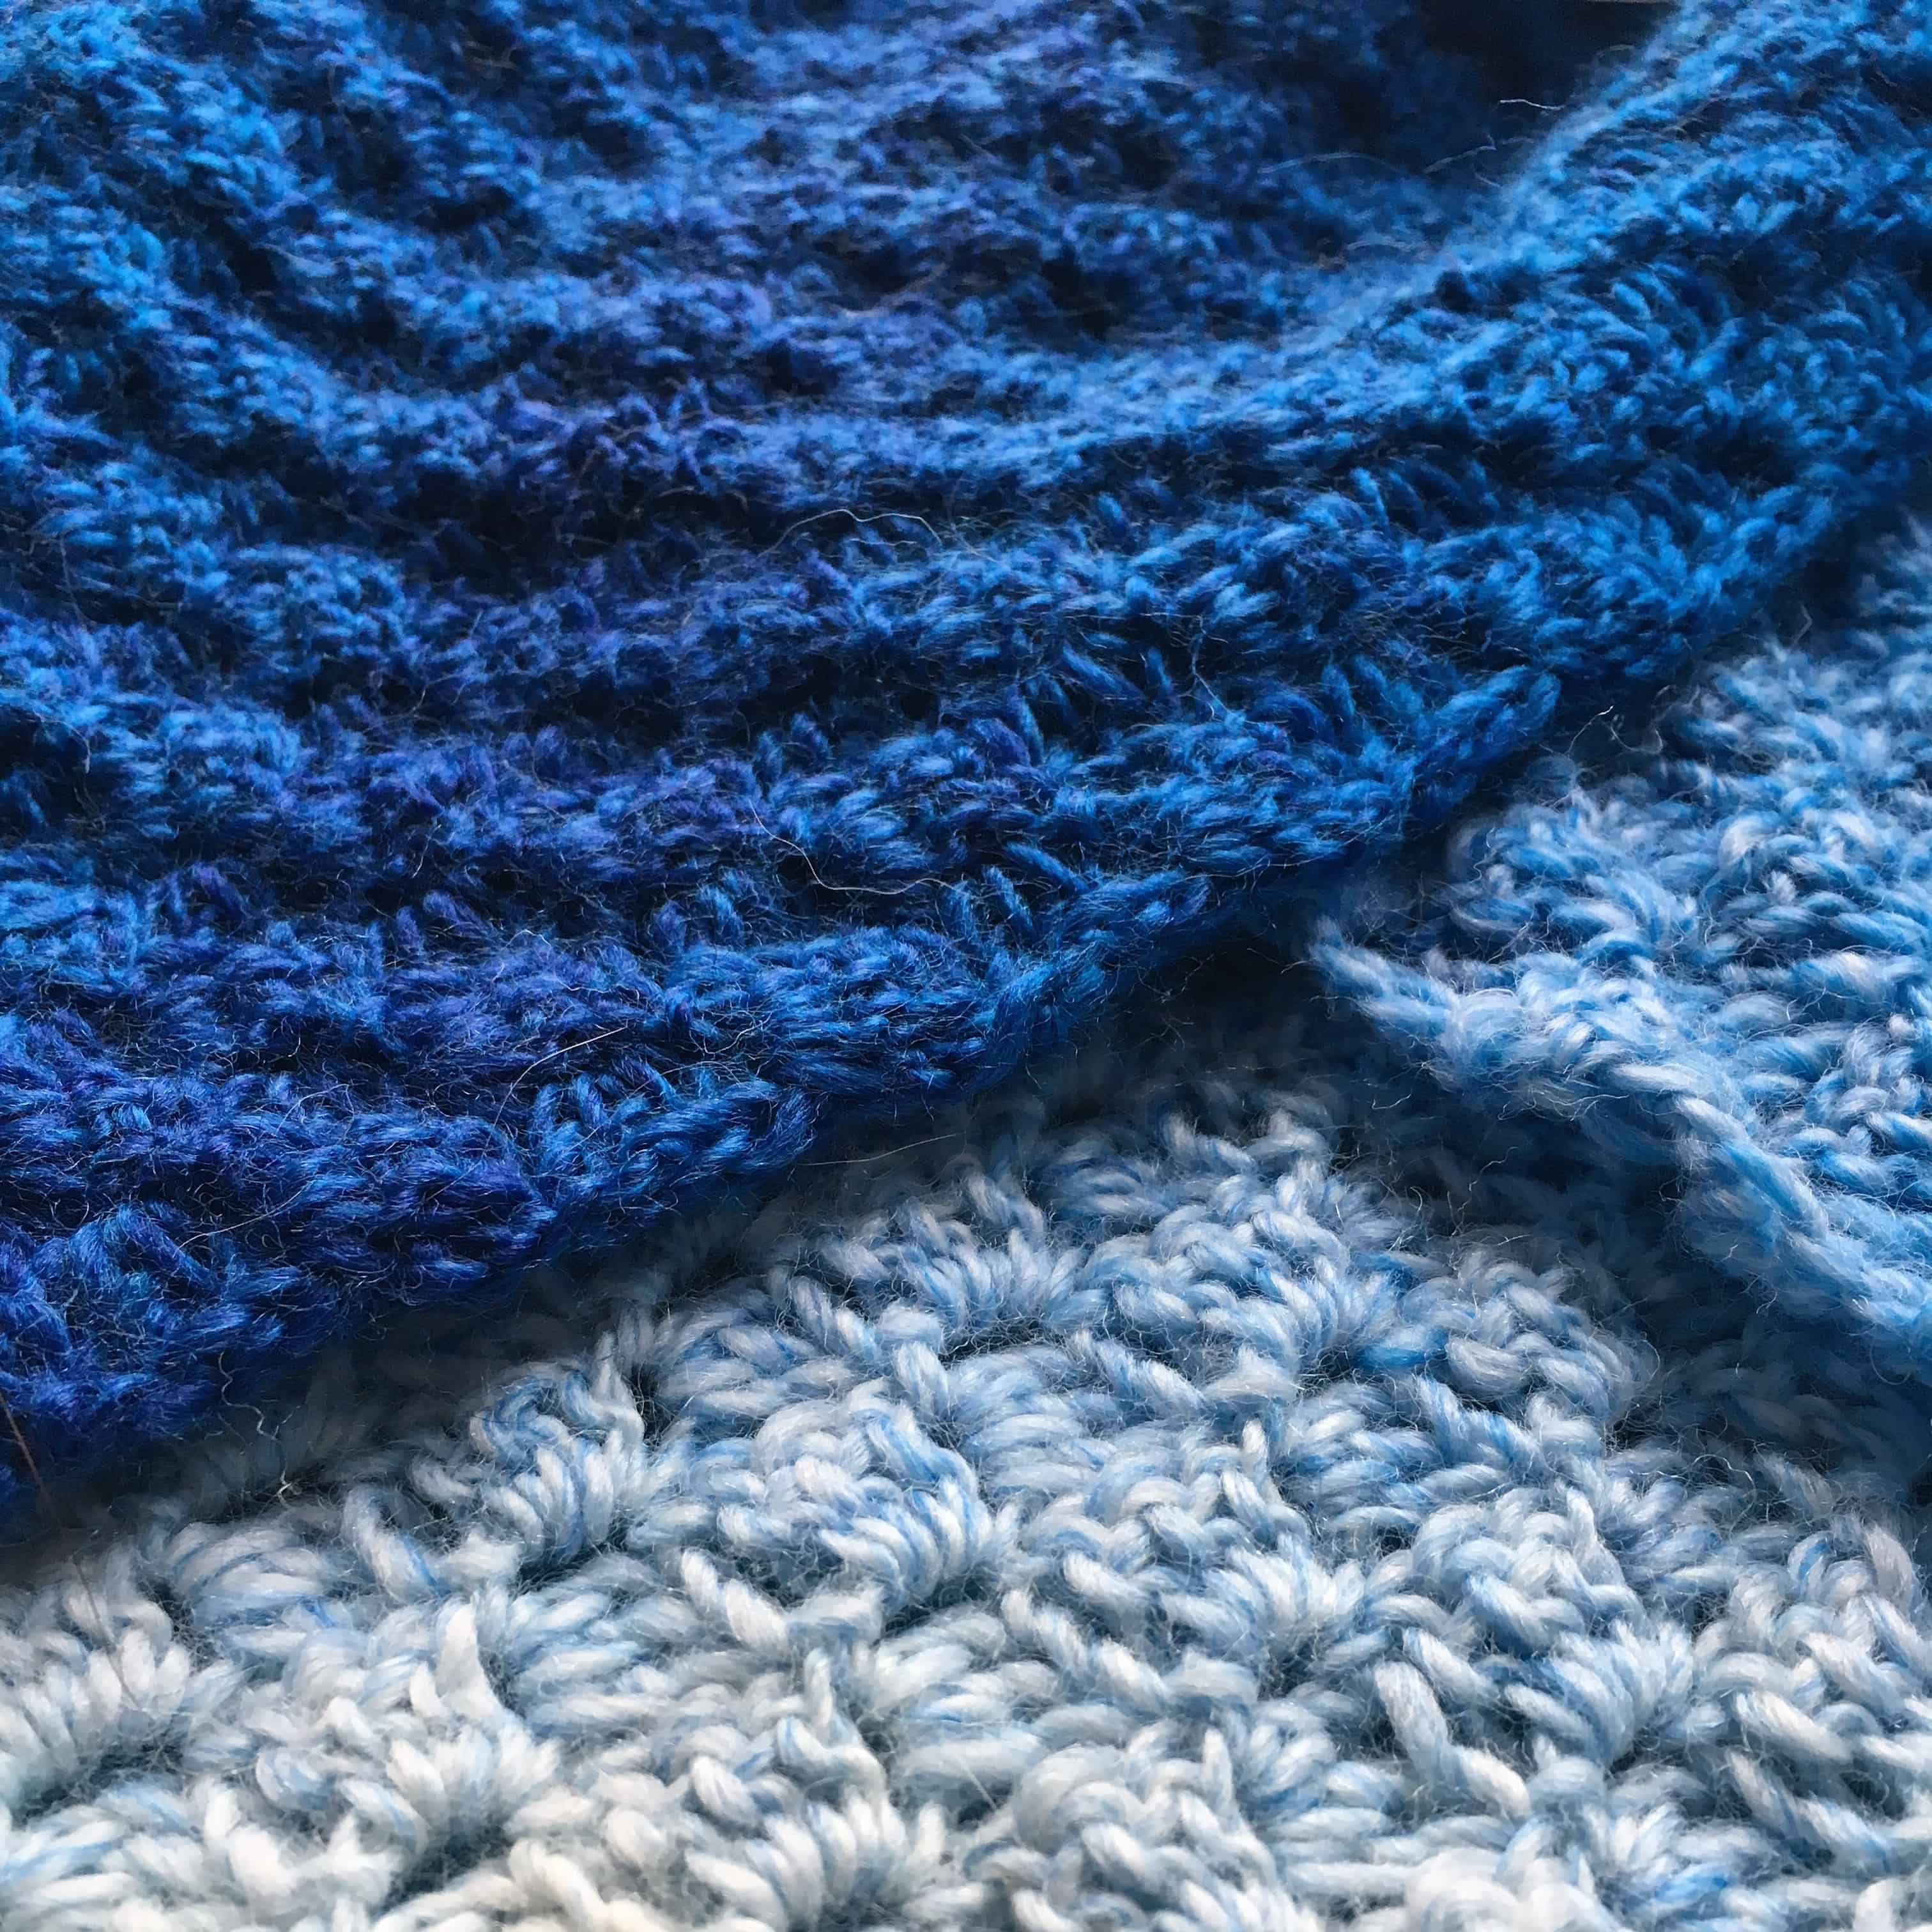
C2C is great to work in stripes or with variegated yarns (as pictured above) and, because of the way the pattern is made from blocks, this techniques is often used to make graphgahn blankets – that is working the blocks in different colours to make a picture – as if each block is a pixel.
There are whole websites and facebook groups dedicated to c2c patterns and pictures. It’s quite an eye-opener!
So, how do you do it? Read on for a step by step guide with picture tutorials.
Corner to Corner (C2C) Crochet Stitch Pattern – Photo & Written Tutorial
Materials
The C2C technique can be worked in any yarn and appropriate hook. For a looser fabric with more gaps and drape, increase your hook size or for a more dense and tight fabric (for example for a cushion) go down a hook size.
Stitches and Abbreviations (US Terms)
- ch = chain
- dc = double crochet (UK treble crochet)
- sp = space
- ss = slip stitch
To start and increase
You will start row 1 with 1 block, row 2 has 2 blocks, row 3, 3 blocks and so on. Increase the number of blocks until you reach your desired width.
Using your chosen yarn and appropriate size hook, Ch 6

Row 1: 1dc in 4th ch from hook and next 2 ch (1 block made), turn


Row 2: Ch6, 1dc in 4th ch from hook and next 2ch (first block on row 2 made)

Ss into top of ch3-sp at start of previous block, ch3, 3dc in ch3-sp (second block on row 2 made), turn


Row 3: Ch6, 1dc in 4th ch from hook and next 2 ch, *ss into ch3-sp in next block, ch3, 3dc in the same ch3-sp; rep from * to end (3 blocks made), turn


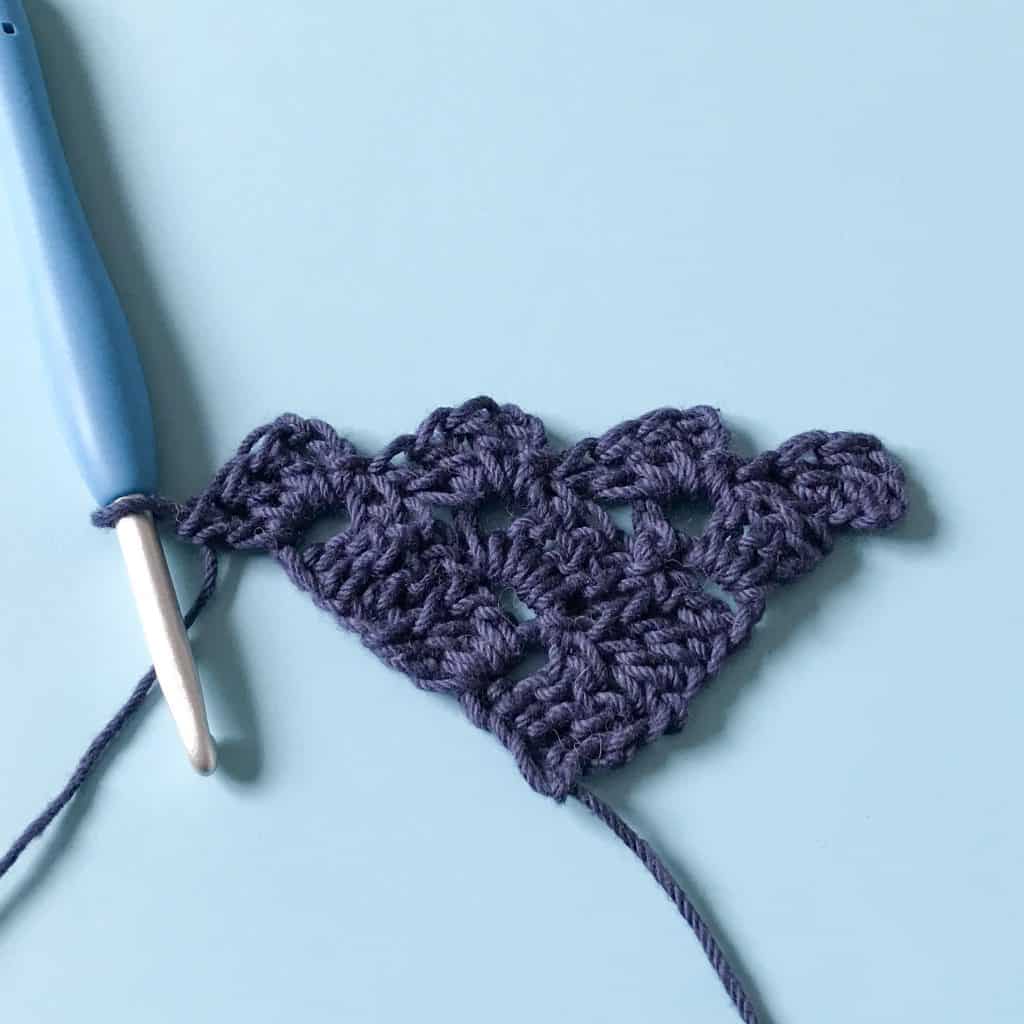
Row 4 onwards: Repeat the stitch pattern from Row 3, adding a block on each row until you reach your desired width.

Once your work reaches the widest part, tou are then ready to start the decrease section.
Decreasing and finishing
Decrease Row: Worked in the cream yarn in the pictures
ss into the 3 dc from the last row and into the ch3-sp
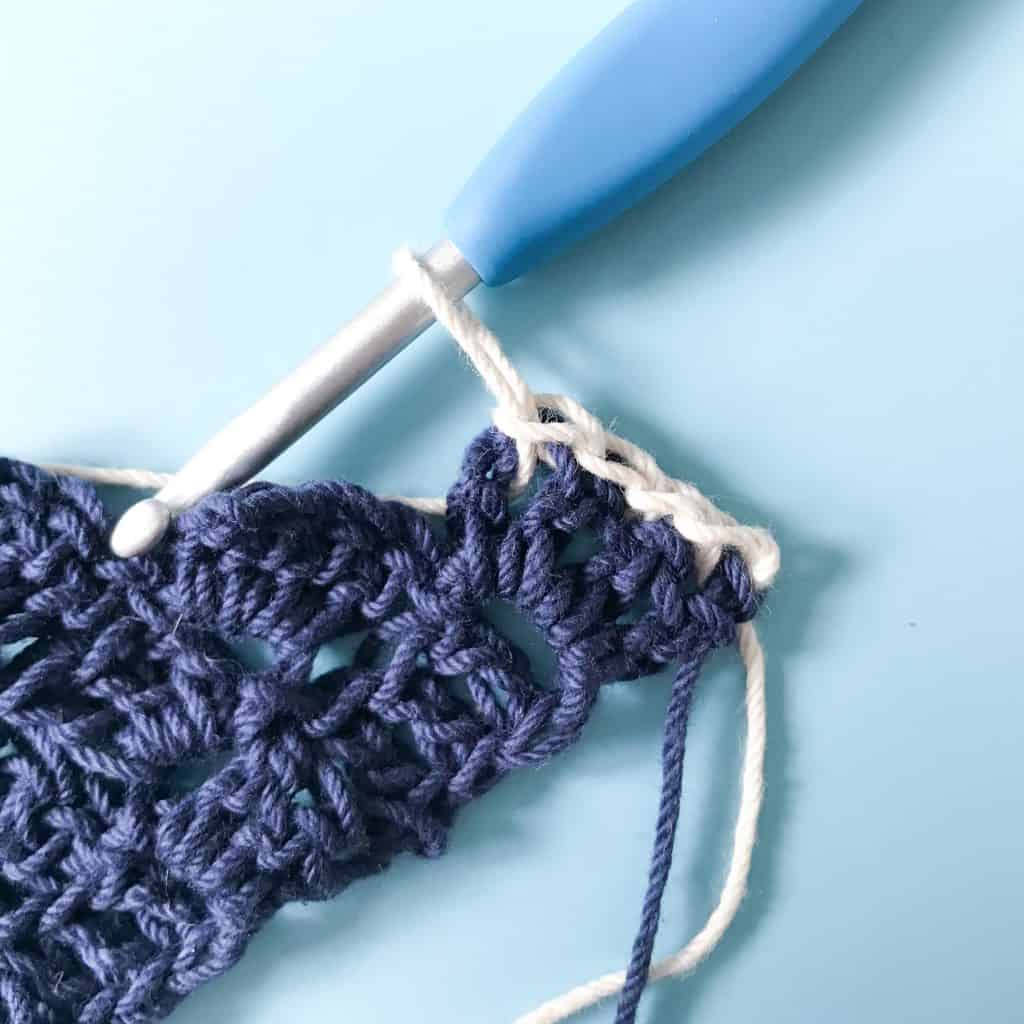
*ch3, 3dc in ch3-sp, ss into next ch3-sp; rep from * to the end of the row and do not make a block in the last ch3-sp (stop at the ss).


This decreases the row by one block.
Repeat the decrease row until you are down to the last block and finish with a ss in the last ch3-sp.
Fasten off, sew in ends and add a border or block to size if required.
There you have it, you’re ready to start your corner to corner journey! Why not give the free c2c block rocking poncho pattern a try?
You can also learn more about c2c as a stitch pattern versus a construction technique in this blog post.
If you found this post useful, please feel free to share on facebook or pinterest and spread the crochet love!
Happy Hooking
Dx
Corner to Corner Crochet Patterns and Project Ideas
Corner to Corner – stitch pattern or construction?
Copyright Dora Does Limited, Registered in England, Company Number 13992263. This pattern is for personal use only and may not be shared or reproduced in written, photo, video or any other form without prior written consent. All rights reserved. Terms of service.


Got as far as row 2 but it doesn’t look anything like it is in the photos.
Tried to do the C2Cso many times over the last few months without success.
Going to stick to the tried and tested and keep it simple. C2C is just not something that works for me despite having tried various tutorials.
I know that sometimes this stitch can be something people struggle with and then suddenly it just clicks. If you follow a video tutorial, try stopping after each section and comparing. Also check that you are the same handed as the tutorial as you might be seeing a mirror image of the pictures or feed.
I have got the requires length of my corner to corner bedspread and am now reducing on the smaller side as i will continue to increase other side Icant fathom how to do it .
Id you’re trying to crochet a c2c rectangle, this tutorial will help; https://doradoes.co.uk/2021/08/05/how-to-crochet-a-rectangle-using-the-corner-to-corner-c2c-stitch/
If you want to keep it square, follow the decrease instructions slowly and step by step in this post. You should decrease by one square per row.
When changing colors in a C2C project, how do you not have stragglers? I haven’t quite got that part of it figured out just yet and I could use some advice to be shown how to do that.
You’ll allays have ends to deal with when changing colours in a specific spot, unless you use a Russian or magic knot or similar join. I’ve not done a lot of c2c colourwork but I know there is quite a bit of guidance online on how best to manage colours in c2c projects.
I want to start to crochet an iPad cover, and I was really looking for a crochet pattern that’s in the middle of textured and simple, and this just fits! Thanks for awesome tutorial!
you’re welcome. I’m glad you found this useful!
I am struggling with the slip stitch at the beginning of the first row of the decrease. I can’t seem to make mine look like yours.
What does yours look like? I’d love to help you out but it’s hard without seeing! Make sure your slip stitches aren’t too tight and don’t chain. I hope that helps!
I recently started my first c2c blanket, Spring into Summer by Felted Button! I LOVE it! So fun, and different. Nice nice break from standard crochet!
It’s a great stitch pattern isn’t it!!!