How to evenly space increases and decreases in crochet
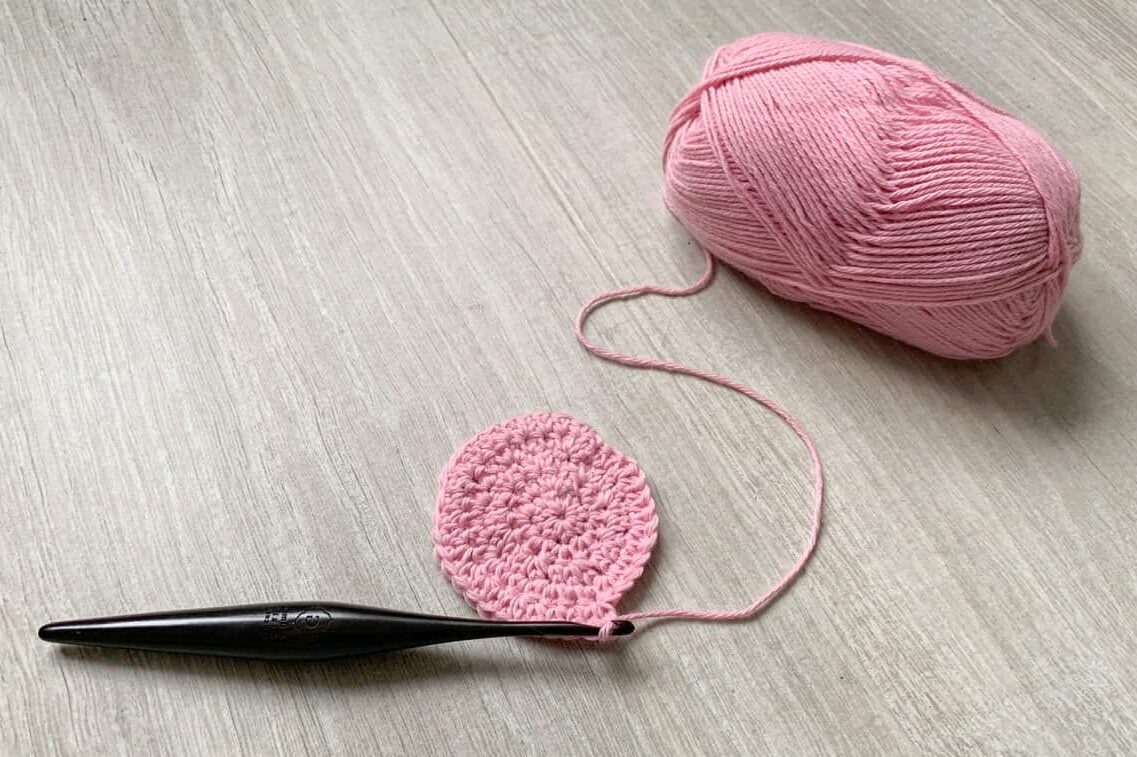
I’ve been writing recently about the different ways you can approach increasing when crocheting in the round.
This got me thinking about how much I used to struggle with working out how many stitches I should crochet between increases (or decreases) to end up with the right stitch count at the end of the round.
So in this post, I want to share a simple tip for working out how to evenly distribute your increases or decreases.
In my post about even circles, I discuss the traditional approach of crocheting your first round with a set number of stitches and increasing by that same number of stitches each round to achieve a flat circle.
Each round you work an increasing number of stitches between the increase to achieve this. Your first increase round you have no stitches between the increases, the next round you have one, then two, then three and so on.
It will look something like this:

This post contains affiliate links. This means if you click a link to a product and go on to make a purchase, I receive a small percentage of the sale at no extra cost to you. You can read my full affiliate disclosure here. As an Amazon Associate I earn from qualifying purchases.
This is great when you are working a flat circle from scratch. But what if you are starting with a larger circle, working in rows, making something shaped or want a smaller or larger number of increases?
Well, however you’re crocheting, the simple bit of maths I’m about to share will explain how to evenly distribute your increases row by row, or round by round.
And there’s a way to do it for decreases too!!
Just before I get started, I should clarify, that for these calculations, an increase is where you work two stitches into one, increasing by one stitch at a time.
Likewise, decreases are where you decrease by 1 a time, working one decrease stitch over two stitches from the previous row or round.
Let’s start with increases.
How to calculate the number of stitches to crochet between increases
Step 1: Decide how many stitches you want at the end of your increase row or round
Step 2: Calculate how many stitches you need to increase by to achieve this (stitches at end of increase round minus stitches on current round)
Step 3: Divide the number of stitches at the end of the increase round by the increase number
Step 4: Subtract 2.
This will give you the number of stitches between your increase.
It’s really that simple!
Here is the calculation for working out the number stitches between increases written as a formula.
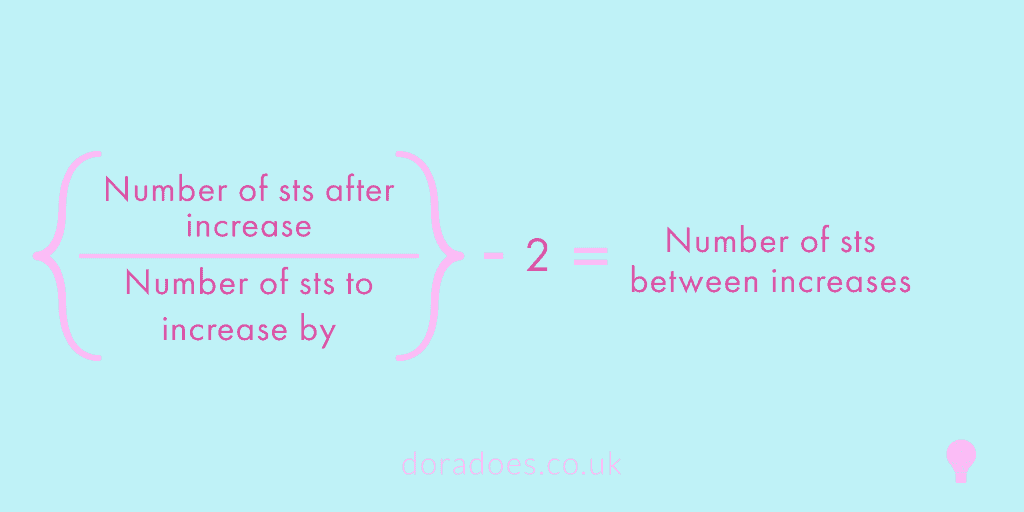
Please don’t be scared of the maths or symbols. The big swirly brackets just mean you do that bit first! I’ll talk you through a worked example.
Worked Example
Let’s look at a worked example. I’ve taken some pictures to help illustrate the process. I’ve made a few rows of a swatch with 20 stitches across.
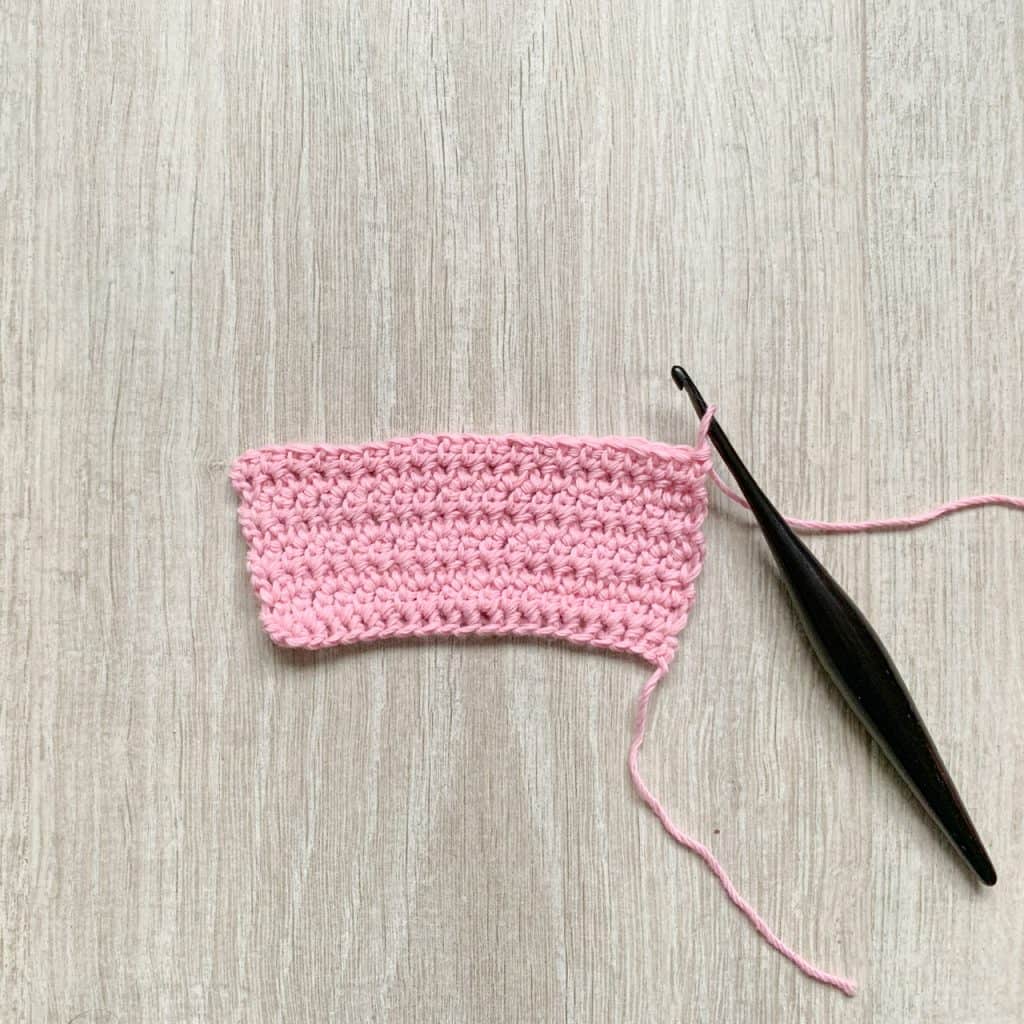
Let’s say I’m working on some shaping and want to increase from 20 to 24 stitches. Let’s plug those numbers in
- 24 – 20 = 4 (the number of stitches I want to increase by)
- 24 / 4 = 6
- 6 – 2 = 4
So I would work 4 stitches, then my increase (2 stitches in the next stitch) all the way across the row.
It looks like this:
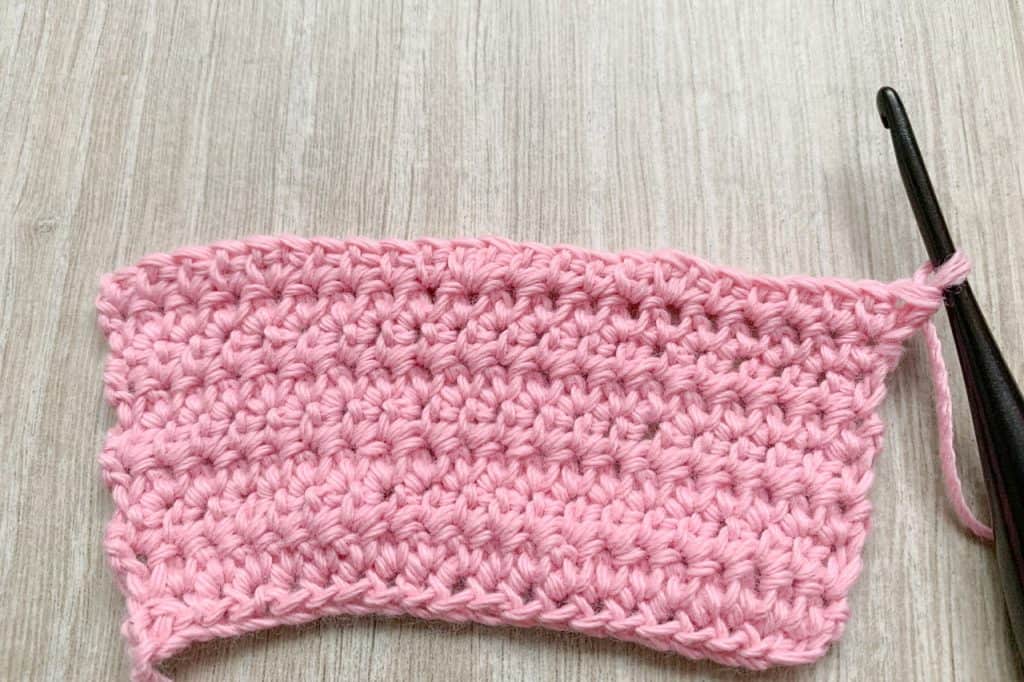
I’ve used rows to demonstrate this process because it shows some other aspects you might want to consider.
Once I have worked a couple of non-increase rows after the increase, you can see in the picture below that there is a kind of bump on the left edge of the swatch. This is because I made the last increase right at the end of the row.
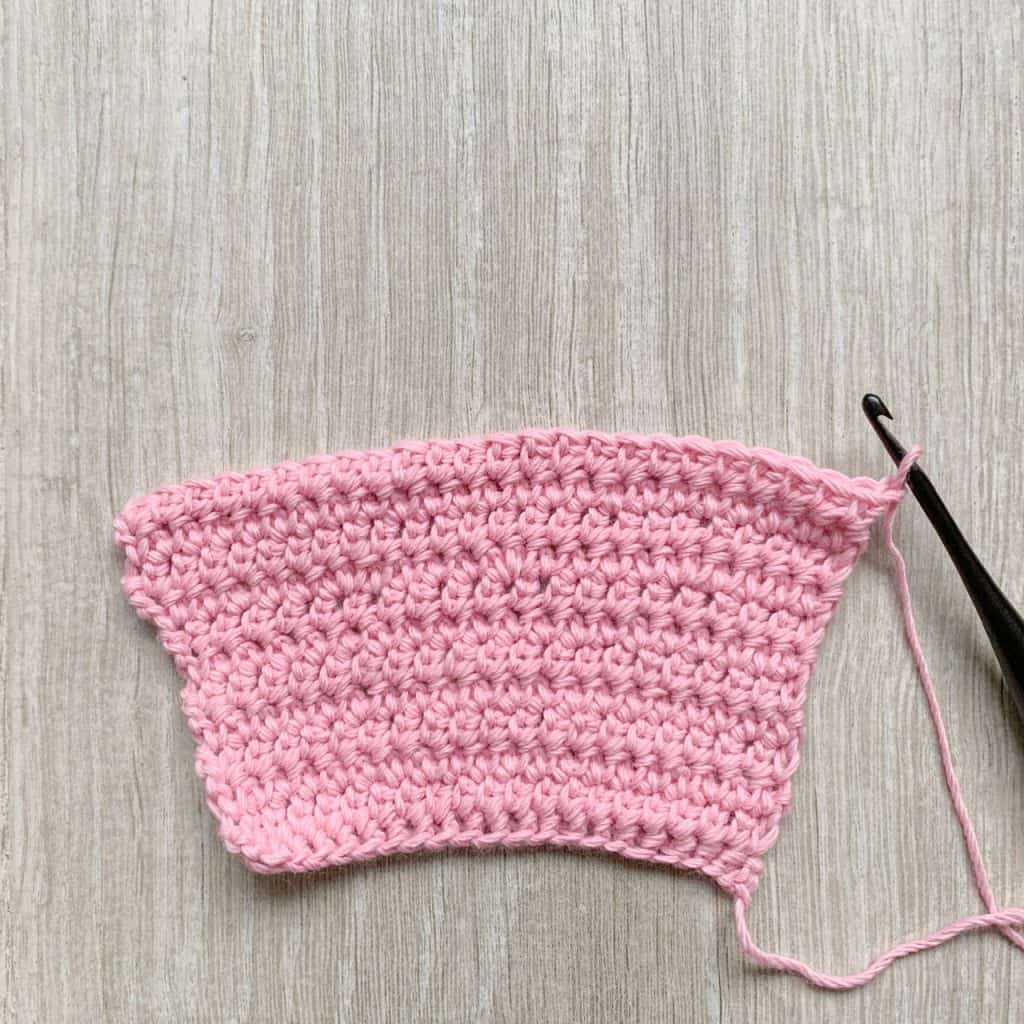
A good way of ‘softening’ the impact of increases and smoothing out this bump is to work them one or two stitches in from the end. You get a much subtler graduation.
If you’re working in rounds, this won’t be so noticeable. Though whilst I’m on the topic, it’s good practice to try and stagger your increases so that they are not stacked on top of each other.
You can see where the increases are stacked as you’ll notice that the shape starts to look geometric (like a hexagon or octagon) rather than a circle. I talk about this in more details in my flat circle tutorial.
What if the increase number isn’t easily divisible?
As simple as the formula is, there are times when the numbers don’t fit so cleanly and a bit if manipulation is required.
Lets say that I wanted to increase to 22 stitches and I had 18 stitches on the current row. So my increase number would be 4. 22 isn’t easily divisible by 4 so I would end up with a decimal. Not helpful.
My approach to this would be to round down to the nearest multiple of 4, in this case 20, for the calculation:
20 / 4 = 5 and 5 – 2 = 3
So I would work 3 stitches then an increase, 4 times (increasing by 4) which would take up 16 of the 18 stitches.
Then I would need to decide where to put those other two stitches (that I rounded from 22 to 20). In this example, and given what we’ve just discussed about bumps in the edge of the work, I would add the extra two stitches on the end.
Next I’ll show you the calculation for decreases.
How to calculate number of crochet stitches between decreases
This is similar, but subtly different form the increase method.
Step 1: Decide how many stitches you want after your decrease row or round.
Step 2: Calculate the number of stitches to decrease by. (The number of stitches on your existing round minus the number of stitches you want to finish your next round with).
Step 3: Divide the number of stitches on your current round (before you decrease) by the decrease number.
Step 4: Subtract 2. This leaves you with the number of stitches to crochet between decreases.
Here’s the formula for calculating even decreases

Worked example of decreases
So back to my swatch, which now has 24 stitches. Let’s say I want to decrease it to 18 stitches.
- 24 – 18 = 6 (the number of stitches to decrease by)
- 24 / 6 = 4
- 4 – 2 = 2
So in this example, I would work 2 stitches between my decreases across the row to end up with 18 stitches.

The main difference with the decrease calculation is that you divide the number of stitches in the current row or round by the decrease number, rather than the resulting one.
Always divide the larger stitch count by the decrease amount.
The same issues apply where the numbers aren’t easily divisible and the same solutions can be used.
I do think that decreases are easier on the eye when worked at the ends of rows, but, again, you can work them a stitch in from the end if you prefer.
You might also find this post on amigurumi tips (which explains invisible increases and decreases) helpful if you’re into aesthetics and getting a smooth finish!

For me, this decrease formula is SO useful when I’m working even decreases.
The increase calculation comes pretty instinctively and I can hold the numbers in my mind. But with decreases, it just bends my brain. So to have a simple formula I can trust is great!
If you are a designer or like to adapt crochet patterns or make them up as you go along then this is definitely one for your took box!
If you like to understand how things like this work, you might be interested in some of my other posts aimed at freestylers and designers.
Happy Hooking
Dx
Materials featured in this post:
Furls’ 4mm Streamline Crochet Hook in Ebony
Note that the images were taken of a left handed swatch. The photos of the circles have been flipped for a right handed perspective.
More foundational crochet tutorials
Copyright Dora Does Limited, Registered in England, Company Number 13992263. This pattern is for personal use only and may not be shared or reproduced in written, photo, video or any other form without prior written consent. All rights reserved. Terms of service.


when crocheting a staggered fan stitch blanket I have a problem with the ends or rows where you have two stitches in each stitches making up the end fans. – which is right at the end of the row, you land up with a bulge on each end, the first six rows are fine, (Row six starts with 2 dc in first stitch, row seven, 2 in each double crochet – totaling 4 and row eight, again two dc in each stitch – totaling 6 – reference fancy fan Crochet stitch) so the end
of the blanket bulges out. . how can I prevent this or at least minimise it.
It’s hard to be specific without seeing the exact pattern, but it sounds like a small adjustment is needed to the stitch multiple add on (so the plus bit) to make sure you get even edges. This post explains about stitch multiples. If you draw out the stitch you’re working or look at a chart, the solution may come to you!
https://doradoes.co.uk/2020/02/29/crochet-explained-what-is-a-stitch-multiple/
This tutorial is brilliant & so very helpful. Thank you, very much, for taking the time to lay it out so simply.
You’re so welcome. I’m glad you count it useful!
I was almost giving up on one of my projects because the decreases were looking “funny”, but then I found your post. Your article is gold. Thank you so much!<3
Ah, I’m so glad this helped you! It’s one of those things that used to baffle me too. I’m glad you didn’t give up! 😊
Hello!! Could you help me with a sweater?? I have 68 stitches and need to increase them to 120, but i dont know how to increase them evenly?? Sorry for bothering, great post!!
Hi there, so you need to increase by 52 stitches? If you are just using one row to do this then you can use the method described in the post to work out how to distribute them. If you want to use multiple rows then you need to divide 52 by the number of increase rows you will use, which will give you the number of stitches needed to increase on each increase row. Then you can use the method described to work out how to increase across each increase row.
I hope that helps, Dora
I think we must invent a new award for blogs: something like
MOST PRACTICALLY HELPFUL CROCHET BLOG
and the year.
I shall design one,
😀
You’re too kind. That would be the best accolade I could receive!! 🙂