Jasmine Stitch Crochet Snood: Free crochet pattern

Crochet Snood vs Cowl: What’s in a name?
Over Christmas I was commissioned to make some snoods for a friend’s children.
After doing some research into what size a child’s snood might be, I got to wondering where a snood turned into a cowl. The words are often used interchangeably, but they are actually different items.
So, for avoidance of doubt, my version of a snood is a tube of fabric which is pulled over the head, sits snugly around the neck and can be pulled up and worn over the head like a hood.
The snug part and the length are what distinguishes the snood from the cowl.
Cowls tend to be looser fitting and shorter – they don’t typically double up as a hood. You can learn lots more about cowl construction here (including the cowl / snood debate)
So the answer to my original question – what circumference should a snood be? – is that it should be bigger than your head circumference, but not too big!
A crochet snood should be large enough to pull over the head, and worn over it, but small enough to retain the cosy feel.

This post contains affiliate links (marked aff). This means if you click a link to a product and go on to make a purchase, I receive a small percentage of the sale at no extra cost to you. You can read my full affiliate disclosure policy here

The Shifting Sands Crochet Snood
So now we’re on the same page with what a snood is, let’s get into this pattern!
It’s made using the crochet Jasmine Stitch, which is a stunning floral shaped stitch pattern made by combining the classic star stitch with mini crochet puff stitches.
I have created a step-by-step picture tutorial for the Jasmine Stitch here, so I won’t repeat that within the pattern.
Skill Level
The pattern for this snood is super simple. It’s the stitch itself which is a little bit fiddly to start with.
The Crochet Jasmine Stitch looks super complex but it’s actually just a bunch of puff stitches worked together. It would suit any crocheter who has a bit of experience and is up for trying out something new.
It’s mostly yarning over and pulling through and that’s it really. You will soon get the hang of it!
Click here to access the tutorial.

Materials
I will say up front. This pattern is a yarn vampire! But it is so worth it. The fabric produced is thick but still drapes and is so squishy. It’s perfect for cosy accessories.
Maybe I’ll work a hat in it too…hmmmm I digress!!
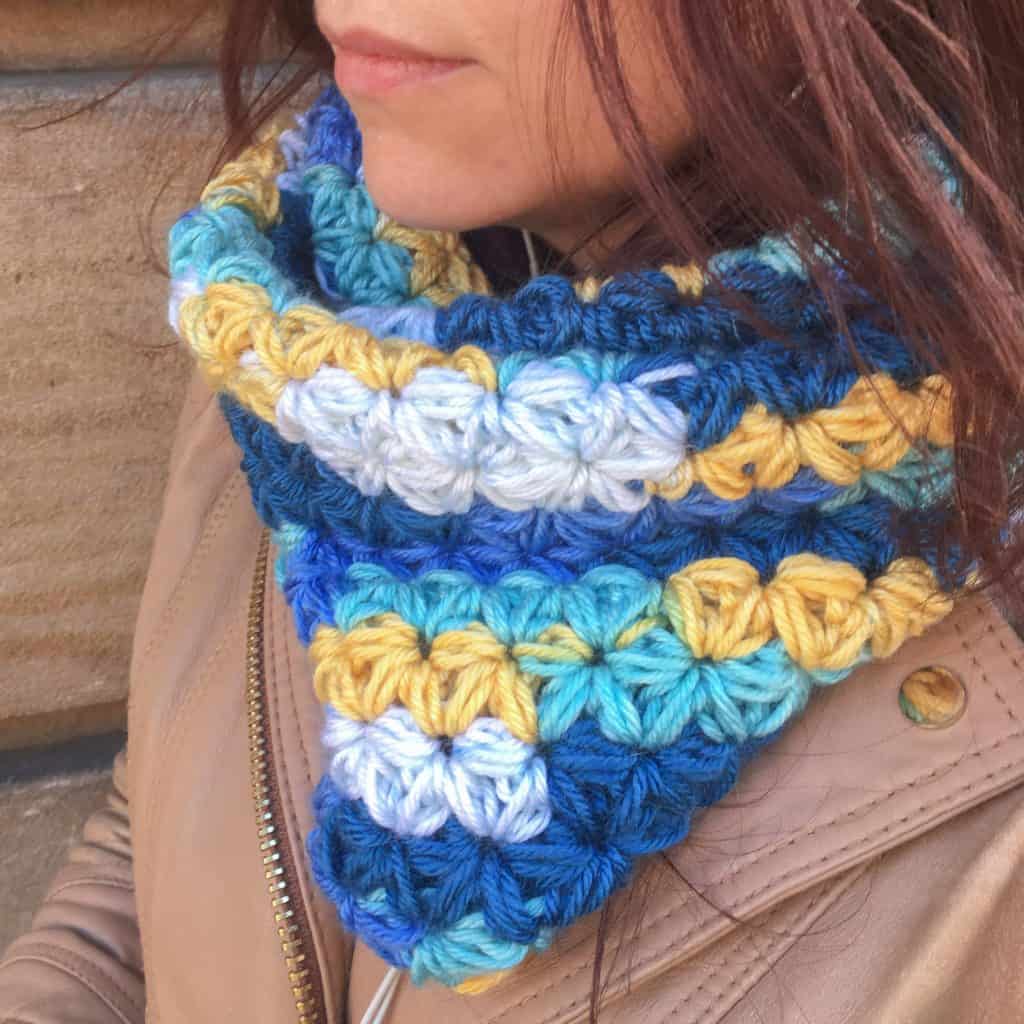
For the item you see pictured I used 2 balls of Caron Simply Soft I used the Stripes variegated colourway called Maddison Avenue. It was these colours which inspired the pattern name as it reminds me of a day at the beach.
Any worsted weight yarn will work for this pattern. In fact any yarn will work, you just need to change the number of stitches in the foundation row to make sure it is long enough.
There are no pesky stitch multiples here so this pattern is also a fab stash buster!
I also used a 5.5mm hook (clover amour are my fave!), though the jazzy one you see pictured is a fancy Japanese hook which I picked up at the Knitting and Stitching show last year and is fun to play with!
5.5mm is a size up from the 5mm hook suggested for this yarn. Jasmine Stitch creates a dense fabric, so the larger hook makes sure that you retain a nice soft drape.
If you are using a different yarn, I advise using a hook on the larger end of the recommendation and making a gauge swatch of course 🙂
Finished Size
This pattern, using the above materials makes a snood measuring 55cm / 22in in circumference and 50cm / 20in long.
To make the snood wider, add sts to row 1 (make sure your st count stays even throughout). To make the snood longer, add rows.

Abbreviations and Stitches (US terms)
- ch = chain
- fps = foundation puff stitch – see special stitches
- js = jasmine stitch – see special stitches
- ss = slip stitch
- yo = yarn over
Foundation Puff Stitch (fps)
Ch1, pulling your starting loop out to about 1cm, *yo, insert hook, yo, pull up a loop* twice (5 loops on hook).
Yo and take hold of the yarn you just wound over and, whilst holding this, pull through all 5 loops
Insert hook under the bit of yarn you’re holding, yo and pull up a loop (2 loops on hook), let go of the yarn, yo and pull through 2 loops to seal the st
That’s your first fps created. You will start working the second one under the last st you just made which is a bit like a sc at the end of the puff.
This is also where you will insert the hook again when you get to the second row.
Click here for a full foundation puff stitch tutorial

Jasmine Stitch (js)
Pulling your starting loop out to about 1cm, *yo, insert hook into top of the last st, yo, pull up a loop* twice, 5 loops on hook.
*yo, insert hook into the base of the same st (the other side of the puff) yo, pull up a loop* twice. 9 loops on hook
*yo, insert hook into st between next 2 puffs, yo, pull up a loop* twice. 13 loops on hook.
yo and grab hold of the bit of yarn behind the hook, just like you did with the foundation puff, only you may want a bit more slack!
Carefully pull through all 13 loops.
Insert hook into the piece of yarn you are holding, yo, pull up a loop (2 loops on hook, let go of the yarn, yo, pull through 2 loops to complete your first jasmine st!
Click here for a full crochet jasmine stitch tutorial
The Shifting Sands Crochet Snood Pattern
Using a 5.5mm hook
Row 1: Make 32 fps, being careful not to twist your work, ss to the base of the first st to make a ring
Row 2: Make 1fps (this counts as your turning chain). Work 32js around to the end, working the last part of the last js into the base of the turning fps to complete the row.
Tip: Count your stitches here to check you have not added a st at the end as this is quite easy to do until you get used to the st placement!
Row 3-20: Repeat row 2
Fasten off and sew in end.
I hope you enjoy this pattern and, as always don’t forget to share using the buttons below or tag me on Instagram @doraexplored, or use #hookmehappy. I’d love to see and share your efforts!

Happy hooking
Dx
More Crochet Scarf, Cowl and Shawl Patterns
Copyright Dora Does Limited, Registered in England, Company Number 13992263. This pattern is for personal use only and may not be shared or reproduced in written, photo, video or any other form without prior written consent. All rights reserved. Terms of service.
Love the colors of your Snood. Very aptly named 🙂
Thanks you 🙂
Dx