Hood in a Snood: Free Crochet Pattern

Crochet snoods and hoods are everywhere at the moment and I am here for it! They are a quick and easy way to keep your head and neck warm during winter weather and simple to crochet!
There seems to be a lot of blurring between the names of these crochet accessories. You might refer to the hood in a snood as a cowl or a hooded cowl. Or maybe just ‘that crochet thing that keeps your head warm’ 😉
I dig into the semantics in this post about crochet cowls and snoods, so I won’t repeat that here other than to say, whatever you want to call it, this free crochet pattern makes for a quick win accessory that will keep you, or your loved ones cozy and warm


This post contains affiliate links. This means if you click a link to a product and go on to make a purchase, I receive a small percentage of the sale at no extra cost to you. You can read my full affiliate disclosure here.


You can read on to find the free pattern or purchase the ad-free, print optimised PDF version of the pattern from Ravelry, Etsy or Love Crafts Crochet.
About the crochet hood in a snood pattern
Regardless of how you like to define this accessory, it is a quick crochet project to work up that will keep your head and neck cosy all winter. Wear it pulled up like a hood or a snood, or down like a cowl.
It uses short rows to create shaping around the back of the head to avoid excess fabric at the front and to easily wear ‘up’ as a hood.


Pattern Notes
General Notes
- Please read through the pattern and all associated notes before starting your project
- This pattern uses standard US crochet terminology (UK equivalents are given in brackets in the abbreviations list where applicable)
- Numbers at the end of a row / round indicate the number of stitches in that row / round and are only given at the start of a section or where there is a change
- Chain 2 turning chain does not not count as a stitch throughout
- Chain 1 turning chain in the short row section counts as one slip stitch / one stitch
- Slip stitches count as a stitch except where they are used to join rounds (the joining slip stitch never counts as a stitch)
- Unless otherwise indicated, stitches should be worked in consecutive stitches
- Right and wrong sides are nominal so have been omitted
Construction
- The pattern is worked from front to back in rounds which are joined and turned
- Short rows are used to create shaping for the hood function to allow the piece to fit comfortably over your head

Skills Used
- Knowledge of basic crochet stitches, techniques and terminology is assumed
- Working in the front 3rd loop of half double crochet and single crochets (see special stitches) and working into the front loop only
- Simple short rows using stitch markers to assist (double ended short rows)
- I have included a photos throughout the pattern demonstrating how the short rows are crocheted in this project.
- You can also find an in-depth tutorial explaining how to crochet short rows here

Materials
Crochet Hook
I recommend an 8mm crochet hook, or size needed to obtain gauge.
I used my knit pro Symfonie hook as I have a preference for wooden hooks when working with larger sizes.
Yarn Requirements
You will need approximately 270m/290yds of heavy worsted, aran or light chunky weight yarn.
The item you see pictured used less than 2 balls (165g) of Hobbii Happy Sheep Woolpower, 100% Wool, 100g = 160m/174yds. Shade 23, Deep Turquoise.

Yarn Substitution Options
Different fibres and yarns will produce a different finished result. A similar yarn will produce similar results.
The yarn I used is classed as aran weight but is definitely on the chunky end of this weight category. This could be because it was a roving yarn (so is not twisted) and has a bit more loft than yarns with a twist.
You may find this post useful when choosing yarn.
Given this project uses a hook that’s larger than recommended for most aran and chunky yarns, there is some scope for different yarn weights. But do make a swatch and check you make gauge and are happy with how the yarn drapes. It is a reasonably dense stitch pattern so the larger hook allows it to have lots of movement, which is an intentional part of the design.
If you want to understand more about yarn weight categories, this article goes into lots of detail.
Other Materials & Notions:
- Yarn needle, scissors and a tape measure
- 2 stitch markers to assist with the short rows
Note that I did not block the project but you may wish to do so to neaten out where the short rows join, if desired. You can learn more about blocking here:

How to purchase a Dora Does crochet pattern:
I sell my PDF crochet patterns in my Etsy, Ravelry and Love Crafts stores. You can purchase this pattern on any of these platforms, depending on your preference. Simply click the relevant links throughout this pattern page to be taken to the listing, or visit the store homepages in the links at the start of this paragraph.
Measurements & Finished Size
The finished item comes in one adult size only.
- The long edge from the top front of the hood (at the forehead) to the back neck measures 50cm/20in
- The shorter edge from the bottom of the hood (under the chin) to the base of the cowl section measures 25cm/10in
- The circumference measures 70cm/28in


Stitches & Abbreviations: US terms
(UK Equivalent in Brackets)
- ch = chain
- FLO = front loop only
- front 3rd lp = front third loop – see special stitches
- fhdc = foundation half double crochet (foundation half treble) – see special stitches
- hdc = half double crochet (UK half treble crochet)
- rep = repeat
- sc = single crochet (UK double crochet)
- sk = skip (UK miss)
- ss = slip stitch
- st(s) = stitch(es)
- yo = yarn over

Special Stitches
Foundation half double crochet (fhdc)
Ch2, yo, insert hook into second chain from hook, yo and pull up a loop (3 loops on hook), yo and pull through 1 loop (3 loops on hook) this creates the base chain of the next fhdc, yo and pull through all 3 loops to complete the st.
*To start the next st, yo, insert the hook under the ‘v’ of the base chain you just created, yo and pull up a loop (3 loops on hook), yo and pull through 1 loop (3 loops on hook), yo and pull through all 3 loops to complete the st; repeat from * for required number of sts.
You can find more details on foundation rows including a tutorial here.
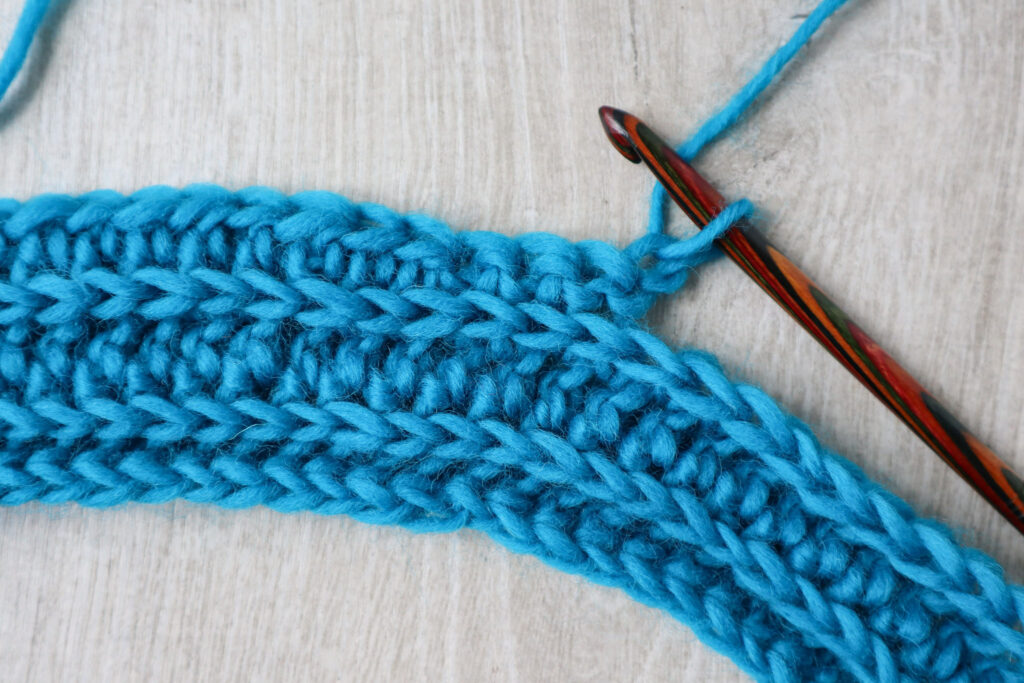
Crocheting in the front third loop (hdc front 3rd lp)
To create the ribbed effect in this pattern, you will crochet into the front 3rd loop of half double crochets (and single crochets during the short row section) on the previous row.
To find the front 3rd lp:
With your work facing you, having turned at the end of the previous row, the front 3rd loop is just below and in front of the two loops on the top of the stitch, where you would normally insert your hook.
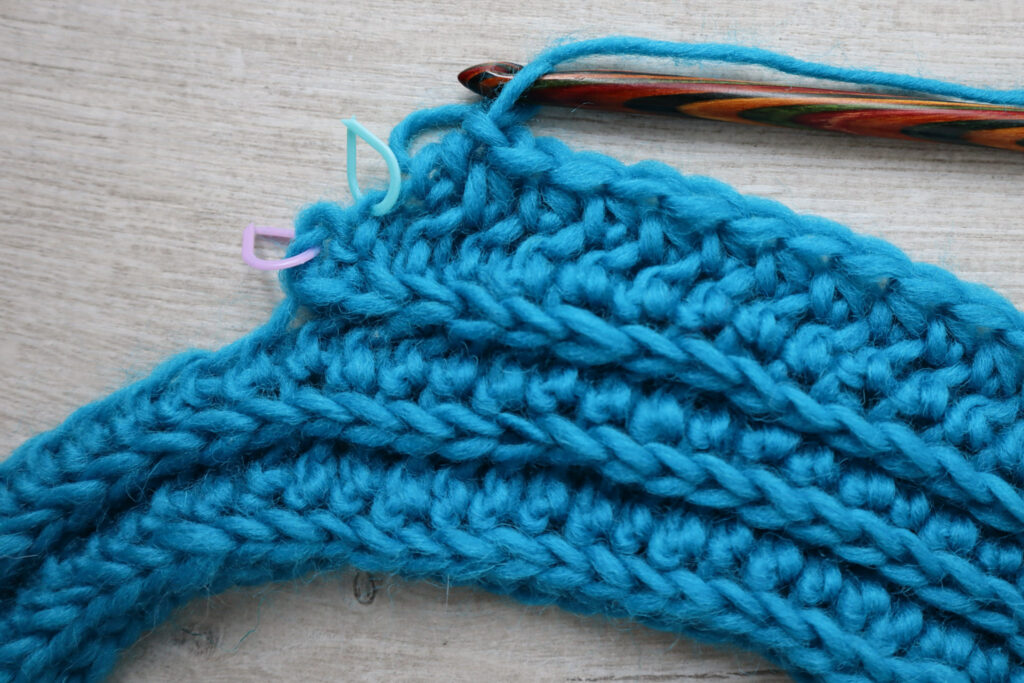
In the image below, the green stitch marker indicates where the front 3rd lp is on a half double crochet (more commonly used and fairly easy to find). The light blue stitch marker shows where the front 3rd lp is on a single crochet, which is a little trickier to find due to the difference in stitch structure, but it’s there 🙂

Gauge
11.5 sts and 9 rows in 10cm of half double crochet worked in the front third loop using an 8mm crochet hook or size needed to obtain gauge.
Variation in your gauge will lead to variations in the finished size of your project.
Note that to achieve this gauge. I kept my tension relaxed. As you’re working with a larger hook than you would typically use for this yarn weight, try to avoid any tendency you may have to tighten up your tension.
Learn how to make and measure a gauge swatch here

Purchase the ad free, print optimised pdf crochet pattern from Etsy, Ravelry or Lovecrafts.
The Hood in a Snood Crochet Pattern
Front of hood
Round 1: Make 80fhdc, being careful not to twist your work, ss to top of first st to join, turn. 80 sts
Round 2: Ch2 (does not count as st throughout), 1hdc front 3rd lp of each st to end, ss to top of first st, turn. 80 hdc
Rounds 3-4: As Round 2
Short Row Shaping
Row 5: Ch2, 1hdc front 3rd lp of 57 sts, 1sc front 3rd lp of each of next 2 sts, ss front 3rd lp of next st, turn, leaving 20 sts unworked on Round 4. 60 sts

Row 6: Ch1 (counts as one ss here and throughout), skip ss, 1sc front 3rd lp of next sc, 1hdc front 3rd lp of next sc…
Images below locate the front 3rd loops of the sc and hdc.


Row 6 contd… 1hdc front 3rd lp of each of next 34 hdc, 1sc front 3rd lp of each of next 2 sts, ss front 3rd lp of next st, leaving 20 sts unworked on Row 5, turn. 40 sts
PM in ch1 (which counts as one ss) at the beginning of the row you just completed


You will now begin the short row increases section, increasing the row length by 2 sts each row;
Row 7: Ch1, skip ss, 1sc front 3rd lp of sc, 1hdc front 3rd lp of next sc, 1hdc front 3rd lp of each st to marked st, 1sc FLO of marked st (ch1 at the beginning of the previous row), remove marker, 1sc front 3rd lp of next unworked hdc, ss front 3rd lp of next unworked hdc, turn. 42 sts (2 sts increased)

PM in first st (ch1) of the row you just completed (you can see the green maker in the image above that was placed at the start of Row 7).
Rows 8-12 (5 rows): As Row 7. 52 sts (you should be left with 14 sts unworked each side)
Row 13: Ch1, skip ss, 1sc front 3rd lp of next sc, 1hdc front 3rd lp of each st to marker, 1hdc FLO of marked st, remove marker, 1hdc front 3rd lp of each st to end, ss to top of first st, turn. 66 sts
PM in first st (ch1) of the row you just completed


Round 14: Ch2, 1hdc front 3rd lp of each hdc to marked st, 1hdc FLO in marked st, remove marker, 1hdc front 3rd lp of each st to end, ss to top of first st, turn. 80 sts

Rounds 15-16 (2 rounds): As Round 2.

Rows 17- 28 (12 rows): Rep Row 5 – Round16.


Back of hood / cowl section
Rounds 29-38 (10 rounds): As Round 2

Note that you can work more or fewer rounds in this section to alter the length and amount of fabric around the neck and shoulders depending on your preference.
Fasten off and weave in ends to finish.

And there you have your finished hood in a snood!

How to share your finished makes
I hope you enjoyed crocheting this simple pattern. You can share your efforts in many ways as outlined below
- On Instagram, you can use the hashtag #DoraDoes to share your finished projects or just tag me @doraexplored
- If you have the bug for creating garments, why not join my dedicated facebook group “My Crochet Wardrobe” and share them there?
- Sign up to the WiP Tip for weekly crochet chat, offers and exclusives straight to your inbox – click here to sign up
More neck warming crochet patterns

Copyright Dora Does Limited, Registered in England, Company Number 13992263. This pattern is for personal use only and may not be shared or reproduced in written, photo, video or any other form without prior written consent. All rights reserved. Terms of service.
I adore this snood!!! I love that you added the shaping – I believe that will make sure it stays up on the head! Like you, I first heard the term snood in the 80’s and 90’s, pre-internet days. Later, I learned of the hairnet version post-internet days. But I like this kind so much better!! I tried knitting an extra long cowl to become a snood, but it didn’t work out the way I’d hoped, which is why I love the short row shaping you added. Oh, and just to add to the confusion – I’ve seen lace snood patterns called “smoke rings”. Anyway, thank you again for the design, and for choosing to gift it in the 24 Giveaways!
According to Maryl Birds blog, you just need to click the 24 Quickies button, but you are asking for a coupon code which Marly hadn’t posted. Help!
Apologies for the technical confusion – it should work now without the need for a code!
Dora