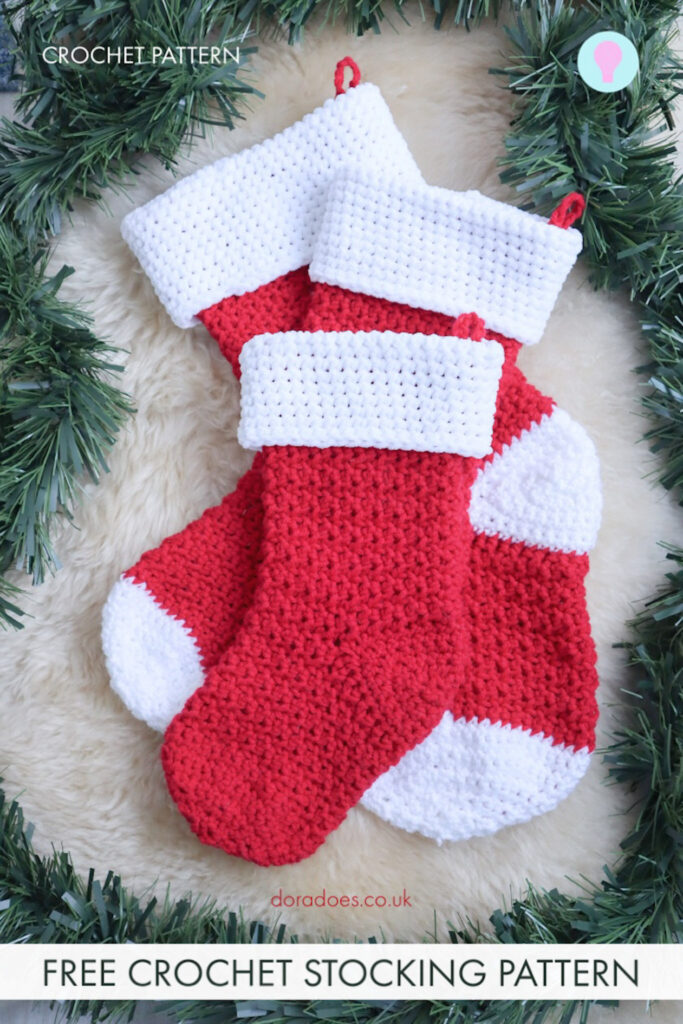
A Classic Chunky Crochet Christmas Stocking (in 3 sizes)

Get into the festive season with this Classic Christmas Crochet Stocking pattern. Quick to make using simple stitches and designed in 3 sizes to suit your celebration.
It might sound strange to say this but I only realised this Holiday season that I’d never designed a crochet Christmas stocking pattern. And I decided it really was time I changed that.
So to compensate for my tardiness, I designed it in a chunky / bulky weight yarn meaning it crochets up relatively fast (this is a great last minute Christmas crochet project) and you can make it in small medium and large, to suit your space, yarn and time availability!
To add to that, the crochet stocking pattern for all three sizes is available free to read on this page. Just keep reading 🙂

This post contains affiliate links. This means if you click a link to a product and go on to make a purchase, I receive a small percentage of the sale at no extra cost to you. You can read my full affiliate disclosure here.


You can also purchase the ad-free printable PDF version of the pattern on Etsy, Ravelry or Love Crafts.

Pattern Notes
General Notes
- Please read through the pattern and all associated notes before starting your project This pattern uses US crochet terms (UK equivalents are given in brackets in the abbreviations list)
- Numbers at the end of a row / round indicate the number of stitches in that row / round and are only given at the start of a section or where there is a change
- Turning chains to not count as stitches
- Instructions written after *asterisks should be repeated as indicated
- Instructions written between [square brackets] should be worked the number of times indicated
- Unless otherwise indicated stitches should be worked in consecutive stitches
- ‘Work in patt’ means continue working in the stitch pattern outlined in the notes
- The stocking is designed for decorative purposes only. Keep away from fire.
Construction
- The stocking is worked from the top down in turned rounds
- You will crochet the ankle, foot, then toe, add the afterthought heel and finish with a cuff
- You will turn at the end of each round – slip stitches used to join rounds do not count as stitches and should not be worked into
- This pattern uses the afterthought heel method where you leave a gap for the heel and come back to add it at the end; this post explains basic sock anatomy which you may find useful for this pattern
Skills Used
- Knowledge of basic crochet stitches, techniques and terminology is assumed
- Working into both sides of a chain (this tutorial shows how you can work into chains)
- Working in the back and front loops
- Working in rows and rounds with simple decreases
- Chainless foundation rows – see special stitches, modification given
- There are some images included throughout the pattern to give a visual for the constrution
Materials
Hook
8mm hook, or as needed to obtain gauge.
I used my Knit Pro Symphony wooden hook for this project.
Yarn
You will need about 150(175, 255)m/165(193, 280)yds (approx 100(125, 170)g) chunky / bulky yarn for the small(medium, large) stocking respectively. (See below for split between body and cuff quantities).

The items pictured used the approximate amounts of the following yarns:
Main Colour (MC):
Used for main body of stocking (including heel and toe): 120(140, 210) metres of Stylecraft Special Chunky in shade Lipstick. 100% Acrylic, 100g ball = 144m / 157yds
The same yarn was used in White (1001) for the toe and heel in some of the different versions photographed.
Contrasting Colour (CC):
Used for cuff only: 30(35, 45) metres of James C Brett Flutterby Chunky in White. 100% Polyester, 100g ball = 175m/191yds.

Substitution Options
A similar chunky / bulky weight yarn which meets gauge should work for this pattern. Different fibres and yarns will produce a different finished result.
When comparing chunky / bulky weight yarns, it can be helpful to look both at the fibre content and the meterage / yardage per 100g to see if the alternative yarn is similar
You may find this post useful when choosing yarn.
Other Materials & Notions:
Yarn needle & scissors, tape measure
Measurements & Finished Size
The pattern is offered in 3 sizes; small, medium and large, with a full length of 34(41, 50)cm and an ankle width of 13(15, 18)cm. See schematic below.
Instructions for different sizes are written in increasing order, with the smallest size first and larger sizes in brackets; e.g. Small (Medium, Large) sts or Rows / Rounds.

Stitches & Abbreviations: US terms
(UK Equivalent in Brackets)
- BLO = back loop only
- ch = chain
- FLO = front loop only
- fsc = foundation single crochet (UK foundation double) – see special stitches
- patt = pattern
- rep = repeat
- RS = right side
- sc = single crochet (UK double crochet)
- sc2tog = single crochet 2 together (UK double crochet 2 together) – see special stitches
- ss = slip stitch
- st(s) = stitch(es)
- WS = wrong side
- yo = yarn over

Special Stitches
Foundation Single Crochet (fsc)
Ch2, insert hook into second chain from hook, yo and pull up a loop (2 loops on hook). *Yo and pull through 1 loop (this creates the base chain stitch of the next fsc), yo and pull through 2 loops to complete the st. To start the next st, insert the hook into the ‘v’ of the base chain stitch, yo and pull up a loop. Repeat from * for required number of sts.
You can find a tutorial for this stitch here.
You will need to crochet into the back of the fsc row when you work the heel. This post includes tips for working into chainless foundation rows if you’re not used to this technique.
Modification for Foundation Row
If you struggle with the foundation single crochet, you can replace this with a chain and work the following round into the back and front loops of the chain. (learn about crocheting into chains)
This will result in a slight difference in the heel but shouldn’t be especially noticeable, so don’t let it stop you progressing with the pattern!
Single Crochet 2 Together (sc2tog)
Insert hook, yo, pull up a loop (2 loops on hook), insert hook into next st, yo, pull up a loop (3 loops on hook), yo, pull through 3 loops to complete stitch.

Pattern Repeat
The body of the stocking is simply single crochets worked alternatively in the back loop, then the front loop of consecutive stitches.
When you see “work in patt” or “continue in patt” this means you should continue to work this stitch pattern (sc BLO then sc FLO) until you are told otherwise.
You might find it useful to know that every round starts by working in the BLO and finishes working in the FLO. As you count stitches, odd number sts will be worked in the BLO and even numbered sts are worked in the FLO.
I found this a helpful tool to keep me on track with the alternation.
Gauge
13 sts and 12 rows in 10cm of rows of single crochet worked alternatively in the back then front loop using an 8mm crochet hook or size needed to obtain gauge.
Learn how to make and measure a gauge swatch here
Although gauge is not essential for this project, variation in your gauge will lead to variations in the finished size of your project.

Classic Chunky Stocking Crochet Pattern
Ankle
Using MC;
Round 1 (RS): Ch37(43, 49), work 1sc in second ch from hook and each ch to end, ss to top of first sc to make a loop (ss used to join the round does not count as a stitch), turn. 36(42, 48) sts
Round 2 (Patt round): Ch1, *1sc in BLO, 1sc in FLO; rep from * to end, ss to top of first st, turn
Rounds 3-21(25, 31): Work in Patt (rep Round 2), finishing on RS round
Do not fasten off
Weave into the tail from the starting chain to create a smooth top to the ankle
Continue to Foot
Note that if you want to make your ankle longer, you can repeat these rounds until it reaches the desired length. Take into account that the cuff will fold over the top of the ankle.

Stocking Foot
Continuing from ankle
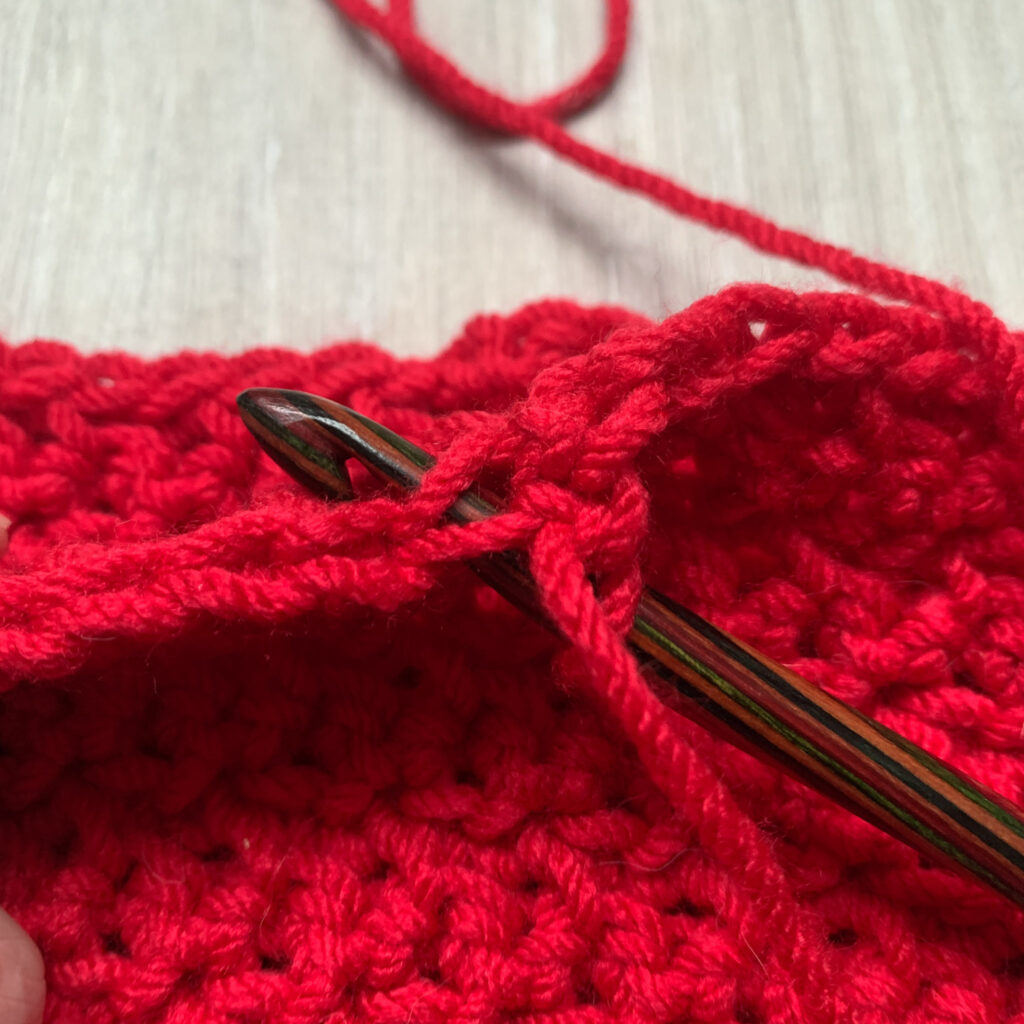
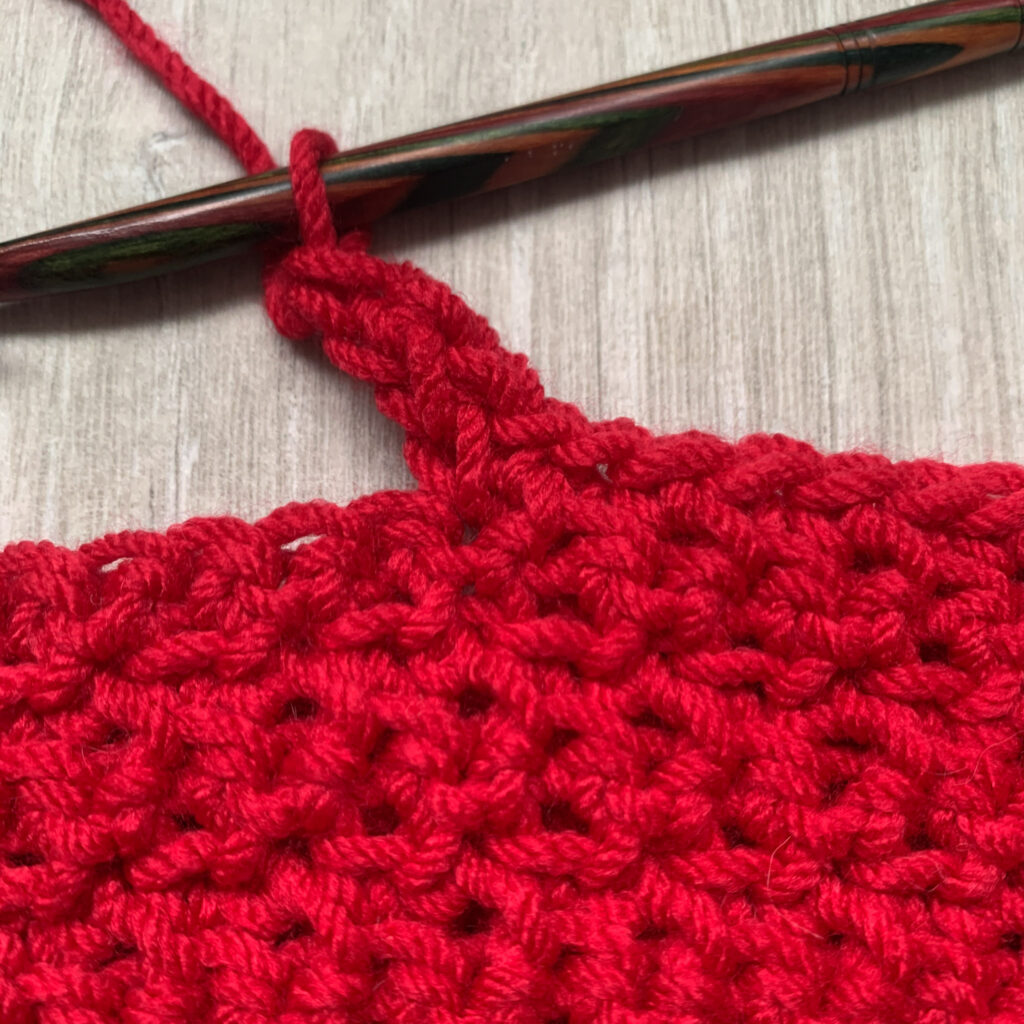
Round 1 (WS): Ch1, work in patt for 18(21, 24) sts (half way around the circumference of the ankle), then make 18(21, 24)fsc (starting the first fsc in the base of the previous st), sk remaining 18(21, 24) sts, ss to top of first st, turn. 36(42, 48) sts
(see images below for visual tips for this section if required)
Round 2: Work in patt around (including working into the front and back loops of the fsc or chain – see special sts for notes on this if needed)
Rounds 3-11(13,15): Work in Patt
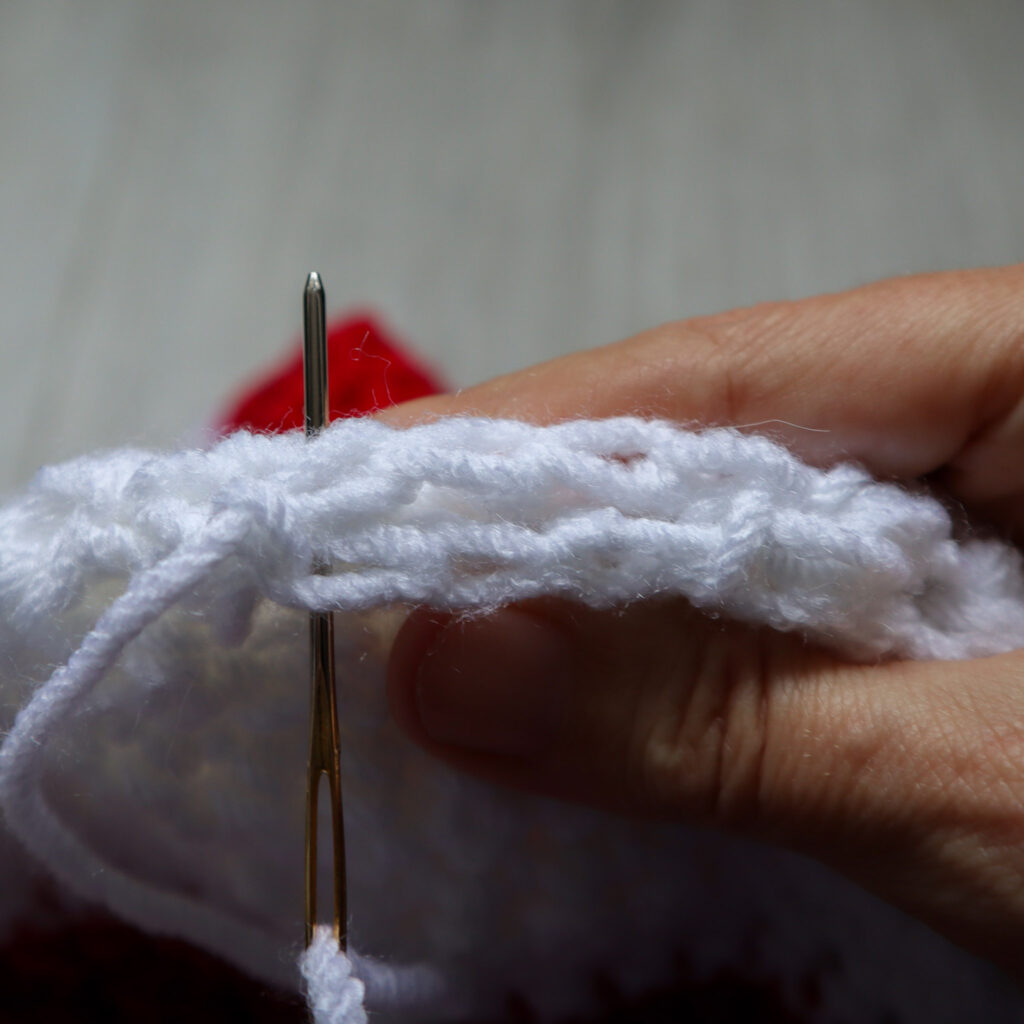
Tips for transition from ankle to foot
When you split off from the ankle to create the foot, you will leave a space between them which will create the afterthought heel. To do this you will work a set of foundation single crochet stitches half way around the ankle and skip the same number of stitches on the last round of the ankle.
The first fsc is started by inserting the hook under both loops of the last stitch you worked into per the images below:

You can change the length of the foot by adding / removing pattern rounds here (remembering you still have the toe to add).


Continue to toe
If you want to crochet the toe in a different colour, add you new colour yarn in the slip stitch used to join the last round of the foot.
Toe
Tips for closure of toe
Before you begin the toe, I just wanted to say a few words about how to close it at the end. You will close the heel and the toe the same way. On the last round of the toe / heel you will be left with 6 or 8 stitches.
With the wrong side facing, you press these together along the line of the top and bottom of the foot (for the toe) and the back of the ankle and foot (for the heel).
You will then sew together (or you can slip stitch if you prefer) the two sides matching stitch to stitch. It’s quite hard to capture with the white yarn but you can hopefully get an idea from the image below. This example shows 8 stitches being pressed together, with 4 matched against 4 on each side.
Toe set-up
Continuing from foot in chosen yarn;
Round 1 (RS): Ch1, working through BOTH loops for all of the toe, 1sc in each st to end, ss to top of first st, turn. 36(42, 48) sts
Rep Round 1 1(2, 3) times

Toe shaping
Round 1: Ch1, *sc2tog, 1sc in next 4(5, 6) sts; rep from * to end, ss to top of first st, turn. 30(36, 42) sts
Round 2: Ch1, *sc2tog, 1sc in next 3(4, 5) sts; rep from * to end, ss to top of first st, turn. 24(30, 36) sts
Round 3: Ch1, *sc2tog, 1sc in next 2(3, 4) sts; rep from * to end, ss to top of first st, turn. 18(24, 30) sts
Round 4: Ch1, *sc2tog, 1sc in next 1(2, 3) sts; rep from * to end, ss to top of first st, turn. 12(18, 24) sts
For size small only:
Round 5: Ch1, sc2tog around, ss to top of first st
Turn inside out, press circle closed and ss 3 sts together to form toe seam
Fasten off and continue to heel
For size medium only:
Round 5: Ch1, *sc2tog, 1sc in next st; rep from * to end, ss to top of first st, turn. 12 sts
Round 6: Ch1, sc2tog around, ss to top of first st. 6 sts
Turn inside out, press circle closed and ss 3 sts together to form toe seam
Fasten off and continue to heel
For size large only:
Round 5: Ch1, *sc2tog, 1sc in next 2 sts; rep from * to end, ss to top of first st, turn. 18 sts
Round 6: Ch1, *sc2tog, 1sc in next st; rep from * to end, ss to top of first st, turn. 12 sts
Round 7: Ch1, sc2tog around, ss to top of first st. 6 sts
Turn inside out, press circle closed and ss 3 sts together to form toe seam
Fasten off and continue to heel

Afterthought Heel
To work the heel, you will place two decreases next to each other at the ‘sides’ of the foot/ankle.
Each decrease round, you will work 2 fewer stitches between each set of decreases than you did in the previous round. I have written it out in full below but you will soon get the hang of the decrease pattern.
You should start with 36(42, 48) sts around the heel opening.
If you wish to crochet the heel in a contrast colour, use your desired yarn for this section.
For all sizes:
With RS facing, join your yarn to the point where the fsc began when you created the foot section. For the first round you will be working into the back of the fsc and the last round of the ankle;
Round 1 (RS): Ch1, working through BOTH loops for all of the heel, sc2tog, 1sc in next 14(17, 20) sts, sc2tog twice, 1sc in each st to 2 from end, sc2tog, ss to top of first st, turn. 32(38, 44) sts
Round 2: Ch1, sc2tog, 1sc in next 12(15, 18) sts, sc2tog twice, 1sc in each st to 2 from end, sc2tog, ss to top of first st, turn. 28(34, 40) sts
Round 3: Ch1, sc2tog, 1sc in next 10(13, 16) sts, sc2tog twice, 1sc in each st to 2 from end, sc2tog, ss to top of first st, turn. 24(30, 36) sts
Round 4: Ch1, sc2tog, 1sc in next 8(11, 14) sts, sc2tog twice, 1sc in each st to 2 from end, sc2tog, ss to top of first st, turn. 20(26, 32) sts
For size small only:
Round 5: Ch1, sc2tog twice, 1sc in next 2 sts, sc2tog four times, 1sc in next 2 sts, sc2tog twice, ss to top of first st, turn. 12 sts
Round 6: Ch1, sc2tog around, ss to top of first st. 6 sts
Turn inside out, press circle closed and ss 3 sts together to form heel seam
Fasten off and continue to cuff
For size medium only:
Round 5: Ch1, sc2tog, 1sc in next 9 sts, sc2tog twice, 1sc in each st to 2 from end, sc2tog, ss to top of first st, turn. 22 sts
Round 6: Ch1, sc2tog twice, 1sc in next 3 sts, sc2tog four times, 1sc in next 3 sts, sc2tog twice, ss to top of first st, turn. 14 sts
Round 7: Ch1, [sc2tog 3 times, 1sc in next st] twice, ss to top of first st. 8 sts
Turn inside out, press circle closed and ss 4 sts together to form heel seam
Fasten off and continue to cuff
For size large only:
Round 5: Ch1, sc2tog, 1sc in next 12 sts, sc2tog twice, 1sc in each st to 2 from end, sc2tog, ss to top of first st, turn. 28 sts
Round 6: Ch1, sc2tog, 1sc in next 10 sts, sc2tog twice, 1sc in each st to 2 from end, sc2tog, ss to top of first st, turn. 24 sts
Round 7: Ch1, sc2tog twice, 1sc in next 4 sts, sc2tog four times, 1sc in next 4 sts, sc2tog twice, ss to top of first st, turn. 16 sts
Round 8: Ch1, sc2tog around, ss to top of first st. 8 sts
Turn inside out, press circle closed and ss 4 sts together to form heel seam
Fasten off and continue to cuff

Cuff
With RS facing, join CC (or chosen yarn for cuff) to the back of the starting chain where you joined the first round
Round 1 (RS): Ch1, 1sc in each st around, ss to top of first st, turn. 36(42, 48) sts
Round 2: Rep Round 1.
Round 3: Ch1, 1 sc in next 9(10, 11) sts, 2sc in next st, 1sc in each of next 17(20, 23) sts, 2 sc in next st, 1sc in next 8(10, 12) sts, ss to top of first st, turn. 38( 44, 50) sts
Round 3 (WS): Ch1, 1sc in each st to end, DO NOT TURN OR JOIN.
From this point on you will crochet in continual rounds without joining or turning with the WS facing. You may wish to place a stitch marker or contrast scrap of yarn in the first stitch of each round so you do not lose your place.
Rounds 4-11(13, 15): Rep Round 3
Fasten off, fold cuff down over outside of RS of ankle (so that the WS you were working on becomes the RS)
Sew in ends
When sewing in the end at the top of the cuff, you may wish to use the invisible join method.

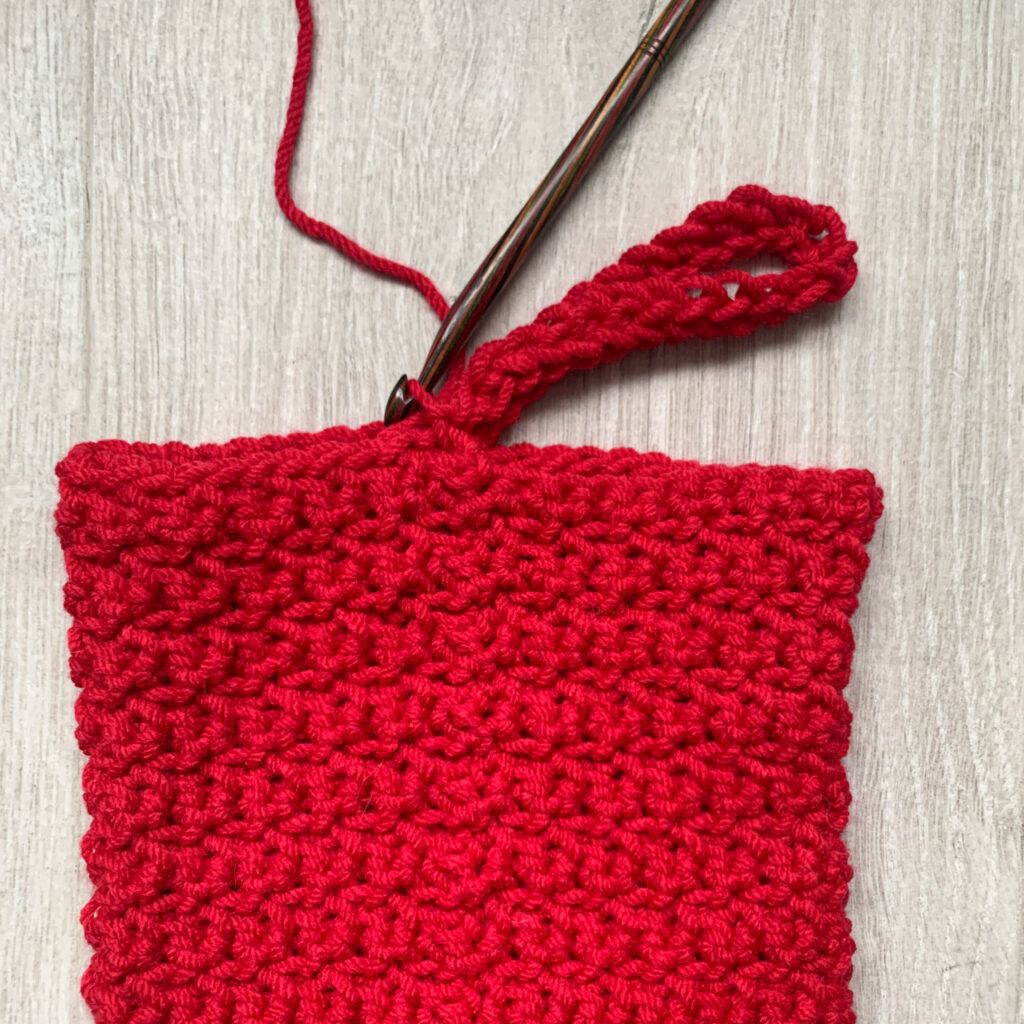
Hanging loop (optional)
Using MC (or your chosen colour for the loop);
Ss to the inside at the back of the stocking about an inch below where the cuff begins, ch12(16, 20), ss back into the stitch next to where you joined the yarn: Essentially you are aiming to join the yarn either side of the fold at the inside back of the ankle so it hangs evenly.
Fasten off and weave in ends
If you prefer, you can simply make the chain, fold in half and sew each end into the inside back of the stocking.
Hang your stocking and wait for Santa!

How to share your finished makes
- On Instagram, you can use the hashtag #DoraDoes to share your finished projects or just tag me @doraexplored
- If you have the bug for creating garments, why not join my dedicated facebook group “My Crochet Wardrobe” and share them there?
- Sign up to the WiP Tip for weekly crochet chat, offers and exclusives straight to your inbox – click here to sign up
Happy Hooking
Dx
Get the PDF crochet pattern for free on December 1st!

To celebrate the launch of this pattern, it will be the first offering in my 2023 Free Festive Friday Event!
For Friday 1st December and Saturday 2nd December (UK time, midnight to midnight) you can get the Free PDF version of this crochet pattern.
Simply visit the Four Free Festive Friday home page, to grab the discount code, comeback here and find the ‘download from Raverly’ Button below. This will take you to the Ravelry page listing where you can enter the code to get the pattern at a 100% discount – i.e. for no money!

Once you have the download code, come back and click the button below to use it for a 100% discount on the PDF crochet stocking pattern.
Merry Christmas!
Big love and happy hooking
Dx
Copyright Dora Does Limited, Registered in England, Company Number 13992263. This pattern is for personal use only and may not be shared or reproduced in written, photo, video or any other form without prior written consent. All rights reserved. Terms of service.