How to tie the magic knot (Russian knot)

Sometimes called the invisible join, or the Russian knot, this is a fantastic technique to join new yarn quickly and without fuss. This post includes a video, written and photo tutorial on how to create it.
When should you use the magic knot?
I particularly like this trick for joining a new skein of the same colour when I’m in the middle of a crochet project. Because of the way it’s created, you can put your tapestry needle away as with this technique, there will be no extra ends to sew in!!
Whilst it’s a super quick and easy way to join yarn, if you’re changing colours it can be tricky to get your knot in the right place until you get the knack. I’ll let you be the judge of why after watching the video below!
When not to use the magic knot
Although, generally speaking the magic knot is an incredibly secure way to join hew yarn, I would add a caveat about when not to use it.
If I am working in a very smooth or shiny yarn, something like mercerised cotton perhaps, I do not use this technique. I have found that some yarns like to in-knot themselves and the last thing you want is this coming undone in the middle of a sweater or blanket! Really this is a judgement call. With experience you get the feel for how different yarns behave and will learn the best way to work with them.
If in doubt have a play with a couple of yarn tails or scraps of the yarn you’re using. See how it responds to knots. Try the magic knot and then do your best to break it – the ultimate quality test!!
Generally I find the magic knot works fab with most acrylic (so long is it isn’t too shiny!) yarns, wool and animal fibres. Any fibre texture that creates some friction essentially!
Magic knot: Video tutorial
Below you’ll find a simple 2 minute video demonstrating the magic knot.
This was one of the first video tutorials I ever created, but it has taken me a while to add a photo tutorial and write it up! For this post I created an extra little sop motion video for fun when I was taking the photos for the Picture tutorial below.
So if you want an even quicker demonstration of the magic knot, then take a peek at the end of the phot tutorial!
Magic Knot: Written and photo tutorial
If videos aren’t for you, then below you’ll find the written and step-by-step picture tutoial.
You will start with two ends of yarn – one will be the working yarn you’ve just come to the end of and the other your new yarn you wish to join.

Lay your yarn flat with one tail underneath the other.

Wrap the underneath yarn (pink) over the top of the other (blue) strand and over itself.

Wrap the tail over the loop you created to tie a simple knot. (Essentially, tie the pink yarn around the blue)

Pull the knot as tight as you can.
Next we will repeat the process with the other yarn tail. So lay the other (blue) end of the yarn underneath the first (pink).

Loop the (blue) tail over the other (pink) yarn and back over itself.

Tie it in a knot the same way you did with the first side. Pull it as tight as you can.
Next task hold of either end of the two pieces of yarn, one in each hand.

This is where the magic happens…
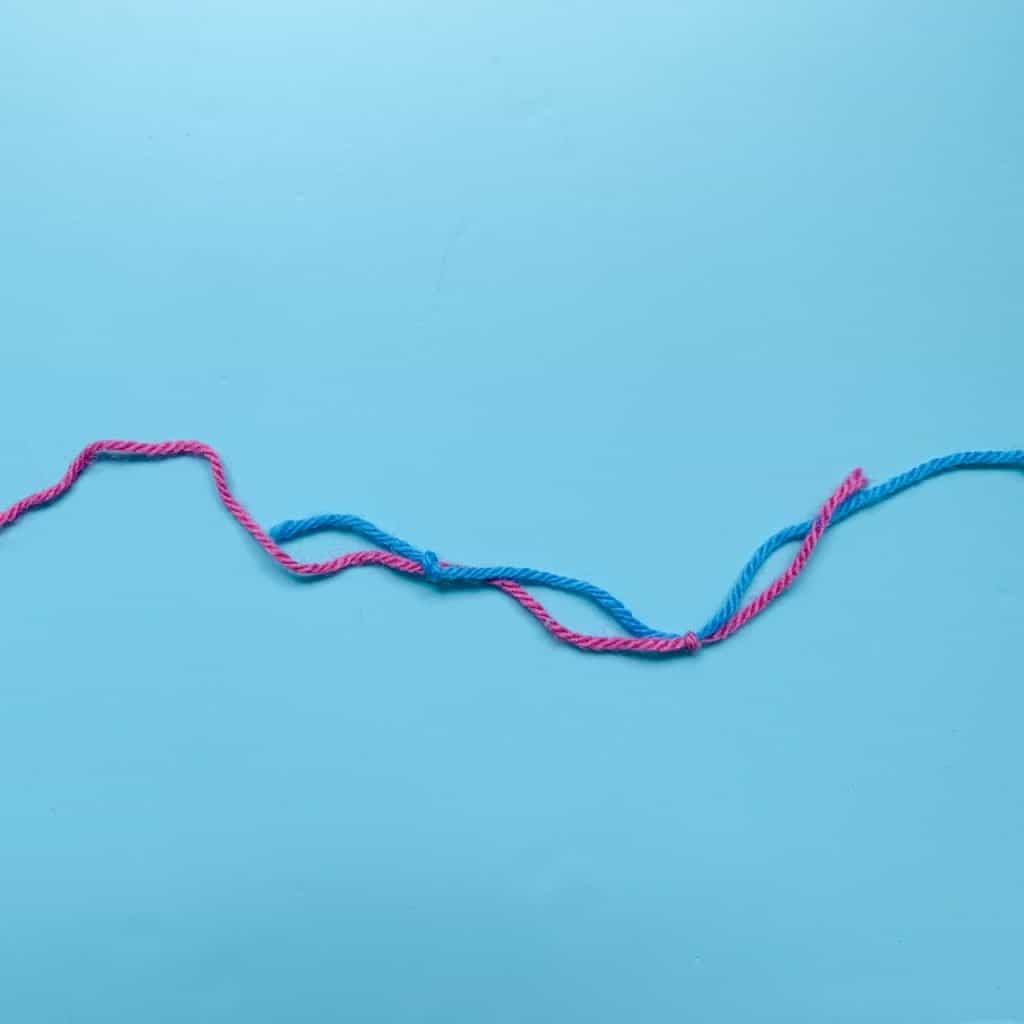
Pull either end of the yarn and the two knots will slide towards each other until they meet and cannot go any further.

Check that the ends are as tight as they can be and then take out your scissors. Placing the blade as close to the knot as possible, without damaging it, snip off the short ends of each piece of yarn.

And there you have it… a tight little knot that will hide nicely inside your crochet stitches. No ends to sew in!

And if you want to see all this in stop motion… like an old fashioned flip book then have a look at my fun quick video below.
I hope you find this tutorial useful. I have a ‘tips tricks and techniques’ page in my resource library with lots more little hacks like this so you may want to check those out too!
In the meantime, do let me know how you got on with this one!
Happy Hooking
Dx


This looks very simple but can it be used in stocking stitch knitting on circular needle.
It’s super simple once you get it. I’m not really a knitter so I can’t answer your question from experience I’m afraid! (But I don’t see why it shouldn’t work!)
Thank you for your clear explanation. I’m able to make the magic knot when joining two different colored yarns but am wondering how it works if you want to join a new ball of the same color. How do you keep from getting confused.
I think the best way is to tie one knot at a time and keep quite a bit of distance between them before you pull them tight. Once you’ve used the technique a few times, you’ll get used to it! 🙂