Brussels Sprout Christmas Hat – Free Crochet Pattern
I had this idea the other day after seeing an illustration by the talented Jo Clark Design of a cat wearing a Brussel Sprout as a hat and… well I couldn’t get it out of my head, so I dropped all the stuff I was meant to be doing and made one… here I share the results!
Below you’ll find a free pattern for an adult size Sprout hat (yes, that’s a sentence I just wrote).
I haven’t created a full PDF pattern for this one as it was really just a kind of off the cuff, silly experiment I wanted to share!

This post contains affiliate links. This means if you click a link to a product and go on to make a purchase, I receive a small percentage of the sale at no extra cost to you. You can read my full affiliate disclosure here

Pattern Notes
- This pattern uses US crochet terms (UK equivalents are given in brackets in the abbreviations list)
- Numbers in brackets at the end of a round or row indicate the number of stitches in that round and are only given at the start of a section or where there is a change
- Turning chains to not count as stitches
- When working in rounds, start each round at the top of the last stitch of the previous round and (skip the slip stitch)
- When working in rows, the first stitch is always worked in the same stitch as the turning chain
- Instructions written after *asterisks should be repeated as indicated
- Unless otherwise indicated stitches should be worked in consecutive stitches
- The hat is worked from the top down in rounds, joining each round with a slip stitch and turning
- Leaves are worked separately and stitched on
- There is no right or wrong side until you start adding the leaves
Skills Needed
- Knowledge of basic crochet stitches
- Making a Magic Ring (modification given)
- Working in rounds using simple increases
- Foundation stitches (Chainless foundation rows)
- Basic sewing to attach the leaves
Materials
Hook: 4mm crochet hook (or size needed for gauge)
Yarn: Any dk weight yarn which meets gauge will work for this pattern. The amount will depend on how many leaves you want to make! I have outlined what I used in the item pictured.
I used 2 colours
- Colour A: Approx 250m / 100g / 1 ball of Women’s Institute Premium Acrylic Double Knit in Green (for the main body of the hat and some of the leaves)
- Colour B:About 100m / 40g / < half a ball of Women’s Institute Premium Acrylic Double Knit in Lime (for leaves only)
Yarn Substitution Options:
Paintbox Yarns Simply DK or Stylecraft Special DK would make good alternatives and both have great colour choices.
The pattern will work with other yarn weights but the finished size will vary if you do not meet gauge.
Stitches & Abbreviations: US terms
(UK Equivalent in Brackets)
- ch = chain
- fsc = foundation single crochet – find a tutorial here (UK foundation double crochet)
- hdc = half double crochet (UK half treble)
- hdc2tog = half double crochet 2 together (UK half treble 2 together)
- MR = Magic Ring – click here for a tutorial
- rep = repeat
- sc = single crochet (UK double crochet)
- sc2tog = single crochet 2 together (UK double crochet 2 together)
- ss = slip stitch
- st(s) = stitch(es)
Gauge
17 sts and 15 rows in 10cm of hdc using a 4mm crochet hook or size needed to obtain gauge.
Measurements & Finished Size
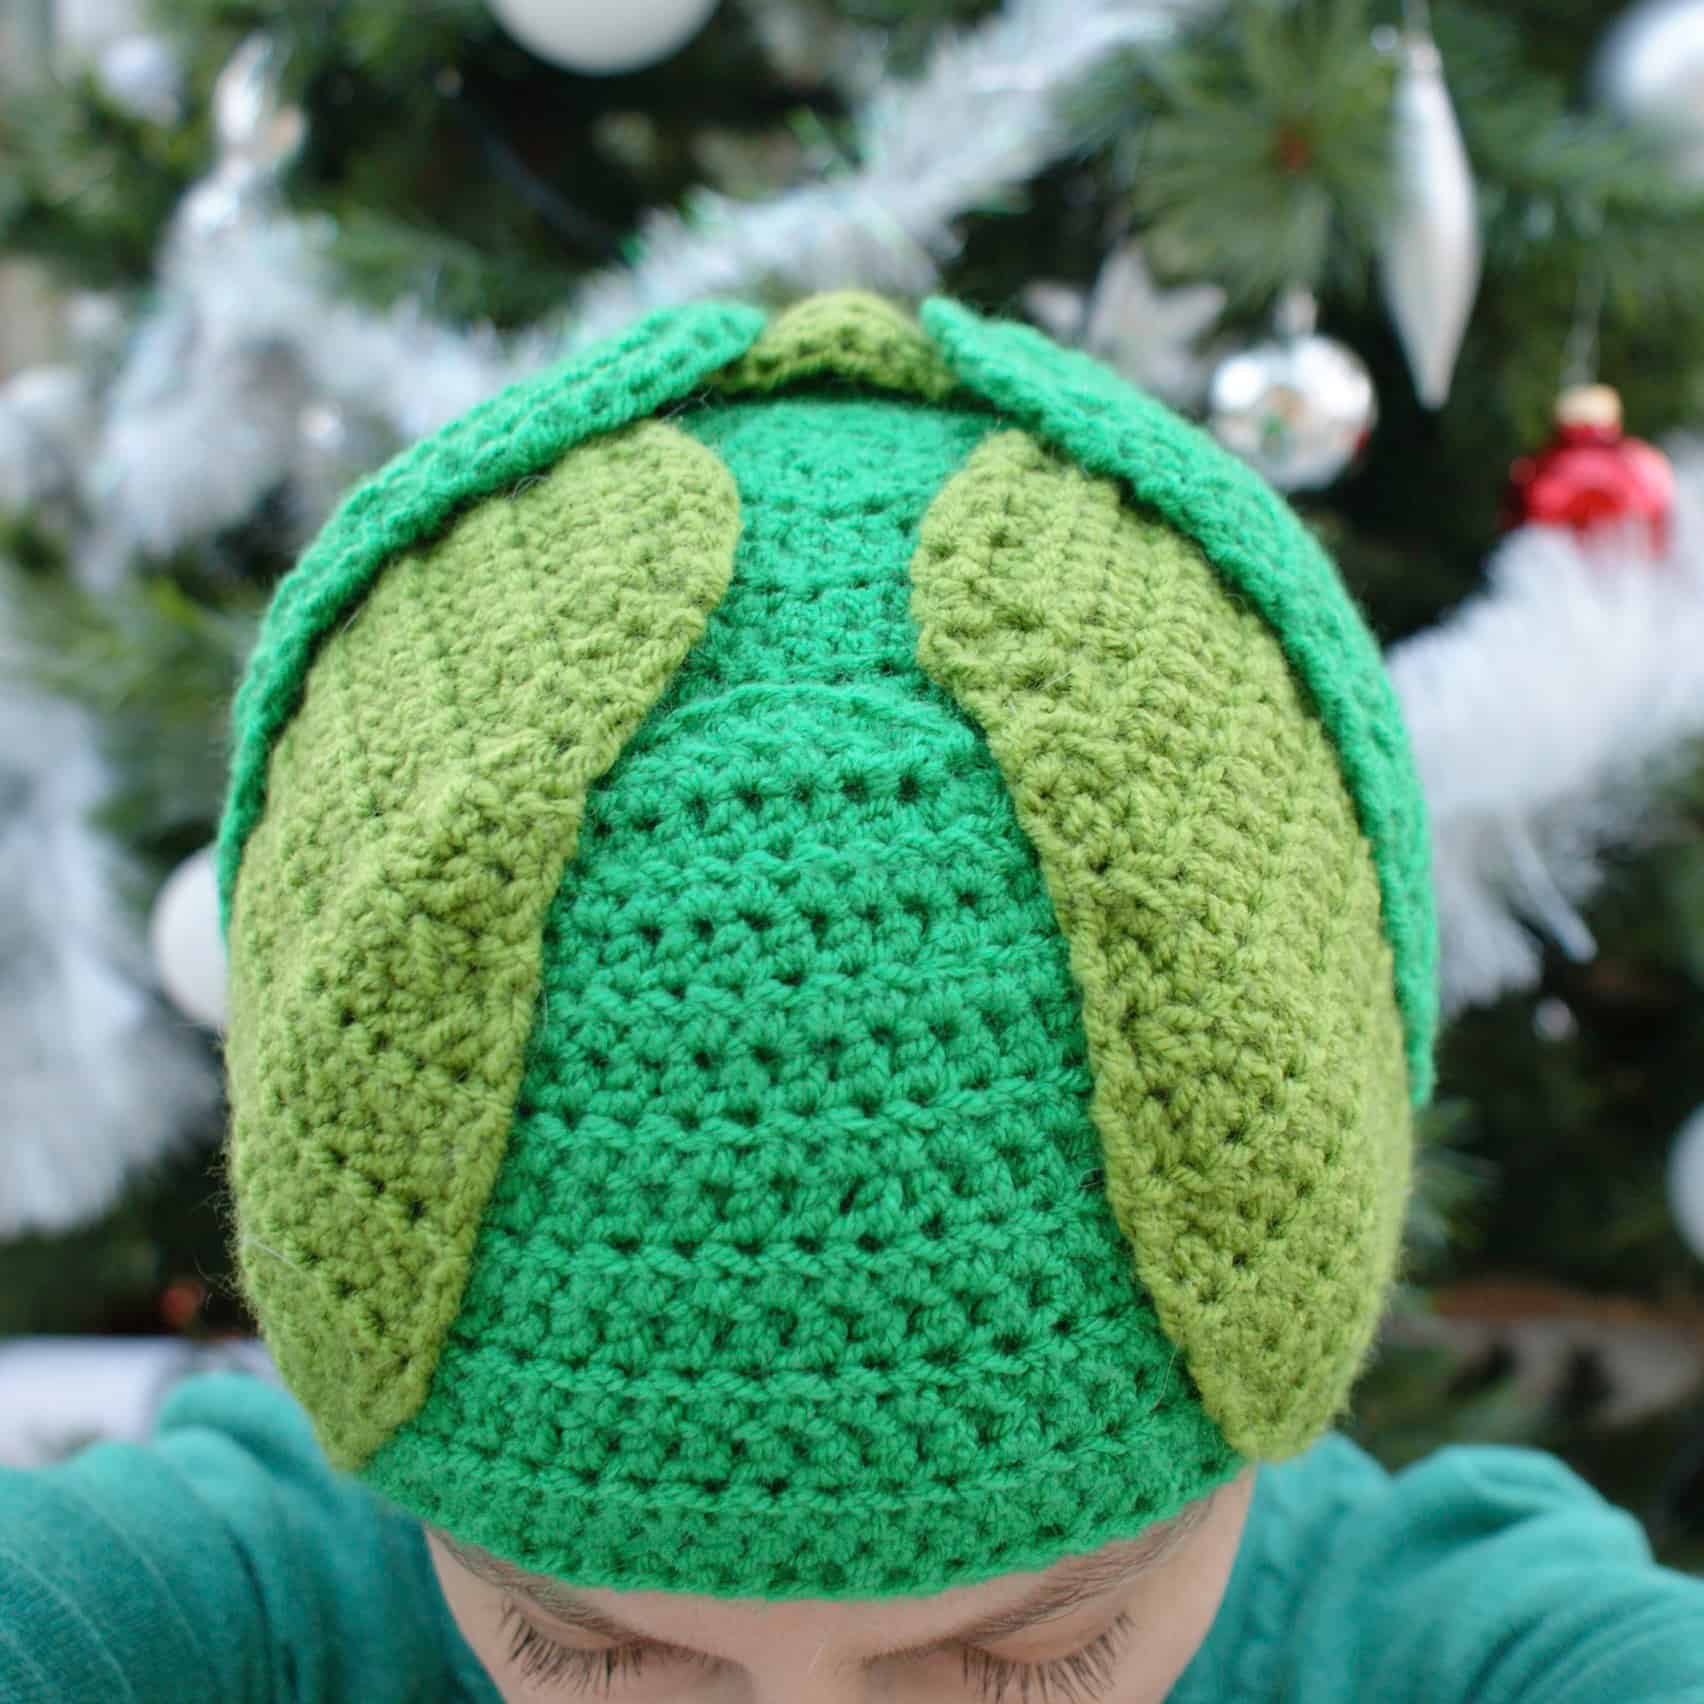
The hat is adult size and measures around 50cm in circumference and 22cm in height (at the longest point).
Each leaf measures about 22cm tall and 15cm wide at the widest point.

Disclaimer: Whilst I endeavour to ensure all patterns are error free, occasional typos or errors may slip through. No liability is accepted for this or subsequent variation in finished projects. However, please do contact me if you think the pattern contains an error or you are unsure about interpreting the instructions.
Information in this crochet pattern is given for reference only. Any reliance on information given in this document and associated reference materials is at your own risk. This pattern falls under Dora Does Terms of Service.
The Brussel Sprout Hat Crochet Pattern
First, crochet the sprout hat base
Using Colour A and a 4mm hook, make a MR (or ch 3 and work into third ch from hook);
Round 1: Ch2 (does not count as st throughout) and work 8hdc into the MR, ss to top of first st, turn (8 sts)
Round 2: Ch2, 2hdc in each st around, ss to top of first st, turn (16 sts)
Round 3: Ch2, *1hdc, 2hdc in next st; rep from * to end, ss to top of first st, turn (24 sts)
Round 4: Ch2, *1hdc in next 2 sts, 2hdc in next st; rep from * to end, ss to top of first st, turn (32 sts)
Round 5: Ch2, *1hdc in next 3 sts, 2hdc in next st; rep from * to end, ss to top of first st, turn (40 sts)
Round 6: Ch2, *1hdc in next 4 sts, 2hdc in next st; rep from * to end, ss to top of first st, turn (48 sts)
Round 7: Ch2, *1hdc in next 5 sts, 2hdc in next st; rep from * to end, ss to top of first st, turn (56 sts)
Round 8: Ch2, *1hdc in next 6 sts, 2hdc in next st; rep from * to end, ss to top of first st, turn (64 sts)
Round 9: Ch2, *1hdc in next 7 sts, 2hdc in next st; rep from * to end, ss to top of first st, turn (72 sts)
Round 10: Ch2, *1hdc in next 8 sts, 2hdc in next st; rep from * to end, ss to top of first st, turn (80 sts)
Round 11: Ch2, *1hdc in next 9 sts, 2hdc in next st; rep from * to end, ss to top of first st, turn (88 sts)
Round 12: Ch2, 1hdc in each st to end, ss to top of first st, turn
Rounds 13 – 23: As Round 12
You will now start to shape the hat and move to work in rows
Row 24: Ch2, 1hdc in next 72 sts, turn (72 sts)
Row 25: Ch2, 1hdc, hdc2tog, 1hdc in each st to 3 from end, hdc2tog, 1hdc, turn (70 Sts)
Rows 26 – 28: Rep Row 25 (64 sts)
Row 29: Ch2, *hdc2tog, 1hdc in next 6 sts; rep from * to end, turn (56 sts)
Row 30: Ch2, *hdc2tog, 1hdc in next 5 sts; rep from * to end, turn (48 sts)
Row 31: Ch2, *hdc2tog, 1hdc in next 4 sts; rep from * to end, turn (40 sts)
Row 32: Ch2, *hdc2tog, 1hdc in next 3 sts; rep from * to end, turn (32 sts)
Fasten off and weave in ends
Now you will make the leaves.
I recommend making a minimum of 5 and one of the half leaves, but you can make more and layer them up. You can also make more half leaves and layer them underneath the full size leaves.
I made one half size and two full size leaves in Colour A and 3 full size in Colour B
For the leaves, start each row in the same st as the turning chain.
When starting your leaf, which is worked from the stem upwards, you may want to leave a long tail to attach it to the hat.
Full size crochet leaf pattern
Row 1: 4fsc, turn (4 sts)
Row 2: Ch2, 1hdc in each st to end, turn
Row 3: As Row 2
Row 4: Ch2, 1hdc, 2hdc in next 2 sts, 1hdc, turn (6 sts)
Row 5: Ch2, 1hdc, 2hdc, 1hdc in next 2 sts, 2hdc, 1hdc, turn (8 sts)
Row 6: Ch2, 1hdc, 2hdc, 1hdc in each st to 2 from end, 2hdc, 1hdc, turn (10 sts)
Rows 7 – 14: As Row 6 (26 sts)
Row 15: Ch2, 1hdc in each st to end, turn
Row 16 – 19: As Row 15
Note that if you want to play around with the size of the leaves, you can work more of fewer repeats of Row 15, or you can continue increasing to widen the centre of the leaf. If your leaves aren’t all identical that is more representative of what a real sprout would look like, so get creative!!
Row 20: Ch2, 1hdc, hdc2tog, 1hdc in each st to 3 from end, hdc2tog, 1hdc, turn (24 sts)
Row 21 – 26: As row 20 (12 sts)
Row 27: Ch1 (does not count as st), 1sc, sc2tog, 1hdc in next 6 sts, sc2tog, 1sc, turn (10 sts)
Row 28: Ch1, 1sc, sc2tog, 1hdc in next 4 sts, sc2tog, 1sc, turn (8 sts)
Row 29: Ss in first st, 1sc in next 2 sts, 1hdc in next 2 sts, 1sc in next 2 sts, ss in last st
Fasten off, weave in ends

Half leaf crochet pattern
Row 1: 26fsc, turn (26 sts)
Row 2: Ch2, 1hdc in each st to end, turn
Rows 3 – 6: As Row 2
Row 7: Ch2, 1hdc, hdc2tog, 1hdc in each st to 3 from end, hdc2tog, 1hdc, turn (24 sts)
Row 8 – 13: As Row 7 (12 sts)
Row 14: Ch1, 1sc, sc2tog, 1hdc in next 6 sts, sc2tog, 1sc, turn (10 sts)
Row 15: Ch1, 1sc, sc2tog, 1hdc in next 4 sts, sc2tog, 1sc, turn (8 sts)
Row 16: Ss in first st, 1sc in next 2 sts, 1hdc in next 2 sts, 1sc in next 2 sts, ss in last st
Fasten off, weave in end
Putting it together
Once you have all your leaves, arrange them around your hat, pinning them on before you start stitching.
Play around with the positioning and the different ways to layer the leaves.
I aligned the base of the leaves with the base of the hat. For the first layer I used the 3 leaves made in Colour B then layered the leaves made in Colour A over the top. I Initially tried the half leaf over the top of the Colour B leaves but didn’t like it so unpicked it an tucked the half leaf underneath.
Once you’re happy, stitch the base and sides of the leaves in place, leaving the top of the leaf open to create texture and depth. I stitched up to the beginning of the decrease at the top end of the leaf.
Weave in ends and get sprouty!!

How to share your finished makes
- On Instagram, you can use the hashtag #DoraDoes to share your finished projects or just tag me @doraexplored
- If you have the bug for creating garments, why not join my dedicated facebook group “My Crochet Wardrobe” and share them there?
- Sign up to the WiP Tip for weekly crochet chat, offers and exclusives straight to your inbox – click here to sign up
Happy Hooking
Dx
Copyright Dora Does Limited, Registered in England, Company Number 13992263. This pattern is for personal use only and may not be shared or reproduced in written, photo, video or any other form without prior written consent. All rights reserved. Terms of service.
.