Bobble Pop Blanket – Free Crochet Pattern

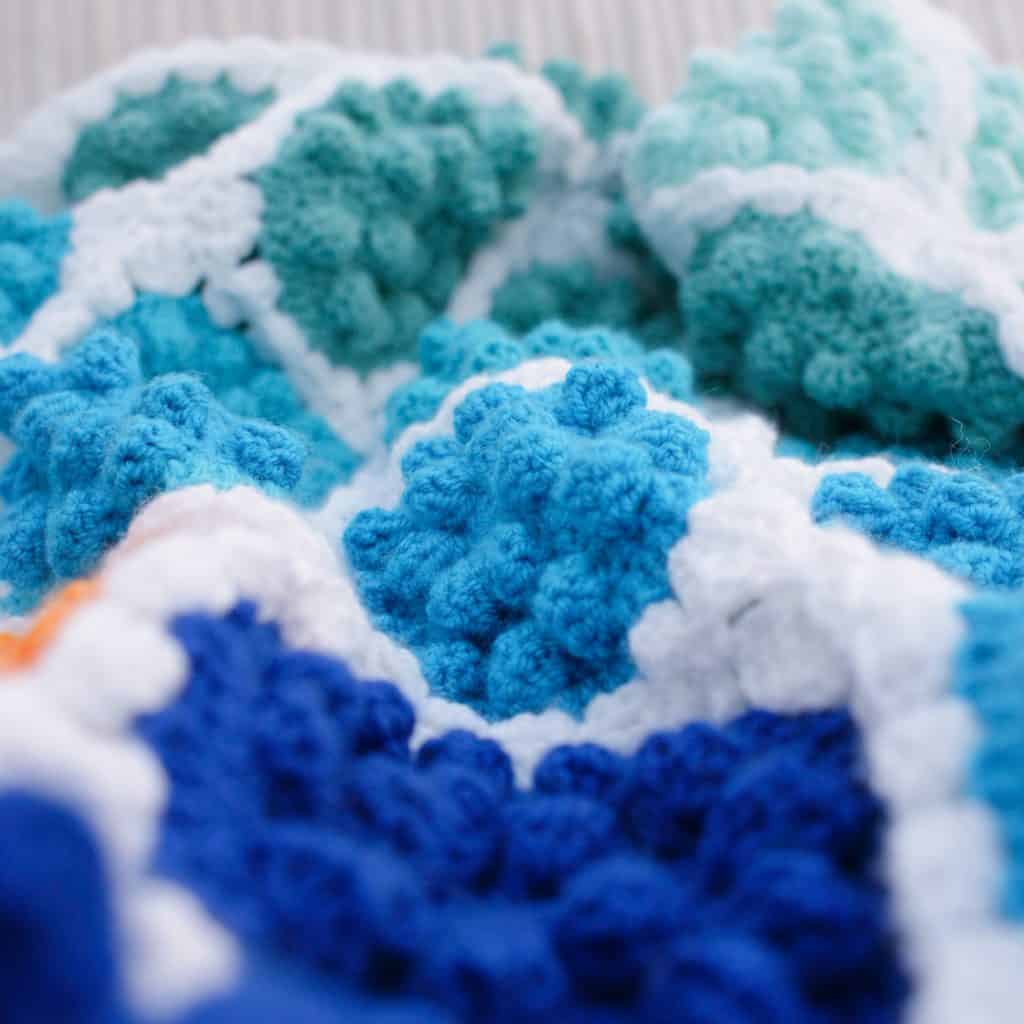
The Bobble Pop throw blanket is a colourful crochet throw pattern, designed to use up lots of leftover yarn in a fun and practical way.
This year I have been working through my yarn stash looking for ways to use up leftover yarn which creates something attractive and useful. I hate waste, so this project really worked for me.
The pop art style design was inspired by a mood blanket (which is a bit like a temperature blanket for your mood!) I made back in 2014 before I started publishing my crochet designs. It still lives on the back of my sofa, so I updated my original design and went from there.
I’ve been making this blanket bit by bit over the last 6 months or so, making a fifteen minute motif here and there between bigger projects.
I really enjoyed the slow pick-up and put-down approach (which would make it a perfect pattern if you enjoy temperature blankets), but it would also be a great one to work on all at once whilst bingeing the latest TV box set!
This pattern is not intended for use as a baby blanket. It should not be used in cots / cribs.
So let’s get into it!
You can purchase an ad-free, printable pdf version of this pattern from Ravelry, Love Crafts or Etsy.


This post contains affiliate links. This means if you click a link to a product and go on to make a purchase, I receive a small percentage of the sale at no extra cost to you. You can read my full affiliate disclosure here


Finished size & gauge
The blanket you see here measures approximately 90cm wide by 114cm long (including the boarder) based on 7 bobble pop motifs wide by 9 long (63 motifs made in total), using DK yarn and a 4mm hook.
The size of the finished blanket will depend on how many motifs you make, the type of yarn selected, hook size you choose and how you choose to lay the bobble pops out.
Because of the nature of the design I have not included a gauge measurement, however each circular bobble pop motif measures about 10cm / 4in. Once squared, each motif will measure about 12cm / 5in.
Skills needed
- Knowledge of basic crochet stitches and terminology
- Working in the round
- Using the Magic Ring (Click for tutorial) – modification given
- Double crochet cluster style Bobble stitches – see special stitches (click here to learn more about the different types of crochet bobble stitches)
- Join as you go – tutorial below and modification given
Materials
You will need a 4mm crochet hook and about 2000m / 850g of double knit yarn (depending on the size of the blanket you wish to make) and a yarn needle to weave in the ends.
I used a mixture of Women’s Institute Premium Acrylic DK, Paintbox Yarns Simply DK and Stylecraft Special DK from my stash, but really any DK yarn will work.
Each motif uses just a small amount of yarn (about 25-30m) so you can make as many of each colour as you wish and even use multiple colours in one motif!
You will get around 10 motifs from a 100g ball of acrylic yarn.
I just picked out all of the part-used blue and blue green yarns from my DK stash box and grabbed half a ball of orange to add a colour pop.
To join the motifs and add the boarder, I used About 250g / 600m of Women’s Institute Premium Acrylic DK in White – I will refer to this as the Background Colour in the pattern.
Yarn Substitution options
This pattern will work with most yarn weights so if you prefer working with aran or worsted (or have lots of this weight to use up) then go with that (making sure you use the suitable hook size for your yarn. If you’re not sure what hook size to choose, this post about hook sizes might help you!)
How to purchase a Dora Does crochet pattern:
I sell my PDF crochet patterns in my Etsy, Ravelry and Love Crafts stores. You can purchase this pattern on any of these platforms, depending on your preference. Simply click the relevant links throughout this pattern page to be taken to the listing, or visit the store homepages in the links at the start of this paragraph.

Pattern Notes
- This Patten uses US crochet terms (UK terms are given in brackets in the abbreviations list)
- Stitch counts are given in brackets at the end of each round
- Turning chains do not count as stitches
- Stitches should be worked in consecutive stitches unless specified otherwise
- Instructions in (brackets) should be worked in the same stitch
- Instructions after *asterisks should be repeated as indicated
- When turning your rounds, make sure you work the first stitch of your new round into the top of the last st from the previous round – do not work it into the slip stitch used to join the round!
- The blanket is constructed by making all the round motifs, then squaring the circle and joining the motifs to each other as you do so
- An optional boarder is added at the end
- I recommend sewing in your ends as you go!
- This blanket is not designed for use by babies or infants. It is not suitable for cots and babies and infants should not be left unattended with it
Stitches and abbreviations (US Crochet Terms)
UK terms are given in brackets below, where applicable.
- bbl = bobble – see special stitches
- ch = chain
- dc = double crochet (UK treble crochet)
- hdc = half double crochet (UK half treble crochet)
- jayg = join as you go
- MR = magic ring (click here for a MR tutorial)
- RS = right side
- sk = skip
- sp = space
- ss = slip stitch
- st(s) = stitch(es)
- tr = treble crochet (UK double treble crochet)
- WS = wrong side
- yo = yarn over

Special stitches
Crochet Bobble Stitch (bbl)
For this pattern, the bobble is actually a 5tr cluster stitch. If you’re used to making decreases, a dc2tog for example, then this would be written as a tr5tog made all in the same stitch.
Here are the instructions:
*yo twice, insert hook into st, yo, pull up a loop, yo pull through two loops, yo, pull through two loops; rep from * 4 more times in the same stitch (5 times in total) so you have six loops on your hook, yo and pull through all remaining loops to complete the stitch.
Bobbles are always worked on the wrong side in the pattern
You can find a full written, photo and video tutorial for the crochet cluster bobble stitch here.
The Pattern
Make 63 motifs in your choice of colours (or as many as desired for your blanket).
Bobble Pop Motif – Written Pattern
Using a 4mm hook, make a MR or ch3 and work into the 3rd ch from hook;
Round 1 (RS): Ch2 (does not count as a st throughout), 12dc in MR, ss to top of first st to join, turn (12 sts)
Round 2: Ch2, *(1dc 1bbl) , 2dc in next st; rep from * to end, ss to top of first st to join, turn (24 sts)
Round 3: Ch2, *1dc, 2dc in next st; rep from * to end, ss to top of first st to join, turn (36 sts)
Round 4: Ch2, *(1dc, 1bbl), 1dc in next 2 sts; rep form * to end, ss to top of first st to join, turn (48 sts)
Round 5: Ch2, *1dc in next 3 sts, 2dc in next st; rep from * to end, ss to top of first st to join (60)
Fasten off, weave in ends
Bobble Pop Motif Video Tutorial
Find a left handed Bobble Pop motif tutorial here

Square the circle
Once you have made all your motifs (or you can do this as you work), you will square each circle and join it to the next circle to build the blanket.
You may want to lay all your motifs out first so that you know how you wish to arrange them for your blanket. If you do this, take a picture on your phone so you can refer to it later!!
With the rs facing you, join the colour of yarn you are going to use as the background colour to the end of the last round.
For your fist motif, work the next round as follows;
Round 6 (rs): Squaring the circle: Ch2, *3dc, sk 2 sts, 3hdc, sk 2 sts, 3hdc, sk 2 sts, 3dc, sk 2 sts, (3tr ch2, 3tr) sk 2 sts; rep from * to end, ss to top of first st to join (72 sts and 4 corner ch2-sp)
Fasten off
For subsequent motifs, follow the instructions above joining one motif to the next using the join as you go instructions given below, or watch the video tutorial below:
Click here for a left handed tutorial
Note that if you do not want to use the jayg method, you can square each circle as described in Round 6 and sew your motifs together afterwards or use your own preferred joining method.

Jayg instructions
The videos linked to above include a tutorial on how to join your squared circles as you go.
Essentially, you will join motifs by slip stitching to the next motif between each group of 3 stitches, ensuring your squares are aligned.
In the corners (the ch2-sp), you will chain 2 between the groups of 3tr, remove the hook from the loop, thread the ch2 through the corresponding ch2 corner space on the square you’re joining to, then pick the loop back up and continue working the next set of 3tr in the same ch2-sp.
Once you get into it, the joining process very quick and simple so if you have never tried joining as you go before, this is a great place to start!!
This method also works for traditional granny square blankets!
Border
Once you have joined all of your motifs, you are ready to add your boarder. The first round is worked in a granny stitch style and the second adds a scalloped edge.
With RS facing you, join your background colour to one corner of the blanket and, using a 4mm hook;
Round 1: Ch2 (does not count as st), 3dc in corner ch2, *sk 3 sts, 3dc in between groups of 3 sts; rep from * to next corner, (3dc, ch2, 3dc) in ch2-sp** to make corner; rep from * to ** around the remaining 3 sides of the blanket, to the last corner where you will work 3dc, ch2 in the ch2-sp and ss to the top of the first st to join, do not turn
Round 2: Ch2, starting by working back into the ch2 from the end of the last round 9dc in the corner, *sk 3 sts, ss in between the group of 3 sts, sk 3 sts, 6dc in between group of 3 sts; rep from * round the entire blanket, replacing 6dc with 9dc in the ch2 corner spaces where appropriate.
A note about the corners: You will either work a slip stitch in the corner ch2-sp or you will work 9dc. For the blanket seen here, I made 9dc in diagonally opposite corners and slip stitched in the other two opposing corners.
Fasten off, sew in ends

I advise blocking your blanket or popping it in the wash and pinning it out flat to dry.
I hope you enjoy this fun stashbuster pattern. The finished blanket is super warm and cosy, perfect for cuddling up on a chilly evening.
I would love it if you could tag me in your finished makes too as it gives me so much joy to see the wonderful creations you make! See how below.
In the meantime,
Happy Hooking
Dx
How to share your makes
I love seeing your finished makes – if social media is your thing, here’s how you can share them:
On Instagram, you can use the hashtag #HookMeHappy or #BobblePopBlanket or just tag me @doradexplored.
You can tweet me your pictures, or add your them to my Facebook page
If Pinterest is your happy place, you can add them there too – check out my Pinterest account for lots more crochet inspiration from makers across the web!
Copyright Dora Does Limited, Registered in England, Company Number 13992263. This pattern is for personal use only and may not be shared or reproduced in written, photo, video or any other form without prior written consent. All rights reserved. Terms of service.
HOW DID I MISS THIS ONE ? – sometimes I become convinced of the need for hara kiri ..
It’s really appealing, Michelle (like all your work), and I am going to make it. I think I might make the whole thing in just the one colour .. Whatever .. Just not sure how much yarn is required, but I’m sure a detailed read-through will tell me. You’re a CHAMPEEN, me old china ! 😀
Ahhh. I’m glad you like it! I use these blankets (I have 2!) so much!!
I spend a large part of my ancient life sitting in a recliner chair with my teeny mog between my knees and my laptop of the r.h. arm: you can believe that I will, too ! 🙂