
How to photograph crochet garments and wearables (without being a professional)

Today I’m going to share my approach to photographing my finished crochet garments and larger wearable projects. Think shawls, sweaters cardigans etc.
I don’t have a professional studio set up, I just use my iPhone, my home and surrounding environment, so this article includes the tips and tricks I’ve learned over the years for getting good photos by using what is to hand.
I have a bit of a double edged relationship with my crochet photography. I love taking photos and I love sharing my crochet designs. I also love crocheting garments and wearables.
But larger crochet items like sweaters need a larger canvas or backdrop to capture. This requires a different photographic approach to something like a hat, pair of mittens or other small items, and this can present some unique challenges.
On top of that I don’t have a lot of space to play with at home and usually take my photos myself, which adds to the resistance I often feel when planning photo shoots.
(I’m not a fan of photographing myself either but needs must.)
Despite these restrictions, I always make an effort to ensure my images convey all the visual information you need to make an informed choice about whether you want to go ahead and purchase one of my patterns.
I aim to show the front, back and sides of any garment as well as a close up of the texture and most of a full body shot so you get an idea of length and proportion. (I usually mention that I’m only 5ft 1 and a bit, so you can also judge what the length might look like if you’re a different height.)
I can’t do mirror selfies either. I just haven’t cracked the angles… The day I learn they will probably introduce a new piece of technology that does it for you…
Despite all that, I have, over the years I have learned a few ways to manage these challenges and find more ease and joy in the photography process.
This is what I want to share with you today.
The image below is one of my favourites from a recent shoot of my Summer Side Tank top. It’s not perfect but it’s real and shows the shape, drape, style and texture of the top so it ticks all the boxes YOU need!

This post contains affiliate links. This means if you click a link to a product and go on to make a purchase, I receive a small percentage of the sale at no extra cost to you. You can read my full affiliate disclosure here. As an Amazon Associate I earn from qualifying purchases.
Without further ado, lets take a look at my tips for a ‘making do‘ approach to photographing your crochet wearables.
What or who is the photo for?
You may be a crochet designer or maker who wants to share or sell your makes. You may just like to share them on social media. Whatever your goal, being aware of why you are taking the photo makes it more likely that you will get the result you want.
So ask yourself this with every click; Who is it for? What do I want to communicate?
Get into that habit and you’ll already be on the right track.
Throughout this post I have used a number of images from recent shoots to illustrate my discussion points. These images were all shot with the intention of demonstrating the features of my designs.
I’ve shared many rejects, which you wouldn’t normally see, because I want to tell the real story. Besides, I’m hopeless at deleting pictures, so I might as well find a use for them!
Let go of perfection
One of the big things that has helped me is learning what ‘good enough’ means.
I am getting better at taking my own advice and remembering that the main purpose of my images is to show you the garment clearly and cleanly from a range of angles, so perfection has to take second place to that.
I favour modelled shots because a garment looks very different on a hangar than a body. It may be much easier get a photo when you can just pop a garment on a hanger on a picture hook, but I don’t think that alone gives necessary information.
Getting full body shots can be a challenge as my flat is not huge and doesn’t have lots of natural light. Still, I do the best with what I have.
The purpose is not to make myself look amazing or to strike the perfect pose, though if I can get a bit arty with it then that’s a bonus…
In theory I could spend hours and hours getting the perfectly styled, lit and posed shot. But time is a pretty valuable resource, and I wonder whether that extra time and effort spent is really worth the benefit.
In project management there is a concept called the golden triangle. Where every project is a balance between three constraints; Time, Budget and Scope. Together these 3 contribute to the quality of the project but almost always conflict with each other.
The theory goes that you can only ever get two of these constraints in the favourable slot. The third will always balance it out. So if you want a project done quickly with a broad scope then it is going to cost a lot.
This essentially demonstrates that perfection is impossible. You cannot get a high quality project done in a short timeline for a low cost (unless you stumble onto a unicorn). You can’t have it all, but you can decide which bits matter to you.
I apply this same theory to my photography. I could take my time to get a whole range of beautiful images with the best camera and lighting set ups, to create the most stunning images. But that’s going to cost a lot in terms of equipment expense and my time. That’s just one example but I hope you get the gist!
Where I land is probably somewhere in the middle of each facet. I take enough time to make sure I am happy with the images, but don’t go over the top and make do with the decent camera I have on my phone and invest in equipment where I see a benefit. The rest I am happy to make do with.
Everyone will place different value each variable, so just because this is my view, it doesn’t make different approaches invalid.
Okay, went off on a bit of a tangent there… back to the pretty pics!
If you’re not a professional photographer, don’t pretend to be one
In no way would I ever class myself as a professional when it comes to photography. And I am okay with sharing that. This isn’t a post about how to be a professional photographer!
I take all my pics on my iPhone and the prospect of flat-lays give me nightmares. I am often very critical of my photos and rarely completely satisfied.
However, in addition to letting go of perfection, I have also got better at developing and embracing my own style by making the most of the space and equipment that I do have to hand.
This is really the approach I want to encourage you to play with.
Own your individual circumstance.
Find the light
It is a generally accepted standard that using natural daylight gives better results than artificial light. I am not gonna argue with this one. It’s important to use ‘good’ light.
Try finding a space near a window or a door you can open to make the most of the natural light.
Side light often gives great results as does playing with shadows.
If you don’t have good light inside, find somewhere outside to shoot. I know this can be tough during winter, but using angled at sunrise or sunset can look spectacular if you get it right.
Make sure the part of the item you want to emphasise is out of shadow.
Below are a couple of recent shots from my Summer Side Tank Top photo session. I took myself out to a glade in the meadow behind where I live.
I loved the dappled shade thrown by the leaves on the trees so decided to try and work with that.
In the picture below I got it pretty wrong. The only bits that catch the light are my upper arm (which I have a hang up about), shoulder and a random part of my right forearm.
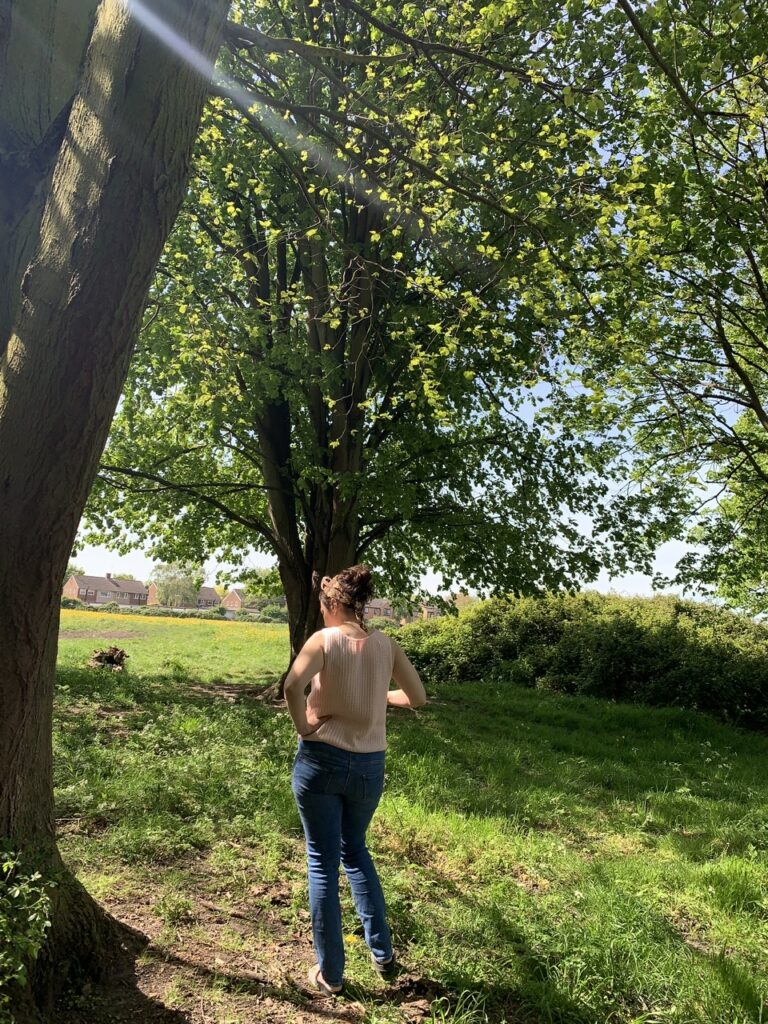
In the image above I’m also quite far away from the camera so you find yourself focusing on the trees and all those houses in the background and essentially anything that isn’t the top… which is meant to be the object.
Not to mention you can see the dry ground and cow poop I’m navigating around!!
Needless to say, this one landed on the metaphoric cutting room floor.
In the image below, I’m closer to the camera and the light, both shaded and bright is falling on the tank, which is draping nicely around my back.
This image shows how the top looks in a variety of lights. I like the shaded part as it shows you the texture of the fabric more clearly than the brightly lit part, all whilst looking natural.
You can also see the nice shaping at the bottom of the side seam as well as the shaping around the underarm, both features which I love about this vest top.
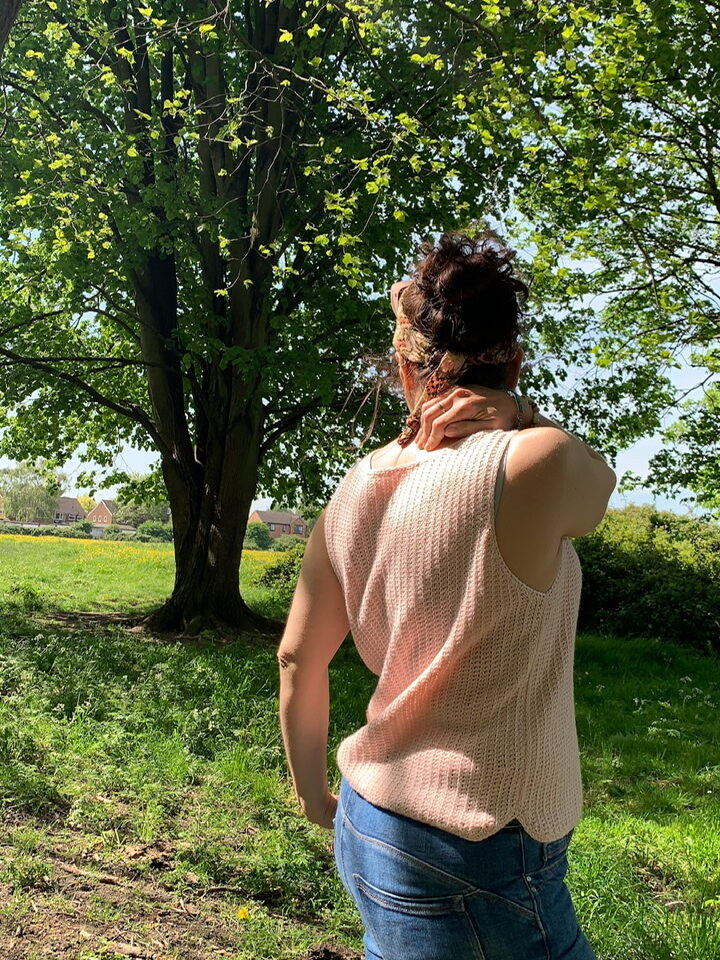
You can still see the houses in the background (I didn’t follow my own photobomb rule here) but they don’t grab your attention because the focus is on the sweater.
This one did also end up on the cutting room floor as you can see my bra strap and I had others I preferred but I thought it was useful to use as a comparison.
Find your spot
When I take photos at home, I usually stand in front of a wall with minimal distractions.
I have recently added a bit of colour to my lounge and I have a new stretch of dusky pink wall that has maybe a 3 ft wide section with no adornments. It’s right by my front door which has frosted glass panels so gives a nice side light at the right time of day.
Below you can see me modelling the bumps pocket shawl in this space.

Corners can work really well too as they add some depth and interesting shadows.
Try taking photos in different parts of your home until you find a spot that works. If you don’t have the space inside, go out and see what you can find.
If you’re leaning against a wall, be careful with the camera positioning as it can lead to some really odd angles and distorted body shapes if things aren’t aligned. Though this can look kind of cool so may be one for experimenting with
As I mentioned in the last section I (very luckily) live next to a meadow where I often venture if inside is not working for me. I also have a row of garages next to my flat which would make a more urban backdrop.
Around the back of my house I have a small alley which is essentially just a brick wall but it can work quite well. I recently shot my Crochet del Mar Shawl there.
This is what my set up looked like, with my tripod and an old towel rail I painted white.
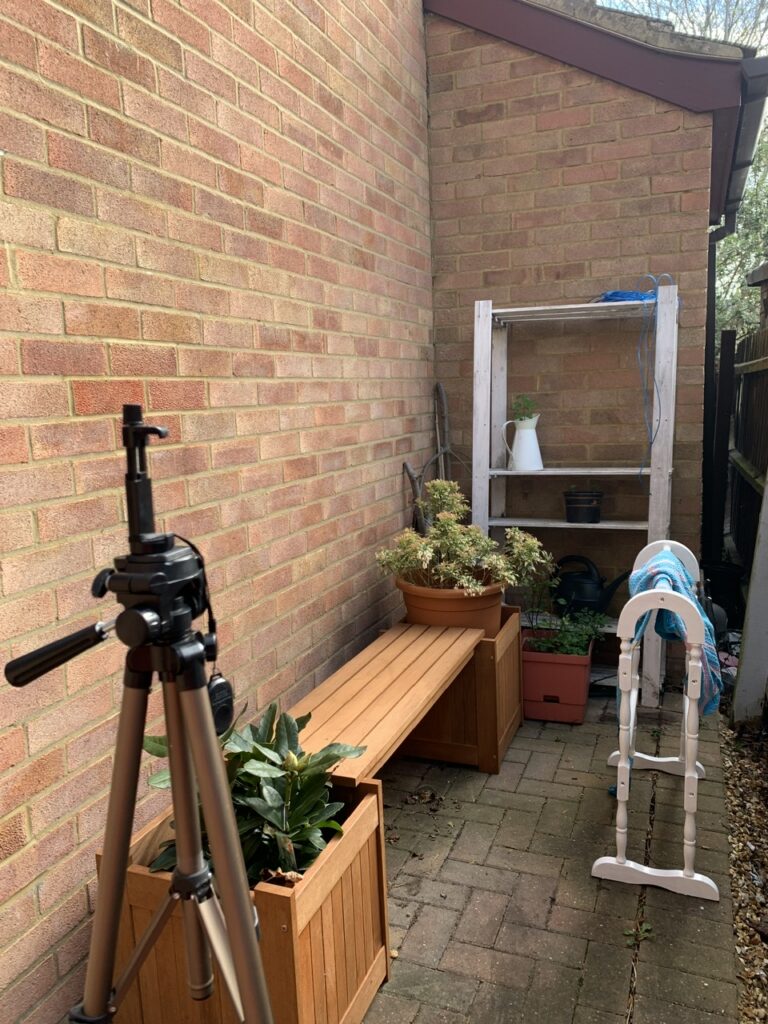
It’s really not glamorous but I felt it was important to show you what it looks like from the other side of the camera!
Here’s an example of one of the finished photos taken in this spot. The reddy orange brickwork offers a nice contrast to the shawl but doesn’t take attention away from it.

Regardless of where you live, have an explore and en experiment until you see something that will work.
Backdrops can be found in the most unlikely places.
Watch out for photobombers
So many times I have taken a whole set of photos only to notice afterwards that I have caught a sheet having over a door in the background.
In the case below, not only do I have a sheet drying over a door, but you can also see a blocking board and my clothes airer. Essentially evidence that I actually live in my home and it’s not picture perfect!

Whilst I’m all for realness in images, no one really needs to see my washing…
It’s fine to have items in the background – few of us live in a photo studio. What matters is to make sure they don’t distract attention from your beautiful make.
So take a couple of practice shots and scrutinise them for intruders that may ruin your shot.
Practice composition
There are lots of tips and tricks to composing photos, which google will do a better job at explaining than I can.
I don’t consciously use these ‘rules’, but I do try and frame images so that they feel naturally balanced, and nothing is jarring in them.
Our brains will unconsciously tell us what we find pleasing to the eye. Through the medium of your gut it will tell you when you’ve got it, so trust that intuition. Go with what feels right.
If you don’t have the confidence to do this, or don’t know what to start, then try noticing what you find visually pleasing.
When you see an image you like (of anything, not necessarily crochet), make a mental note of the placement of the items and start to apply that to your own photographs.
I’m not advocating copying here, just taking inspiration for your own interpretation.
I like to use images where the focus object is slightly off to one side. I think it’s a cheat way of making something look ’a bit arty’.
Be patient with yourself and make lots of mistakes
Playing around and practicing can take time so know that you are unlikely to get it ‘right’ first time(there is no right here, only right for you).
Mistakes can often make the best pictures, so embrace the idea of creating images you didn’t expect too see. I totally misjudged where the camera was in the picture below, but I kind of like the result anyway.
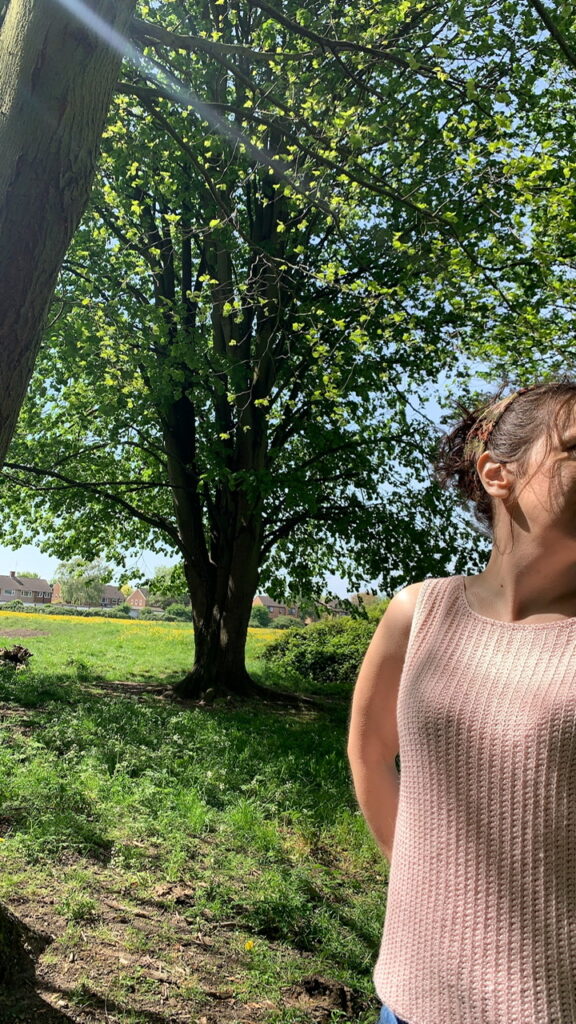
I still make a lot of mistakes. But I take a lot of pictures so the law of averages ends up in my favour…
Gone are the days where we are limited in the number of frames we can shoot by the cost of developing cellulose film.
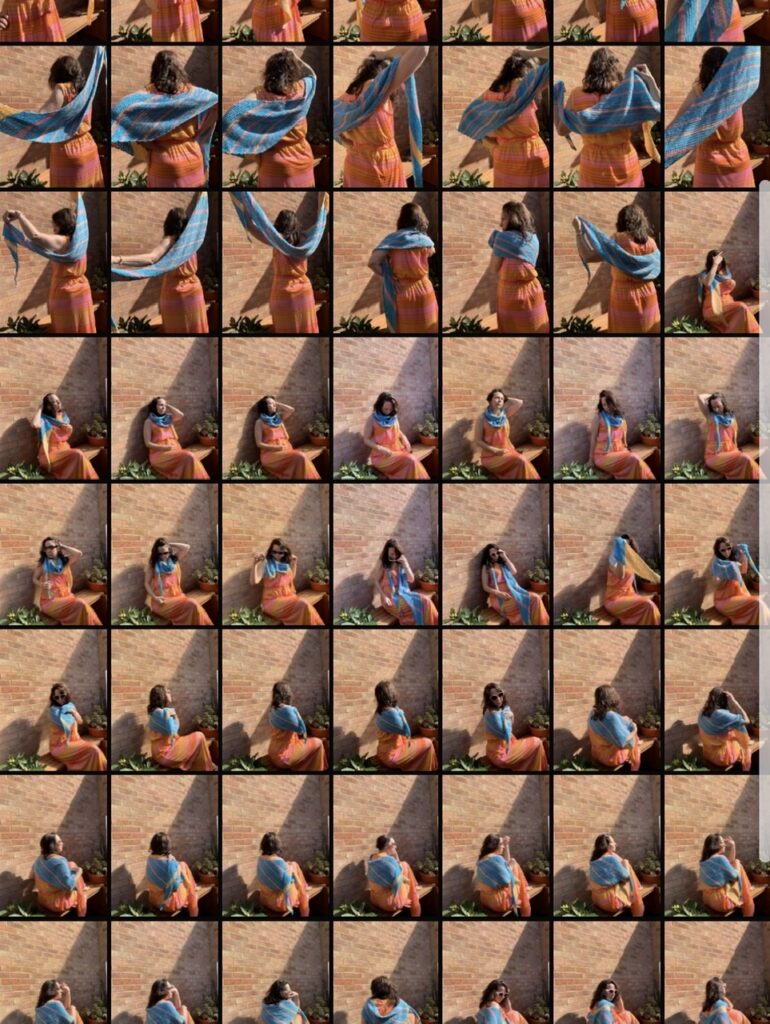
As a result, this is a typical example of what my camera looks like after a shoot… just imagine scrolling for many many rows like this!
Use what you have
You don’t need expensive tripods and fancy gadgets to take nice photos.
I’ve taken photos leaning my phone on stools, balanced on a work surface and all sorts of other DIY approaches.
What is important is that the camera is steady..
Because I run my shoots solo as both model and photographer, the thing I have found the most useful is a remote control to take the actual photo.
Until I got a remote, I used to set the timer then run into position which was always a pain In the butt and vert slow going.
I often hide the remote in my pocket so it can’t be seen in the image. Other times, I pop it under my foot and click it with my big toe – working this one out was a game changer!
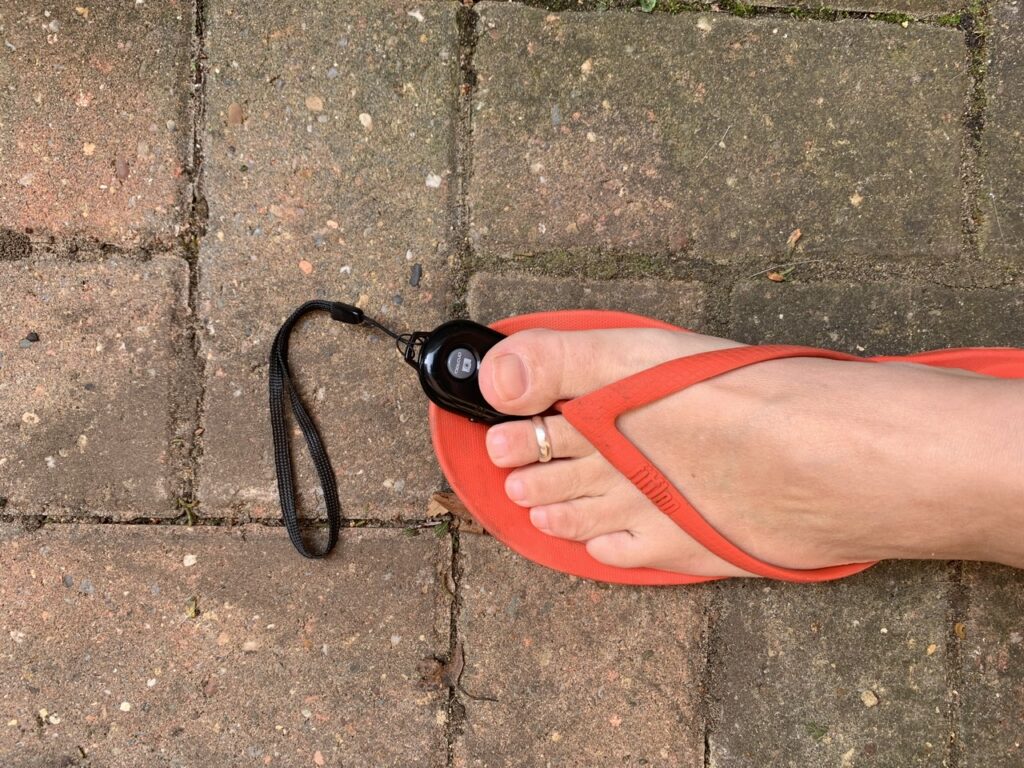
These kinds of remotes are very inexpensive. This is the one you see in the picture which came from Amazon.
Clean your lens
This one might seem obvious, but I’ve fallen prey to the curse of the blurry lens before.
If you’re using your phone for photography, the chances are it’s been rolling around in a bag or a pocket so make sure you give the lens a good clean before you start.
The last thing you want is to finish your session only to find a blur from a fingerprint overlaid on your images.
Yes I have done this.
Simple editing hides a multitude of sins
There are a ton of free and paid editing apps out there, but I always try to set up my pictures to minimise the need for editing (by using the approaches I’ve shared so far).
Yes it’s possible to cut out items from the background and remove items or backgrounds all together, but it can be fiddly to do well and is pretty time consuming.
I use an Adobe product called lightroom for the editing I do do, which works well for me. (I pay for it but there might be a free version – I’m not sure).
However, my best editing tip is available for free on your phone – the glorious crop function.
Playing around with the framing of a picture post production is a quick and simple way to get the most out of whatever it is you want to highlight with your image.
It can also hide those inconvenient objects. Here’s another picture of the bumps pocket shawl, this one before cropping. You can see my little shoe bench in the bottom corner which is not ideal. (I also look a bit like I’m chewing a wasp but best not to dwell on that)
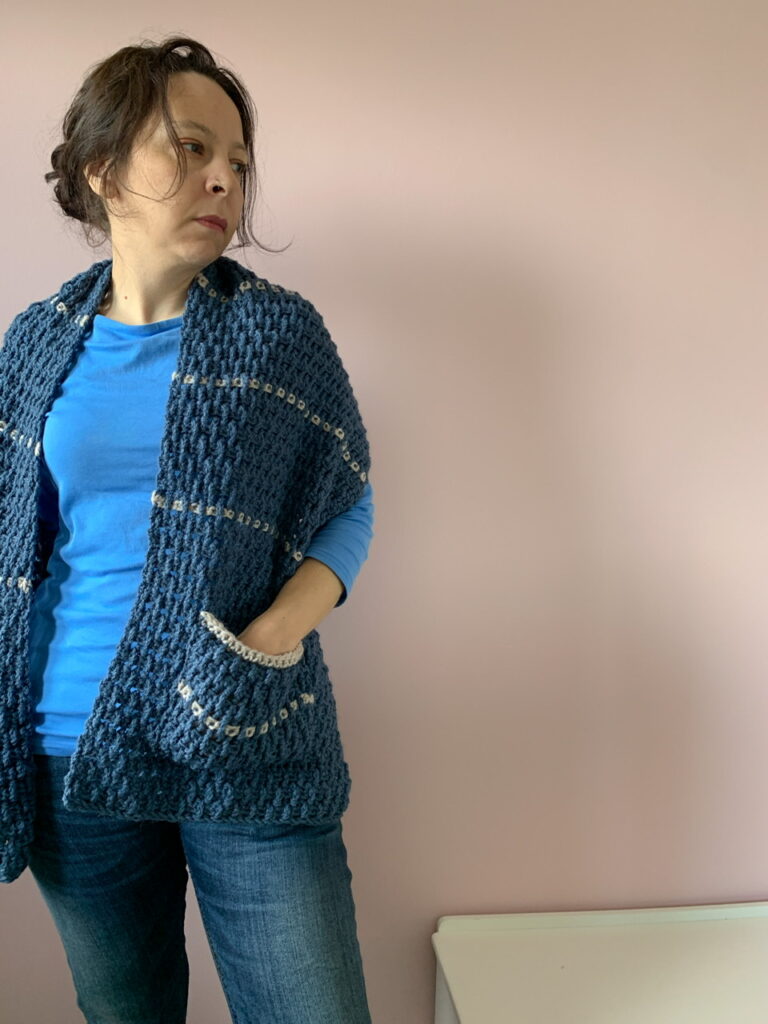
Here is the same image simply cropped to remove the bits I don’t like.

You get to see the texture and function of the shawl without the distractions. So simple and so effective.
Have fun with it
Laugh, pull silly faces, move around and make all kinds of shapes with your body.
Use whatever props you have. Sometimes they work, sometimes they don’t. I love a prop I can hold in my hand, sunglasses, cup of tea, that kind of thing. Failing that, a pocket for one hand works a treat (and is somewhere to hide your remote).
Here’s me playing around when photographing the forthcoming Slice of Sunrise crochet shawl pattern. I was trying to catch an action shot of me throwing one end around my shoulder… my hair clearly had other ideas!
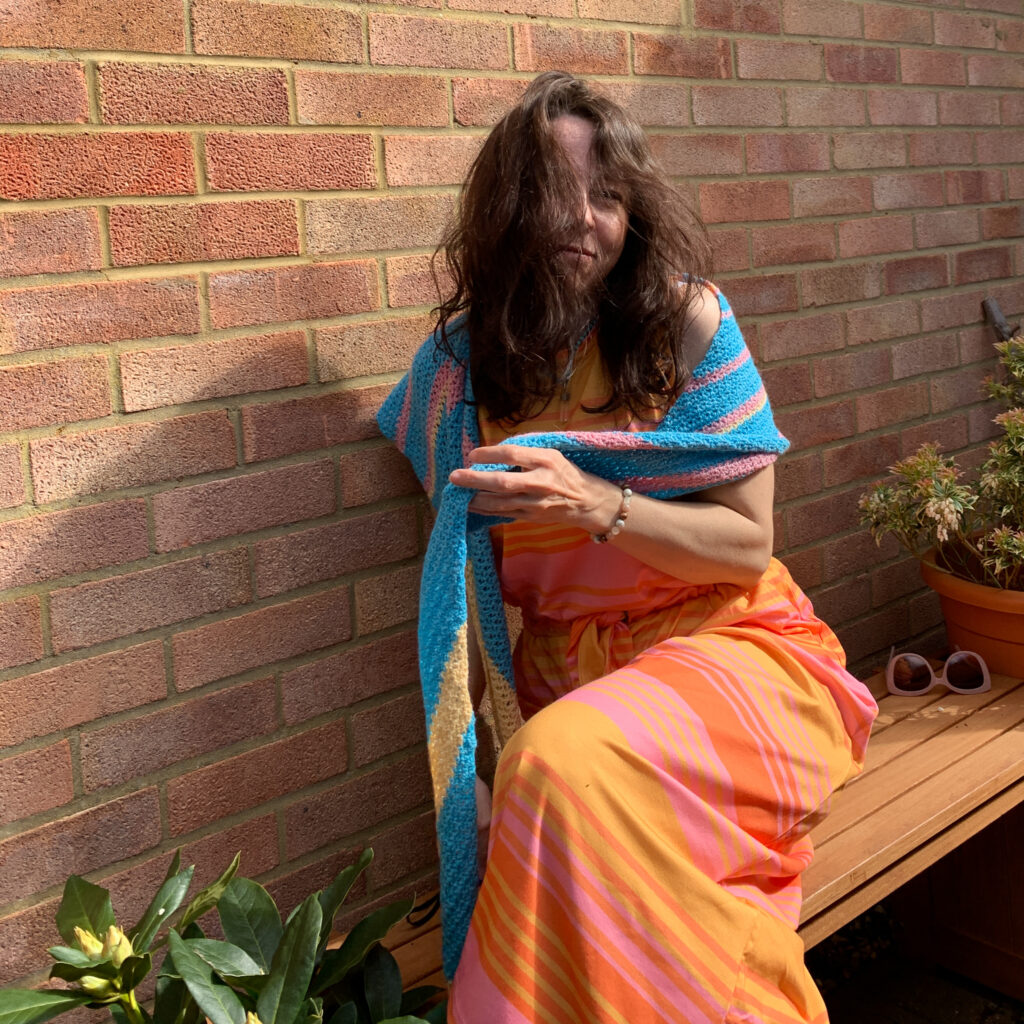
Most of all, don’t take any of it too seriously. I strongly doubt that any of us are auditioning for an editorial spot in vogue, so get creative, play and just enjoy yourself.
Oh and apparently if you’re me, you need to smile more 😉
I hope you have found this a useful insight into DIY crochet photography. I’d love to hear if you have any tips or tricks for photographing your crochet makes. Drop them in the comments so we can all share and learn to enjoy the process more.
Happy snapping!
Dx


This is such a good post, thank you. I love your photos because of their realness and I take inspiration from them. Just wanted to ask, when you do flat lays, what is the roll of what looks like white paper? Thank you 😊
Thank you so much, that’s a lovely comment. If you’re referring to the pictures on my insta stories yesterday, that is indeed a roll of white paper I picked up for a few pounds in Hobbycraft. It’s the first time I’ve used this (I normally use my grey laminate floor!) so keep an eye out for the next blog post to see how it turns out!! 🙂