
Pin Banner
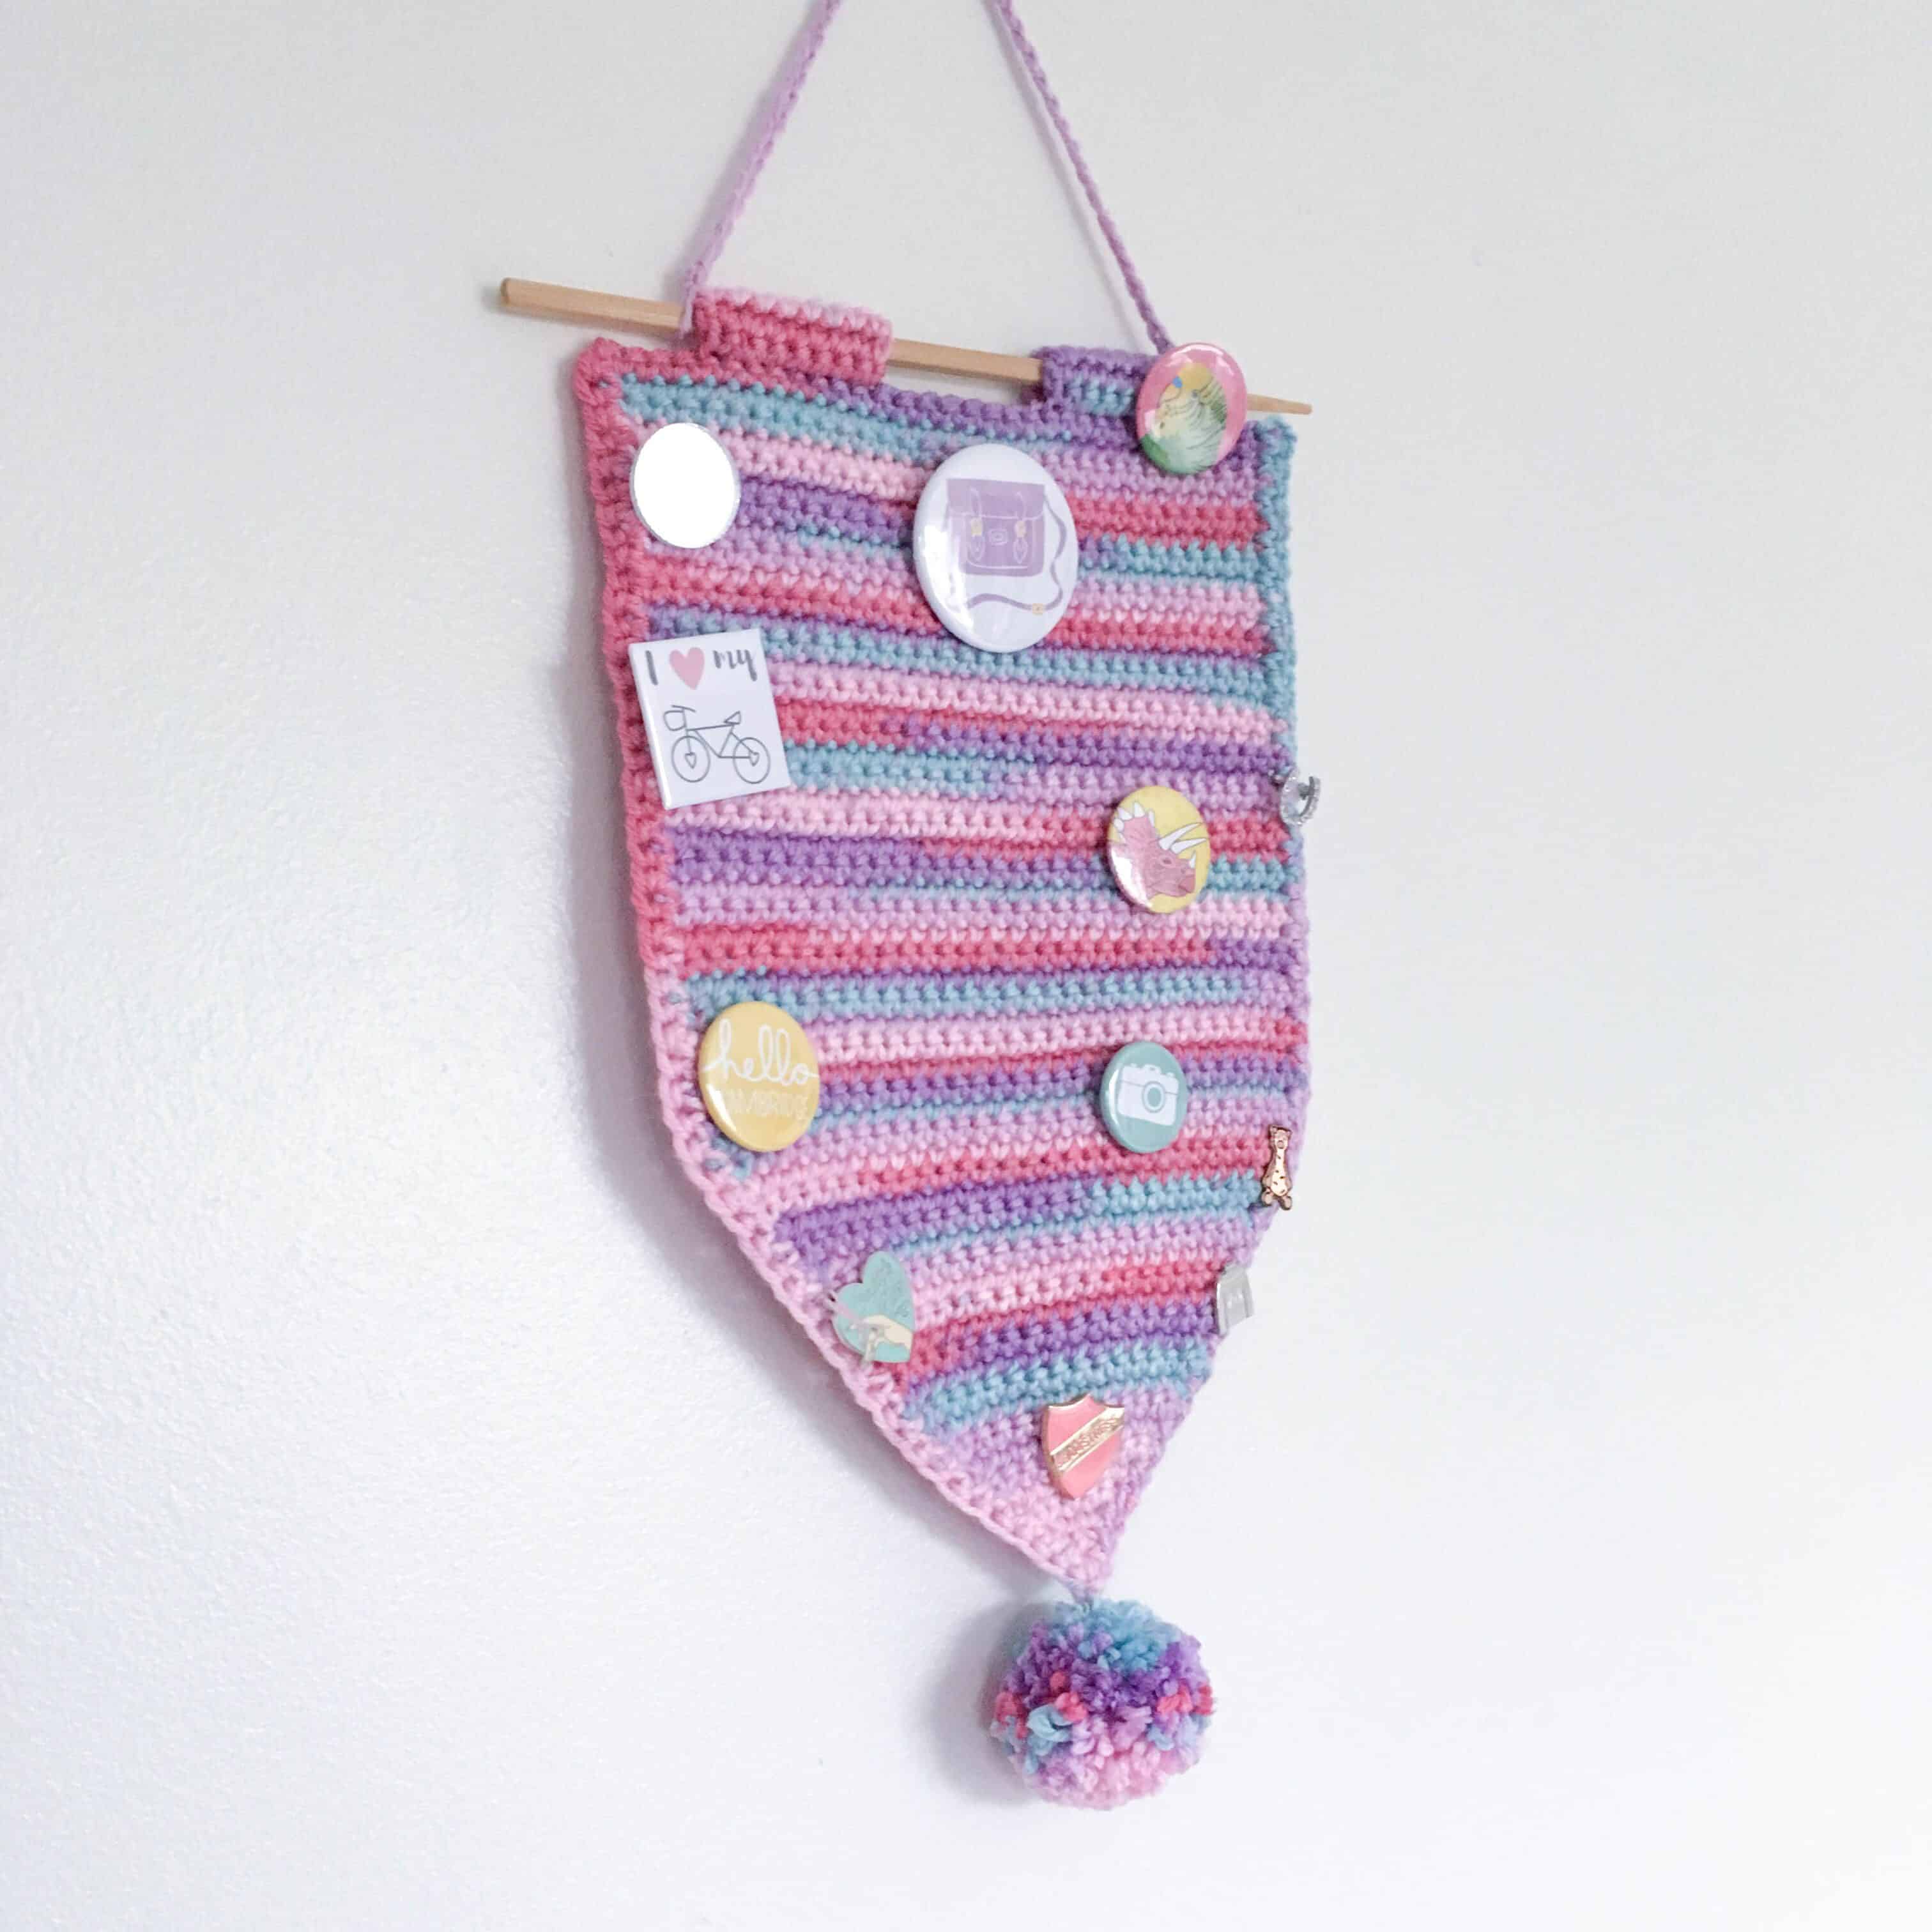
Back in February 2018, I designed a crochet pennant to house all my pins.
You can read the original blog post, which includes not only the pattern but also what inspired me to design it and why crochet banners are so great for pins (they have the holes!) here. Or you can skip straight to the free pattern below!
This post contains affiliate links (marked aff). This means if you click a link to a product and go on to make a purchase, I receive a small percentage of the sale at no extra cost to you. You can read my full affiliate disclosure policy here
Skill level
This is a really easy project. It probably took me around an hour to make the banner and a little longer to factor in blocking and pom pom making. The project uses only single crochet (US terms) and the odd slip stitch.!
Materials & Sizing
100-150 yards / 50-60g Worsted weight yarn. I had some Caron Simply Soft (aff) in the Times Square colour way, sitting in my WiP pile. I had bought it to have a go at planned pooling and whilst the pooling worked, I didn’t have nearly enough yarn to make it look effective (this would look amazing as a blanket!). So i decided to frog the lot and use it for this banner instead. It’s such a beautiful colour way that it needed to be seen!
I used a 5mm crochet hook (clover amour are my personal faves) (aff) and whilst gauge isn’t particularly important, I wanted the stitches quite tight to stop distortion once I started adding the pins.
For the bar across the top I used a wooden chopstick I had in my draw. Alternatively you could use a knitting needle or pick up some inexpensive doweling from any DIY store. If you want to go back to nature you could also collect a stick from the garden or park, like I did when making my pom pom tree!
The finished size of my banner when hanging is 9in wide by 14in long from the tip of the pennant to the tabs. It is easy to change the size by adding more rows. Guidance is given in the pattern below.
Pattern Notes
Stitch abbreviations (US Terms)
ch = chain
st = stitch
sc = single crochet (UK double crochet)
ss = slip stitch
blo = back loop only (used for the hanging tabs)
RS = Right Side – until you add the edging there is not a right side!

The Pattern
Row 1: ch2, sc in 1st ch (1)
Row 2: ch1, turn, 2sc in sc from row 1 (2)
Row 3: ch1, turn, 2sc in next 2 st (4)
Row 4: ch1, turn, 2sc, sc in next 2 st, 2sc (6)
Row 5: ch1, turn, 2sc, sc in next 4 st, 2sc (8)
Row 6: ch1, turn, 2sc, sc in next 6 st, 2sc (10)
Row 7: ch1, turn, 2sc, sc in next 8 st, 2sc (12)
Row 8: ch1, turn, 2sc, sc in next 10 st, 2sc (14)
Row 9: ch1, turn, 2sc, sc in next 12 st, 2sc (16)
Row 10: ch1, turn, 2sc, sc in next 14 st, 2sc(18)
Row 11: ch1, turn, 2sc, sc in next 16 st, 2sc (20)
Row 12: ch1, turn, 2sc, sc in next 18 st, 2sc (22)
Row 13: ch1, turn, 2sc, sc in next 20 st, 2sc(24)
Row 14: ch1, turn, 2sc, sc in next 22 st, 2sc (26)
Row 15: ch1, turn, 2sc, sc in next 24 st, 2sc (28)
Row 16: ch1, turn, 2sc, sc in next 26 st, 2sc (30)
Row 17: ch1, turn, 2sc, sc in next 28 st, 2sc (32)
If you want to make the banner wider, then you can continue to increase by working 2sc in the first and last st of each row, as above.
Row 18-50: ch1, turn, sc in next 32 st (32)If you want to make the banner taller you can continue adding rows here.
Edging
Without fastening off, and with RS facing: sc down the side of the flag, to the bottom, work 3sc in the bottom st (the first ch). Sc up the other side, fasten off and sew in ends.
Hanging Tabs

Tab 1:With RS facing away and working on the top row of the banner:
Row 1: Skip the first 4sc. Join the yarn to the blo and sc in blo of the next 8 st
Rows 2-6: Ch1, turn, sc in both loops of 8 st you just made
Row 7: Ch1, turn. Fold the tab back down to the body of the banner and ss through both the front loop of the main flag (where you made the 8sc in the blo) and the sc of row 6 of the tab.The wrong side of the tab should look like this before you sew in the end. I crocheted over the beginning tail.
Tab 2:With the RS still facing away from you, skip 8 st from where Tab 1 finished, and repeat the instructions for Tab 1.There should be 4 st left in the final row of the banner and the tabs should be evenly spaced across the top. Your bar (or chopstick if you’re me!) will slide through these tabs to secure the banner.
Finishing

Depending on what yarn you use, you might want to block your banner to ensure the point sits flat as the increasing section can create a little curl. I used a steam iron on a gentle heat on mine, placing a tea towel between the iron and the crochet as direct heat on acrylic yarn can can break it down.
You can hang your banner from the bar, or tie a length of yarn to either side of the bar to hang it. I made a ch50, leaving a larger loop on either end of the chain, sewed in the ends (ensuring the loops were close fitting round either side of the chopstick) and used this to hang my flag.
I hope you enjoy this pattern and, as always don’t forget to share using the buttons below or tag me on Instagram @doraexplored, or use #hookmehappy. I’d love to see and share your efforts!
Happy hooking
Dx
You may sell what you make from this pattern but the pattern is for personal use only and may not be shared or reproduced without prior written consent. Photos may be shared with credit.
Copyright Dora Does 2019