
The Connected Cowl – Free Crochet Pattern

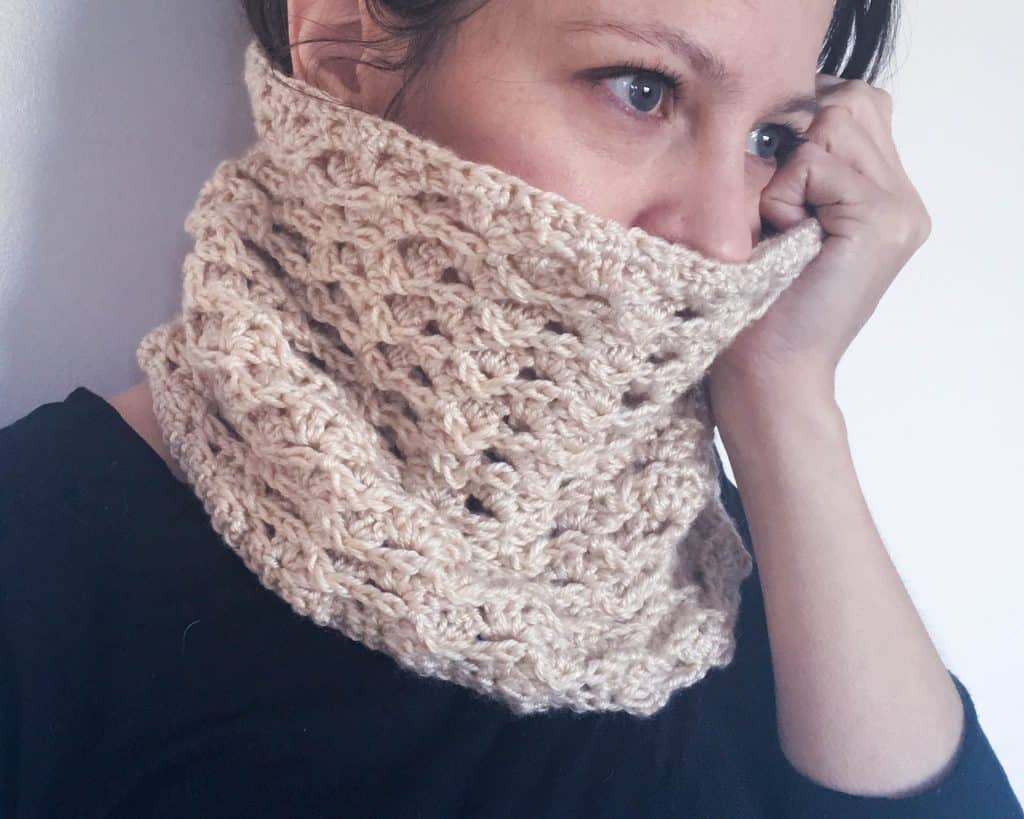
This pattern uses a simple stitch repeat to create a highly textured, 3d, chunky cowl. This makes the Connected Cowl incredibly warm. The stitches work together to create a beautiful net like pattern, each stitch reaching out to connect with the others.
You can read this blog post about how I found the stitch pattern by accident and fell in love!
You can also purchase an ad-free printable version of this pattern from Ravelry orEtsy.


This post may contain affiliate links which means if you follow the link and go on to make purchase then I will receive a small commission at no extra cost to you. These links are marked with (aff) and you can read my full affiliate disclosure here




Skill Level
Although this looks quite complex, the pattern is a 2 row stitch repeat and really very simple when you get used to it! It’s suitable for those with some experience as it works round front posts but once you get the hang of it, it’s really very easy!
Materials
Hook: 5.5mm. I crochet loose so you may want to move up to a 6mm for this
Yarn: one 140g, 250yd skein of Lion Brand Heartland in Acadia (aff). Because I crochet loosely, I went down to a 5.5mm hook. If you know you crochet on the tighter side, I would suggest a 6mm hook as recommended on the yarn label.
Yarn needle to sew in your ends.
Sizing & Gauge
Size: Circumference: 23in, Length: 9in
You can keep working extra rows to make this longer, or add multiples of 6 to the foundation chain to make it looser, depending on the size and fit you are looking for
Gauge: 4in x 4in = 11 rows x 18 stitches (3 pattern repeats)
This is based on the materials given. However, gauge is not key in this piece, as long as the cowl is a comfy fit around the neck.
Pattern Notes
- The cowl is worked in the round, joining with a slip stitch at the end of each round and turning.
- You can continue to work the stitch repeat over additional rows to make the cowl as long as you want it.
- The cowl is worked over a multiple of 6 stitches, so if you want a looser or tighter fit then you can alter the length of the foundation chain by 6 stitches.
- Starting chains to not count as stitches.
- Instructions in brackets like (this) are worked into the same stitch.
- Instructions between *asterisks* are repeated the number of times indicated
- The stitch count remains the same as the foundation chain throughout, so is only indicated on the first row of the pattern.
Stitches & Abbreviations (US terms):
- ch = chainst = stitch
- ss = slip stitch
- sc = single crochet
- dc = double crochet
- tr = treble crochet
- sp = space
- sk = skip
- yo = yarn over
- fpdc = front post double crochet
Special Stitches
Foundation double crochet (fdc)
Ch 3, yo, insert hook into 3rd chain from hook, yo and pull up a loop (3 loops on hook). *Yo and pull through one loop (this creates the base stitch of the next fdc). Yo and pull through two loops, yo and pull through two loops. To start the next st, yo and insert the hook into the v of the base stitch you just created and pulling up a loop. Continue from * for the number of stitches required.
You can find a tutorial for this stitch whether you re Left handed or Right handed on my YouTube Channel
If you struggle with this technique it can be replaced with making a chain of the number of stitches plus 2, then making a dc in the 3rd chain from the hook and across to the end.
How to purchase a Dora Does crochet pattern:
I sell my PDF crochet patterns in my Etsy, Ravelry and Love Crafts stores. You can purchase this pattern on any of these platforms, depending on your preference. Simply click the relevant links throughout this pattern page to be taken to the listing, or visit the store homepages in the links at the start of this paragraph.
The Pattern
Round 1: 96 fdc, join to the start with ss to create a ring. Be careful not to twist the foundation row. (96)
Round 2: Ch3, turn, *tr, sk next 2st (2fpdc, ch1, 2fpdc) round next st, sk next 2 st. Repeat from * to end. Ss into the top of the starting tr.
Round 3: Ch2, turn, *(2fpdc, ch1, 2fpdc) around the tr, sk next 2 st, tr in ch1 sp, sk next 2 st. Repeat from * to the end. Ss into the first two dc of the round and into the ch1 space.
Round 4: Ch3, turn, *tr into ch1 sp, sk next 2 st, (2fpdc, ch1, 2fpdc) around the next tr, sk next 2 st*. Repeat from * to the end. Ss into the top of the starting tr.
Round 5-22: Repeat rows 3 and 4, finishing on a row 4 repeat. If you want a longer cowl, continue these repeats until desired length is reached.
Round 23 / Final Round: *fpdc round the tr, hdc into next 2 dc, sc into ch1 sp, hdc into next 2 dc*. Repeat * to end. Ss into top of first dc, fasten off and sew in end.
Sew in starting tail, joining the bottom of the fdc row made in round 1.
Enjoy the cosiest cowl you will ever wear!!

As always, don’t forget to tag me in your finished makes! Nothing makes me happier than seeing my designs brought to life by others. I love the colour choices and personal touches you add to the patterns.
How to find me and share your finished makes
- On Instagram, you can use the hashtag #DoraDoes to share your finished projects or just tag me @doraexplored
- Sign up to the WiP Tip for weekly crochet chat, offers and exclusives straight to your inbox – click here to sign up.
- Check out my YouTube Channel for my biweekly ‘Crochet Studio Sessions’ podcast.
Happy Hooking
Dx
More Crochet Scarf, Cowl and Shawl Patterns
Copyright Dora Does Limited, Registered in England, Company Number 13992263. This pattern is for personal use only and may not be shared or reproduced in written, photo, video or any other form without prior written consent. All rights reserved. Terms of service.