Herringbone Double Crochet Stitch Tutorial

I’ve had my eye on the herringbone crochet stitch for a year or two now and finally I get to bring you a tutorial so you can fall in love with it too!
The first time I saw it, I knew it would make a beautiful fabric for homewears and garments. The tweedy fabric is so elegant and it has a beautiful drape to boot! I’ve used this stitch in both the Slow Living Skirt and the Light Fandango Sweater Patterns… I just adore it!
Read on for the written instructions, step by step photo guide and video tutorial.
The Herringbone stitch can be worked using the US double crochet (UK treble crochet) or the US half double crochet (UK half treble crochet) and this tutorial covers the double crochet. However, I have written some notes at the end on how to work the US half double (UK half treble) version!
This post contains affiliate links. This means if you click a link to a product and go on to make a purchase, I receive a small percentage of the sale at no extra cost to you. This helps me to keep my content and many of my patterns free. You can read my full affiliate disclosure policy here
How to crochet the Herringbone Double Crochet (HBdc) – Written instructions:
- Yarn over, insert hook into stitch
- Yarn over, pull a loop through the stitch and continue to pull through the next loop on the hook (2 loops on hook)
- Yarn over, pull through 1 loop (2 loops on hook)
- Yarn over, pull through 2 loops to complete the stitch
As you can see, the Herringbone double crochet is worked in a similar way to the standard double crochet but with a little jiggery pokery of a slip stitch when you first insert the hook into the stitch.
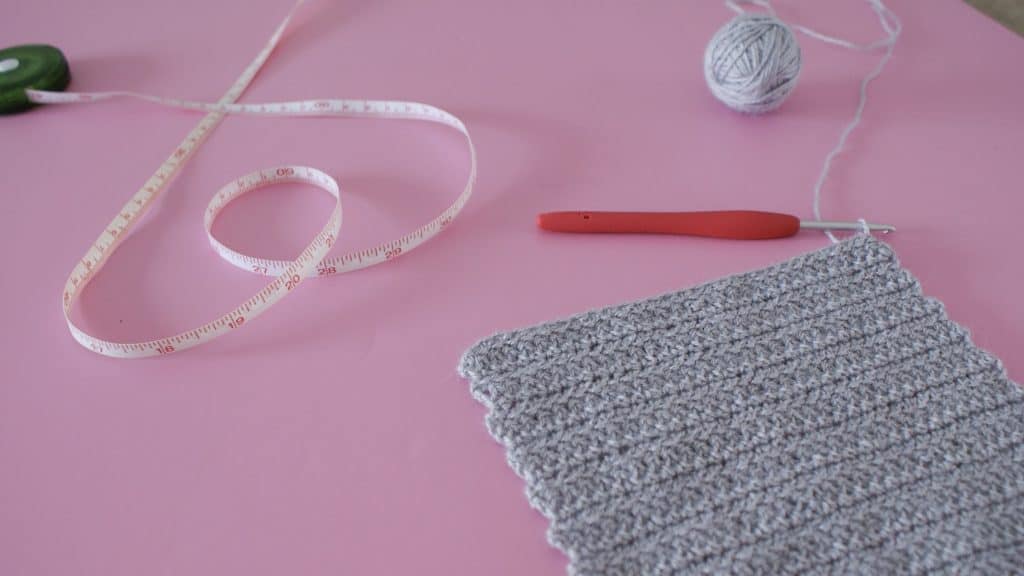
Note that in the video and photos tutorials, I am using a 3.5mm Clover Amour Crochet Hook and Drops Baby Alpaca Silk Yarn.
Herringbone Double Crochet (HBdc) – Video tutorial
You can find a right handed Herringbone Double Crochet video tutorial below
Click here for the left handed video Herringbone Double Crochet Tutorial
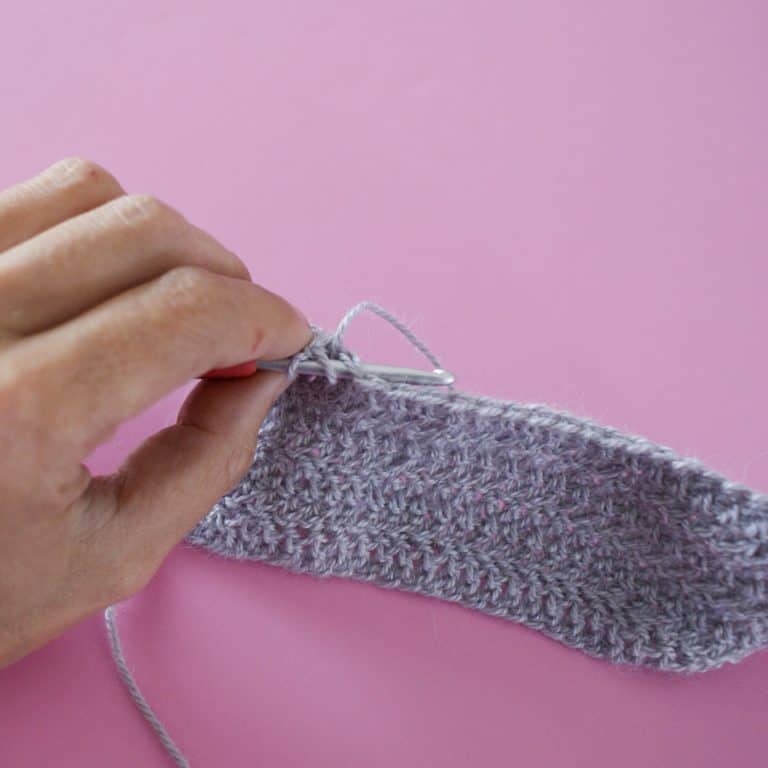
Herringbone Double Crochet (HBdc) – Picture tutorial
Note that the images in this tutorial are shot from a left handed swatch. If you are a right handed crocheter, your swatch will be a mirror image of the pictures below.
Tutorial time: 5 minutes
The Herringbone Double Crochet Stitch (HBdc):
- Yarn over, insert your hook into the stitch

- Yarn over, pull through the stitch
- Continue to pull through the first loop on hook (2 loops on hook)
- Yarn over, pull through 1 loop (2 loops on hook)
- Yarn over, pull through 2 loops to complete the stitch


I hope you found this tutorial useful. Don’t forget to share it with your friends using the buttons below.
I’d love to see your finished makes too, so if you’re on on instagram, make sure you tag me @doraexplored and use the hashtag #hookmehappy.
If Facebook is more your thing, you can post on my page Dora Does or come and join the My Crochet Wardrobe Facebook Group!
If you liked this then check out the crochet tutorials on Doralosophy and my Crochet stitch directory for more tutorials!
Happy Hooking
Dx


Is there a height difference between the herringbone DC and the standard DC? I am making a top using the herringbone DC although the pattern calls for standard DC because I love the stitch texture. Will I need more yarn?
I’ve never compared the two stitches directly, so I couldn’t say for sure. My advice would be to make a swatch with both of the same number of stitches and rows, then compare the size and weight of each swatch. That way you have an answer which will work for your tension. 🙂
Are the photos of the herringbone stitch back to front or do you work from left to right?
I’m left handed so they will be a mirror image for a right hander. You’re right that I work left to right (I don’t think I flipped the images for this tutorial!!